Simply Comfortable
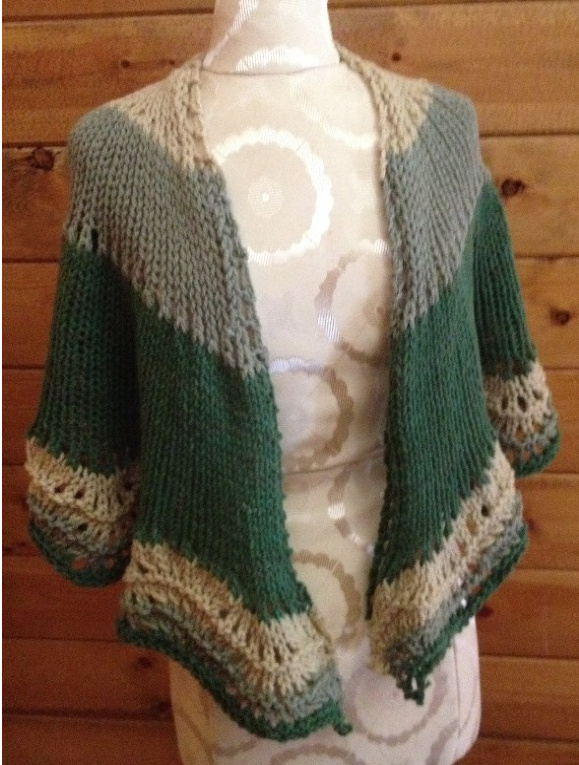
An easy-to-wear, almost-circular shawl in worsted weight yarn for warmth and style. by Lonna Cunningham (Frazzlehead) beautiful naturally dyed yarn and it told me, quite clearly, that it wante to be a shawl. It needed to be something that showed off the lovely colours and the way natural shades blend together, something warm and cozy and easy to wear. Simply Comfortable is the result. The only stitches used are knit, purl, yarn over, knit two together and knit two together through the back loop (or ssk, doesn't matter which). Easy!
Materials
You can modify the size of the shawl to work with what you have: the original was made with 320 grams (11 ounces) of a 10 WPI yarn (worsted weight, I believe it's Custom Woolen Mills Mule Spinner 2-ply). If you have about 675-725 metres (730-800 yards), you should be good to go. A bit heavier or a bit lighter in yarn will work as well, though you'll probably want to double up anything much finer than 6 WPI.
This would be fabulous in handspun: you could get really neat colour effects by knitting with several strands of yarn held together (which is a great way to use up all those little samples you spin). You'll need a circular needle sized to give you generously drapey fabric: I used an 80 cm long (32") 9 mm (US 13). Gauge isn't critical, just be sure the fabric is nice and open.
Instructions
Cast on six stitches (I use the cable cast on, but do whatever works for you: not too tight, you do need it to stretch a little). Knit one row.
First Section
Repeat (knit one, yarn over) to the last stitch, knit the last stitch. You now have eleven stitches. The next row is a wrong side row: knit the first two stitches, purl to the last two stitches, knit the last two. All the wrong side rows follow this pattern, until you get to the border. On the right side: knit the first stitch, yarn over, knit two together, then knit to the last three stitches; knit two together through the back loop (or ssk, whichever you prefer), yarn over, knit the last stitch. Repeat these two rows twice more: you will have a total of six rows from the increase row. Time to increase again: repeat (knit one, yarn over) to the last stitch, knit the last stitch. You now have twenty one stitches. Work one wrong side row. Continue working as you were before: right side rows knit plain (with the knit one / yarn over / knit two together : ssk / yarn over / knit one borders at the outer edges), wrong side rows purled (with the outer two stitches always knit). Stop when you have twelve rows from the increase row. (Don't stress, one row more or less won't make a lot of difference, but twelve is what you are aiming for, and you do want to end on a wrong side row.)
Second Section
Just like the before: repeat (knit one, yarn over) to the last stitch, knit the last stitch. You now have forty one stitches. Work one wrong side row. Change colours, if you wish, on the next right side row. Continue working the same pattern as you had for the first section: right side rows knit plain (with the knit one / yarn over / knit two together : ssk / yarn over / knit one borders at the outer edges), wrong side rows purled (with the outer two stitches always knit). Stop when you have twelve rows from the increase row.
Third Section
And again: repeat (knit one, yarn over) to the last stitch, knit the last stitch. You now have eighty one stitches. Work one wrong side row. Change colours, if you wish, on the next right siderow. Continue working the same pattern: right side rows knit plain (with the knit one / yarn over / knit two together : ssk / yarn over / knit one borders at the outer edges), wrong side rows purled (with the outer two stitches always knit). Stop when you have twenty four rows from the increase row. If you are running low on yarn, you can work fewer rows in this section, though you probably want at least twelve.
Border
One more increase: repeat (knit one, yarn over) to the last stitch, knit the last stitch. You now have eighty one stitches. Work one wrong side row. Change colours, if you wish, on the next right side row. Knit one right side row and one wrong side row as before, with the outer borders. Now work the Old Shale pattern on a right side row: knit one, yarn over, knit two together, knit two; then repeat the following to the last seven stitches:
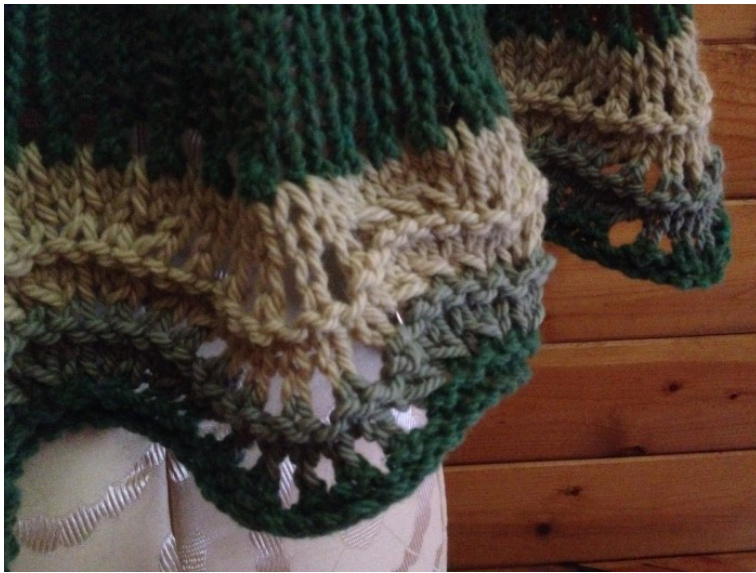
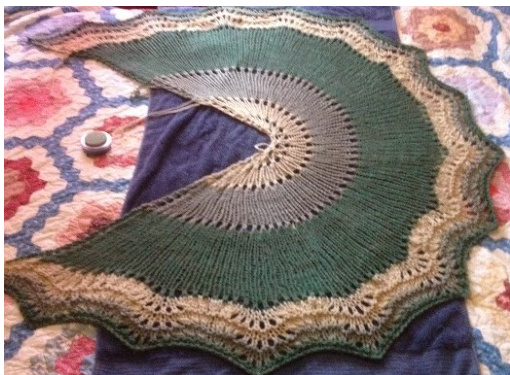
knit two together three times yarn over, knit one five times yarnover knit two together through the back loop (or ssk) three times knit one knit one, knit two together through the back loop (or ssk), yarn over, knit one Follow this with the next three rows: work one wrong side row with all stitches knit work one right side row the same as before (all knit, with the knit one / yarn over / knit two together : ssk / yarn over / knit one borders at the outer edges) purl one wrong side row (with the outer two stitches knit, as before) Then start over with the Old Shale right side pattern row. Change colours as you see fit, and repeat the four edging rows until the border is as big as you want it. Bind off loosely with whatever method makes you happy. Weave in ends, soak the shawl thoroughly, wring out in a towel and block into a Pac-Man sort of shape, straightening the inside edges and pinning the centres of the fan edging out into waves. Tada! Please feel free to share this pattern with others, with credit where it's due, of course. What you do with the items you create based on this pattern is entirely up to you ... I hope that you enjoy what you make and wishyouhappyknitting!