You Puck This!
Design by Susanna IC
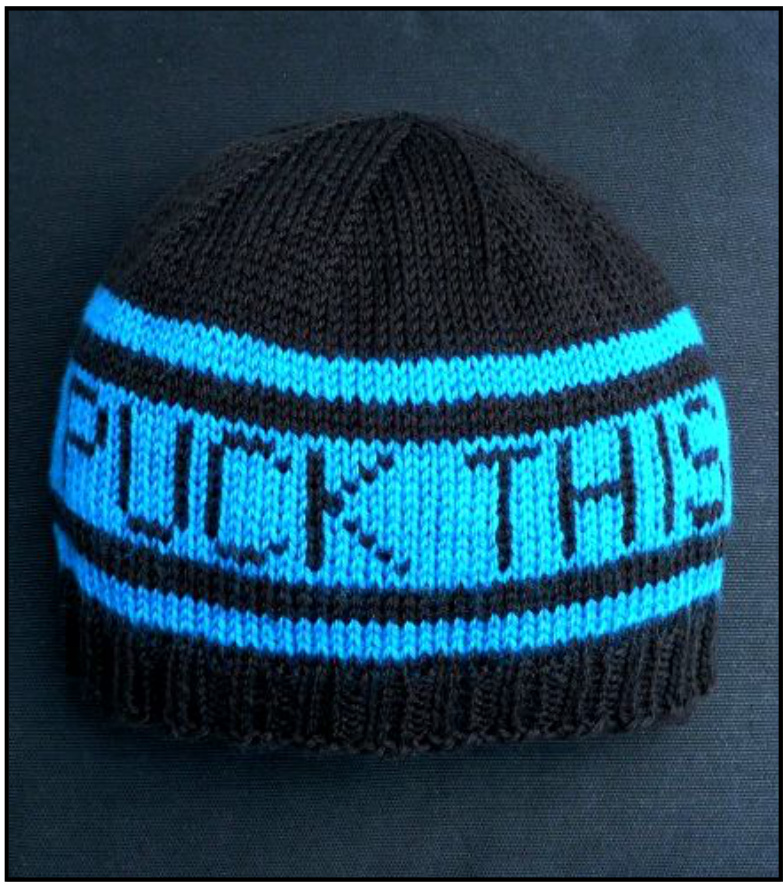
Show off your Ravelry group allegiance by knitting your favorite hockey team colors into a fun hat. This hat features a very easy and quick to knit stranded color pattern that will look great in almost any color combination as long as there is enough contrast for the lettering to show up properly. You can use two colors as shown in the original or you can include three of your team's colors by simply switching some of the stripe colors for a third one. Of course, you can also decide not to include the group's logo and knit a simple striped hat in any color combination you like. Choose your colors, cast on and in no time you will have a hat for yourself or your favorite sports fan. Go team!!
Finished Size: 19" to 22"
Yarn: Any sport weight or DK weight yarn; the original was knitted with approximately 60 meters each of two colors of Wolle Rodel Alround, total of 120 meters $40\%$ wool, $30\%$ polyacryl, $30\%$ polyamid; 125 meters / 50 grams) Gauge: I2 sis / 1o rows np palern kt circurany (not suretcneu) Needles:Size $4\,/\,3.50\ \mathrm{mm}$ and 5 / 3.75 mm circular needle or a set of double pointed needles Notions: stitch marker
Hat
With smaller needles cast on 108 stitches with first color; place marker and join for knitting in the round, being careful not to twist stitches. Work k2, p2 ribbing all the way around until work measures about $1\,^{1}/4^{\,^{39}}$ from the edge. Continue the ribbing for at least another $1\,^{1}/4^{\,^{\,3}}$ or more if you would like a folded brim, but you will need extra yarn for this. With the ribbing complete, switch to larger needles and knit a single round plain to set up for the color striping. Add your second color at the start of the following round, knit three rows for the first stripe (please see note below for jogless stripes). Next row return to your original color or introduce color number three and knit three rounds for the second stripe. Switch your color again, knit one round plain and then start the Puck This! chart. The logo wilifit twice around the hat circumference. Knit another plain row after completing the chart (if you choose to knit the hat without the logo, simply knit eleven rows total in this color), then switch colors twice for two additional three row stripes. The colorwork is now complete. Make sure to strand the yarn loosely enough to accommodate the stretching necessary for a hat to fit correctly and to avoid puckering. The easiest way to ensure proper tension is to spread out the stitches on the right needle before each color change; this will stretch out the float without making it much too long. Depending on your preference, you may also consider weaving some of the longer color floats as you knit. To hide the jog in the stripes, complete a round in the new color. At the start of the next round pick up the right side of the stitch directly below, add it on the left needle and simply knit the two stitches together. Use this technique on the first stitch of the second round each time you start a new stripe color for smooth, jogless stripes. To complete the hat return to the original color and knit six rounds plain. For a larger hat simply add a few more plain rows before starting the decrease rounds. Form decreases as follows: Row 1 \*K2tog, k10; rep from \* to end. Row 2 Knit to end. Row 3 \*K2tog, k9; rep from \* to end. Row 4 Knit to end. Row 5 \*K2tog, k8; rep from \* to end. Row 6 Knit to end. Row 7 \*K2tog, k7; rep from \* to end. Row 8 Knit to end. Row 9 \*K2tog, k6; rep from \* to end. Row 10 Knit to end. Row 11 \*K2tog, k5; rep from \* to end. Row 12 Knit to end. Row 13 \*K2tog, k4; rep from \* to end. Row 14 Knit to end. Row 15 \*K2tog, k3; rep from \* to end. Row 16 Knit to end. Row 17 \*K2tog, k2; rep from \* to end. Row 18 Knit to end. Row 19 \*K2tog, k1; rep from \* to end. Row 20 Knit to end. Row 21 \*K2tog; rep from \* to end, 9 stitches remain Break yarn, thread the tailthrough the remaining stitches, pull the hole closed tight and weave the tail on the inside of the hat. Weave in any remaining loose ends; block gently to even out the stitches.
Color Chart


