CRAFTS By AP
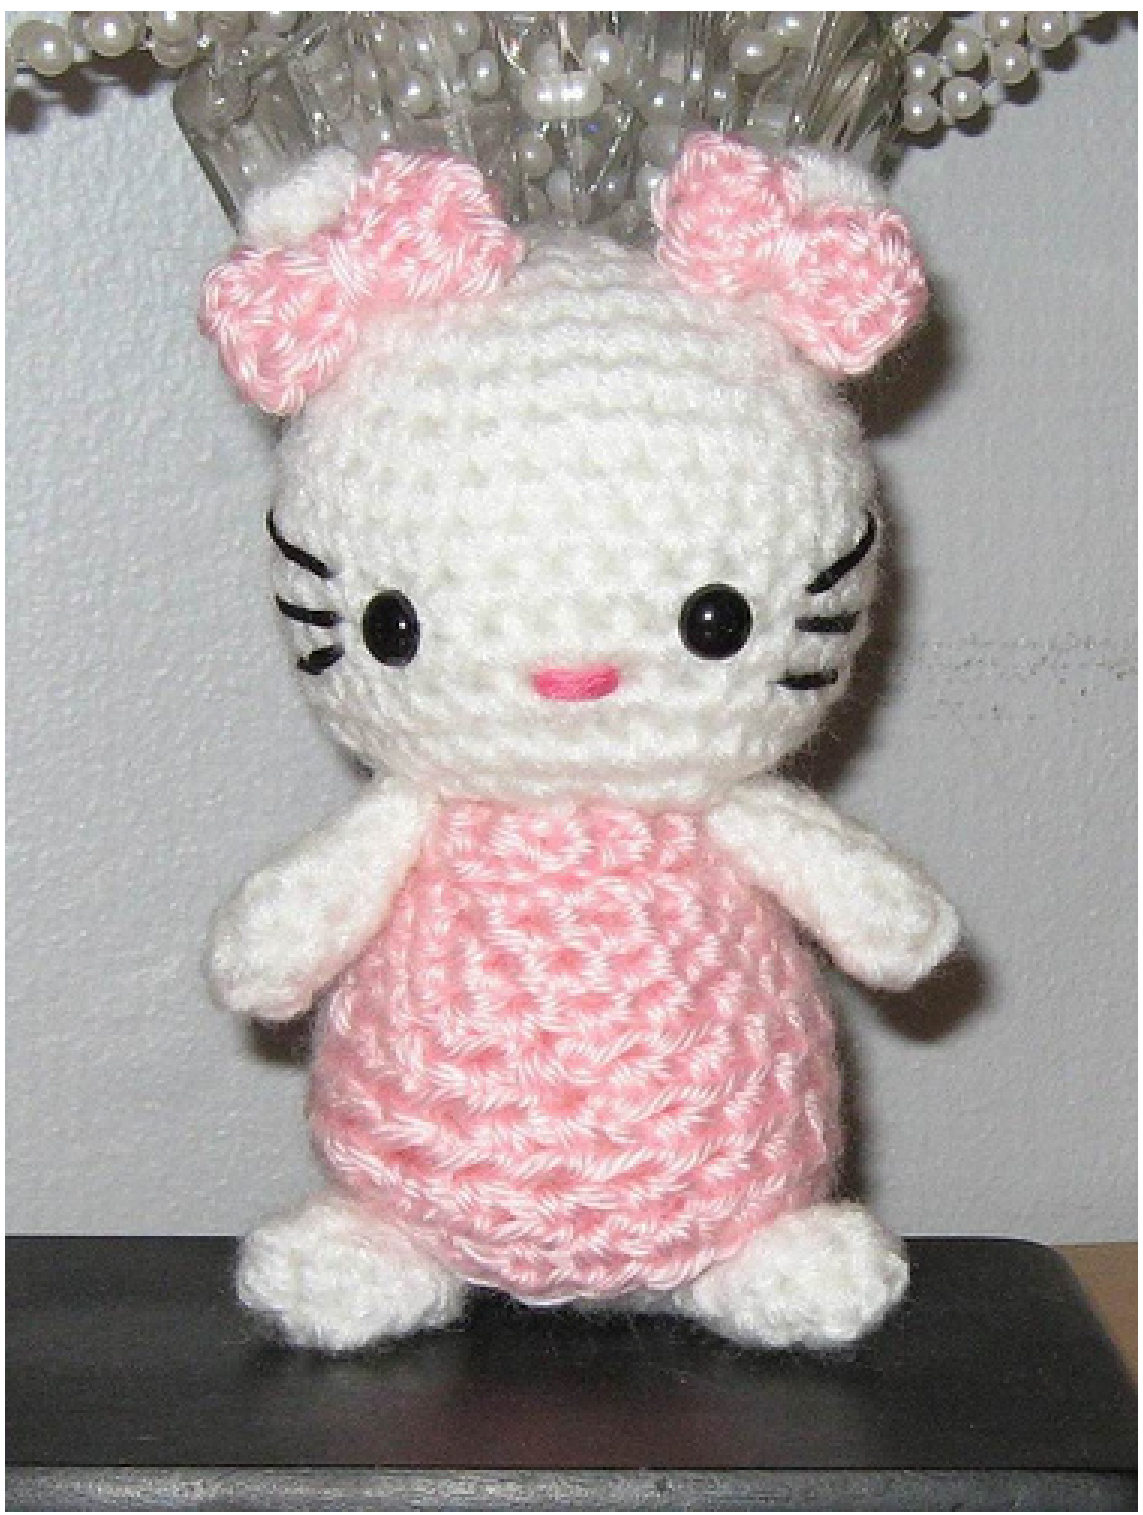
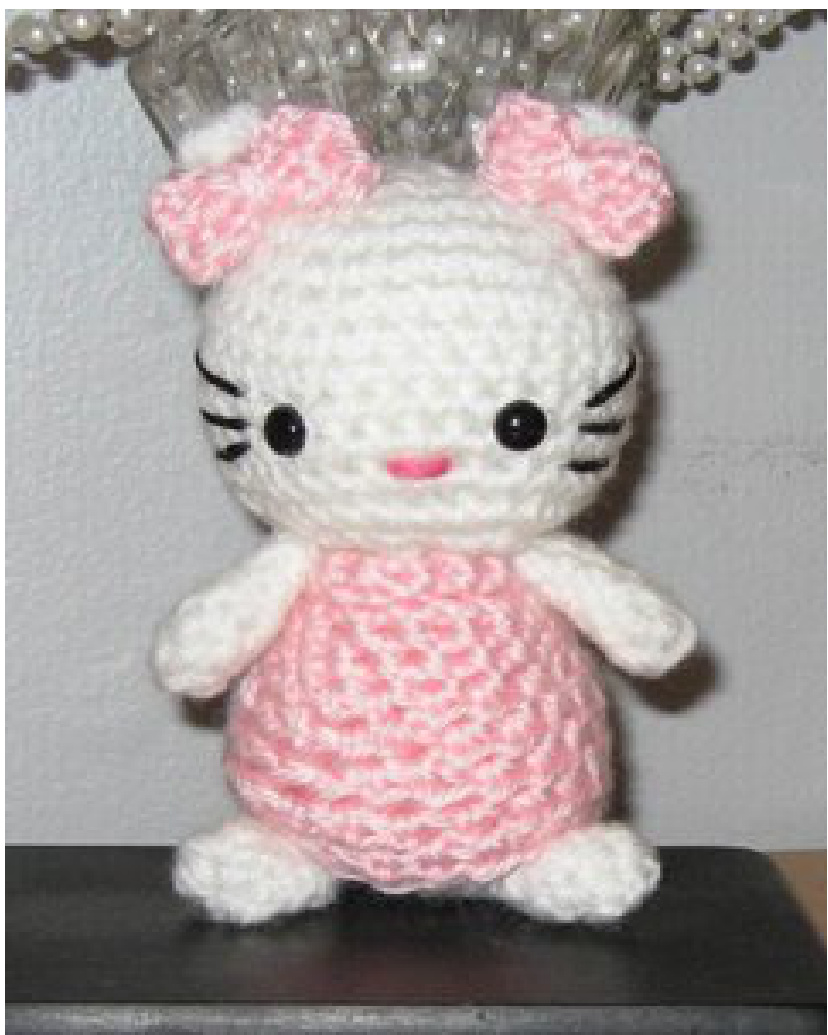
Amigurumi Hello Kitty
THIS WORK IS LICENSED UNDER THE CREATIVE COMMONS ATTRIBUTION-NONCOMMERCIAL-SHARE ALIKE 3.O UNITED STATES LICENSE. TO VIEW A COPY OF THIS LICENSE, VISIT HTTP://CREATIVECOMMONS.ORG/LICENSES/BY-NC- SA/3.0/US/ OR SEND A LETTER TO CREATIVE COMMONS, 171 SECOND STREET, SUITE 300, SAN FRANCISCO, CALIF0RNIA, 94105, USA.
Materials:
Lion Brand Pound of Love - White Caron Simply Soft - Soft Pink Size US-F/3.75mm Crochet Hook Pink & Black embroidery floss Polyester Fiberfill 2 - 9mm Safety Eyes Blunt darning needle
Abbreviations:
SC $\underline{{\underline{{\mathbf{\delta\pi}}}}}$ Single Crochet HDC $\underline{{\underline{{\mathbf{\delta\pi}}}}}$ Half Double Crochet Ch $\underline{{\underline{{\mathbf{\delta\pi}}}}}$ Chain Rnd(s) = Round(s) Beg = Beginning Sts $\underline{{\underline{{\mathbf{\delta\pi}}}}}$ Stitches 2tog $\underline{{\underline{{\mathbf{\delta\pi}}}}}$ Crochet 2 stitches together (decrease) = Repeat stitches from \* to end of \* 2nd $\underline{{\underline{{\mathbf{\delta\pi}}}}}$ Second
Pattern Notes:
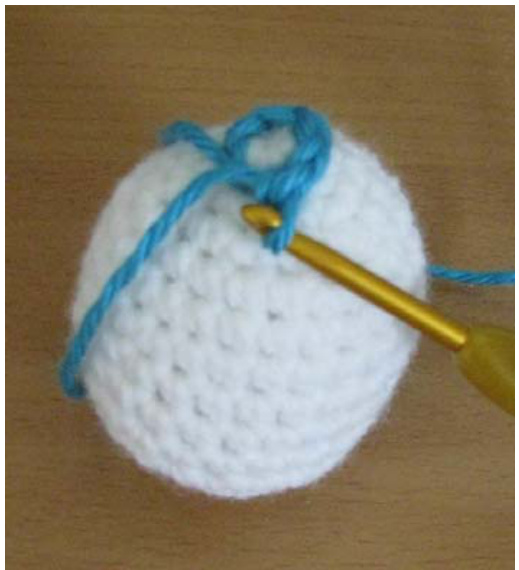
·Worked in continuous rounds; do not join and do not turn unless specified. Use stitch marker to indicate beginning of rounds. ·Yarn and hook listed is what I used - size may vary with other yarns or different size hook. http://apdesigns.etsy.com http://craftsbyap.artfire.com http://arminas-aminals.blogspot.com/ Head: Ch 2 Rnd 1: Work 5 sc in 2nd ch from hook = 5 sc Rnd 2: Work 2 sc in each sc around $\underline{{\underline{{\mathbf{\delta\pi}}}}}$ 10 sc Rnd 3: \*Sc in first sc, 2 sc in 2nd $s c^{\star}$ , repeat from \* around $\underline{{\underline{{\mathbf{\delta\pi}}}}}$ 15 sc Rnd 4: \*Sc in next 2 sc, 2 sc in next $s c^{\star}$ , repeat from \* around $\underline{{\underline{{\mathbf{\delta\pi}}}}}$ 20 sc Rnd 5: \*Sc in next 3 sc, 2 sc in next $s c^{\star}$ , repeat from \* around $\underline{{\underline{{\mathbf{\delta\pi}}}}}$ 25 sc Rnd 6: \*Sc in next 4 sc, 2 sc in next $s c^{\star}$ , repeat from \* around $\underline{{\underline{{\mathbf{\delta\pi}}}}}$ 30 sc Rnds 7-12: Sc in each sc around Rnd 13: \*Sc in next 4 sc, sc 2tog\*, repeat from \* around $\underline{{\underline{{\mathbf{\delta\pi}}}}}$ 25 sc Rnd 14: \*Sc in next 3 sc, sc 2tog\*, repeat from \* around $\underline{{\underline{{\mathbf{\delta\pi}}}}}$ 20 sc Rnd 15: \*Sc in next 2 sc, sc 2tog\*, repeat from \* around $\underline{{\underline{{\mathbf{\delta\pi}}}}}$ 15 sc Fasten off, leaving a long tail for sewing: insert safety eyes and stuff head firmly. Sew opening closed. Body: With White Yarn, Ch 2 Rnd 1: Work 5 sc in 2nd ch from hook $=5$ sc Rnd 2: Work 2 sc in each sc around $\underline{{\underline{{\mathbf{\delta\pi}}}}}$ 10 sc Rnd 3: $\star s c$ in first sc, 2 sc in 2nd $s c^{\star}$ , repeat from \* around $\underline{{\underline{{\mathbf{\delta\pi}}}}}$ 15 sc Rnd 4: $^{\star}S c$ in next 2 sc, 2 sc in next $s c^{\star}$ , repeat from \* around $\underline{{\underline{{\mathbf{\delta\pi}}}}}$ 20 sc Rnd 5: \*Sc in next 3 sc, 2 sc in next $s c^{\star}$ , repeat from \* around $\underline{{\underline{{\mathbf{\delta\pi}}}}}$ 25 sc Rnds 6-11: Sc in each sc around Rnd 12: \*Sc in next 3 sc, sc 2tog\*, repeat from \* around $\underline{{\underline{{\mathbf{\delta\pi}}}}}$ 20 sc Rnd 13: \*Sc in next 2 sc, sc 2tog\*, repeat from \* around $\underline{{\underline{{\mathbf{\delta\pi}}}}}$ 15 sc Fasten off leaving a long tail for sewing; stuff firmly. Sew opening closed (this will be the bottom). Flatten bottom so kitty can stand. Arms: (Make 2) Ch 2 Rnd 1: Work 5 sc in 2nd ch from hook = 5 sc Rnd 2-6: Sc in each sc around Fasten off, leave long tail. Do not stuff. Legs: (make 2) Ch 2 Rnd 1: Work 5 sc in 2nd ch from hook = 5 sc Rnd 2-4: Sc in each sc around Fasten off, leave long tail. Do not stuff. Ears: (Make 2) Ch 2 Rnd 1: Work 5 sc in 2nd ch from hook = 5 sc Rnd 2: Work 2 sc in each $s c=10$ SC Rnd 3: Sc in each sc around $\underline{{\underline{{\mathbf{\delta\pi}}}}}$ 10 sc Fasten off, leave a long tail. Do not stuff. Fold in half. Bow: Rnd 1: Ch 6 Rnd 2: Sc in 2nd ch from hook, ch 1, turn. Rnd 3-6: Sc across. Fasten off, leave long tail for sewing. To Form Bow: 1. Weave in short piece of yarn (where ch was started) to center; 2. Weave in long tail to center: 3. Pinch center and wrap long tail around several time (4 or 5 times): 4. Thread long tail through blunt needle and secure by running under the wrapped part, bringing it out; secure firmly. (NOTE: You can make 1 bow for one ear, or you can make 2 bows, one for each ear). To Assemble: Attach head to body. Attach arms, just below head. Attach legs. Attach bow. With pink embroidery floss, sew nose. You can use black embroidery floss to whiskers. Your Amigurumi Kitty is finished! Doll measures approximately $5"$ Tall. Happy Crocheting! Gown Tutorial I use this technique of crocheting the gown directly on to the body. I find that it gives a more complete look and you don't run the risk of the filling showing through your stitches. This tutorial is based on a $5"$ to 5-1/2" doll. If your doll is bigger, you will continue with additional rows, continue until the gown reaches the bottom of the body. The first step is to crochet the body. That will be your base. On all of my Amigurumi, I flatten the base so my Ami will stand. That way, I can, if I choose, add legs or leave as is. It will stand on its own. So once your base is complete, you are now ready to start crocheting the gown directly on to the body Please Note: The stitches I have in this tutorial is based on a $5"$ to 5-1/2" doll. My sample is in turquoise so the stitches will show. Rnd 1: Starting on top of body, insert crochet hook in sc on body and pull yarn through to form a loop: sl st to secure (use stitch marker to mark). Continue inserting crochet hook into body and work 6 sc around.
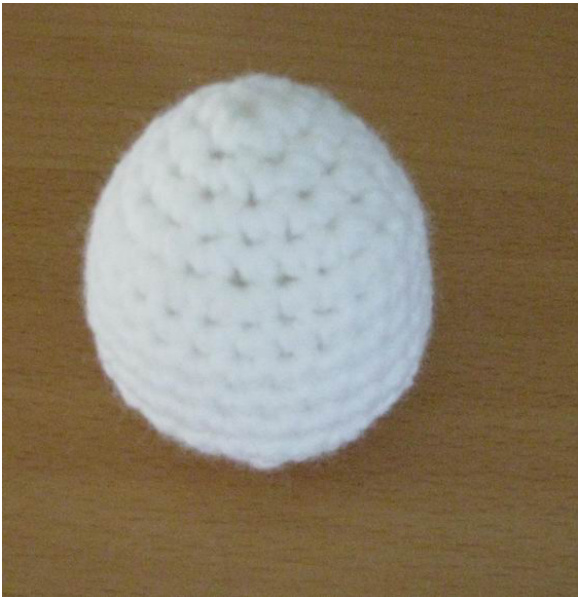

Body Base
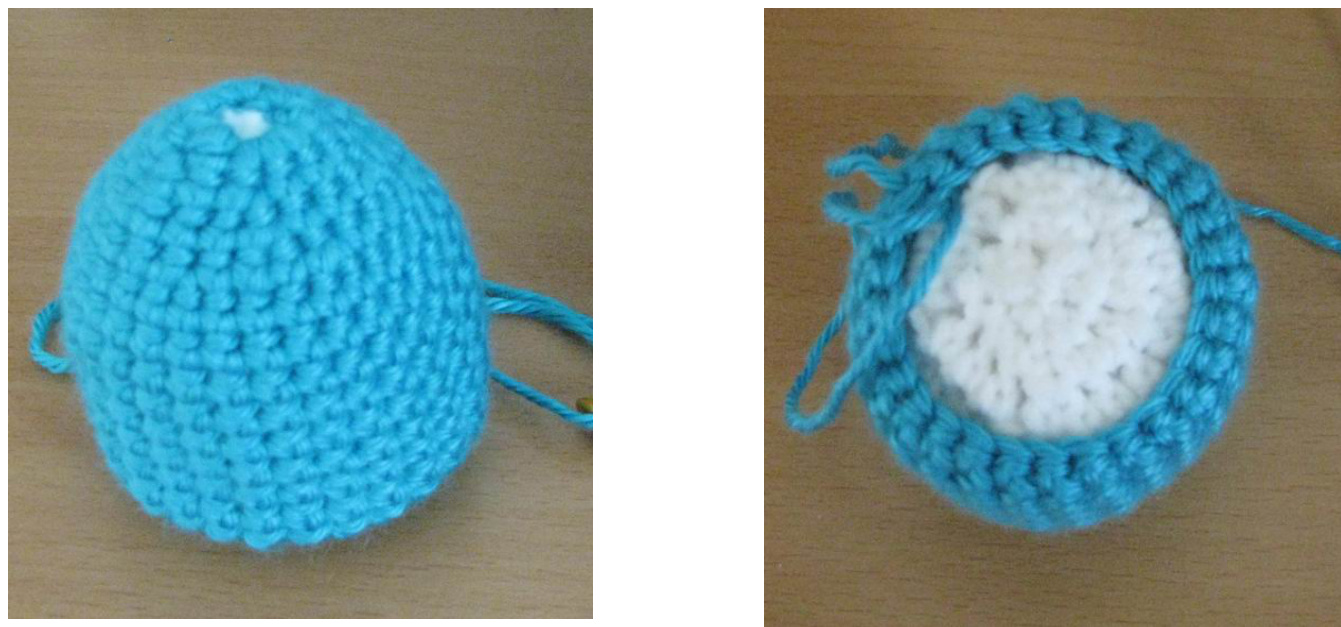
Starting Loop Rnd 2: Now work 2 sc in each sc around $\underline{{\underline{{\mathbf{\delta\pi}}}}}$ 12 sC You are now working your stitches into the first row. You will no longer be crocheting directly on to the body.
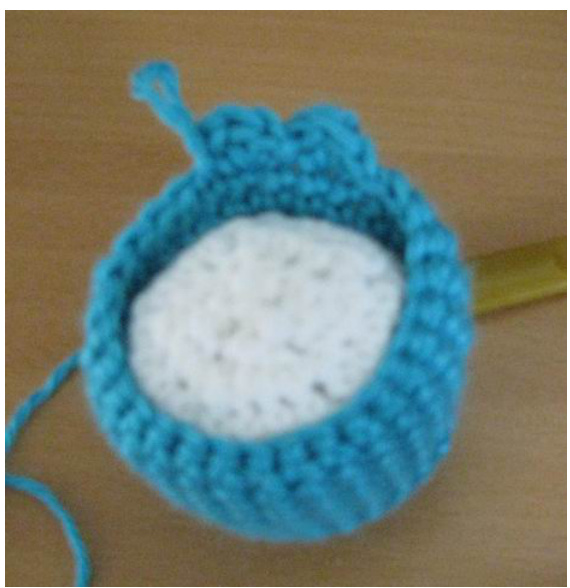
Rnd 3: $\star s c$ in first sc, 2 sc in next sc,\* repeat from \* around $\underline{{\underline{{\mathbf{\delta\pi}}}}}$ 18 sc Rnd 4: $^{\star}S c$ in next 2 sc, 2 sc in next sc\*, repeat from \* around $\underline{{\underline{{\mathbf{\delta\pi}}}}}$ 24 sc Rnd 5: $^{\star}S c$ in next 3 sc, 2 sc in next $s c^{\star}$ , repeat from \* around $\underline{{\underline{{\mathbf{\delta\pi}}}}}$ 30 sc Rnd 6-14: Sc in each sc around (gown should reach bottom of body base). Sl st to join, fasten off.


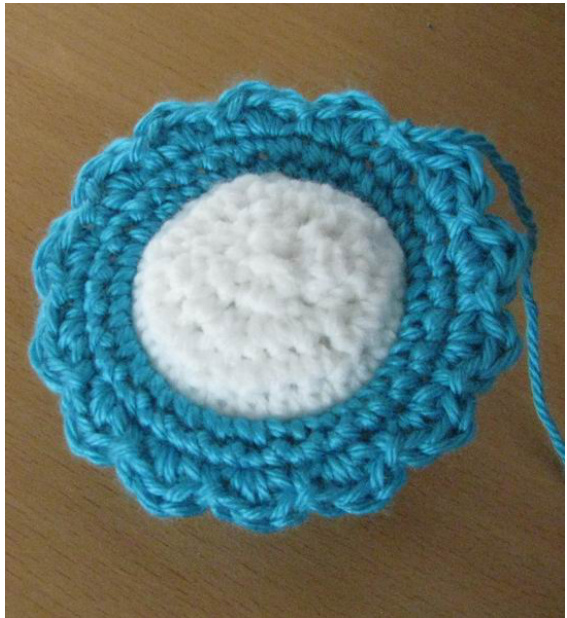
NOTE: The ruffle border is optional. If you do not want to put a ruffle border, you can stop at Rnd 14, fasten off, and attach the legs. I wanted to include the ruffle border in this tutorial because I use this often. Rnd 15: For ruffle border, \*(HDC, DC, HDC) in first sc, sl st into next sc, (HDC, DC, HDC) in next $s c^{\star}$ , repeat from \* around. Fasten off. Weave in yarn.
I hope this tutorial helps when you are creating your wonderful Amigurumi.