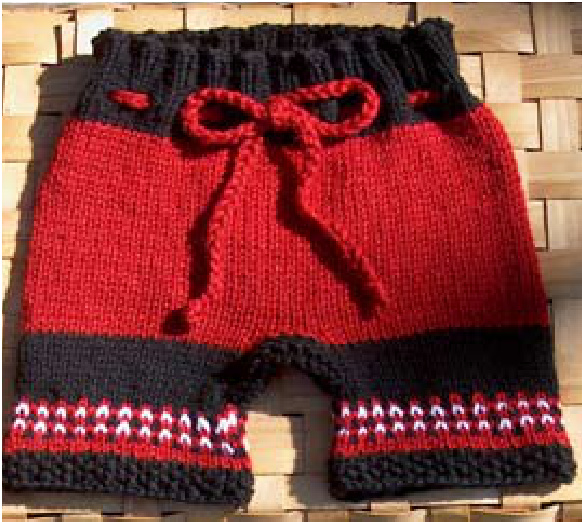
Burgh Baby Gear Pattern for Longies, Shorties, and Capris
From the book "Knitting Wool Diaper Covers from Start to Finish" by Maggie Broderick www.burghbabygear.com burghbabygear@yahoo.com Copyright 2008 - Be Sharp, LLC
This is a great pattern for a pair of wool longies, shorties, or capris that can be made by knitters of all skill levels. If you're new to knitting just relax! Remember - you're basically just making a tube for the bum with two tubes for the legs attached to it. You'll learn a ton by using this pattern, and it's written so that you can just do the basics and not any of the extra touches. Your woolies will still be absolutely adorable! If you're more advanced, this pattern allows you to show your creativity by adding personal touches and changing details to make unique and special longies, shorties, and capris. The beauty of this pattern is that it can be made any size, from the tiniest newborn up to the largest toddler and beyond! Directions and gauge for both worsted and Aran/ bulky weight yarns are included, so that you are only limited by your imagination. This pattern is written in a conversational tone, with every step completely written out. Once you know how to do all of the steps, you can refer to the shorter version at the end of this pattern. This pattern is generally intended for personal use, but you are also welcome to sell items made from this pattern. I only ask that you please include a reference in your item's listing that you used this pattern in making your product. Thanks!
Terms and Techniques
Some terms and techniques you need to know to use this pattern are: Knit Stitch and Purl Stitch Knitting in the Round "Knitting on" Cast On (or other "stretchy" cast-on techniques) "YO" /"Yarn Over" "K2T" /"Knit 2 Together" "P2T" /"Purl 2 Together" "Increasing”"-Iusetwo types: “KFB" (“Kni ront and back”) and "KRL" ("Knit right loop") increases "Picking up stitches" Binding offin pattern If you are not familiar with these terms and techniques, try looking them up on www.knittinghelp.com or in a basic knitting book (from the library or bookstore), or simply do a basic internet search. There is a ton of information out there in books and on the internet for us knitters! Most importantly, have fun and enjoy your creative journey!
Size
Measure your child over his or her thickest diaper, and plug the numbers into the appropriate places in the instructions below'. All measurements are in inches. Write your child's measurements here: $\mathrm{A}=\mathrm{W}$ aist (around the belly at belly-button height) $\mathrm{B}=\mathrm{Hips}$ (around the thickest part of the diaper) $C=\mathrm{Rise}$ (from the bellybutton, down through the crotch, and to the back at belly-button height) ”1 $\mathbf{D}=$ Thigh (around the thickest part of the thigh) ” $\mathrm{E}=$ Inseam (from the crotch, down the leg, and ending at the top of the foot) 11 If you're knitting for a child who isn't born yet or whom you can't measure right now, here's a handy chart with some typical measurements.
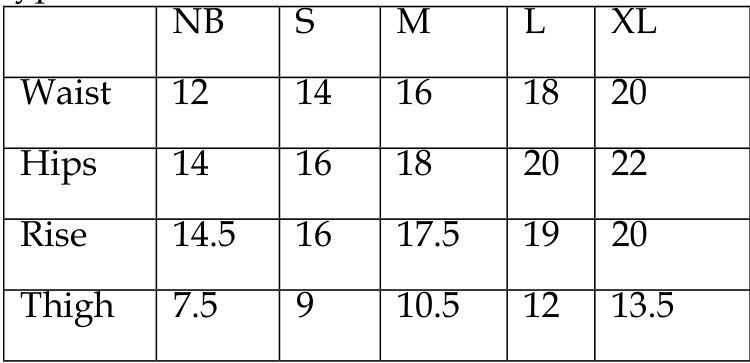
1 If you are making this item for a child who uses disposable diapers or no diapers at all, simply measure over the disposable diaper or underwear. The pattern will work just as beautifully with those measurements! You may omit the short rows entirely and just knit the body without the short rows if you're knitting for a child who doesn't use cloth diapers. It'll be even easier and quicker to knit!

Gauge
For worsted weight yarn: 4.5 stitches per inch, 7 rows per inch For Aran/bulky weight yarn: 4 stitches per inch, 6 rows per inch Note - I tend to be a loose knitter. If necessary, you can either adjust to my gauge by changing needle sizes, or if you're so-inclined and an experienced knitter, feel free to adjust the math in the pattern to your gauge.
Materials
Worsted or Aran/bulky weight wool (not super-wash wool) - between 200 and 440 yards, depending on the desired size of the longies/ shorties and the yarnweight (200-220 for most shorties and 400-440 for most longies) $24^{\prime\prime}$ Circular knitting needles in sizes 4 and 6, or size needed to achieve gauge (I use interchangeable needles, like Knit Picks brand from www.knitpicks. com). For very small sizes, you may need to use smaller circular needles or double-points instead. For Aran/bulky weight yarn, you will probably need larger needles (I use sizes 5 and 7 for heavier yarns). Set of four size-7 double-point needles (size-8 is better for Aran/bulky weight yarn)\* Tapestry needle Stitch markers (2) Stitch holders (3) Size J crochet hook (optional) \*Note that the double-point needles are to be one size larger than the circular needle used.
Knitting the Body
Casting on:
If using Worsted weight yarn: Miuiupiy tne nup measurement (Ivieasurement D) Dy 4.5. Round to the nearest number that is divisible by 4. A typical size medium/large would be 88 or 92 stitches $(20^{\prime\prime}$ hips). If using Aran/bulky weight yarn: Multiply the hip measurement (Measurement B) by 4. A typical size medium/large would be 80 stitches $(20^{\prime\prime}$ hips). Cast on stitches (see formulas above) onto smaller-sized circular needle (I use size 4). I use the "knitting on" cast-on method, but any stretchy cast-on is fine. Place stitch marker at end of round.
Waistband:
Work in $2\mathrm{x}2$ ribbing (K2 P2) for 8 rounds. Work eyelet row (K2 YO P2T) for one round. Knit one round.
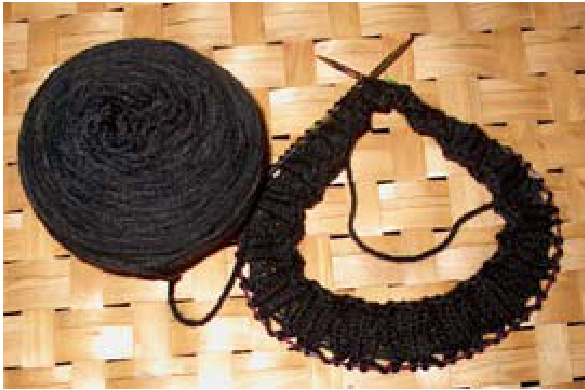
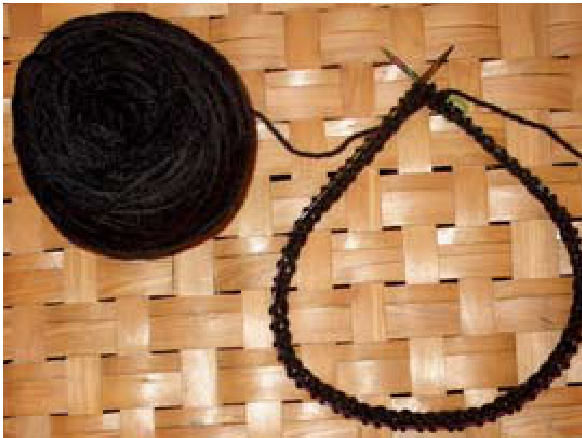
Change to the larger-sized circular needle (I use size 6 for worsted weight yarn and size 7 for Aran/bulky weight yarn). If a color change is desired for a contrasting Waistband, change colors now. Knit 3 rounds2.
Short Row Preparation:
Divide the number of stitches on your needles by 4, and Write that number here. 3 Now it's time for the infamous short-rows. Relax! It's not as hard as it sounds, and you'll get it with a little practice! Now it's time to breathe and relax...maybe meditate for a minute (just kidding!). As I wrote in the "Knitting Tips" section of this book short rows can be daunting to new knitters, but they're really not that hard. With a little practice, you will be fine. I will take you step by step, with pictures. You will be doing between 3 and 5 sets of short rows, depending on the size of your woolies. First, knit one stitch past your stitch marker. Your first stitch marker is now called "stitch marker A."
Step one - Wrapping and turning:
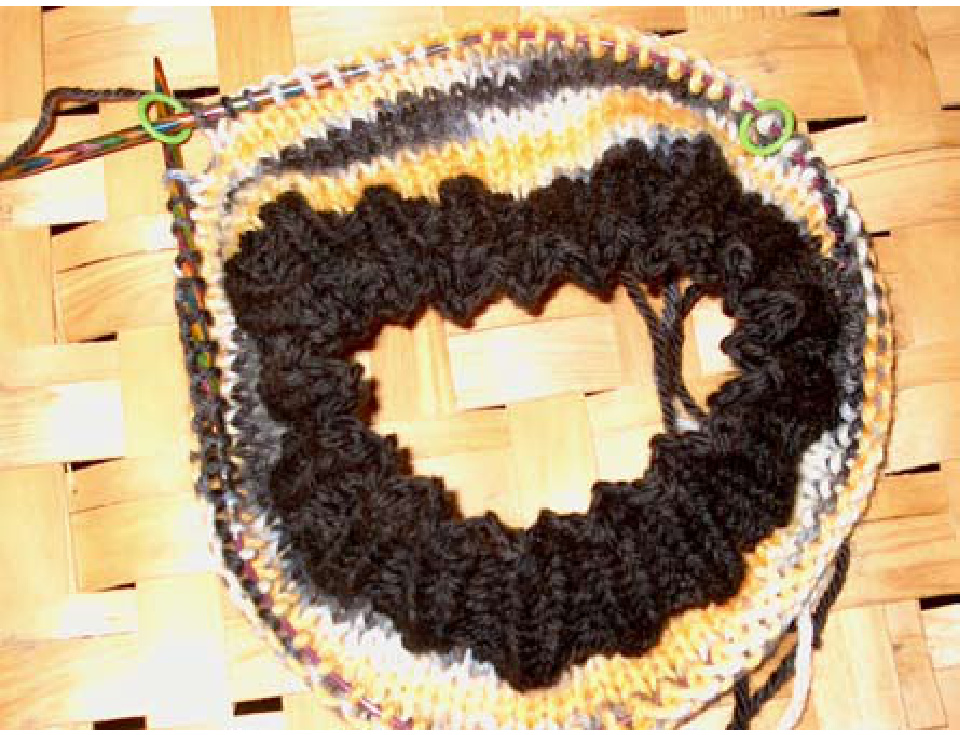
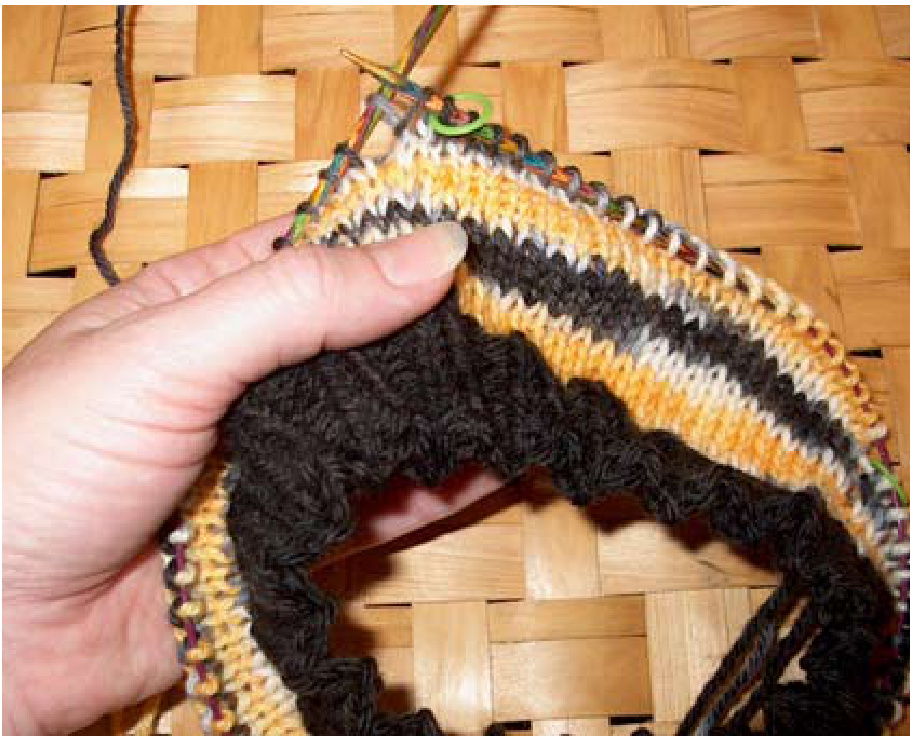
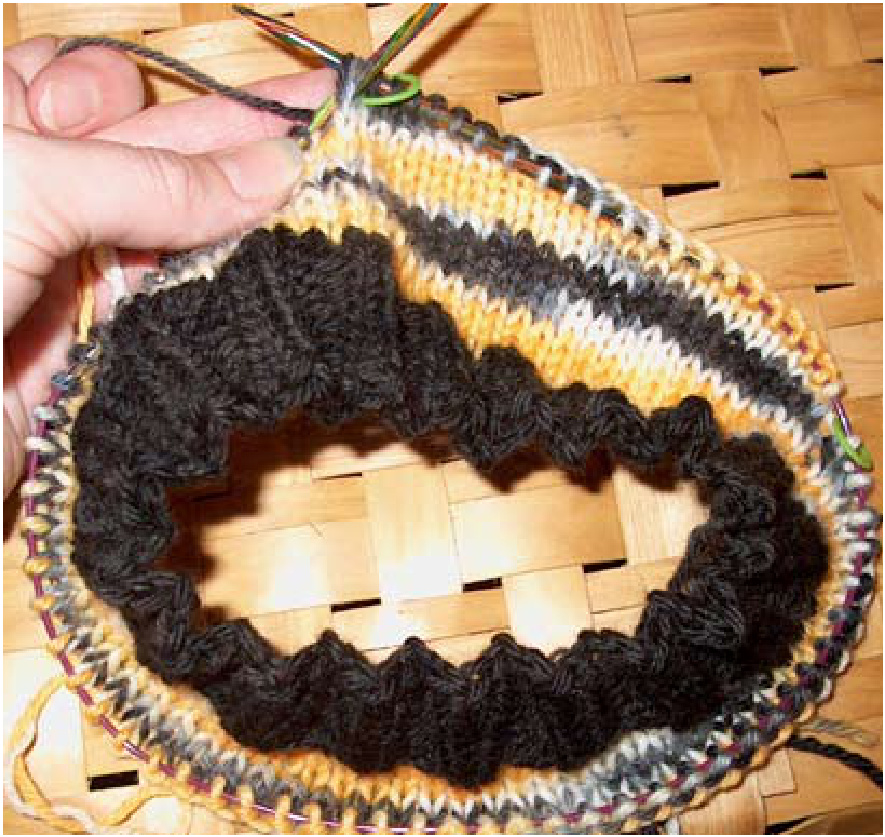
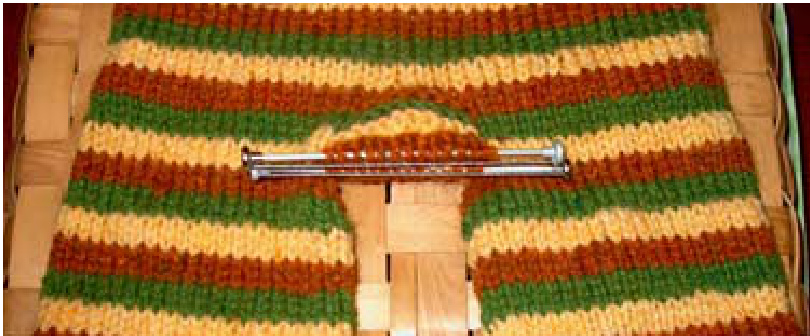
Now, find the number of stitches you just wrote above $(1/4$ of the stitches on your needles) and knit that many stitches. Place a second stitch marker. Your second stitch marker is now called ""stitch marker B"" You've now knitted $1\%$ Of the stitches on your needles, plus one more stitch. These stitches are between the two stitch markers, and will form the extra "bum room" in the back of your woolies. Your original stitch marker will be called "stitch marker A," and this new marker will be called "stitch marker B." The two stitch markers will remain on the needles until you are finished with your desired number of short row sets. In the following picture, you will see the two stitch markers. (The picture shows the third (last) set of short rows on a sizesmall pair of longies.) All of the short rows on your woolies will be done exactly the same way, regardless if you're on the first set or the last set.
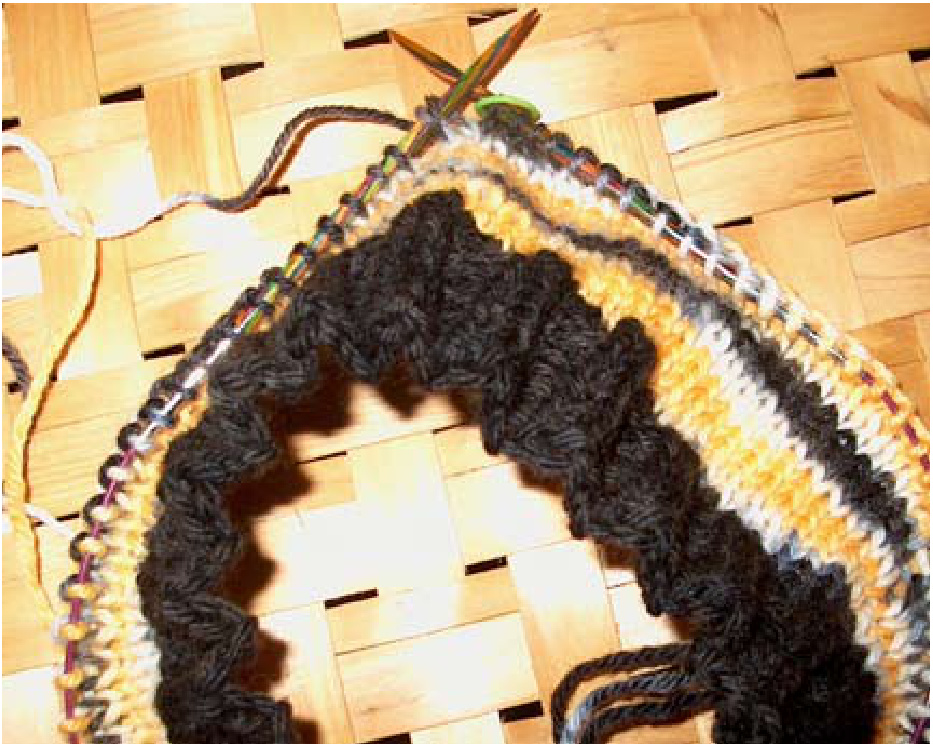
Slip "stitch marker $\mathbf{B}^{\prime\prime}$ onto the right needle. Now you are going to wrap the stitch after "Stitch marker B."
Slip the stitch after "stitch marker $\mathtt{B^{\prime\prime}}$ onto the right needle. Bring your yarn from the back to the front. Slip the stitch back onto the left needle. Bring your yarn from the front to the back ("wrapping the stitch" with your working yarn.
Turn your work so that you are looking at the inside of your woolies (the purl side of your work). Purl back to one stitch before "stitch marker A". Congratulations on doing one side of your first short row! That wasn't so hard, was it? Now you are going to do the same technique for the other side of the short row. You should be looking at the purl side (inside) of your work. Now you are going to wrap the stitch before "Stitch marker A." Slip the stitch before "stitch marker A" onto the right needle. Bring your yarn from the front to the back. Slip the stitch back onto the left needle. Bring your yarn from the back to the front (" wrapping the stitch" with your working yarn.
Congratulations again! You've just wrapped your first short row! Now, turn your work so that you are looking at the knit side (outside) of your woolies.
Step Two - Closing the Gaps ("Unwrapping"):
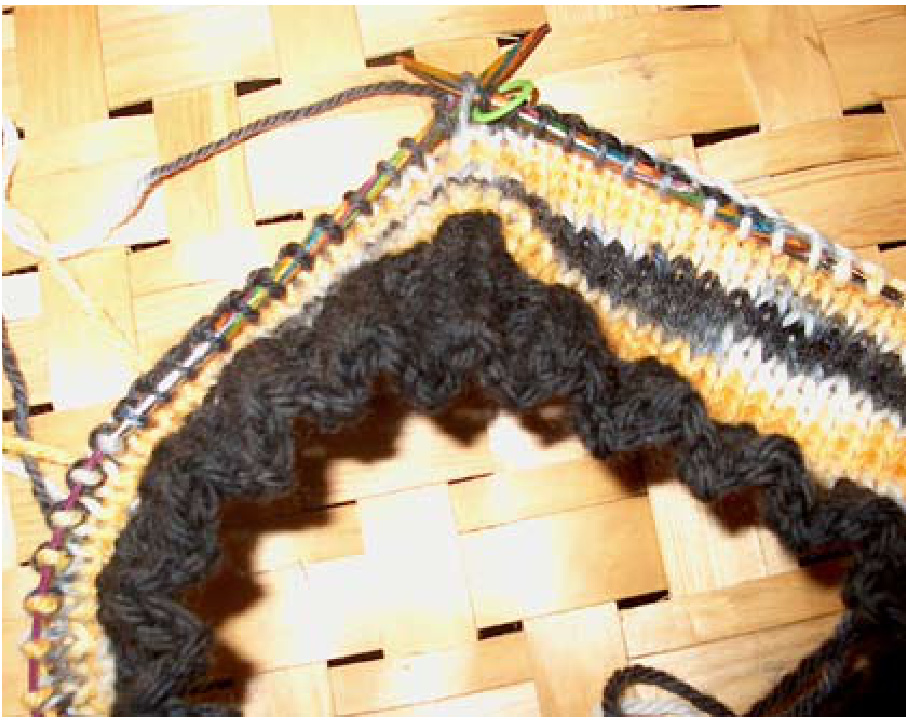
You will now be using the wraps you created at the ends of the short row to "close the gaps" in your knitting, so you don't have any holes. As you do this, watch your tension so that you don't pull the ends of the short rows too tightly or loosely. You should be just past "stitch marker A." Knit until you get to the first wrap, just beyond "stitch marker B." Your wrap should look just like the picture below. As you approach the wrapped stitch, insert your right needle into the wrap as shown. Using your right needle, lift the wrap up and over the original stitch, replacing it on the left needle.
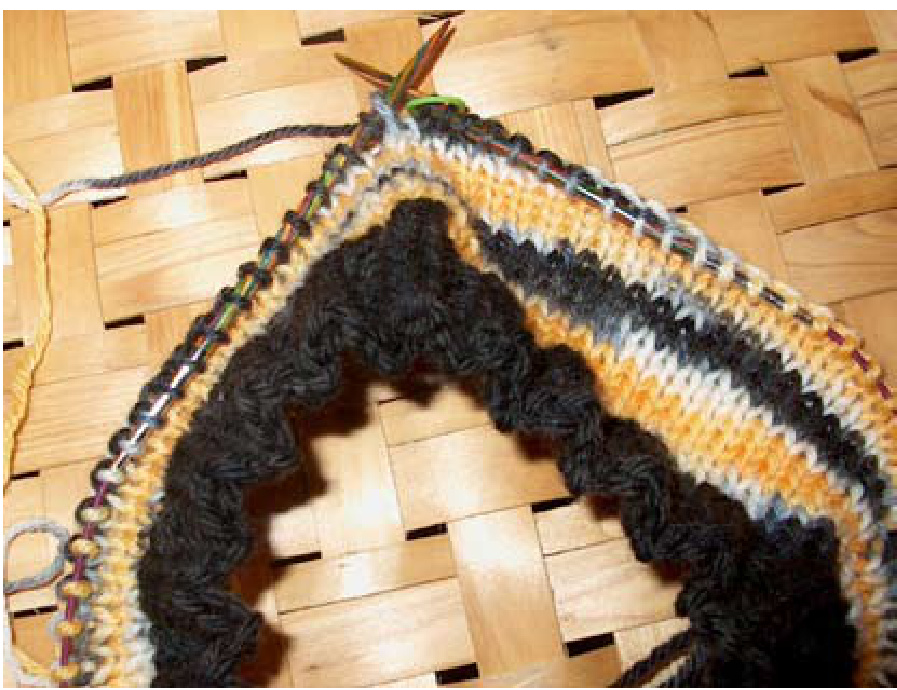
The wrap is now the first stitch on your needle, as in the next picture. You will need to move it behind the original stitch, so that it will be hidden and close the gap.
Now, you are going to pull the original stitch up through the wrap stitch and then reverse the mount (so that it isn't twisted). Put your right needle into the wrap, as if to purl. Slip the original stitch onto the right needle. Reverse the mount of the original stitch (now on the right needle) by taking it off the needle and "untwisting" it. It should look just like the other stitches on the right needle. Then, slip the original stitch back onto the left needle. The original stitch is now the first stitch on your left needle, followed by the wrap, as in this picture.
These two stitches are about to be knitted together.
Now you will be knitting the original stitch and the wrap together. K2T (knit two together) through the back of the stitches, as in this picture.
Whew! You did the hardest part of the entire project. You'll get better and better with practice. Give yourself a pat on the back! Knit the rest of the round until you get to the stitch after stitch marker A. As you begin the next round, unwrap the stitch and hide the wrap exactly the same way you did with the other wrapped stitch. Complete the round.
Step Three - Add length between short row sets
Knit 2 more rounds (yup - that's all) Repeat this short row sequence between 3-5 times (4 times for most sizes; for NB and small sizes I only do 3 sets of short rows, and for XL I sometimes do 5 sets of short rows). Back patting every time you complete a short row is not necessary, but won't hurt one bit. To review - the process is: 1. "Wrap and turn" 2. "Close the gaps" (while knitting in the round) 3. Knit two more rounds Once you are done with the desired number of short row sets, remove "stitch marker $\mathbf{B}^{\prime\prime}$ as you knit in the round.
Completing the Rise:
Continue to knit in the round for a while, measuring both the front and back of your work as you go. The back of your work should generally be about ${1^{\prime\prime}}$ longer than the front, give or take a little bit. You need to stop knitting when your front and back measurements added together equal $3.5^{\prime\prime}$ less than your rise measurement (Measurement C). Remember that the total rise measurement (Measurement C) will go all the way from the bellybutton, through the crotch area, and ending at the back at bellybutton height. Copy rise measurement (measurement C) here: Subtract $3.5^{\prime\prime}$ from that measurement The number you just wrote is what your work should measure now, just before you start the crotch gusset. I sometimes add up to $1/{2}^{\prime\prime}$ to the rise just to be on the safe side, since kids grow so fast.
Preparing to Knit the Gusset:
Now you will be placing two stitch markers as you knit one round. The stitch markers will be at the exact front and back of your work. As you begin this round, remove "stitch marker A" and place it aside. Knit until you are in the middle of your short row area (half of the number of stitches that you did for your short rows). Place stitch marker, which we will now call the "back stitch marker." Knit exactly half of the stitches on your needles, and place another stitch marker, which we will call the "front stitch marker." The "back stitch marker" should be exactly at the back of your woolies, and the "front stitch marker" should be exactly at the front.
Knitting the Gusset:
Now double-check that you have the same number of stitches on either side (between the stitch markers). If you are off by one or two stitches, you will need to undo and redo the front until it is even. Knit until you are 2 stitches before the "back stitch marker." Increase into the next stitch. (I do a "KFB" /"Knit Front and Back" increase, since it blends in well with the gusset stitch pattern). Knit the next stitch and pass the stitch marker. Knit the next stitch after the stitch marker, and increase (KFB) into the next stitch after that. You will now be knitting until you reach the front of your Woolies. Perform the same increases at the front as you did for the back. Knit until you are 3 stitches before the "back stitch marker." Purl 3 stitches, pass the stitch marker, and purl 3 more stitches. Knit until you get to the front, and purl the front of the gusset the same way. Now that your gusset has been started, repeat the following steps until you have 14 purl stitches on each side (front and back.). 1. Knit until you get to the first purl stitch. 2. Increase into the first purl stitch 3. Knit the gusset stitches (pass the marker as you knit) until you get to the last purl stitch. 4. Increase into the last purl stitch. Then: 5. Knit until you get to the first increase. 6. Purl all the way through the gusset (pass the marker as you purl). Repeat steps 1-6 above (for both the front and back of you gusset until your gusset is complete. Again, your gusset is complete when both the front and back parts of the gusset have 14 purl stitches total (7 on each side of the stitch marker). You've just completed the purl part of the gusset on the front of your woolies. Knit until you reach the end of the gusset on the back part of your woolies (including the back part of the gusset). Having one side of the gusset end with purl stitches and the other side with knit stitches will make it look neater when we go to graft it together later on.
Splitting for the Legs:
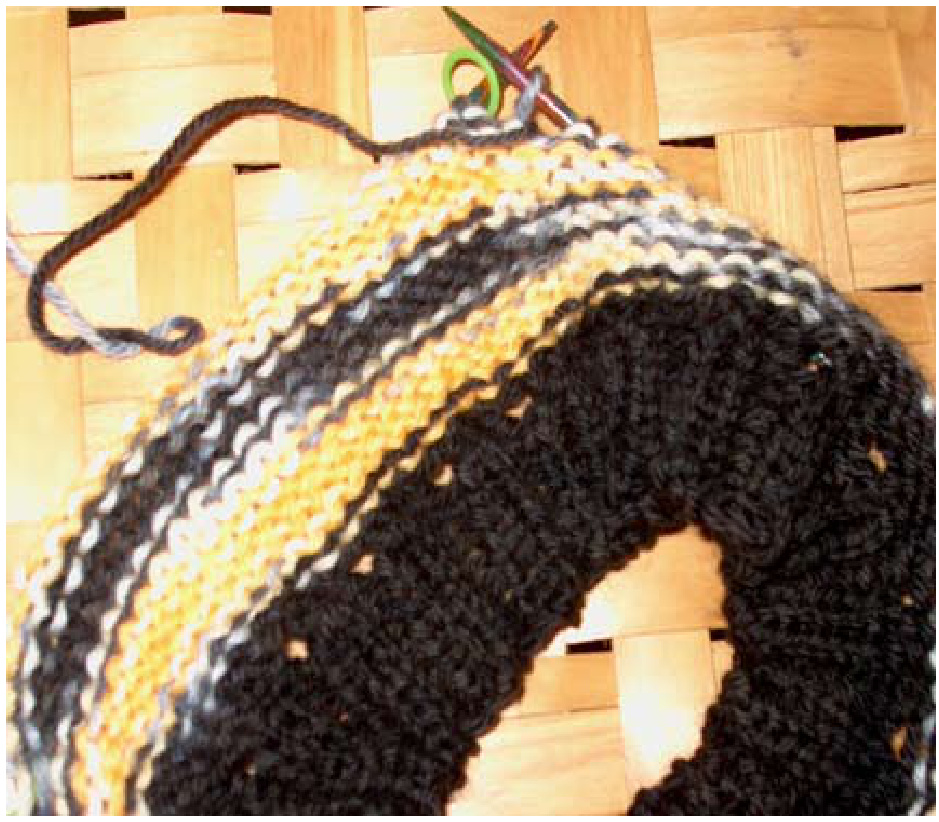
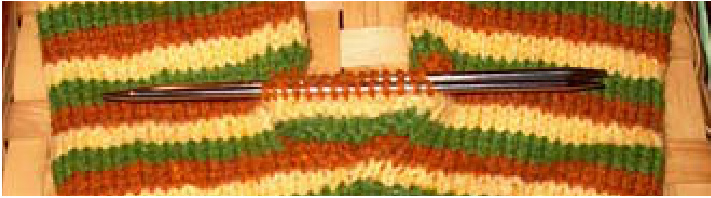
Time for something different! You will now abandon your circular needles for some double-point needles three stitch holders. The double-point needles that you will be using are one size larger than the circular needles. This allows for a little extra "give" /room in the thigh and for a nice drape on the legs. Continue holding your work upside-down, with the waistband towards you and the back facing you. Working from left to right, on the stitches you just finished knitting, place the back gusset stitches (the first 14 stitches from left to right) on one stitch holder5. Then put the stitches for a leg on another stitch holder. (Stop when you get to the purl stitches for the front gusset.) Then put the stitches for the front gusset (the 14 purl stitches) onto a third stitch holder. Divide remaining stitches (the stitches for the left leg) onto 3 double-point needles, as in the next picture.
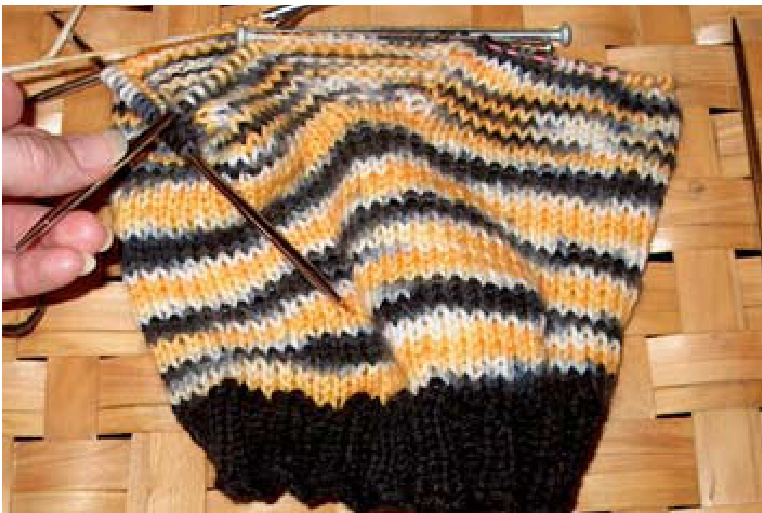
You'll see that your working yarn is right where it needs to be so you can start knitting the first leg.
Knitting the Legs
Now you need to check your thigh measurement (Measurement D) against your work and pick up the appropriate number of stitches so that the legs fit your little one just right. You will need to pick up at least 4 stitches in order to avoid holes around the crotch gusset. Use the following formula to determine if you need to pick up more than 4 stitches for the leg. Number of stitches currently on double-point needles (total) plus 4 more stitches
Divided by:
Your gauge (4.5 stitches per inch for worsted or 4 stitches per inchforAran/bulky) $=$ The number above is your current thigh measurement. If it's a little big, that's fine. If it's more than $1/2^{\prime\prime}$ to small, you will need to pick up more than 4 stitches. Pick up 4 extra stitches for each inch needed. I've picked up as many as 12 stitches for babies with super-chunky thighs! Most often, 4 stitches is plenty, though. Whew - that was a lot of math. Time for some easy knitting! Use your working yarn to pick up the stitches on both sides of the crotch gusset (form individual stitches by drawing your working yarn through the stitches right next to each of the stitch holders, dividing your new stitches evenly among both sides). Put those new stitches onto your first double point needle. By picking up stitches on both sides of the crotch gusset, you are closing the loop for the leg and getting ready to knit in the round on your double-point needles. If necessary, reorganize your stitches so that your needles have the same number of stitches (or close to the same). Knit in the round until one inch before you reach your desired inseam (the cuffs will measure about one inch). See the next section to determine the desired measurement for your shorties, capris, or longies.7 If a color change is desired for the cuffs, stop knitting with the body color one round before you start the cuffs. Knit one round with the new color, and then proceed to the cuffs. (This avoids a bad color transition into the purl stitches in the cuffs.)
Length:
For shorties: "Classic" style shorties typically have an inseam between 2 and 3.5 inches. If you're unsure, $2.5^{\prime\prime}$ is a great choice.
For capris or board shorts: Capris and board shorts (longer shorties for a boy) can vary a lot on the inseam, but generally have at least a $4^{\prime\prime}$ inseam, and are a few inches shorter than the child's actual inseam. You can be very creative with lengths for capris and board shorts! For longies: Longies typically go exactly to your child's inseam measurement (Measurement E). See the sections at the end of this pattern for more info on cuffing longies, if desired.
Cuffs:
Work five rows of seed stitch (K1 P1). If you already have an odd number of stitches at this point, you can continue in K1 P1 for all five rounds. If you have an even number of stitches at this point, simply increase into the last knit stitch, and then continue as above. This will keep the pattern in seed stitch as you knit in the round. Bind off in seed stitch.
Leg Number Two
Now it's on to the other leg! Knit the other leg in the same Way as above, picking up the same number of stitches at the beginning of the leg. You will need to join new yarn when you pick up the stitches, and leave a nice-sized tail so you can securely weave it in when you're finished knitting.
Grafting the Crotch Gusset
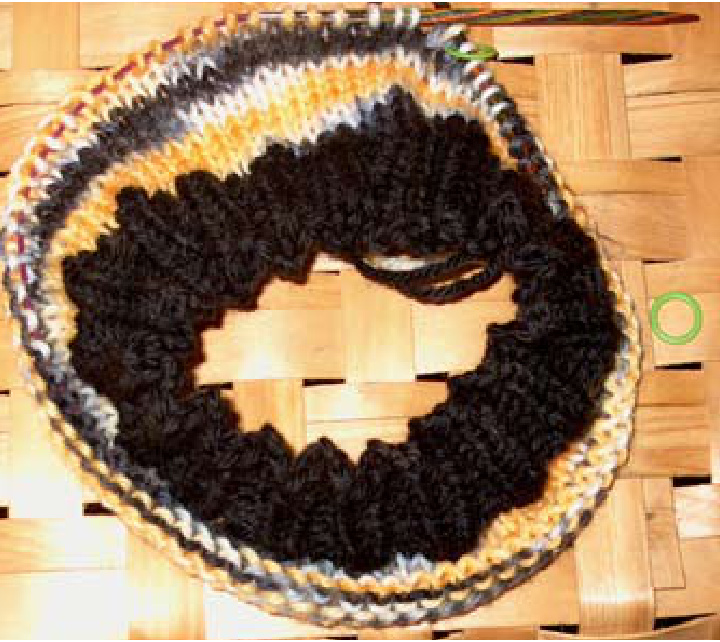
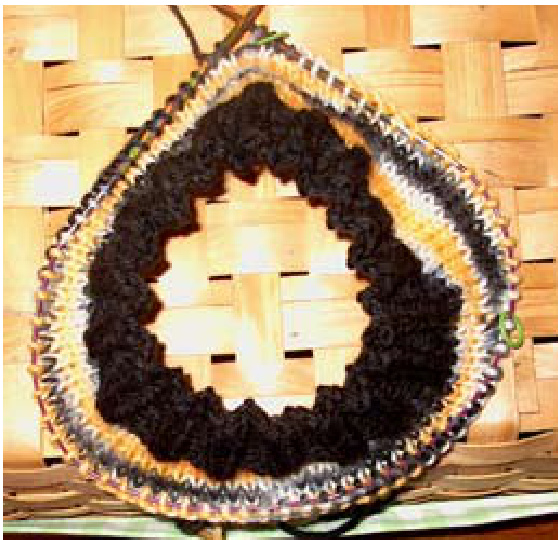
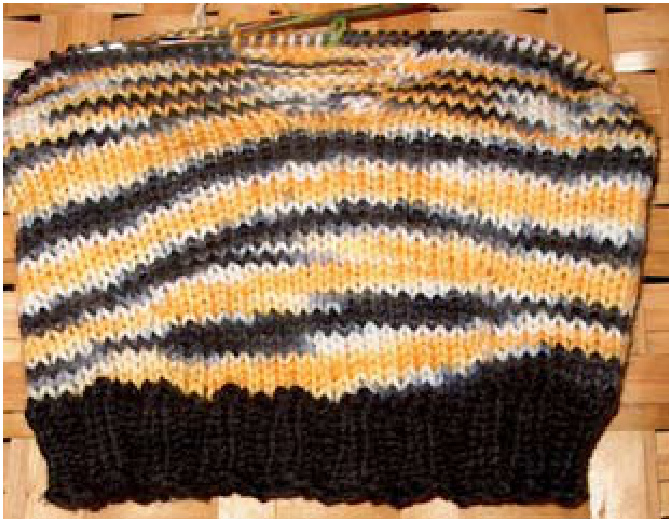
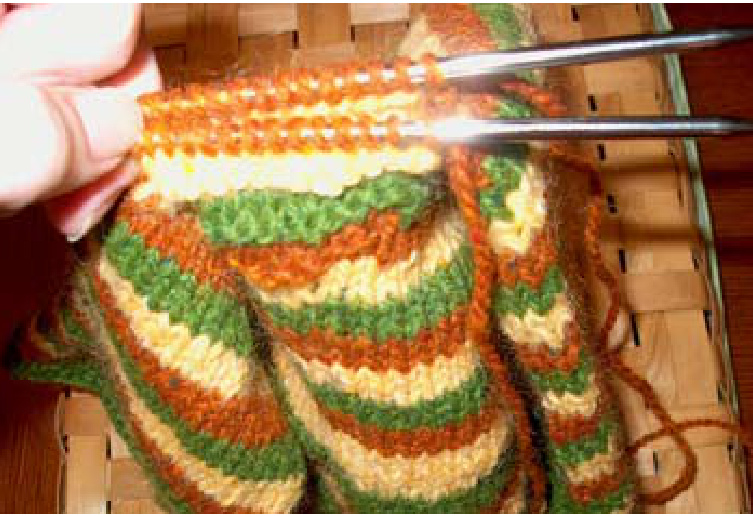
Now you're ready to complete the body of the woolies!8 Here is what your woolies should look like with the two stitch holders on either side (front and back):
Make sure that your stitches are not twisted, or else your graft won't look quite right. If you've never done a kitchener graft, just relax! It takes a little practice, but is actually very simple, and you will be good at it in no time! Hold your woolies so that you are looking at the back of them (the bum) upside-down (legs on top, waistband on the bottom), like this:
Using your tapestry needle and a long strand of new yarn (about one yard long), set up your kitchener graft by pulling your yarn through the first stitch on the bottom needle as if to purl, and then through the first stitch on the top needle as if to knit. Leave a tail at the end so that you can weave it in later.
Now that you are properly set up for the kitchener graft, follow the following steps until you reach the other end of the seam and no stitches remain: Pull yarn through first stitch on bottom needle as if to knit. Pull that stitch off of needle. Pull yarn through next stitch on bottom needle as if to purl. Leave that stitch on needle. Pull yarn through first stitch on top needle as if to purl. Pul that stitch off of needle. Pull yarn through next stitch on top needle as if to knit. Leave that stitch on needle. The trick is pulling your yarn just right - not too tightly and not too loosely. Hold the work steady with your left hand and work with your right. Just pay attention to which direction your yarn is going, and say this little mantra, "Knit, Purl, Purl, Knit," and you'll be done in no time! For the final two stitches, just pull them off of the needles as you enter them with your yarn purl-wise and knit-wise. Bring your yarn ends through to the inside of your woolies, to be woven in later. I usually crochet a simple chain using a double strand of yarn (one strand from each end of the skein). How long you want the ties to hang is up to you (I thread it through as I go, and determine the length by eye). Weave your drawstring in and out through the eyelet holes, so that the two ends are at the two front-most holes when you are done. If you have an odd number of eyelet holes, simply skip one hole (usually at the very back) with the drawstring, and darn the hole up with a tapestry needle and some matching yarn afterwards. Double knot both ends of the drawstring when you are done. If you find that the drawstring is too long for your child, it's easy to just tie another double knot up higher, and then trim the ends with this method. Other options for drawstrings include I-cord, braided drawstrings, twisted drawstrings, or simply a couple of strands of yarn tied together. I think that a double strand of crochet looks and feels the best, and it works up very quickly. Instructions for making an I-cord (a very popular option) can be found at www.knittinghelp.com. I-cord tools make it easier and faster to make I-cords, and are available at craft stores and online stores.
Securing the Drawstring:
Before weaving in your other yarn ends, consider tacking down your drawstring for your child's safety (and/or to protect against product liability if you are selling your Woolies). I simply use the tail that is left over from casting on at the top of the waistband, and weave it down and through to secure the drawstring in one spot.
Finishing:
Weave in all of the other yarn ends. At the sides of the gusset you will probably have some tiny holes, which can be easily darned up with the yarn as you are weaving in the ends. Tips for weaving and for my special cuff treatment can be found in an earlier section of this book. Congratulations on completing your woolies! You deserve another pat on the back! If you're feeling fancy next time, see the optional touches in the next section.
Optional Touches:
Now that you know the basics, you can let your imagination run wild and create woolies that are as unique as your child.
Optional Crocheted Ruffles on Cuffs:
Using your crochet hook, pick up each stitch of the bottom of the skirt and work a double-crochet stitch three times into each stitch. Once you get all of the way around the skirt, bind off your final crochet stitch and weave in ends securely.
Pleated Knitted Ruffles:
For a simple knitted ruffle that "swirls" towards one direction, do the following for your cuffs: K2 P2 K1, increase into the next knit stitch, P2 K3 P2 K2, increase into the next knit stitch, P2 K4 P2 K4, increase into the next knit stitch, P2 K5 P2 Bind off in pattern You can make an even fluffier pleated ruffle variation by doing increases into the knit stitches on both sides of the knitted sections, like this: K2 P2 Increase into first stitch, increase into the next knit stitch, P2 K4 P2 Increase into first stitch, K2, increase into the next knit stitch, P2 K6 P2 Increase into first stitch, K4, increase into the next knit stitch, P2 K8 P2 Rind off in nattorn This variation makes the ruffles more like a pleated skirt, with even triangle-like shapes for the knitted sections. See Www.knittinghelp.com for info on doing increases that match on both sides, so that your pleats look nice and neat. I like the "KRL" /"Knit Right Loop" and "KLL"/"Knit Left Loop" pair of increases for making pleated ruffles.
Optional Changes to the Fit:
Babies come in all shapes and sizes. If there is a large difference between your waist and hip measurements (more than 2-3 inches), you may want to do additional shaping to get the perfect fit. Simply use your waist measurement instead of your hip measurement when choosing how many stitches to cast on. Then space increases evenly throughout while knitting in the round to reach the desired hip measurement. Doing all of your increases in the first couple of rounds Will result in a smaller waist and bigger body in general. Spreading increases gradually over all of the rounds will result in more of a graceful "pear-shaped" body. For my popular "relaxed hip" fit, I do increases in the row just before the crotch gusset. I increase once for every 8-12 stitches, depending on size and how "relaxed" I want the fit to be.
Optional Changes to longies/shorties style:
To create flared legs, try doing evenly-spaced increases gradually, starting around the knee (about halfway down the leg). I like to do increases every 5 rows, and increase once for every 8-12 stitches in the row where I do the increases. For some serious bell-bottoms, try doing even more increases! Seed stitch cuffs are classic, but you can mix it up by trying some different cuff styles. For example, if you simply continue knitting in the round for an inch or so longer than your desired inseam, you'll create a simple rolled cuff. Ribbed cuffs, done in $2\mathrm{x}2$ (K2 P2) ribbing create a sporty look, more like sweat pants. You could also try a simple picot edge or other fancy edge treatment (there are lots of resources available if you look around). A sweet, girly look can be created by making eyelet holes similar to the waistband, and running thin drawstrings through them to make little bows. The possibilities are endless! Finally, don't forget that you can make your woolies longer and cuff them. Kids grow fast, and it's easy to un-cuff as they grow. Seed stitch cuffs will stay folded up fairly well, but you can also tack them with some yarn on the inside, and then un-tack them later on.
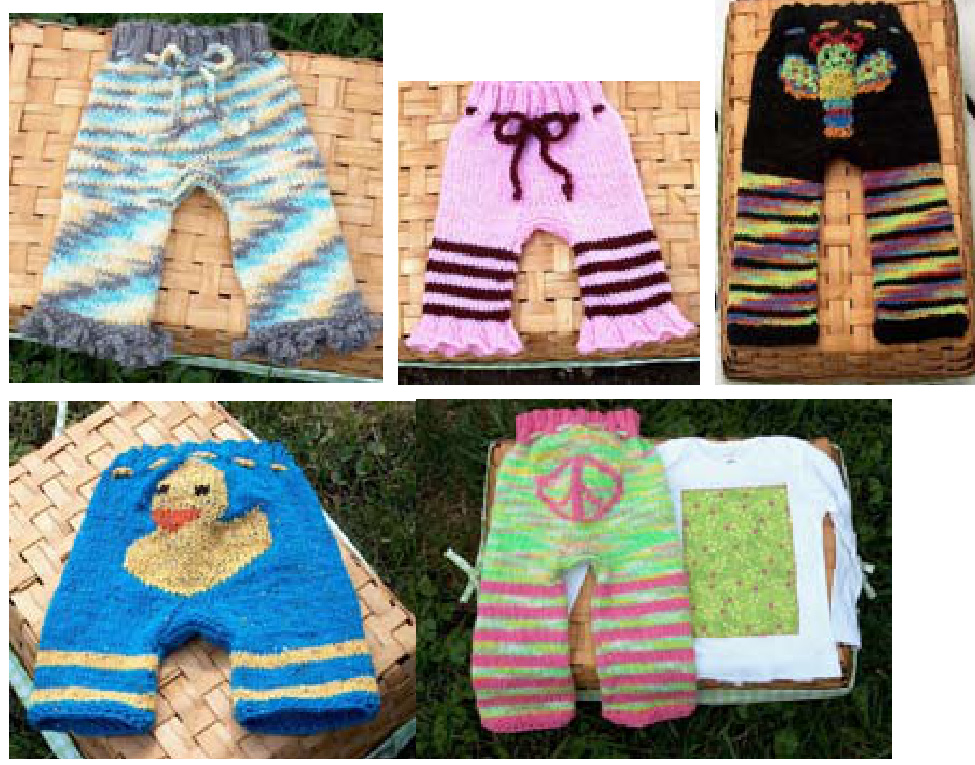
Skirted longies/shorties/capris:
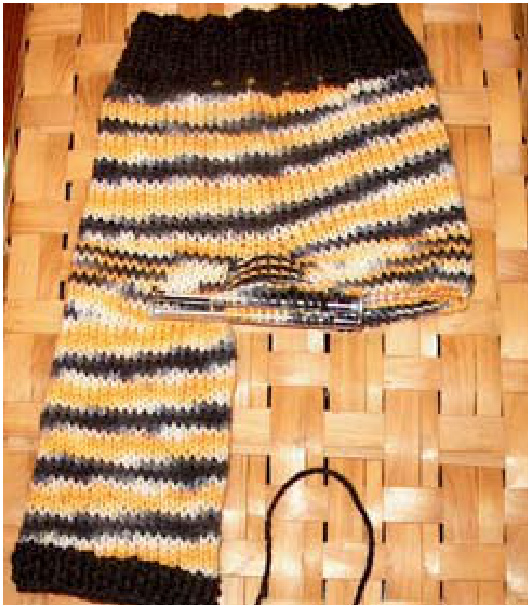
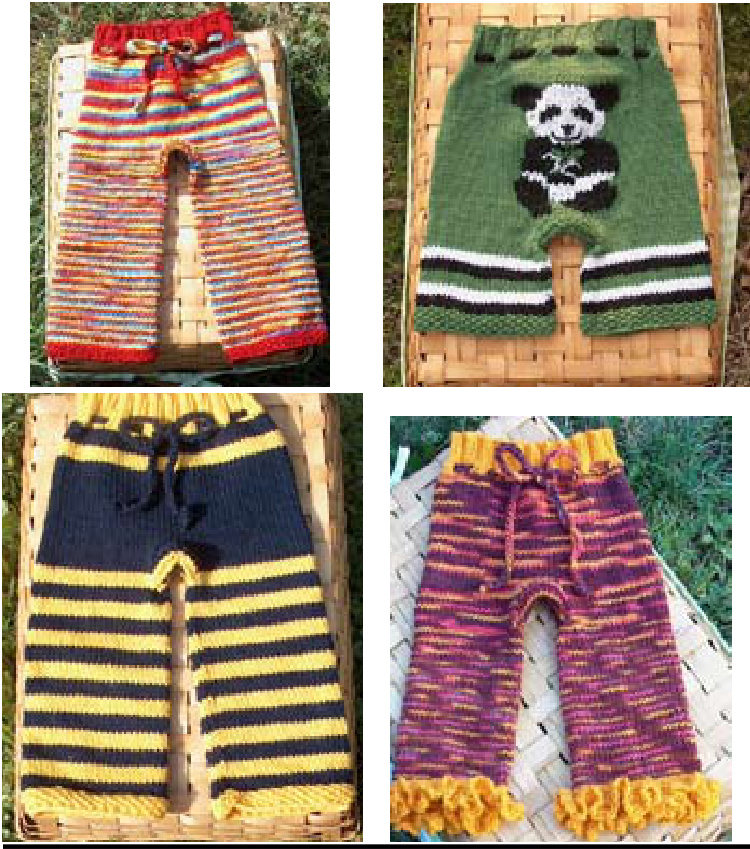
Skirts can be added to longies, shorties, and capris, giving them an adorable, feminine touch. Directions for adding a skirt can be found in the Burgh Baby Gear Skirty and Soaker Pattern. Simply make your longies/ shorties/ capris, and then add the skirt just below the waistband as you would with a skirted soaker. You might even want to try making a pair of longies/ shorties/capris with a detachable skirt! This is something I've been working on, and it would offer wonderful interchangeable wardrobe options. Here are some more examples of shorties, longies, and capris for inspiration! Have fun, and happy knitting!
Short Version of
Longies/Shorties/Capris Pattern:
Once you've gone through all of the steps in the pattern and learned the basics, you can use this handy short version the next time you knit some woolies.
Size
$\mathrm{A}=$ Waist (around the belly at belly-button height) $\mathrm{{B}=\mathrm{{Hips}}}$ (around the thickest part of the diaper) $C=\mathrm{Rise}$ (from the bellybutton, down through the crotch, and to the back at belly-button height) $\mathbf{D}=$ Thigh (around the thickest part of the thigh) $\mathrm{E}=$ Inseam (from the crotch, down the leg, and ending at the top of the foot)
For worsted weight yarn: 4.5 stitches per inch, 7 rows per inch
For Aran/bulky weight yarn: 4 stitches per inch, 6 rows per inch
Knitting the Body
Casting on:
If using Worsted weight yarn: Multiply the hip measurement (Measurement B) by 4.5. Round to the nearest number that is divisible by 4. A typical size medium/large would be 88 or 92 stitches $\,20^{\prime\prime}$ hips). If using Aran/bulky weight yarn: Multiply the hip measurement (Measurement B) by 4. A typical size medium/large would be 80 stitches $(20^{\prime\prime}$ hips).
Waistband:
Work in $2\mathrm{x}2$ ribbing (K2 P2) for 8 rounds. Work eyelet row (K2 YO P2T) for one round. Knit one round. Change to the larger-sized circular needle. Knit 3 rounds.
Short Row Preparation:
Divide the number of stitches on your needles by 4, and write that number here
Short Rows:
Place stitch marker B (after 1 stitch plus $\%$ of the stitches on your needles) 1. "Wrap and turn" 2. "Close the gaps" (while knitting in the round) 3. Knit two more rounds Repeat the above steps 3-5 depending on the size of your Woolies.
Completing the Rise:
Copy rise measurement (measurement C) here: Subtract $3.5^{\prime\prime}$ from that measurement Knit in the round until you reach that measurement.
Preparing to Knit the Gusset:
As you begin this round, remove "stitch marker A" and place it aside. Knit until you are in the middle of your short row area (half of the number of stitches that you did for your short rows). Place "back stitch marker." Knit exactly half of the stitches on your needles, and place " front stitch marker."
Knitting the Gusset:
Knit until 2 stitches before the "back stitch marker." KFB, $\mathrm{K},$ pass stitch marker, K, KFB Knit until 2 stitches before the "front stitch marker." KFB, $\mathrm{K},$ pass stitch marker, K, KFB Knit until you are 3 stitches before the "back stitch marker." P3, pass stitch marker, P3 Knit until you get to the front, and purl the front of the gusset the same way.
Continue on:
1. Knit until you get to the first purl stitch. 2. Increase into the first purl stitch 3. Knit the gusset stitches (pass the marker as you knit) until you get to the last purl stitch. 4. Increase into the last purl stitch. Then: 5. Knit until you get to the first increase. 6. Purl all the way through the gusset (pass the marker as you purl). Repeat steps 1-6 above until your gusset is complete (14 purl stitches total - with 7 on each side of the stitch marker). Knit until you reach the end of the gusset on the back part of your woolies (including the back part of the gusset).
Splitting for the Legs:
Place stitches on stitch holders (1 stitch holder for each side of the gusset and one for one of the legs). Divide remaining stitches (the stitches for the left leg) onto 3 double-point needles.
Knitting the Legs
Pick up at least 4 stitches along crotch gusset. Knit in the round until one inch before you reach your desired inseam.
Cuffs:
Work five rows of seed stitch (K1 P1). Bind off in seed stitch.
Leg Number Two:
Repeat process for second leg, joining new yarn to start the leg and pick up the stitches.
Grafting the Crotch Gusset
With new yarn, set up and perform kitchener graft.
Finishing
Create and secure drawstring, and weave in all ends securely. Voila!


