Freckle Bottoms - Shorties/Capris/Longies Pattern Designed and written by Heather Johnson
SECTION 1: Getting Started - Explicit Instructions
Please note that this pattern is fairly detailed. I wanted to make sure that there were as few question points as possible! As much as I won't mind answering questions, it can be frustrating to be at a transition point, and need to wait for a response before you can continue. HOWEVER, I am also well aware that, once you know how it works, all of the details may become redundant, and you may only want the basic information that you need to work the pattern. In an effort to avoid any frustration from excess information, there is an additional, abbreviated version of the pattern included on page 13 of your package, and a separate Calculation Worksheet Only on page 14. Before casting on, please read through the Getting Started Section thoroughly, as doing so will likely answer questions you may run into while working the pattern, as well as get you started off on the right foot. ludes both explicit instructions as well as customizable instructions for any gauge/si
Required Materials NEEDLES/HOOKS
Gauge/Soaker Needle - Circular needle used to get gauge. (For the sized version of your shorties or longies, , yol will need a gauge of 5 spi, for many, on worsted/aran weight yarn, this is a size US 6 or 7 (4.0mm-4.5mm)). See below for information on needle length(s). Waist Needle - Gauge Needle minus 2-3 sizes (1.0-1.5mm) For the waist and body, 16" circulars will work for all sizes, although a small circular knitting solution might be desired for the newborn size. For the legs, you will need either 2 16-24" circulars or 1 40-47"’ circular in order to work both legs at once. For the crotch gusset, you will need 2 size 7 (or size needed to obtain gauge) DPNs. Crochet Hook - Size 4.0mm or 4.5mm for cuffs (or the same size or 1 size smaller than your gauge needle used for knitting.) Darning Needle. Sized/Explicit Version: Worsted to Aran Weight 100% Wool. Gauge of 5spi and 7rpi.
Page l of 14
Fully Customizable: You pick the yarn and needle sizes. I still love Worsted to Aran weight yarns, however Light Worsted (for lightweight woolies in the spring and early fall) up to Bulky Weight (for heavier weight woolies for wintertime, and a quick knit) will work as well. (Freckle favorites are Blackberry Ridge Merino, Aran BFL, Aran Corriedale, Cestari Farm Yarns, and Gaia Organic Merino. Some of these will give you the 5spi needed for the sized version of the pattern. Others will give you more or less than 5spi and will work wonderfully for customized bottoms.) (My preferred needle sizes are 6's for WOTA, Blackberry Ridge, Galenas Merino and Purewool; 7's for Aran BFL, Corriedale, Malabrigo, Peace Fleece, Targhee, and Cestari Columbian; 8's for Cestari Fine/Superfine, Peregrine Merino and Lindon Merino; 9's for Stallion/Gaia Organic Merino and Nirvana Bulky; 10-10 1/2's for WOTA Bulky and Bliss Bullky) Approximate Yarn Amount Requirements
| Size (rise/hip) | Shorties | Capris | Longies |
| Newborn(14"/16") | 2.5-3oz | 3-3.5oZ | 4oz |
| Smal1 (15"/18") | 30z | 3-4oz | 4-5oz |
| Medium (17"/20") | 4oz | 4-5oz | 60Z |
| Large (19"/22") | 5oz | 5-6oz | 80z |
| X-Large (21"24") | 5-6oz | 6-80z | 8-12oz |
\*A note about your yarn: Since this pattern is written to knit both legs at once, take note of that when winding your yarn. A center pull ball or 2 separate balls will be required once you reach the legs in the pattern.
Gauge Swatch
It is important to knit an accurate gauge swatch. The usual recommendation is to do a swatch of 4+ inches wide x 4 inches high. However, I'll confess to often doing a swatch only about 2 inches high, since the row gauge isn't as critical for these items (you'll be measuring the length as you go). However, it can be helpful to have a rough idea of the row gauge, so I do recommend you do still measure your row gauge. But it isn't a big deal if you are off a bit, and it does NOT need to match any requirements for this pattern. To be proper, you are supposed to cast off before measuring your gauge swatch, but I will also confess to keeping the swatch on the needle, determining the gauge, then ripping the swatch out so I can still use that yarn for the project. However, 1 tester of my soaker pattern recommended knitting a full 4x4 swatch, keeping it, felting it, and then cutting out a shape from it to applique onto a matching shirt or accessory for your woolens. This could be a fun incentive to knitting the swatch many would like to skip. To make a gauge swatch, cast on approximately 24 stitches onto a size 6 or 7 needle. Then knit in stockinette for at least 2 inches, more if you prefer. Once you have knit a swatch, you will want to lay it flat. Some will cast off, wash it, lay it flat, let it dry, then pin it out (w/o stretching it). But I've found that usually isn't necessary for items such as diaper woolies. Be careful not to stretch the swatch at all, or it will throw off the gauge. Then, count exactly how many stitches are in 4 inches. To determine the stitches per inch, divide this number by 4. Make sure to preserve any fractions. (If you have 19 stitches to 4 inches, your gauge is 4.75 spi, NOT 5 spi). Also determine how many rows are in an inch. Depending on the swatch, you may only get 2 inches, but that is fine, since accuracy isn't as critical for the rows... For the explicit instructions for the pattern, the stitches per inch should be 5 stitches per inch and the rows per inch should be 7 rows (although, as stated before, the row gauge is flexible).
Page 2 of 14
If you find that you typically knit more loosely or more tightly when knitting flat, than when knitting in the round, knit your gauge swatch in the round instead. A trick for doing this is to knit, with your circular needle, across the swatch. Then, slide all of your stitches so the right edge of the right side of the fabric is back to the edge of the left needle. Drape a length of yarn across the back of your knitting, and begin knitting on the right edge of the fabric again. Repeat this proces until your swatch is the desired length. (I've never found my in-the-round gauge to differ significantly enough to warrant this process, but I have heard of others who have found it quite useful.) For the explicit instructions, if your gauge doesn't match, you will want to repeat the gauge swatch process with either a larger or smaller needle. If your gauge is HIGHER than the recommended, use a smaller needle. If your gauge is LOWER than the recommended, use a larger needle, until you match the gauge. Just remember you will also want to adjust which needles you are using for the pattern as you go. Because of this, once you reach gauge, it may be helpful to return to the Required Materials Section and record your gauge needle at this point. You can also figure your other needles required based on your projected project at this point. For a fully customized pair of bottoms, any gauge will work, as long as the fabric produced is to your liking. Please record your gauge components here for later use on the Calculation Worksheet. Stitches Per Inch Rows Per Inch Needle Size
MEASURING YOUR CHILD
Next, grab your child. You are going to want to take a few measurements. Make sure to do these measurements when they are in a typical diaper you would use under the bottoms. 1. Hips: Measure around your child's bum, right at/above the leg openings of the diaper. (Generally, a hip measurement would be taken at the widest point around the bum and hips.) 2. Rise: Measure from the front at the point where you'd like the top of the bottoms to hit through the legs on up to the back of where you would like the top of the bottoms to hit. Most prefer for this to be 1-1 i/2” above the top of the diaper. 3. Thigh: Do two measurements. Once at an angle along the diaper line. The second, straight around the thigh. Then take an average of these two measurements. This is your thigh measurement. Typically, this will be about 1/2 of the hip measurement. 4. Waist: Measure just at, or slightly above, where the top of your child's diaper ends. 5. Inseam: Measure from the top of the leg at the inside of the crotch to where you would like the bottoms to end. For shorties, this will be somewhere between 1-3", for capris 3-7"', and for longies 5-13+". Select the most appropriate size from the chart below for knitting a non-customized soaker. Or fill in customized measurements for a customized soaker.
| Size | Waist | Hips | Rise | Thigh | Inseam S/C/L |
| Newborn | 14"" | 16"" | 14"" | 7-8"" | 1.5"/3"/5" |
| Small | 16"" | 18" | 15"" | 8-9'' | 2""/4"/7"" |
| Medium | 18"" | 20"" | 17"" | 10"" | 2.5"/5*"/9"" |
| Large | 20" | 22"" | 19"" | 11"" | 3"/6"/11"" |
| X-Large | 21"" | 24"" | 21"" | 12"" | 3"/7"/13"” |
| Custom |
As mentioned before, the above size chart will be used in the Explicit Instructions worked at 5 spi. If you are working with a different yarn gauge, but still would like to use a canned size, the above measurements will work for you when doing your calculations for a customized garment.
Page 3 of 14
SECTION 2: Calculations for a Customized Garment
(A) Cast On: (Waist x Gauge (rounded to be divisible by 4)) (B) Hips: (Hips x Gauge (rounded to be divisible by 4)) (C) Marker Placement: (B/4) (D) Pre-gusset Rise: Rise - 3" (E) Rise: See size chart or Measuring Instructions for rise suggestions. (F) Total Leg Stitches: (1/2B) + 2 (G) Front/Back Leg Stitches: 1/2F (H) Short Row edging: 1/4B (round down to nearest 5, if H=1/4B, deduct 5)
SECTION 3: Bottoms Pattern Overview
Architecture
The Freckle Bottoms Pattern will give you clear instructions on constructing a top down pair of bottoms for your child. Starting with waist ribbing, increasing for the hips, inserting of short rows throughout the bum, inserting a crotch gusset, grafting the crotch, and ending with working both legs at the same time using the Magic-Loop method. Many cuff options will be provided as well.
Some abbreviations/details:
All stitch counts listed assume the newborn size. Then the other sizes are in parenthesis (small, medium, large, XLarge, Custom). It is suggested that you print out this pattern, go through and highlight the correct (or cross out all the wrong values) to help prevent using the wrong #. For all stitches below, please use your favorite knitting reference to determine a method to use to create the stitch. My favorites are www.knittinghelp.com, Debbie Stoller's Stitch 'n Bitch, and Vogue Knitting's The Ultimate Guide to Knitting. As an alternative to this, pictures and/or videos will soon be provided on the Freckle Pattern Support Forums (http://freckle.forumco.com). M1: Make 1 stitch. When M1 is referenced, use your preferred increase here. M1F (make one forward), M1B (make one back), KFAB (knit front and back), etc. would all be acceptable here. KFAB: Knit Front and Back. Make 1 stitch by knitting through the front and back of the stitch on your left needle. This is sometimes called a bar increase. SC: Single Crochet. HDC: Half Double Crochet. DC: Double Crochet. TC: Treble/Triple Crochet. Page 4 of 14
SECTION 4: Bottoms Pattern
Waist Band
Cast on 72 (80, 88, 100, 104, -A) stitches, using the waist needle and a stretchy cast-on. My preferred method is the Long-tail cast-on. Join without twisting and work in a K2P2 rib around. (place marker at the beginning of your round “CBM'", this will be the center back of your item.) Work in K2P2 ribbing for 7 more rounds. Insert Eyelet Row: \*K2, YO, P2tog\* around Work in K2P2 ribbing for 7 more rounds.
Setup Hips
Switch to gauge needle and increase evenly around to your hip count. The row will work as follows: NB: \*K8, KFAB\* around Small: \*K6, KFAB, K6, KFAB, K5, KFAB\* around Medium: \*K6, KFAB, K6, KFAB, K7, KFAB\* around Large: \*K7, KFAB, K7, KFAB, K8, KFAB\* around X-Large: \*K5, KFAB, K6, KFAB\* around Custom: Increase evenly around to desired number of stitches. Please email me if you'd like help with this. You should now have 80 (92, 100, 112, 120, _B) stitches on your needles.
Hips
If you have used a contrast color for your waistband, this is where you will join the yarn for your body. Knit 1 round. Knit 20 (23, 25, 28, 30, -C), place marker “RHM" for right hip, Knit 20 (23, 25, 28, 30, C), place marker “CFM" for center front, Knit 20 (23, 25, 28, 30, —C), place marker “LHM'" for left hip, Knit 20 (23, 25, 28, 30, —C). (Note: When knitting top down bottoms, when your knitting is in your hands, your RHM (right hip marker) is to the left of the CBM and your LHM (left hip marker) is to the right of the CBM.) Insert Zig Zag Short Row Set: Now, you will insert a set of Zig-zag short rows (a la Elizabeth Zimmerman). Knit 5 stitches past CBM, wrap and turn, purl back past CBM to 5 stitches past CBM, wrap & turn, K to 10 stitches past CBM, wrap & turn, purl back past CBM to 10 stitches past CBM, wrap & turn, continue in this manner increasing 5 more stitches past M each row. As you go, make sure to pick up all wraps as you come to them and knit them into the stitch to hide it. Repeat this process until you have done the knit purl/short row pairs to 1 stitch before the RHM/LHMs. (If this means for the last set, you do not increase by 5, just round up or down as necessary. For example, your small pair will work as follows: 5 past, 10 past, 15 past, 20 past, 22 past.) Knit all the way around making sure to pick up the last 2 wraps. (If you need further clarification on working short rows, please refer to your favorite knitting reference or a picture tutorial by Freckle, found here: httn:// flial cam/nh<ta/71 46105@N106/cata/72157606122707522/) Knit 4 rounds. Insert Traditional Short Row: Knit to 1 stitch before RHM, wrap and turn, purl back past CBM to 1 stitch before LHM, wrap and turn, knit around making sure to pick up your wraps. Knit 4 rounds.
Page 5 of 14
Insert Traditional Short Row: Knit to 3 stitches before RHM, wrap and turn, purl back past CBM to 3 stitches before LHM, wrap and turn, knit around making sure to pick up your wraps. Knit to 1 stitch before RHM, wrap and turn, purl back past CBM to 1 stitch before LHM, wrap and turn, knit around making sure to pick up your wraps. Continue knitting in stockinette until your front and back rise add up to 11 1/2(12 1/4, 14, 16, 17, -D)", inserting an additional short row or 2 if desired. I do find that most times the zig-zag set, plus 2-3 traditional sets are sufficient\*. \* I shoot for a difference of 2" (2", 2", 2 1/2", 2 1/2", 2") between the front and back rise numbers when determining if I have inserted enough short rows. This number will be smaller for non-cloth-diapered babies or larger children who are no longer wearing diapers.
Crotch Gusset
Knit to LHM. This will now become your beginning of round for the remainder of the pattern. Rnd 1. Knit to 2 stitches before CBM, kfab, k1, Slip CBM, k1, kfab, knit to 2 stitches before CFM, kfab, k1, slip CFM, k1, kfab, knit to end of round. Rnd 2. Knit around. Rnd 3. Knit to 3 stitches before CBM, kfab, k2, slip CBM, k2, kfab, knit to 3 stitches before CFM, kfab, k2, slip CFM, k2, kfab, knit to end of round. Rnd 4. Knit around. Rnd 5. Knit to 4 stitches before CBM, kfab, k3, slip CBM, k3, kfab, knit to 4 stitches before CFM, kfab, k3, slip CFM, k3, kfab, knit to end of round. Rnd 6. Knit around. Continue in this manner, repeating rows 5 and 6 increasing the distance of your increases from the center markers by 1 stitch each time, until your front and back rise add up to 14 (15, 17, 19, 21, -_E)". End on an even round.
Splitting for the legs and completing your crotch gusset
My preferred method for knitting legs is to Magic-Loop them both at once. At this point, you will introduce your 40- 47"′ circular needle and begin magic-looping. Alternate instructions are included on page 12 for working 2 legs on 2 circulars. Refer to your favorite knitting resource for the basics on how to magic-loop. An additional picture tutorial for setting up the Magic Loop and splitting for legs can be found at http://www.flickr.com/photos/7146185 @N06/sets/72157606152608728/. Before beginning this section, refer to your crotch gusset. Count the number of increases you made for the gusset and enter the value here: ——(GS, gusset stitches.) You can do this easily by counting the number of bars you have On either side of the CFM or CBM. Also see the note about leg width below for customizable options before beginning Step 1. Remove LHM. With your 40-47" cable needle, knit to (2+GS) stitches before CBM, drop your working yarn, slip (2+GS) stitches onto a DPN the same size as your gauge needle, remove CBM, slip (2+GS) stitches onto the same DPN. With the alternate end of your ball or a second ball, join a new yarn, leaving an 18" tail, by beginning to knit with it. Knit to RHM. Remove RHM. Pull your cable through. Knit to Page 6 of 14 (2+GS) stitches before CFM, drop your working yarn, slip (2+GS) stitches onto a DPN, remove CFM, slip (2+GS) stitches onto the same DPN. Pick up the yarn for the left leg, and making sure to snug up the first stitch, knit to end. If you do not snug this up tightly enough, you will end up with a strand of yarn at this join between the back left leg and the front left leg initial join. (What you have just done is knit the back /2 of the left leg, slipped the back gusset stitches onto a DPN, knit the back /2 of the right leg, pulled your magic-loop through, knit the front /2 of the right leg, slipped the front gusset stitches onto a DPN, and knit the front /2 of the left leg.) Step 2. Step 3. sing the tail end of the yarn you joined to knit the right leg, graft your crotch gusset. Knit the stitches for the back 12 of the left leg, pick up 3 stitches at the back left side of the crotch gusset, drop your working yarn, pick up the yarn for the right leg, pick up 3 stitches from the back right side of the crotch gusset, knit the stitches from the front /2 of the right leg, pull your cable through, knit the stitches from the front half of the right leg, pick up 3 stitches a the front right side of the gusset, drop your working yarn, pick up the yarn for the left leg, pick up 3 stitches from the front left side of the gusset, knit the stitches from the front /2 of the left leg. (You have now set up your legs, you should now have 42 (48, 52, 58, 62, ——_F) stitches for each leg on your needles.)
Legs
(Note: Leg width/Thigh will be approximately 1/2 of the hip measurement. If you desire wider legs, switch to a needle 1 size larger than your gauge needle at this point to complete the legs. If you desire narrower legs, in step 3 of the Split/Gusset section, only pick up 1 or 2 stitches on each of the 4 corners of the gusset, rather than 3.) Round 1: Knit 21 (24, 26, 29, 31, \~G), drop working yarn, pick up yarn for right leg, knit 21 (24, 26, 29, 31,__G), pull cord through, knit 21 (24, 26, 29, 31, —-G), drop working yarn, pick up yarn for left leg, knit 21 (24, 26, 29, 31, LG). Continue knitting as in round 1 until your item reaches your desired length less the height of the cuff you would like to use. For a traditional garter, ribbed, rolled or seed stitch cuff, this will be 1-1 /2". Flares, ruffles, crochet lace/shells may be a bit more or less. Please see Cuffs section below and enter your cuff width here:_
Cuffs
All cuffs should be knit in the same manner as the legs have been, knitting the back left, back right, pulling the cable through, front right, then front left. For simplicities sake, I will just give the instructions on knitting the cuffs on a single, simple round. If you will use a contrast color for your cuff, switch to that color now and knit one row. Keep in mind that seed stitch, double seed, garter, ribbed, and possibly even the rolled cuff options will cuff up nicely, so you can add additional length to the inseam for room to grow. Any of the flared or ruffle cuffs will not cuff up so nicely. You can still add a bit if you want, just know that they won't look very good cuffs, so you are better off knitting to the exactly inseam length you desire, and rely on stretching the legs in blocking after your little one has grown an inch.
Seed Stitch Cuff -- Optimally 1-2"
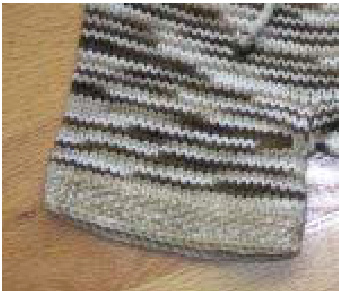
Rnd 1. K2tog, \*K1, P1\* to last stitch, K1 Rnd 2. \*P1, K1\* to last stitch, P1 Rnd 3. \*K1, P1\* to last stitch, K1 Repeat rounds 2 and 3 until your total inseam, including your cuff, equals your desired inseam length. Bind off knit-wise or in pattern, whichever your preference. Page 7 of 14

Double Seed Stitch Cuff - 1-2"
Rnd 1. Decrease (if needed) 2 stitches. You should have a Multiple of 4 stitches +2 on each leg. Rnd 2. \*K2, P2\* to last 2 stitches, K2. Rnd 3. \*P2, K2\* to last 2 stitches, P2. Repeat rounds 2 and 3 until your total inseam, including your cuff, equals your desired inseam length. Bind off knit-wise.
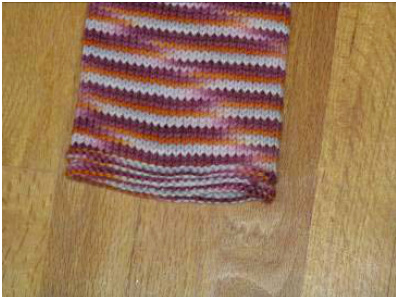
Rolled Cuff - 1/2-3/4"'
Rnd 1. Purl around. Rnd 2. Purl around. Rnd 3. Knit around. Repeat round 3 for about an inch. Bind off knit-wise.
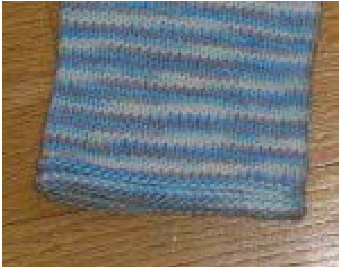
Garter Cuff - 1-2 Rnd 1. Knit Around. Rnd 2. Purl around. Repeat rounds 1 and 2 until your total inseam, including your cuff, equals your desired inseam length. Bind off knit-wise.
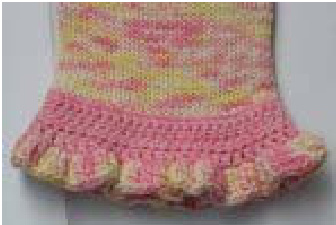
Alyssa's Way Crochet Flare and Ruffle Cuff - Approximately 2 1/2" Bind off your knitting knit-wise. With a 4.5mm crochet hook and contrast yarn, join with a slip stitch. Rnd 1. Chain 1, SC in each stitch around. Join first chain with a slip stitch. Rnd 2. Chain 1, turn. SC in each stitch around, join first chain with a slip stitch. Rnd 3. Chain 1, turn. HDC in each stitch, join first chain with a slip stitch. Rnd 4. Chain 1, turn. HDC in each stitch, join first chain with a slip stitch. Rnd 5. Chain 2, turn, DC in each stitch, join first chain with a slip stitch. Finish Off Rnd 6. Attach main color with a slip stitch, Chain 3, \*2 TC in next stitch, 3 TC in next stitch,\* repeat to end of round. Join 3'd chain with a slip stitch. Finish Off.
Page 8 of 14
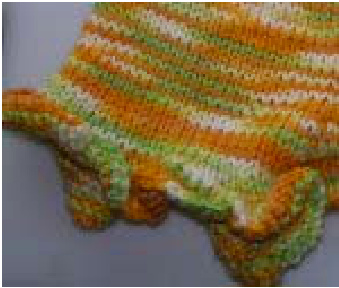
Butterflies Flare and Shell Edge Cuff - Approximately 2 1/2
2 1/-3" before your total desired inseam length, begin your cuff. \*K 3, M1\* around. Knit in stockinette for 2". Bind off using a Double Crochet Bind off. With Contrast Color, and a 4.5mm crochet hook, join yarn with a slip stitch. Rnd 1. Chain 1. HDC in each stitch, join first chain with a slip stitch. Rnd 2. Chain 1, turn. HDC in each stitch, join first chain with a slip stitch. Rnd 3.Turn, \*ss, SC, 3HDC, SC\* repeat from \* around. Finish Off.
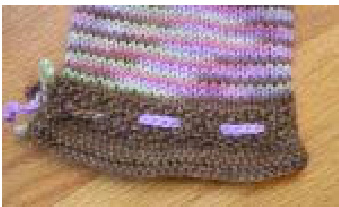
Seed Stitch Eyelet Flare Cuff - Approximately 2 1/2"
Join contrast color and knit 2 rounds. Rnd 3. K2tog, \*K1, P1\* to last stitch, K1 Rnd 4. \*P1, K1\* to last stitch, P1 Rnd 5. \*K1, P1\* to last stitch, K1 Rnd 6. \*P1, K1, YO, K2tog\* around to last stitch, P1 Rnd 7. \*K1, P1\* to last stitch, K1 Rnd 8. \*P1, K1\* to last stitch, P1 Rnd 9. \*K1, P1\* to last stitch, K1 Rnd 10. \*K2, Kfab\* around. Knit 2 rounds. Purl 1 round. Knit 1 round. Bind off purlwise. Make 2 18-24"” crochet chains in your main colorway and weave through the eyelet holes, tie in a bow, and secure to the inside of the cuff. Rnd 1. Purl around. Rnd 2. Knit Around. Repeat rows 1 and 2 for 2". Bind off the front 12 of the leg. Work flat in garter stitch (knit each row) for 2". Bind off loosely. Fold garter flap back and seam edges to the sides of the leg.
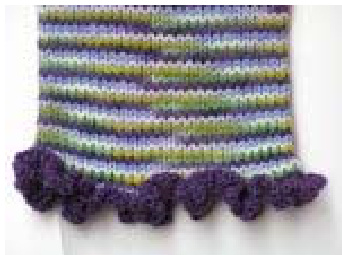
Garter Shells
Rnd 1. Purl around. Rnd 2. Knit around. Rnd 3. Purl around. Rnd 4. Bind off using a double crochet bind off with a 4.Omm crochet hook. Rnd 5. Chain 1, \*(SC, HDC, SC), ss, skip stitch, ss\* around. Finish Off.
Page 9 of 14
Simple Crochet Lace 1 - 1/2-1"
Rnd 1. With 4.5mm crochet hook, bind off using the double crochet bind off. Rnd 2. Chain 1, SC around. Join chain with slip stitch. Rnd 3. Chain 1, turn, SC around. Join chain with slip stitch. Rnd 4. Chain 1, turn, HDC around. Join chain with slip stitch Rnd 5. \*Chain 4, slip stitch into 3"d stitch\* around. Finish Off.
Simple Crochet Lace 2 - 1 1/2"
Join contrast color yarn, knit 5 rows. Bind off using the single crochet bind off. Join main color with a slip stitch using a 4.5mm crochet hook. Crochet Rnd 1. Chain 3, slip stitch into 3"d stitch from hook. Repeat around. Crochet Rnd 2. Chain 3, slip stitch into loop made in the previous round from your chains of 3. Repeat around. Finish off.
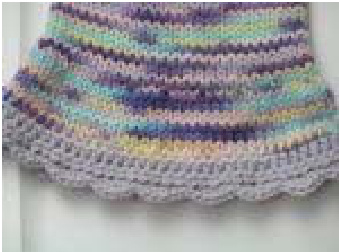
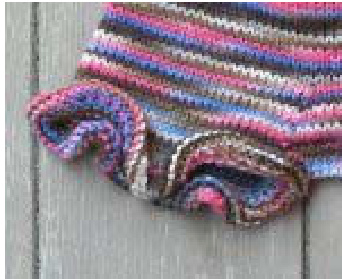
Secret Garden Ruffles - 3"
Rnd 1. Purl around. Rnd 2. Knit around. Rnd 3. Purl around Rnd 4. Knit around. Rnd 5. Bind off purl wise. Rnd 6. With a 4.0 mm crochet hook, join contrast color 1 with a slip stitch. Chain 1. SC in each stitch. Join first chain with a slip stitch. Rnd 7. Chain 1, turn. HDC in each stitch around. Join first chain with a slip stitch. Rnd 8. Chain 2, turn. DC in each stitch around. Join 2"d chain with a slip stitch. Rnd 9. Chain 1, turn. HDC in each stitch around. Join chain with a slip stitch. Finish off. Rnd 10. With crochet hook, join contrast color 2 with a slip stitch. Chain 3. \*2TC, 3TC\* around. (Meaning in the next stitch, do 2 triple crochet stitches, then in the next stitch, do 3 triple crochet stitches. Work around, alternating between 2 and 3 triple crochets in each stitch.) Finish off. Rnd 1. \*K1, Kfab\* around. Rnd 2. Knit around. Rnd 3. Knit around. Rnd 4. \*K1, Kfab\* around. Rnd 5. Knit around. Rnd 6. Bind off knit-wise or by using a double crochet bind off.
Page 10 of 14
Rnd 1. Kfab around. Rnd 2. Knit around. Rnd 3. Knit around. Rnd 4. Knit around. Rnd 5. Knit around. Rnd 6. Bind off knit-wise or by using a double crochet bind off.
Simple Ruffle 2 - 1/2-1'
Milli's Ruffle - O' (will roll and bunch... you will want to knit your inseam to desired length + 1 row before knitting this cuff) If using a contrast color, join it in 1 row before working the cuff. Work the cuff using a needle 2 sizes smaller than that you are using for the legs, on up to the size you are using for the legs. Milli recommends sizing down 2, but I've worked it both ways and like it either way. Rnd 1. Kfab around. Rnd 2. Kfab around. Bind off knit-wise or using a Single Crochet Bind off.
Finishing
1.Your bottoms are now finished. 2. Weave in waist and cuff yarn ends. 3.Weave in the gusset tail, adjusting and tightening stitches and/or using duplicate stitch to cover any holes created when picking up the stitches on the sides of your gusset. 4. Make a drawstring. Some of the most common include: i-cord, making a crochet chain with yarn doubled, or just a twisted cord using a hand mixer or drill. Approximate length should be 14-18" longer than the waist circumference. 5. Work the drawstring through the eyelets, meeting up in the front. 6. Wash, lanolize, and block. Blocking is a tremendously helpful step that is often neglected. After washing and squishin; out the bottoms, lay them on a flat surface to dry. Pat them out to smooth (the stitches will even out a bit from the washing, and the yarn will often fill out a bit as well). Let dry.
Page 1l of 14
Alternate Instructions for knitting legs using 2 circulars
Splitting for the legs and completing your crotch gusset. My preferred method for knitting legs is to Magic-Loop them both at once. These are the alternative instructions for knitting 2 legs on 2 circulars. Refer to your favorite knitting reource for thebasics onhw toknit smalldiamter circular knitting uing 2 ircular needs. Before beginning this section, refer to your crotch gusset. Count the number of increases you made for the gusset and enter the value here: ——(GS, gusset stitches.) You can do this easily by counting the number of bars you have on either side of theCFM orCBM. Step 1. Remove LHM. Introducing a new 16-24" circular cable needle (Needle 1), knit to (2+GS) stitches before CBM, drop your working yarn, slip (2+GS) stitches onto a DPN the same size as your gauge needle, remove CBM, slip (2+GS) stitches onto the same DPN. With the alternate end of your ball or a second ball, join a new yarn, leaving an 18" tail, by beginning to knit with it. Knit to RHM. Drop Needle 1. Remove RHM. Pick up your initial 16- 24" circular cable needle (Needle 2). Begin knitting and knit to (2+GS) stitches before CFM, drop your working yarn, slip (2+GS) stitches onto a DPN, remove CFM, slip (2+GS) stitches onto the same DPN, pick up the yarn for the left leg, knit to end. (What you have just done is knit the back %2 of the left leg, slipped the back gusset stitches onto a DPN, knit the back /2 of the right leg, all on Needle 1. Then, knit the front /2 of the right leg, slipped the front gusset stitches onto a DPN, and knit the front I/2 of the left leg, all on Needle 2.) Step 2. Using the tail end of the yarn you joined to knit the right leg, graft your crotch gusset. tep 3. With Needle 1, knit the stitches for the back 1/2 of the left leg, pick up 3 stitches at the back left side of the crotch gusset, drop your working yarn, pick up the yarn for the right leg, pick up 3 stitches from the back right side of the crotch gusset, knit the stitches from the front /2 of the right leg. Drop Needle 1, pick up Needle 2, knit the stitches from the front half of the right leg, pick up 3 stitches a the front right side of the gusset, drop your working yarn, pick up the yarn for the left leg, pick up 3 stitches from the front left side of the gusset, knit the stitches from the front / of the left leg. (You have now set up your legs, you should now have 42 (48, 52, 58, 62, -_F) stitches for each leg on your needles.) Round 1: With Needle 1, knit 21 (24, 26, 29, 31, —-G), drop working yarn, pick up yarn for right leg, knit 21 (24, 26, 29, 31, G). Drop Needle 1 and pick up needle 2, knit 21 (24, 26, 29, 31, G), drop working yarn, pick up yarn for left leg, knit 21 (24, 26, 29, 31,__G). Continue knitting as in round 1 until your item reaches your desired length less the width of the cuff you would like to use. For a traditional garter, ribbed, rolled or seed stitch cuff, this will be 1-1 I/2". Flares, ruffles, crochet lace/shells may be a bit more or less. Please see Cuffs section below and enter your cuff width here:_
Page 12 of 14
Freckle Bottoms Brief Pattern
ked the pattern a time or 2, this brief version should be a great 1 sheet companion for on-the-go knitting
Waistband
Cast on 72 (80, 88, 100, 104, --A) stitches, using the waist needle and the Long-tail cast on. Join without twisting and work K2P2 ribbing around, placing a CBM (center back marker) Work K2P2 ribbing for 7 more rounds. Insert Eyelet Row: \*K2, YO, P2tog\* around Work K2P2 ribbing for 7 rounds.
Hips Set up
Switch to gauge needle and increase evenly around to your hip count. The row will work as follows: NB: \*K8, KFAB\* around. Small: \*K6,KFAB,K6,KFAB,K5,KFAB\* around Medium: \*K6, KFAB, K6, KFAB, K7, KFAB\* around Large: \*K7, KFAB, K7, KFAB, K8, KFAB\* around X-Large: \*K5, KFAB, K6, KFAB\* around Custom: Increase evenly around to desired number of stitches. You should now have 80 (92, 100, 112, 120, _B) stitches on your needles.
Hips
If you have used a contrast color for the waist, join your main color now. Knit 1 round. If you have used a contrast color for your waistband, this is where you will join the yarn for your body. Knit 1 round. Knit 20 (23, 25, 28, 30, __C), place marker “RHM" for right hip, Knit 20 (23, 25, 28, 30, __C), place marker “CFM for center front, Knit 20 (23, 25, 28, 30, __C), place marker “LHM' for left hip, Knit 20 (23, 25, 28, 30, C). Knit 1 round. Insert Zig Zag Short Row Set. Knit 4 rounds. Insert Traditional Short Row. Knit 4 rounds. Insert Traditional Short Row. Knit 4 rounds. Insert Traditional Short Row (Optional for sizes NB and Small). Continue knitting in stockinette until your front and back rise add up to 11 1/2(12 1/4, 14, 16, 17, -— D)", inserting an additional short row or 2 if desired.
Crotch Gusset
Knit to LHM. This will now become your beginning of round for the remainder of the pattern. Rnd 1. Knit to 2 stitches before CBM, kfab, k1, Slip CBM, k1, kfab, knit to 2 stitches before CFM, kfab, k1, slip CFM, k1, kfab, knit to endofround. Rnd 2.Knit around. Rnd 3. Knit to 3 stitches before CBM, kfab, k2, slip CBM, k2, kfab, knit to 3 stitches before CFM, kfab, k2, slip CFM, k2, kfab, knit to end of round. Rnd 4.Knit around. Rnd 5. Knit to 4 stitches before CBM, kfab, k3, slip CBM, k3, kfab, knit to 4 stitches before CFM, kfab, k3, slip CFM, k3, kfab, knit to end of round. Rnd 6.Knit around. Continue in this manner, repeating rows 5 and 6 increasing the distance 01 your increases from the center markers by 1 stitch each time, until your front and back rise add up to 14 (15, 17, 19, 21, _E)". End on an even round.
Leg Split and Magic Loop Start
Count the number of increases you made for the gusset and enter the value here: (GS,gusset stitches.) Step 1. Remove LHM. With your 40-47' cable needle, knit to (2+GS) stitches before CBM, drop your working yarn, slip (2+GS) stitches onto a DPN the same size as your gauge needle, remove CBM, slip (2+GS) stitches onto the same DPN. With the alternate end of your ball or a second ball, join a new yarn, leaving an 18" tail, by beginning to knit with it. Knit to RHM. Remove RHM. Pull your cable through. Knit to (2+GS) stitches before CFM, drop your working yarn, slip (2+GS) stitches onto a DPN, remove CFM, slip (2+GS) stitches onto the same DPN. Pick up the yarn for the left leg, and making sure to snug up the first stitch, knit to end. Step2. Using the tail end of the yarn you joined to knit the right leg, graft your crotch gusset. Step3. Knit the stitches for the back 12 of the left leg, pick up 3 stitches from the gusset, drop your working yarn, pick up the yarn for the right leg, pick up 3 stitches from the gusset, knit the stitches from the front /2 of the right leg, pull your cable through, knit the stitches from the front half of the right leg, pick up 3 stitches from the gusset, drop your working yarn, pick up the yarn for the left leg, pick up 3 stitches from the gusset, knit the stitches from the front 1/2 of the left leg. (You have now set up your legs, you should now have 42 (48, 52, 58, 62, F) stitches for each leg on your needles.)
Legs
Round 1: Knit 21 (24, 26, 29, 31, _G), drop working yarn, pick up yarn for right leg, knit 21 (24, 26, 29, 31, _G), pull cord through, knit 21 (24, 26, 29, 31, _G), drop working yarn, pick up yarn for left leg, knit 21 (24, 26, 29, 31, —_G). Continue knitting as in round 1 until your item reaches your desired length less the height of the cuff you would like to use.
Cuffs and Finishing
See main pages of pattern.
Page 13 of 14
The Freckle Bottoms Pattern Stand Alone Worksheet
Use this worksheet as an alternative to printing the entire pattern out every time you need to recalculate custom values due to custom measurements or custom gauge. (Just print this page.)
GAUGE & NEEDLES
Stitches Per Inch Rows Per Inch Needle Size Gauge Needle - 2 = Waist Needle Gauge Needle = Hips/Body/Legs
MEASUREMENTS
| Size | Waist | Hips | Rise | Thigh | Inseam S/C/L |
| Newborn | 14"" | 16"" | 14"" | 7-8"" | 1.5"/3"/5" |
| Small | 16"" | 18"" | 15"" | 8-9"" | 2"/4"77"" |
| Medium | 18"" | 20" | 17" | 10"" | 2.5"/5"79"" |
| Large | 20"" | 22" | 19"" | 11"" | 3"/6"/11"" |
| X-Large | 21"" | 24"" | 21"" | 12"" | 3"/7"/13"" |
| Custom |
Calculations for a Customized Garment
(A) Cast On: (Waist x Gauge (rounded to be divisible by 4) (B) Hips: (Hips x Gauge (rounded to be divisible by 4)) (C) Marker Placement: (B/4) (M) Pre-gusset Rise: Rise - 3" (E) Rise: See size chart or Measuring Instructions for rise suggestions. (F) Total Leg Stitches: (1/2B) + 2 (G) Front/Back Leg Stitches: 1/2F (H) Short Row edging: 1/4B (round down to nearest 5, if H=1/4B, deduct 5)


