
by Heather Anne Ordover
Skills

· knit and purl stitches · knitting in the round · use of stitch markers · knowledge of doubleknitting helps but is explained, regardless Size · Shown in women's 7.5 Gauge · 8 stitches and 11 rows = 1 inch in stockinette Yarn · Plymouth Yarn Sockotta Sock Yarn; DK/ I Sportweight; 400 - 450 ya Needle US 0 / 2.0 mm; sampl Notions ● stitch markers These socks were constructed for the Harry Potter Sock Swap. As a consequence I no longer own them and wasn't much of a blogger when I first took photos so I have precious few. Therefore, I list this as a recipe rather than a pattern. This might not be such a good place to start if you are a firsttime sock knitter. If that is the case, you are welcome to refer to my free eBook on top-down socks and my other on toe-up sock knitting.
Begin Recipe:
General Notes
This is a toe-up sock using Judy's Magic Cast-on. Increase up to the stitches you need (measure around the ball of your foot, multiply by your gauge, subtract 10%—that is the number to increase to).
My Cast-on
Cast on in contrasting toe color using the awesome Knitty Cast-on for toe-up socks. After a number of socks I've found that I like to have at least 7-8 stitches on each needle (14-16 per side of the cast on, 28-32 sts total). Less makes for to0 pointy a toe, and I wasn't sure what my secret pal's feet look like, so I thought I'd rely on the socks to stretch into pointy-ness if necessary. I alternated knit-only rounds Needle 1: Place Start of Round (SoR) marker, k2, right increase, knit across Needle 2: knit across until there are two sts left, left increase, k 2 Needles 3-4: repeat 1 and 2 Continue increasing until 60 sts are reached. The sock will be knit in a continuous patterned ribbed stitch, so unless the foot is huge, 60 sts should be fine at this gauge. Place an EoS (End of Sole) marker at 30 sts (at the halfway point from the SoR marker)
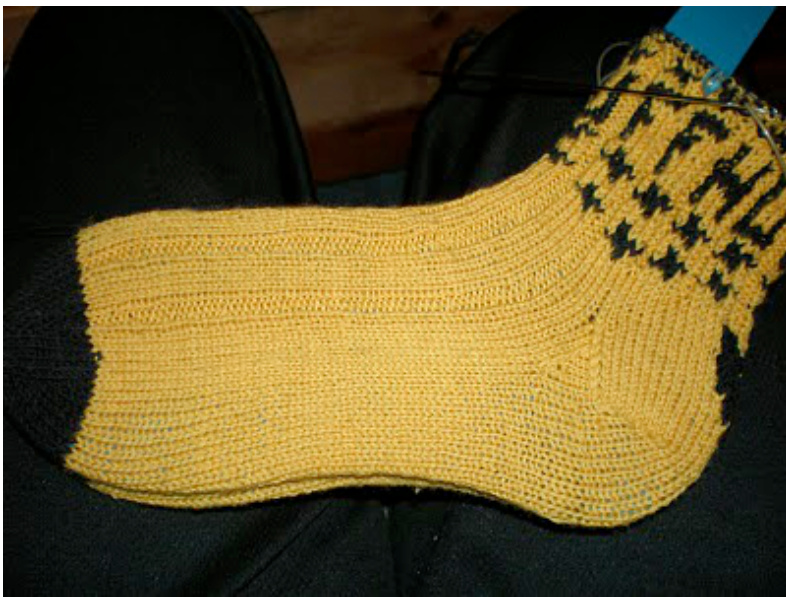
Begin Foot
Begin Gusset and Heel Turn Knit a stockinette foot and a k4p2 instep. I used the Sockulator V to calculate a toe-up heel with a flap which is necessary for the Badgerlicious socks I needed to be able to pattern the heel with the badger face and this was the easy way. All calculation images from the Sock-ULator. A toe-up heel flap means you have to add a gusset\* on the bottom of the foot. Step by step instructions follow from my sock class, but you can also use the link to the awesome Sockulator V to calculate for your own. Work 15 sts, lift up the ladder after st 15 and purl it. This is your seam stitch. Purl on RS, knit on WS. PlaceMarker SlipMarker SlipslipKnit-slipping as if to knit K2tog-Knit two together P2tog-purl twotogether
Gusset Increases
1- Slip SoR marker, k2, PM, M1L, k2, PM, knit to seam, p seam, knit across to the last 4 sts before the EoRmarker, PM, k2, M1R, PM, k2, slip EoS marker, knit to SoR. 2- knit around, slipping markers. 3- Slip SoR marker, k2, SM, M1L, k3, SM, knit to seam, p seam, knit across to marker, SM, k3, M1R, SM, k2, Slip EoS, knit to SoR. 4- knit around, slipping markers. Repeat 3-4 until you have added 12 sts between each set of side markers.
Continue to purl seam on RS/knit on WS through the heel turn.
Gussets on a toe-up sock will increaserather thandecrease.
Begin Heel Turn
1 - (RS) Slip SoR, k2, SM, knit remaining 12 gusset sts, SM, k1, M1L, knit across, turn at next marker. 2 - (WS) sl1 purlwise wyif, M1L as purl, purl to 3sts before next marker, turn. 3 - (RS) sl1 purlwise wyib, M1L, knit to 3 sts before marker, turn. 4 - (WS) sl1 as before, M1L as purl, purl to 5 sts before marker, turn. 5 - (RS) sl1 as before, M1L, knit to 5 sts before marker, turn. 6 - (WS) sl1 as before, M1L as purl, purl to 7 sts before marker, turn. 7 - (RS) sl1 as before, M1L, knit to 7 sts before marker, turn. End seam st (k2tog next round). 1 - (WS) sl1 as before, M1L as purl, purl across to last st before marker. Slip stitch to rt needle, remove marker. Return st to left needle, p2tog, turn. 2 - (RS) sl1, knit across to last st before marker. Slip last st in front of marker to rt needle, remove marker. Return st to left needle, k2tog, turn. 3 - (WS) sl1, p across to gap. P2tog to close gap, turn. 4 - (RS) sl1, k across to gap. K2tog to close gap, turn. Repeat Rows 3-4 until all edge sts are used and you are back to 60 sts for entire sock. Continue knitting in the round plain or with desired pattern or ribbing. If your heel is particularly narrow, continue the decreases past row 7.
Heel Flap and Turn
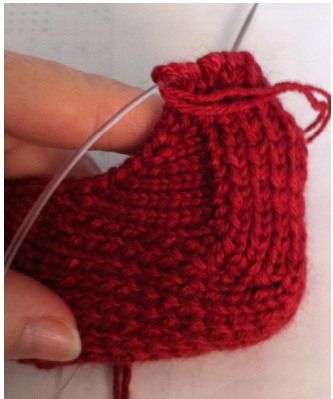
This picture is from my Hunger Games sock, with a ribbed sole and flap, but you can still see the seaming process achieved by "closing the gap" in this section
Begin Leg
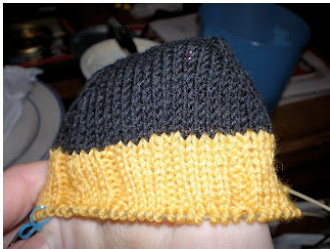
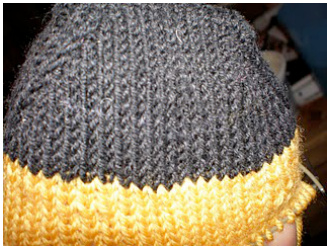
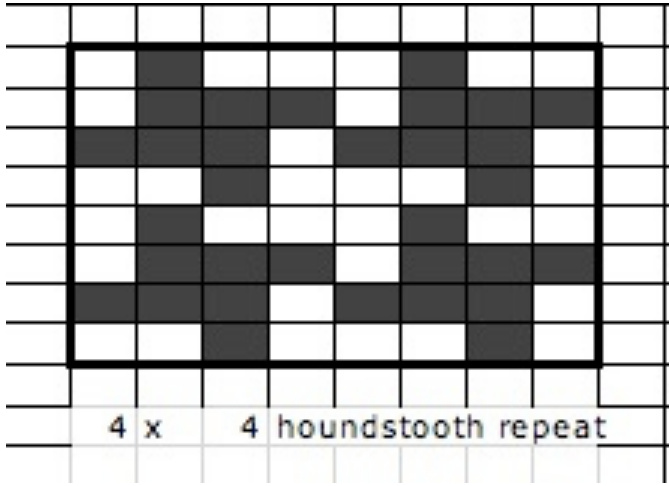
After the heel turn, I began the houndstooth motif, broken by two rows of regular stockinette, then I followed the Hufflepuff chart. I put HUFFL on the back the left sock and front of the right and ELPUFF on the back of the right sock and front of the left. That way the socks read HUFFLEPUFF from the back and the front. After two more rows of houndstooth, I placed a 2 inch black ribbing at the end.
You can JUST see the badger face on the heel flap. I completely forgot to take a picture before sending it to my Harry Potter Sock Swap partner.

Hufflepuff Charts

Houndstooth

For more information, see tutorials: http://mamaoknits.blogspot.com/2007/05/anatomy-lesson.html http://mamaoknits.blogspot.com/2007/04/more-on-badgerlicious-sock.html http://mamaoknits.blogspot.com/2007/05/sock-complete...
M1R/m1a & M1 L/M1b Tutorial
For this pattern we need increases that slant right and left.
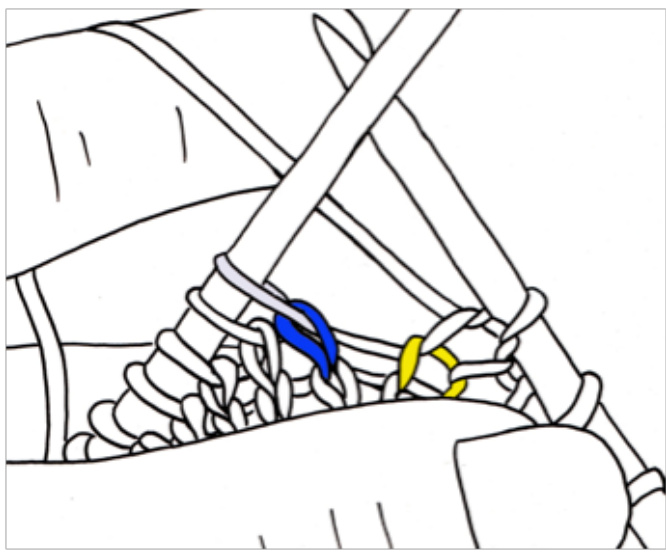
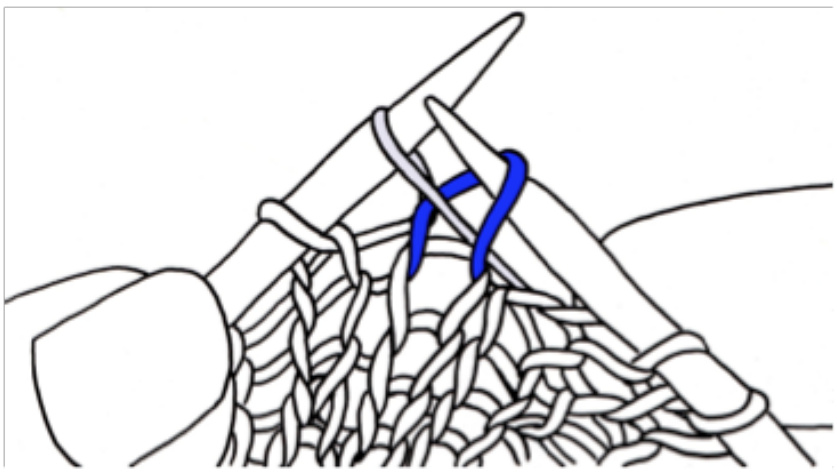
When holding stitches mid-row you will see a noticeable gap between the stitches you just knit (right needle, yellow) and the stitches you're about to knit (left, blue). On fig1, a yellow stitch is visible before the gap and a blue stitch can be seen on the left that comes after the gap. In some patterns you'll see m1b indicating to use the st "before" the gap or mla for using a stitch "after" the gap. Those stitches, when used for increases, create definite “leans" to the increases: left leaning (m1b leans left or M1L) and right leaning (mla leans right or M1R). m1after (M1R)- make 1 leaning right using the stitch after the gap Blue arrow indicates position of gap. Lifted stitch—-blue stitch now lifted by right tip. This increase uses the stitch after the gap, lifted by the right needle tip to be placed on left needle next to the original grey stitch, then knit as usual. This increase leans right.
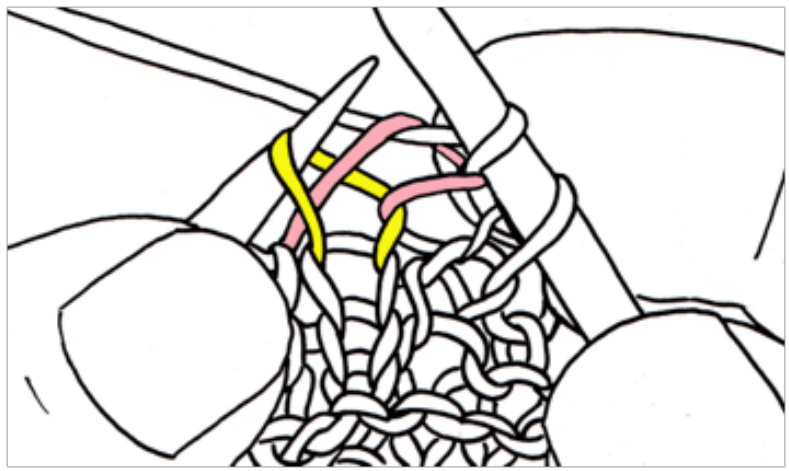
m1before (M1L)- make 1 leaning left using the stitch before the gap Yellow arrow indicates current position of gap. The lifted stitch needed is not the stitch directly below the top stitch on the right needle (pink st), but the one below (yellow st). If you were to use the pink stitch you would pull the just-worked-stitch on the needle out of alignment. The yellow stitch is safe to pull up onto the left needle, then knit into the front of the loop for a mirrored increase. This increase leans left.
More from Crafting-a-Life Originals
And if you would like something to do while knitting, you can stick a book in your ear (free!) at Craftlit or Just the Books podcasts.


