When I was learning to knit socks, the heel fap was my favorite part. I was always disappointed when I reached the end — far too quickly —- and had to start working the gussets. This scarf solves the heel flap lover's dilemma: It provides hours of heel flap happiness with no gussets in sight. For this scarf, you can use any yarn and knitting needle size that produce a fabric you enjoy. The below materials and gauge produced a thick, cozy, breeze-blocking fabric good for wearing under a jacket; a lighter yarn knit on large needles will yield an airier scarf. One caveat: A protein fiber is strongly suggested, as heel flap stitch curls, much like stockinette stitch. You can block out some of the curl if you use a protein fiber like wool or alpaca, but I can't vouch for the good behavior of any Heel Flap Scarves knit with something like linen or cotton. (If you venture to knit one in a plant fiber, though, I'm interested in hearing about your results!)
materials
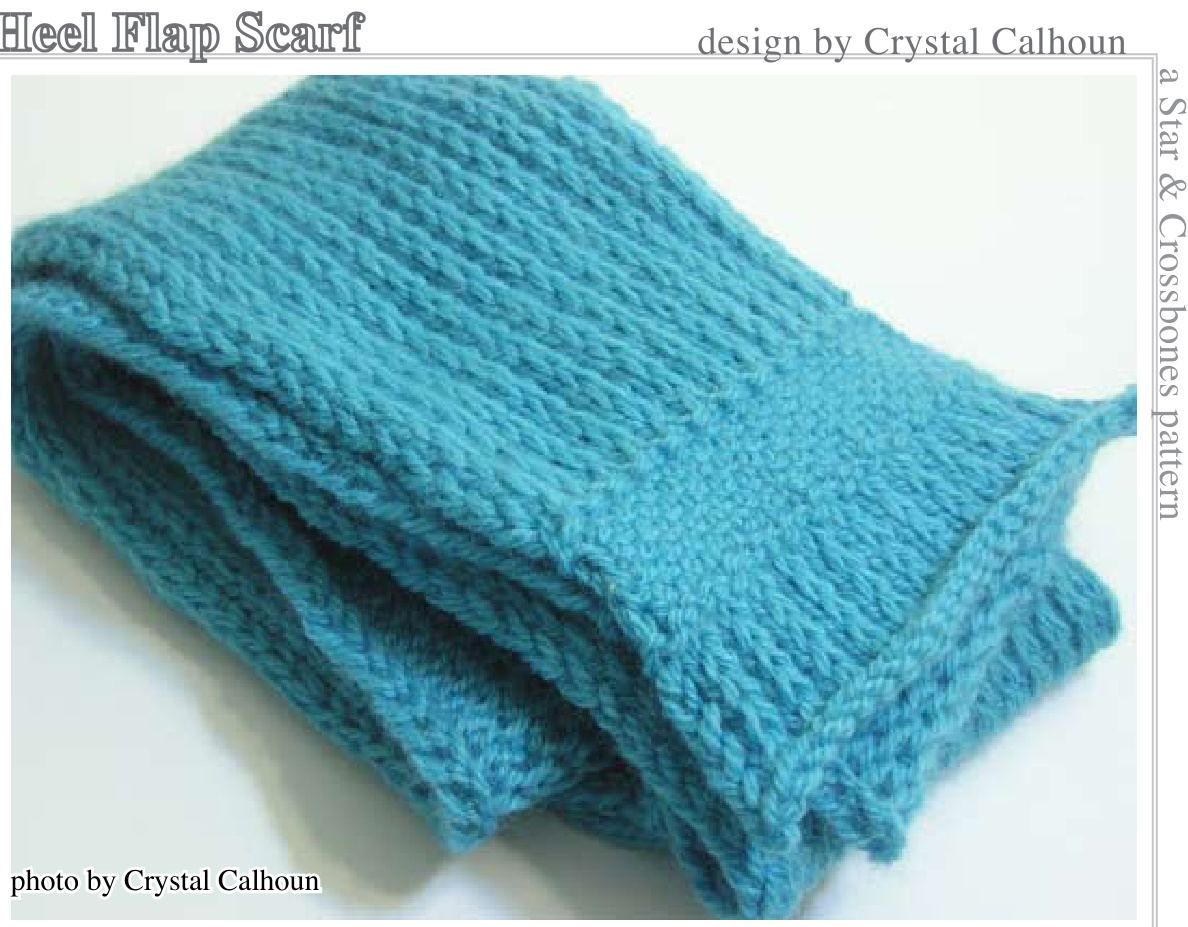
· worsted weight yarn (230 yards) · US size 7 straight needles (The aqua scarf pictured used up a few yards less than one ball of Patons Classic Wool.)
gauge
7 sts/inch in heel stitch Remember: These materials and gauge are only suggestions. Knit & block your own test swatches to find a fabric that fits your personal taste!
finished size
The directions below will produce a skinny scarf measuring approximately 60 inches long by 4 inches wide. You can easily knit this scarf to any width and length you like — just make sure to cast on an even number of stitches to accommodate the stitch patterns. (And make sure you have enough yarn. ;))
structure
This is a traditional long rectangular scarf, knit flat in heel fap stitch with stripes of linen stitch near the ends. It needs blocking to reduce the curling tendency of the heel flap stitch, but it makes an attractive, textured, cozy fabric and produces a classic scarf that adapts to many yarns, gauges and sizes. (If you find that your scarf curls too much, try using larger needles for a slightly looser fabric.)
stitch patterns
Heel Flap Stitch
RS rows: sl1, k1. Rep these two sts to end. WS rows: sll, purl to end.
Linen Stitch
RS rows: sl1, k1. \*sl1 wyif, k1. Rep from \* to end of row. WS rows: sl1, p1. \*sl1 wyib, p1. Rep from \* to end of row.
the pattern
Cast on 28 sts. (If you use the long-tail cast-on, remember that your first row will be a WS row and follow the stitch pattern directions as appropriate.) Knit in heel fap stitch for 1 inch, ending with a RS row.
Linen Stitch Stripe
Next row (WS): Sl1, knit across. Knit in linen stitch for 10 rows, or for 1 inch, ending with a RS row. Next row (WS): Sl1, knit across.
Body of Scarf
Resume knitting in heel fap stitch. Knit for 56 inches, or until scarf length measures two inches less than desired finished length. (Remember also that your scarf may get a bit longer in blocking.)
End of Scarf
Repeat Linen Stitch Stripe directions once. Knit in heel flap stitch for 1 inch, ending with a WS row. Bind off all stitches loosely. (You may want to use a bind-off that matches your cast-on.) Weave in ends. Block the scarf to reduce curling. Enjoy!
scarf variation ideas
Lots of Linen Stitch
If you'd like to knit a scarf that doesn't curl as much as the one produced by the above directions, you can knit the linen stitch stripe at even intervals throughout the length of the scarf. This should help keep the curling more under control.
Add Edging
The slipped stitch at the beginning of every row provides a nice edge for picking up stitches. (That's why the slip stitches are there in the heel flaps of socks, after all. ;)) You can easily put a decorative edging on the scarf by using a long circular needle to pick up stitches along the long edges and knitting on the edging of your choice. (A simple two-row garter stitch is a pretty and simple addition that requires no math -- yay!) You could also pick up stitches all the way around the scarf, including the short edges, and knit an edging on circularly - just don't forget you may need to miter the corners to make the edging lay flat. (To miter corners, place two stitch markers around each corner stitch. On every other round, increase one stitch beside each marker. You can increase inside the markers or outside — whichever you like.)
glossary
st stitch WS wrong side (or “back") of fabric wyib with yarn in back wyif with yarn in front BO bind off CO cast on k knit stitch (k1 = knit 1 stitch) p purl stitch (p1 = purl 1 stitch) rep repeat RS right side (or “front'") of fabric sl1 slip 1 stitch from left needle to right needle, usually as if to purl (unless oth erwise noted)
Credits
Special thanks to my test-knitters, Melody Robinson and June!
License and Copyright
Pattern and layout @ Crystal Calhoun 2010-2011 , all rights reserved. This pattern and items created from it are intended for personal, noncommercial use only. Please do not reproduce and/or redistribute this pattern without the designer's permission. If you're interested in using this pattern or the products of this pattern for commercial purposes, please contact the designer at crystal@ starncrossbones.com. Thanks for supporting indie designers!
Version & Updates
This pattern was released on March 22, 2011. Check out www.starncrossbones.com for more knitting patterns — and for other fiber goodies like handspun yarn, shawl pins, and stitch markers!


