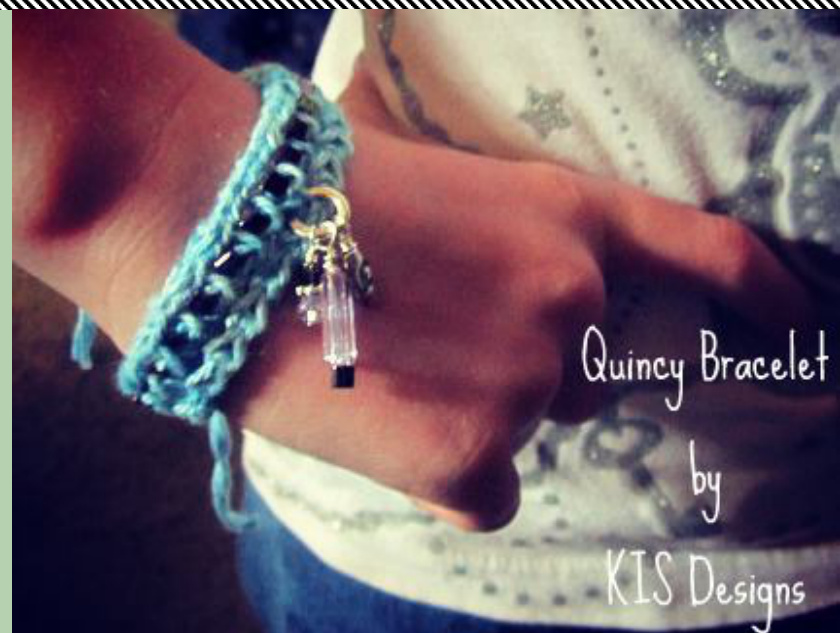
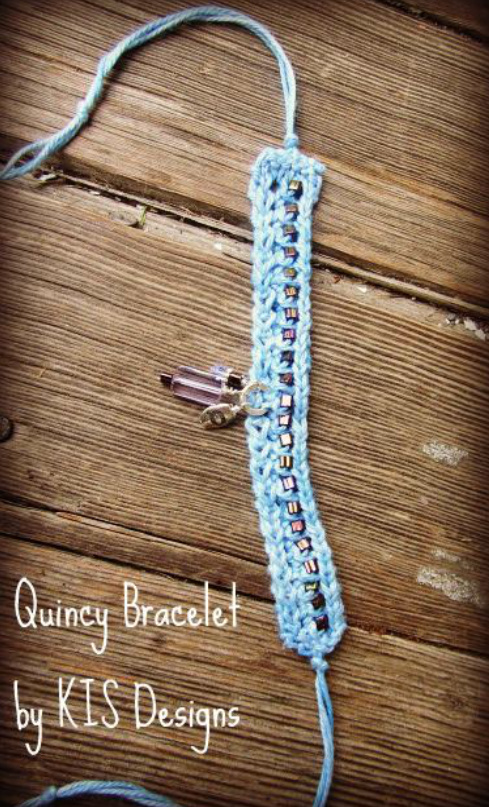
Quincy Knitted Bracelet By KIS Designs Difficulty: Advanced Beginner Quincy is a very hip and versatile "friendship" bracelet which can be made short (single wrap) or long to wrap several times around your wrist. It would also make a great hatband, belt or choker. It's perfect for any age and any season. An added Bonus: It uses very little yarn, so it's a great way to use up all those little bits of sock yarn you have bouncing around in your stash! SIZE Child/Teen/Adult
MATERIALS
Leftover fingering weight or sock yarn (approximately 15 yards for a single wrap) 1 set US size 2/2.75 straight needles Tapestry needle Big-Eye Beading Needle Size 8 Glass Seed Beads 2-6 Beads (size 4-6mm) 3-4 Metal Head Pins 1 Metal Jump Ring (12mm)
GAUGE
36sts & 40 rows= 4inches in st st
AU
PREPARING THE YARN FOR KNITTING
Using your big-eye beading needle, string your size 8 seed beads. The number of beads required varies on the length of bracelet you wish to make. You will need approximately 5 beads per inch, plus a few extra for the final embellishments.
KNITTING THE BRACELET
Using the Long-Tail CO method, and leaving a 14" tail, CO 17sts. P2 rows. 1 (RS): Sl1 st pwise, k1, yo, sl1 st wyib, k2tog with bead, psso, yo, k1, pl Step 2 (WS): Sl 1 st pwise, p to end of the row. Repeat Steps 1 & 2 until piece measures your desired finished length, end having completed Step 2. Step 3 (RS): P1 row. BO all sts kwise, leaving a 8" tail.
FINISHING/EMBELLISHMENT
Block your piece lightly to take out any curl. Thread your tail through the tapestry needle and weave it to the center of the bracelet end. This will be your tie. Cut another piece of yarn, 16" long and thread it alongside your centered tail. Knot these together and braid or twist these end pieces for your tie. Repeat for opposite side. Trim the excess.
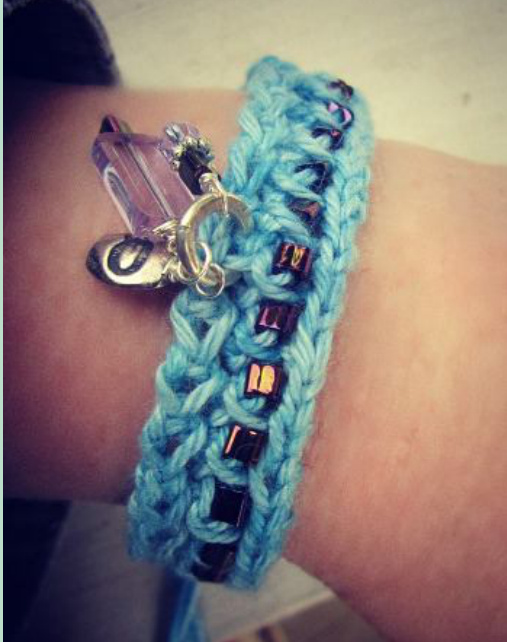
Am CREATINGTHEBEADEDCHARMS Stack your beads onto your headpins in the arrangement that is most pleasing to you (2 beads / headpin works best). Finish headpin with a loop to secure beads. Thread these charms onto your jump ring and attach to your bracelet at the center. Be sure to close the jump-ring tightly.
ABBREVIATIONS
BO (Bind Off) CO (Cast On) K2TOG (knit 2 sts together) PSSO (pass the slipped stitch over) PWISE (purlwise) RS (right side) WS (wrong side) WYIB (with yarn in back) \*This pattern is the property of KIS Designs. It has been printed for your personal use only. It is not nice ( or legal ) to copy any part of this pattern without permission. Items made from this pattern may not be used for business purposes. Please contact KIS Designs to purchase this and other fine patterns and products you are sure to love. www.kisdesigns.etsy.com


