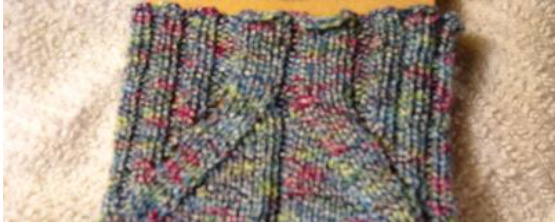
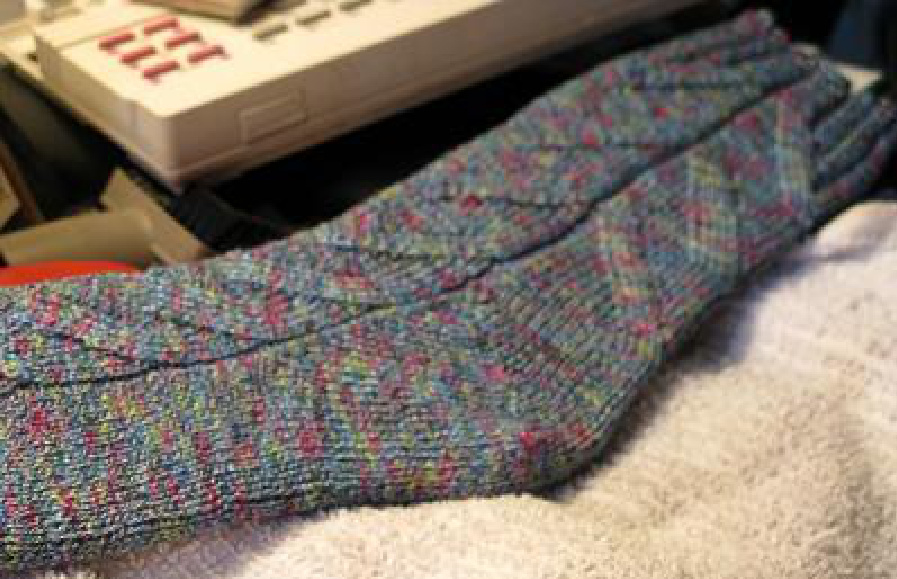
Oddvine Socks
by Sarah Cukrowicz Copyright 2009 This pattern is not for sale, it may not be posted to any website, bulletin board, or list, and cannot be sold to any individual, corporation or other entity without the express written permission of the designer. Projects made using this pattern may be sold, but the seller cannotclaim the design as their own without serious modifications to the pattern and must indicate the pattern source.
Pattern Notes: This pattern was inspired by the Nutkin pattern available on Knitzi. The heel comes from Wendy Knits, the toe uses Judy's Magic Cast On. I've added some "hidden" shaping to gently increase the diameter of the cuff. Don't be frightened off by all the charts. You'll very quickly find the rhythm of the pattern and will soon be breezing along without them. The pattern also works extremely well with a standard short row heel instead of the one used here, although I chose this particular heel because it echoed the lines of the stitch pattern.
Materials and Gauge:
Yarn: 2 balls Regia Bamboo Color (Jamaica Color) 218 yds/50g ball, 45% Bamboo, 40% Wool, and 15% Nylon, see size notes. Needles: set of 5 size 1 (2.5 mm) dpns, can easily be converted to two circular needles by placing sole stitches on one needle and the instep stitches on the other. Gauge: 8 sts, 11 rows/inch in stockinette. (see pattern notes for adaptation to different gauges)
Size:
As written, fits women size 7 12 - 8 12 foot. The sock may seem quite long, with a surprisingly low stitch count suggesting lots of negative ease. If you try on the sock as you work, you'll find that this yarn happily expands horizontally, but simultaneously shrinks vertically. I've accommodated for that with the length of the sock worked before the heel begins. If you are using a "standard" sock yarn (one that is 75% wool, 25% nylon or 100% wool), or have smaller or larger feet, you can adjust for this by beginning your heel shaping 2 - 2 12 inches shy of the total foot length needed.
Places you'll need to visit:
I don't feel comfortable providing detailed directions on how to do either of these techniques, (for copyright and intellectual property reasons) and will instead refer you to the following sites for them Judy's Magic Cast On (http: //www.knitty.com/ISSUEspring06/FEATmagiccaston.html) video version here (http://www.youtube.com/watch?v=lhBISoAhhQY) Wendy Knits Gusset Heel (http:/media.wendyknits.net/knit/FingeringweightSocks.pdf)
Chart Key:
| purl | |
| / | knittwotogether |
| slip one stitch, knit next stitch, pass slipped stitch over | |
| 0 | yarn over |
| knit | |
| This stitch doesn't exist, pretend the black box isn't there. |
Pattern
Toe: Using Judy's Magic Cast On, cast on 12 stitches per needle over two needles. (24 stitches totall) If using double pointed needles, divide stitches evenly over 4 needles (6 stitches per needle.) Optional-place marker to indicate beginning of round. 1. Knit one round plain. 2. Knit first stitch, knit front and back of next stitch, knit 8, knit back and front of next stitch, knit 2, knit front and back of next stitch, knit 8, knit back and front of next stitch, knit 1. (4 stitches increased, 28 stitches total) 3. Knit one round plain. 4. Knit first stitch, knit front and back of next stitch, knit 9, knit back and front of next stitch, knit 2, knit front and back of next stitch, knit 9, knit back and front of next stitch, knit 1. (4 stitches increased, 32 stitches total) 5. Knit one round plain. 6. Knit first stitch, knit front and back of next stitch, knit 10, knit back and front of next stitch, knit 2, knit front and back of next stitch, knit 10, knit back and front of next stitch, knit 1. (4 stitches increased, 36 stitches total) 7. Knit one round plain. 8. Knit first stitch, knit front and back of next stitch, knit 11, knit back and front of next stitch, knit 2, knit front and back of next stitch, knit 11, knit back and front of next stitch, knit 1. (4 stitches increased, 40 stitches total) 9. Knit one round plain. 10. Knit first stitch, knit front and back of next stitch, knit 12, knit back and front of next stitch, knit 2, knit front and back of next stitch, knit 12, knit back and front of next stitch, knit 1. (4 stitches increased, 44 stitches total) 11. Knit one round plain. 12. Knit first stitch, knit front and back of next stitch, knit 13, knit back and front of next stitch, knit 2, knit front and back of next stitch, knit 13, knit back and front of next stitch, knit 1. (4 stitches increased, 48 stitches total) 13. Knit one round plain. 14. Knit first stitch, knit front and back of next stitch, knit 14, knit back and front of next stitch, knit 2, knit front and back of next stitch, knit 14, knit back and front of next stitch, knit 1. (4 stitches increased, 52 stitches total) 15. Knit one round plain. 16. Knit first stitch, knit front and back of next stitch, knit 15, knit back and front of next stitch, knit 2, knit front and back of next stitch, knit 15, knit back and front of next stitch, knit 1. (4 stitches increased, 56 stitches total) If using dpns, you should now have 14 stitches per needle. If using 2 circs, you should have 28 stitches per needle.
Instep & Sole:
Follow Chart A once over the instep stitches. Purl the first and last sole stitch, so there is a two stitch purl column framing the instep stitches, all other sole stitches are knit. On even numbered rows, purl the purls, all other stitches are knit. If using dpns, the double purl column on the chart shouid be where your work is divided between two needles, splitting thecolumnover twoneedles. Chart A
| 18 | |||||||||||||||||||||||||||||||
| 0 | 0 | 17 | |||||||||||||||||||||||||||||
| 0 | " | 0 | / | 15 | |||||||||||||||||||||||||||
| \ | 0 | 0 | 13 | ||||||||||||||||||||||||||||
| 0 | " | / | 11 | ||||||||||||||||||||||||||||
| \ | 0 | " | 0 | 9 | |||||||||||||||||||||||||||
| 0 | 0 | / | 7 | ||||||||||||||||||||||||||||
| " | \ | 0 | " | 0 | " | 5 | |||||||||||||||||||||||||
| 0 | 0 | / | 3 | ||||||||||||||||||||||||||||
| " | |||||||||||||||||||||||||||||||
| " | - | 0 | / | 1 |
rt B once over the instep stitches while continuing the same sole pattern.
Chart B
| 16 | |||||||||||||||||||||||||||||||
| 0 | 0 | 15 | |||||||||||||||||||||||||||||
| 0 | 0 | / | 13 | ||||||||||||||||||||||||||||
| 0 | 0 | / | 11 | ||||||||||||||||||||||||||||
| 0 | 0 | / | 9 | ||||||||||||||||||||||||||||
| \ | 0 | 0 | / | 7 | |||||||||||||||||||||||||||
| \ | 0 | " | 0 | / | - | 5 | |||||||||||||||||||||||||
| 0 | " | " | 0 | / | 3 | ||||||||||||||||||||||||||
| 0 | -- | 0 | / | 1 |
rt C once over the instep stitches while continuing the same sole pattern.
Chart C
| 14 | |||||||||||||||||||||||||||||||
| 0 | 0 | " | 13 | ||||||||||||||||||||||||||||
| \ | 0 | 0 | / | 11 | |||||||||||||||||||||||||||
| \ | 0 | 0 | / | - | 9 | ||||||||||||||||||||||||||
| \ | 0 | 0 | / | 7 | |||||||||||||||||||||||||||
| 0 | 0 | 5 | |||||||||||||||||||||||||||||
| 0 | 0 | / | 3 | ||||||||||||||||||||||||||||
| \ | 0 | -—-— | / | ||||||||||||||||||||||||||||
| 0 | 1 |
Your sock from tip of toe to this point should measure 6 inches. Follow Chart B-2 over the instep, moving on to Chart A-2 when Chart B-2 finishes. At the same time, follow the gusset heel shaping from Wendy Knits (web address in pattern notes above) with the following changes: Round 1: Continue instep stitches in pattern, sole stitches should be worked as follows: purl one, knit one, make one, knit to 2 stitches before end of round, make one, knit one, purl one. Round 2: purl the purls, all other stitches are knit. Repeat until there are 30 stitches are on each of the sole needles (60 sole stitches total) Continue following Wendy's instructions for turning the heel with the following changes: Remember to maintain your purl column at either end of the sole stitches. In row 1 of her instructions, knit 31 instead of the 33 she indicates. You will finish with 32 stitches, which should be divided evenly over what are now the back of the leg needles. ChartB-2 (\*note the difference to even numbered round 16, increasing the instep stitches to 15 per needle)
| 0 | 0 | 16 | |||||||||||||||||||||||||||||||
| 0 | 0 | 15 | |||||||||||||||||||||||||||||||
| 0 | 0 | / | 13 | ||||||||||||||||||||||||||||||
| 0 | 0 | 11 | |||||||||||||||||||||||||||||||
| \ | 0 | 0 | / | 6 | |||||||||||||||||||||||||||||
| \ | 0 | " | " | 0 | / | 7 | |||||||||||||||||||||||||||
| 0 | 5 | ||||||||||||||||||||||||||||||||
| \ | 0 | " | 0 | / | 3 | ||||||||||||||||||||||||||||
| \ | 0 | -—- | 0 | 1 |
Continue with Chart A-2 across the instep. Note that when following Wendy's instructions, you'll stop about half way through chart A2 to complete the turn heel. Beginning on the first round after the heel, begin purling the first and last stitch of the back of the leg needles, keep the remaining stitches on these needles in stockinette. Don't worry that when you pick the pattern back up again you'll have 30 stitches total on the instep needles, and 32 on the heel needles. As with the previous chart, you'll be adding a stitch on an even numbered row, which is only worked across the instep needles, bringing the count up to 16 stitches per needle.
'as on the previous chart, we are increasing the number of instep stitches
| 0 | 20 | |||||||||||||||||||||||||||||||
| 0 | 0 | / | 19 | |||||||||||||||||||||||||||||
| 0 | 0 | / | 17 | |||||||||||||||||||||||||||||
| 0 | 0 | / | [ | 15 | ||||||||||||||||||||||||||||
| \ | 0 | 0 | / | 13 | ||||||||||||||||||||||||||||
| 0 | 0 | / | 11 | |||||||||||||||||||||||||||||
| 0 | 0 | / | 9 | |||||||||||||||||||||||||||||
| 0 | 0 | 7 |
| \ | 0 | 0 | 5 | |||||||||||||||||||||||||||||
| 0 | " | 0 | / | 3 | ||||||||||||||||||||||||||||
| \ | 0 | -- | o | / |
(64 stitches total at the end of chart A-2) Continue with Chart B-3, working the chart over both the front of the leg, repeating it across the back of the leg. re adding one stitch to each needle on row 20, for 17 stitches per needle)
| 0 | 0 | 20 | |||||||||||||||||||||||||||||||||
| 0 | 0 | 19 | |||||||||||||||||||||||||||||||||
| 0 | 0 | / | 17 | ||||||||||||||||||||||||||||||||
| \ | 0 | " | " | 0 | / | 15 | |||||||||||||||||||||||||||||
| 0 | 0 | 13 | |||||||||||||||||||||||||||||||||
| 0 | 0 | / | 11 | ||||||||||||||||||||||||||||||||
| \ | 0 | 0 | 9 | ||||||||||||||||||||||||||||||||
| \ | 0 | 0 | / | 7 | |||||||||||||||||||||||||||||||
| \ | 0 | " | 0 | / | 5 | ||||||||||||||||||||||||||||||
| \ | 0 | " | " | 0 | / | 3 | |||||||||||||||||||||||||||||
| o | 0 | / | 1 |
(68 stitches total at the end of chart B-3) Continue with Chart C-2, working the chart over both the front of the leg and repeating for the back of the leg. You'll be increasing to 18 stitches per needle. Chart C-2
| 0 | 0 | 20 | |||||||||||||||||||||||||||||||||
| 0 | 0 | 19 | |||||||||||||||||||||||||||||||||
| 0 | 0 | / | 17 | ||||||||||||||||||||||||||||||||
| 0 | / | 15 | |||||||||||||||||||||||||||||||||
| 0 | 0 | / | 13 | ||||||||||||||||||||||||||||||||
| 0 | " | 0 | 11 | ||||||||||||||||||||||||||||||||
| 0 | 0 | / | 6 | ||||||||||||||||||||||||||||||||
| 0 | 0 | / | 7 | ||||||||||||||||||||||||||||||||
| 0 | 0 | / | 5 | ||||||||||||||||||||||||||||||||
| o | o | - | 3 |
| \ | o | --] | o | 1 |
The last row of chart B-4 will set up the ribbing that will continue up through the cuff until you choose to bind off. As before, you'll be increasing one more time, on an even row. You'll end up with 19 stitches per needle. Chart B-4 (Last chart, I promise!)
| 25 | ||||||||||||||||||||||||||||||||||||
| 0 | " | " | - | 0 | 24 | |||||||||||||||||||||||||||||||
| 0 | 0 | 23 | ||||||||||||||||||||||||||||||||||
| \ | 0 | - | 0 | / | 21 | |||||||||||||||||||||||||||||||
| \ | 0 | 0 | / | 19 | ||||||||||||||||||||||||||||||||
| 0 | - | 0 | 17 | |||||||||||||||||||||||||||||||||
| \ | 0 | - | 0 | / | 15 | |||||||||||||||||||||||||||||||
| \ | 0 | 0 | 13 | |||||||||||||||||||||||||||||||||
| 0 | 0 | / | 11 | |||||||||||||||||||||||||||||||||
| 0 | 0 | 9 | ||||||||||||||||||||||||||||||||||
| \ | 0 | 「 | 0 | 7 | ||||||||||||||||||||||||||||||||
| 0 | 0 | 5 3 | ||||||||||||||||||||||||||||||||||
| 0 | 0 | o | 0 | / | / |
Continue in the ribbing pattern that was established in row 25 for 1 inch before loosely binding off in pattern.