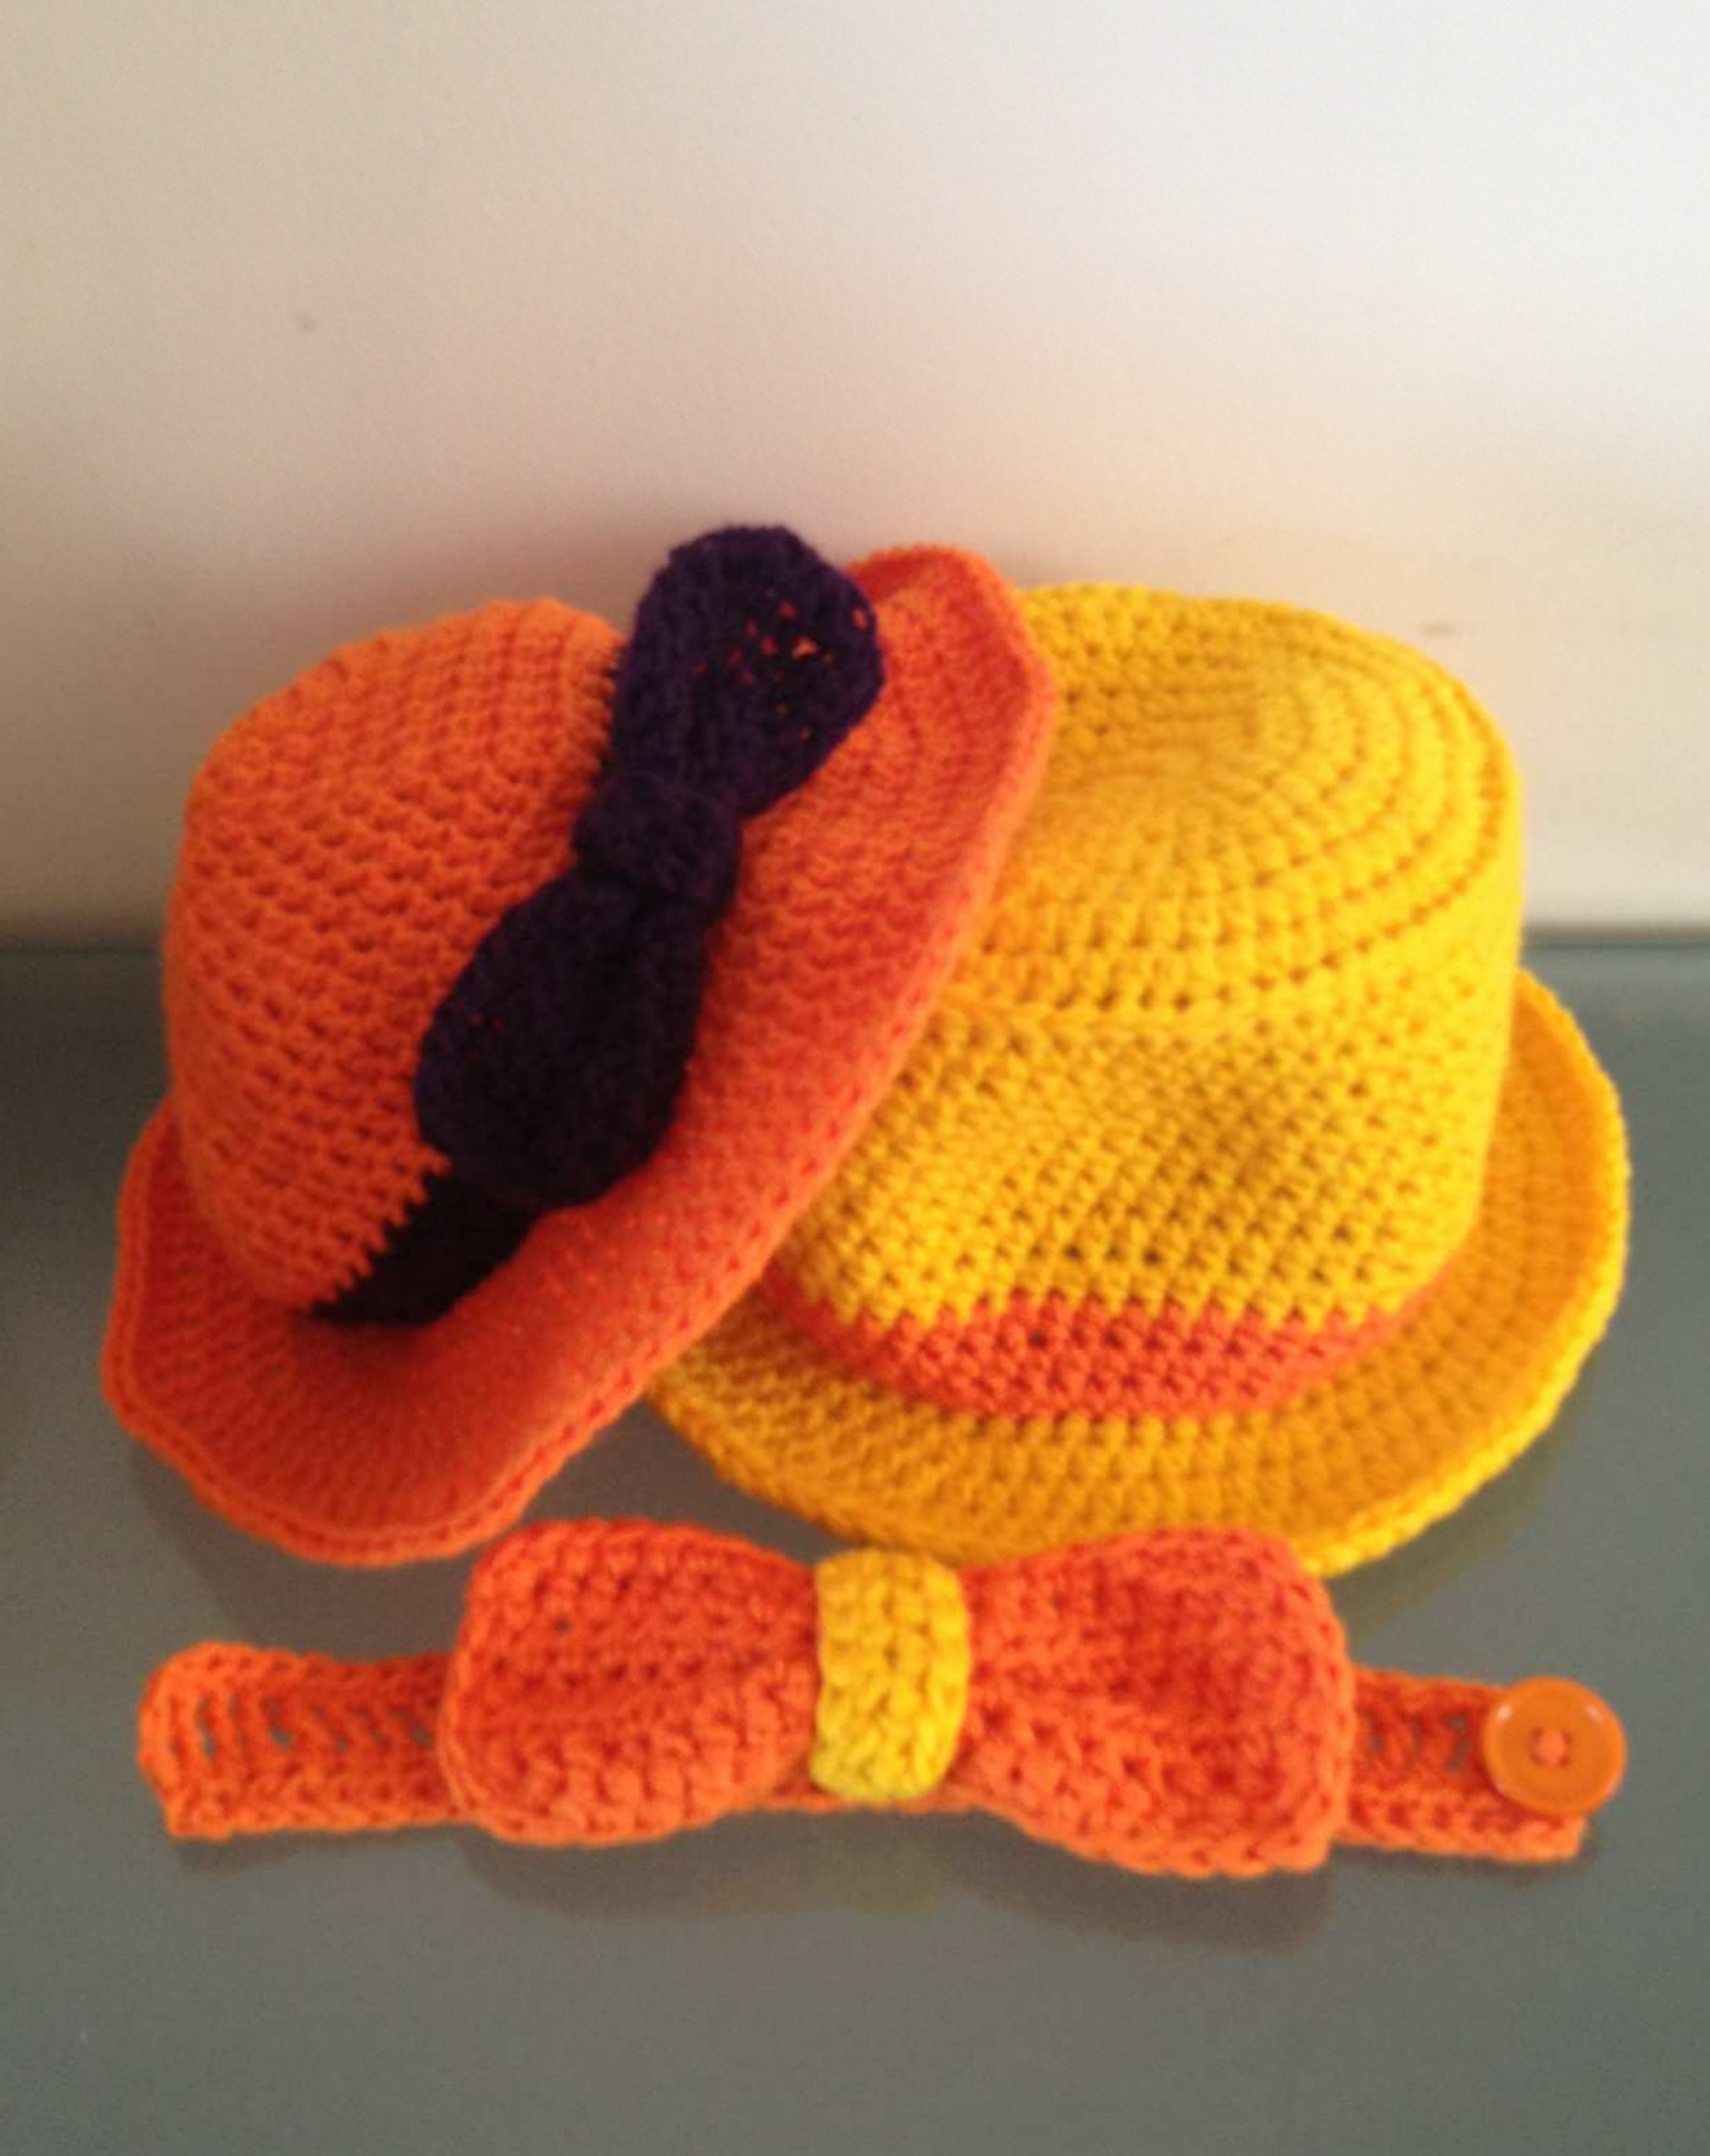
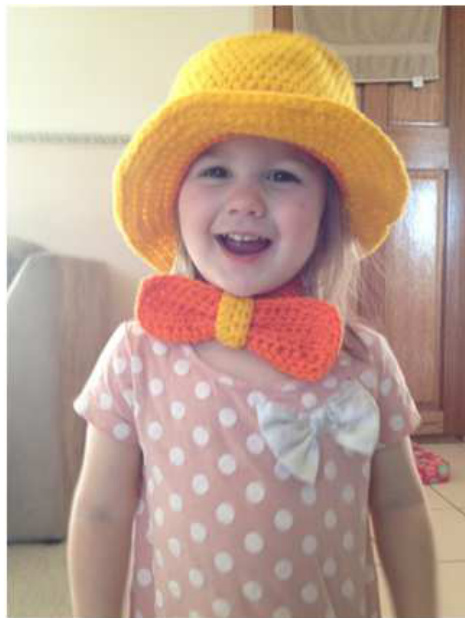
High Tea Haty (Free)
Nicole Davis 2012
Yarn: 8ply / DK / Worsted Weight Note: As these are fancy dress toys for toddlers, I recommend a quality acrylic or acrylic blend yarn to allow for easy washing.
Hook:
4.00mm / UK 8 / US G-6 5.00mm / UK 6 / US 6.00mm / UK 4 / US J-10 Yarn Colours: 2 desired colours for each hat Additional Tools: Embroidery Needle Scissors 30mm button (approx.) Approximate Size: Toddler (1-3 years)
US Terms Abbreviations:
sl st = slip stitch sC = single crochet hdc = half double crochet dc = double crochet inc = increase sc2tog = single crochet two stitches together dc2tog = double crochet two stitches together BLO = Back Loop Only FLO = Front Loop Only FPsc / FPhdc / FPdc = stated stitch worked in the Front Post BPsc / BPhdc / BPdc = stated stitch worked in the Back Post ch = chain st = stitch hk = hook rnd = round STOP = Finish current round without working remaining stitches. I will be the beginning of a new round.
Optional Use of Magic Circle:
Throughout this pattern, where "Ch 2" is listed as the foundation, you may begin by using a Magic Circle. If you are instructed to Ch more than 2, you will not be able to use a Magic Circle as your foundation. Optional Use of Foundation Double Crochet (Fdc) / Foundation Half Double Crochet(Fhdc): Throughout this pattern, when you are required to "Ch X" and work in rows ONLY, you may instead skip the foundation chain and begin Row 1, working instead in Fdc (or Fhdc) to the stitch total of the row.
Copyright & Resale
Pattern copyright Nicole Davis @ 2012. All rights reserved. Do not copy or share this pattern. You may sell products made from this pattern, however please credit Nicole Davis / MetricMama as the designer.
Contact
Please contact me via email (nickidav87@gmail.com) with any questions you may have with the pattern. If you feel there is a mistake, please let me know. -- Floppy Hat -- Hat: Working in Colour A Using 4.00mm hook Ch 2 Rnd 1: sc x7 in 2nd ch from hk (7) Switch to 5.00mm hook Rnd 2: hdc inc around (14) Switch to 6.00mm hook Rnd 3: [dc, sc inc] around (21) Rnd 4: [dc x 2, sc inc] around (28) Rnd 5: [dc x3, sc inc] around (35) Rnd 6: [dc x2, sc inc, dc x 2] around (42) Rnd 7: [dc x 5, sc inc] around (49) Rnd 8: [dc x3, sc inc, dc x 3] around (56) Rnd 9: [dc x7, sc inc] around (63) Rnd 10-11: dc around (63) Rnd 12: hdc, sc, sl st, Change to Colour B, sl st, sc, hdc. STOP. (6) Rnd 13-15: dc around (63) Rnd 16: hdc, sc, sl st, Change to Colour A, sl st, STOP. ch 1 (4) Rnd 17: FPdc around, sl st to join (63) {This is the beginning of the Brim} Rnd 18: sc, hdc. STOP. (2) Rnd 19: [dc x4, dc inc, dc x4] around (70) Rnd 20: [dc x9, dc inc] around (77) Rnd 21: [dc x 5, dc inc, dc x 5] around (84) Rnd 22: [dc x 11, dc inc] around (91) Rnd 23: [dc x 6, dc inc, dc x 6] around (98) Rnd 24: [dc x 13, dc inc] around (105) Rnd 25: [dc x 7, dc inc, dc x 7] around (112) Rnd 26; hdc, SC, sI st. STOP. (3) Finish off. Weave in tail. Bow (Large Rectangle): Working in Colour B Using 6.00mm hook Ch19 Row 1: dc in 2nd ch from hook, dc across, ch 1, turn (18) Row 2-4: dc across, ch 1, turn (18) Row 5: dc across, ch 1 (18) Rnd 6: sc around, working 2 stitches into each corner (40 approx) Finish off. Weave in tail.
Bow (Small Rectangle):
Working in Colour B Using 6.00mm hook Ch9 Row 1: dc in 2nd ch from hook, dc across, ch 1, turn (8) Row 2: dc across (8) Finish off. Wrap around middle of bow. Stitch to hat. Fold/Squish large rectangle and wrap smaller rectangle around it to form a bow shape. Join two ends of small rectangle together, ensuring the small rectangle is stitched to the large one to prevent movement. Stitch to the back of your Hat.
Alteration:
Following the Bow directions above, the bow is quite floppy. You can substitute them for the “Bow Tie" instructions below for the Large and Small Rectangle. This will give you a firmer, slightly bigger bow.
Sizing:
Before starting on the Brim (Rnd 17) the hat should be 13cm tall. Comprising this, Colour A should be 10cm tall and Colour B (the band) should be 3cm tall) The Brim should finish at 8cm wide. -- Top Hat - Hat: Crocheting with Two Strands of Yarn Working in Colour A Using 5.00mm hook Rnd 1: sc x8 in 2nd ch from hk (8) Switch to 6.00mm Rnd 2: hdc inc around (16) Rnd 3: [hdc, hdc inc] around (24) Rnd 4: [hdc x 2, hdc inc] (32) Rnd 5: [hdc x3, hdc inc] (40) Rnd 6: hdc x 2, hdc inc, hdc x 2] (48) Rnd 7: [hdc x5, hdc inc] (56) Rnd 8: [hdc x3, hdc inc, hdc x3] (64) Rnd 9: sc, sl st. STOP. Ch 1 (2) Rnd 10: BPhdc around, sl st to join (64) Rnd 11: sc, hdc. STOP. (2) Rnd 12-19: hdc around (64) Rnd 20: sC, sl st, Change to Colour B, sl st, sc. STOP. (4) Rnd 21-23: hdc around (64) Rnd 24: sC, sl. Change to Change A, sl st. STOP. Ch 1 (3) Rnd 25: FPhdc around, sl st to join (64) Rnd 26: sc, hdc. STOP. (2) Rnd 27: [hdc x 7, hdc inc] around (72) Rnd 28: [hdc x 4, hdc inc, hdc x 4] around (80) Rnd 29: [hdc x9, hdc inc] around (88) Rnd 30: [hdc x 5, hdc inc, hdc x 5] around (96) Rnd 31: sc, sl st. STOP. (2) Finish off. Weave in tails. --Bow Tie -- Tie (Large Rectangle): Crocheting with Two Strands of Yarn Working in Colour B Using 6.00mmhook Ch 19 Row 1: hdc in 2nd ch from hk, hdc across, ch 1, turn (18) Row 2-4: hdc across, ch 1, turn (18) Row 5: hdc acrossm ch 1, do not turn (18) Rnd 6: sc around, working 2 sc in each corner (40) Sl st. Finish off. Weave in tails. Set aside. Tie (Small Rectangle): Crocheting with Two Strands of Yarn Working in Colour A Using 6.00mm hook Ch 11 Row 1: hdc in 2nd ch from hk, hdc across, ch 1, turn (10) Row 2: hdc across (10) Finish off. Leave 15cm (6") tail. Set aside. Tie Strap (Long Rectangle): Crocheting with One Strand of Yarn Working in Colour B Using5.00mmhook Ch 41 Row 1: hdc in 2nd ch from hk, hdc across, ch 4, turn (40) Row 2: trc in 2nd st from hk, trc across, ch 1, turn (40) Row 3: hdc in 2nd ch from hk, hdc across (40) Finish off. Leave tail long enough to attach button, use to stitch button to the two end trc. Note: Check your button before attaching. Button should fit snuggly between your trc stitches. If it is too small, it will pop out easily. If it is too large, you will not be able to wearthebowtie.
Putting It Together:
Fold/Squish large rectangle and wrap small rectangle around it to form a bow shape. Join two ends of small rectangle together, ensuring the small rectangle is stitched to the large one to prevent movement. Take long rectangle and fold in half. Stitch bow to the two middle trc stitches of the long rectangle. Stitch across twice to ensure it's secure. You should now have a bow tie!
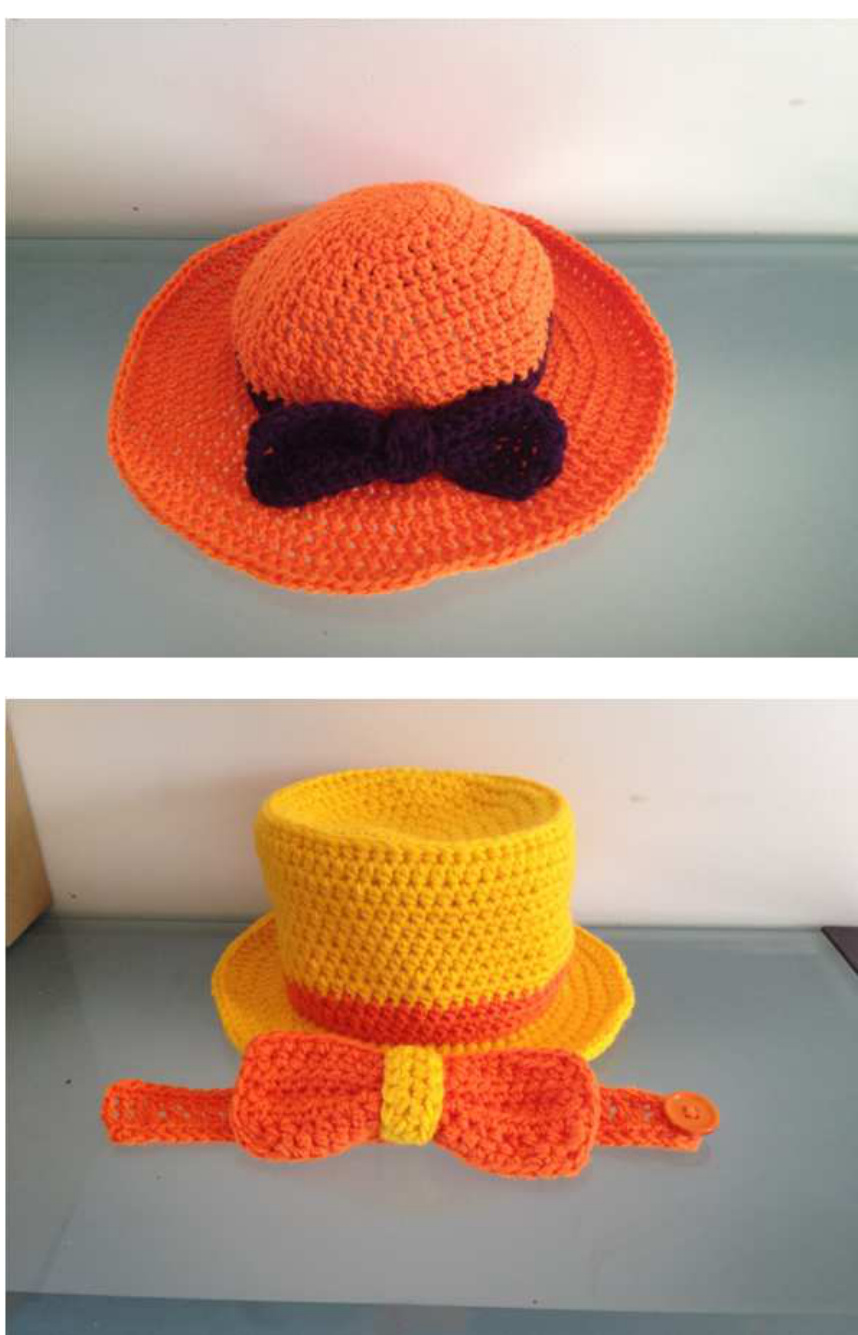
Photos & Size Customisation:
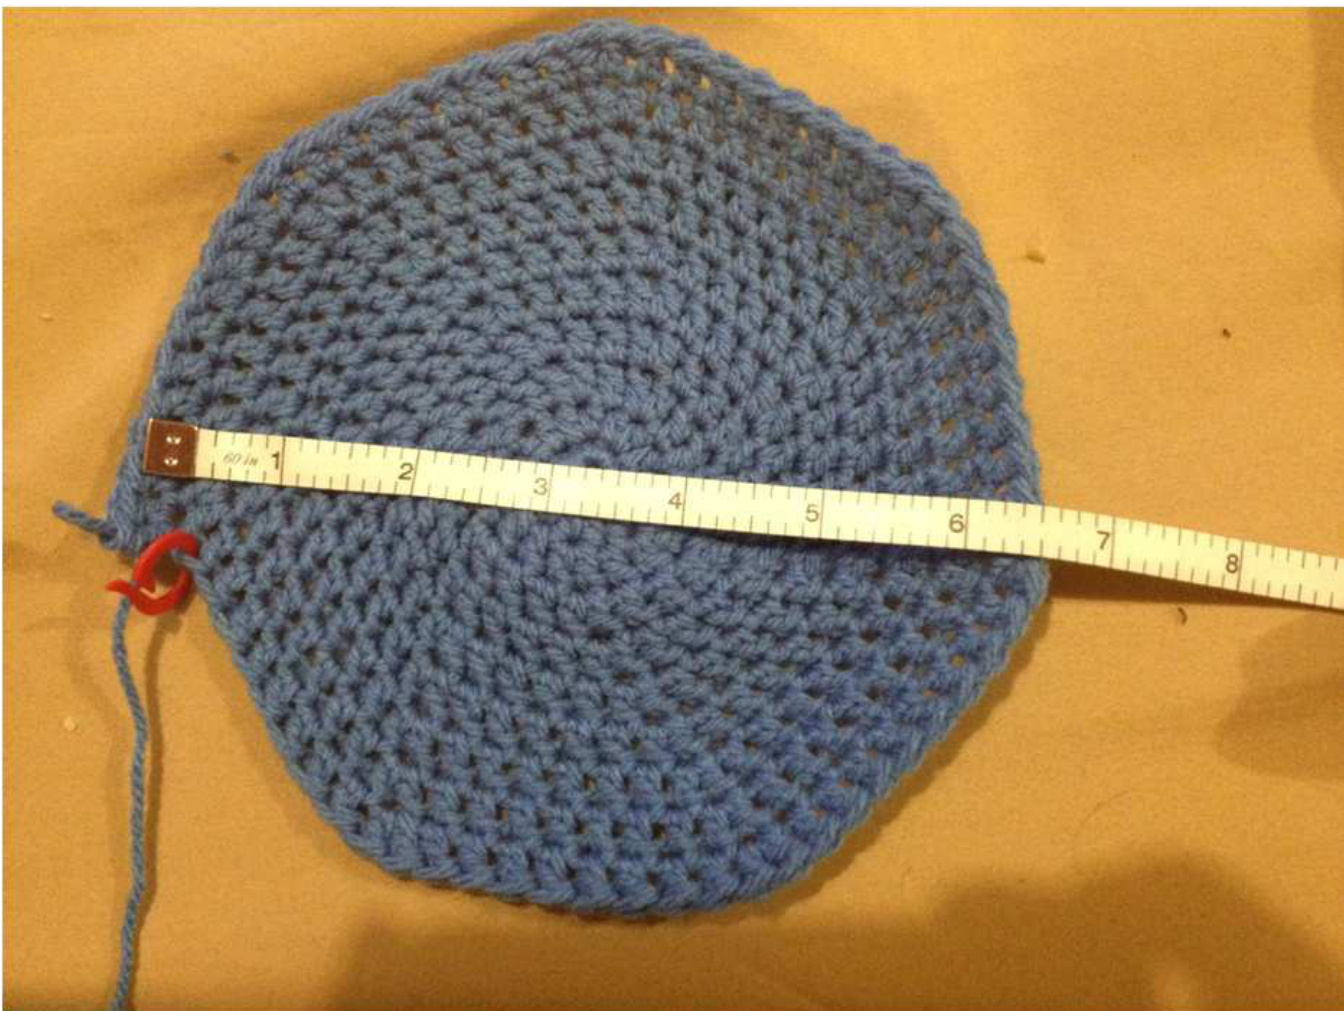
Work in continuous rounds, increasing by 7 each round, until the Diameter (straight across) of your Hat equals is the required Width (refer to size chart).
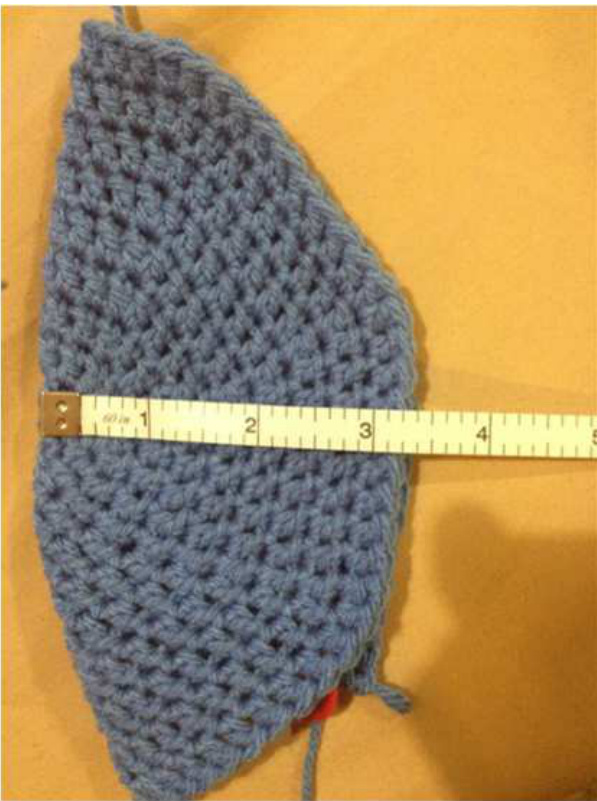
Then, work in continuous rounds, without increasing, until the Height of your Hat (folded in half) is the height of of round less than the required Height (refer to size chart) I.E. If you're making a Toddler size and your rows are approximately 1/3" (1cm) high, you will crochet until your Height is 14.5cm - 16.0cm (5.7" - 6.3") [Above Photo]. Then you will continue crocheting in rounds, without increasing until the height of your piece is 11.4cm - 12.1cm (4.5" - 4.8") [Left Photo]. Note: For the Top Hat, the Height measurement begins with the BPhdc round, not from the first round of the hat.
| Floppy Hat Customisation Measurements | |||
| Age | HeadCircumference | Hat Crown (Width/Diameter) | Hat Height (Length) |
| 1-3 years | 18.0-20.0 | 5.7"- 6.3" | 4.5"-4.8' |
| 45.7cm-50.8cm | 14.5cm-16.0cm | 11.4cm-12.1cm | |
| Inc by 7 each round | Brim: 8cm (3.2") wide | ||
| Top Hat Customisation Measurements | |||
| Age | HeadCircumference | Hat Crown (Width/Diameter) | Hat Height (Length) |
| 1-3 years | 18.0-20.0' | 5.7"- 6.3" | 4.1"-4.3" |
| 45.7cm-50.8cm | 14.5cm-16.0cm | 10.5cm-11.1cm | |
| Inc by 7 each round | Brim: 5cm (2") | ||
General Notes:
These sizes are approximations. They will not fit everyone within the age bracket. To ensure a good fit, you must measure as you make the hat. If you do not know the measurements of the recipient, and cannot get them, I recommend leaning towards the larger measurements of the age bracket. Rnds which contain the colour changes are what I refer to as "Ramps". These are how I make smoother transitions between colours when working in continuous rounds. lf you have another way you prefer to change colours, you can omit these rnds.
Floppy Hat Notes:
These measurements will give you a loose fitting hat. If you want a tight fitting hat, consider making the smaller size in the bracket or drop down a size. If desired, you can increase the width of your Brim, continuing to increase by the same amount each round. For a stiffer hat, crochet using two threads of yarn together, working in hdc instead of dc.
Top Hat Notes:
The Height and Brim measurements are suggestions only. These can be adjusted to make a taller or shorter hat as desired. If you do not want to crochet using two threads of yarn together, you can try the following to make your hat stiff: OThicker yarn (10-12ply) Working in sc OFabric stiffener
Bow Tie:
The Bow Tie is designed to be overly large, and should measure 17cm long and 6cm tall. The Tie Strap should be 30cm long. This will fit most toddlers, due to the stretch of trc stitches. If you're unsure, measure the wearer's neck and adjust accordingly.
Photos:

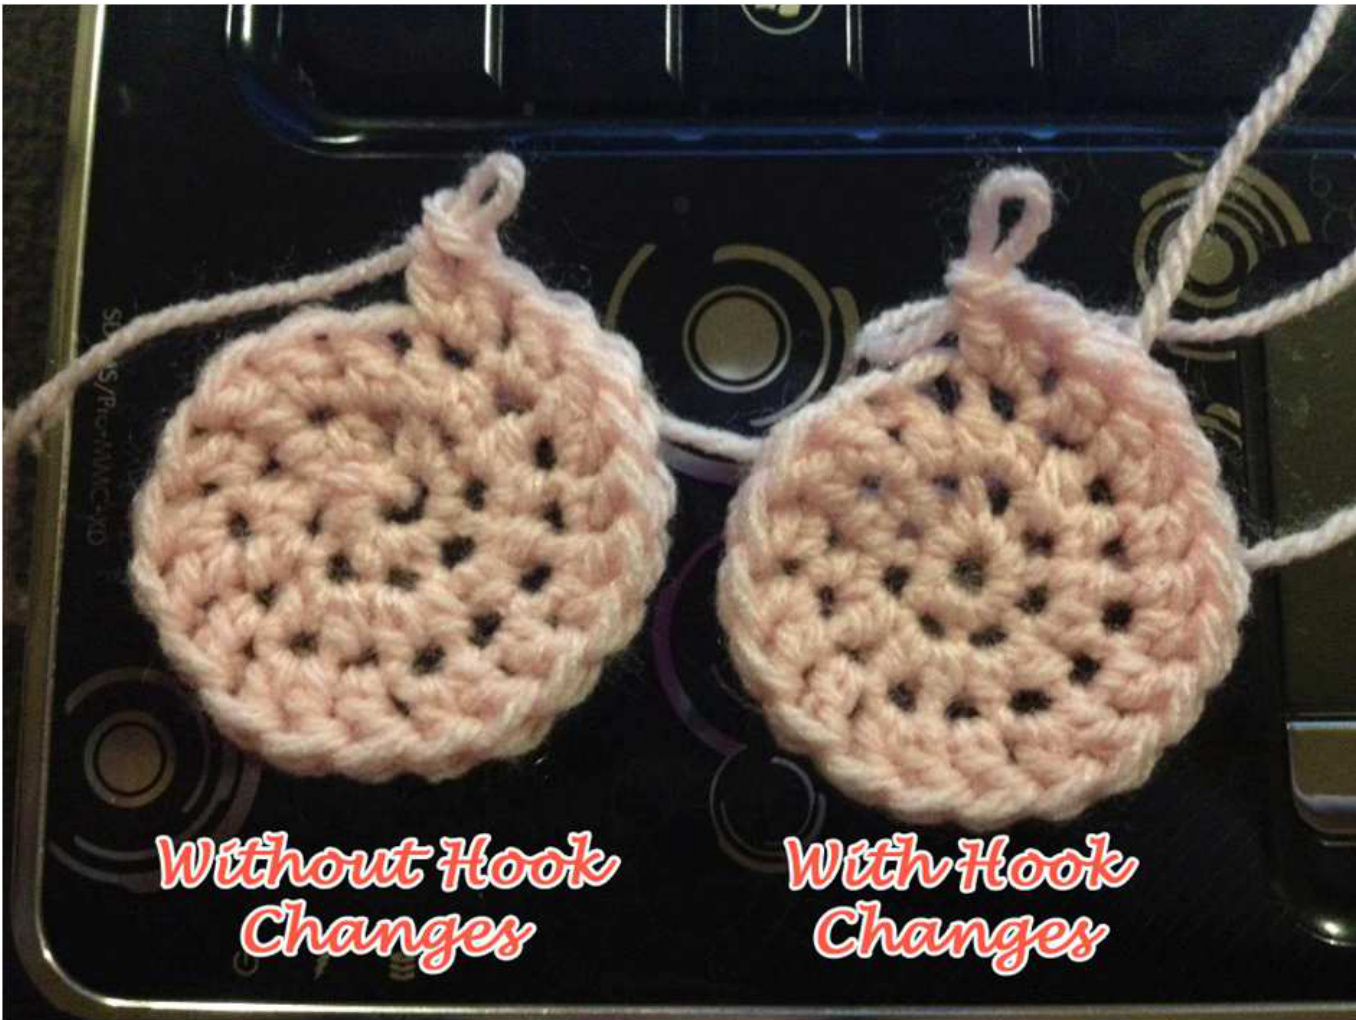
Why The Hook Changes?
You may be wondering whether the hook changes at the start of the Hat section are essential to the finished pattern. Quick Answer: No, the changes are not essential. Feel free to begin the Hat with a 6.00mm hook and continue with it. Now you're wondering why I've suggested such unnecessary size changes. Simply put, it results in a much nicer finish, at least in my opinion. Check out the comparison pictures below and decide for yourself.