DOLLY SODS-ACOLORWORK HAT
BY STEVEN HICKS
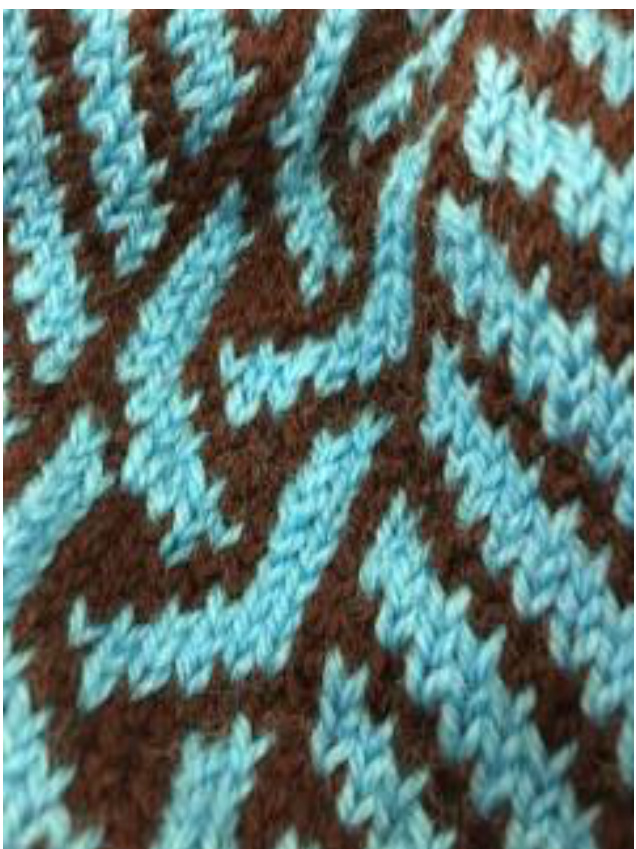
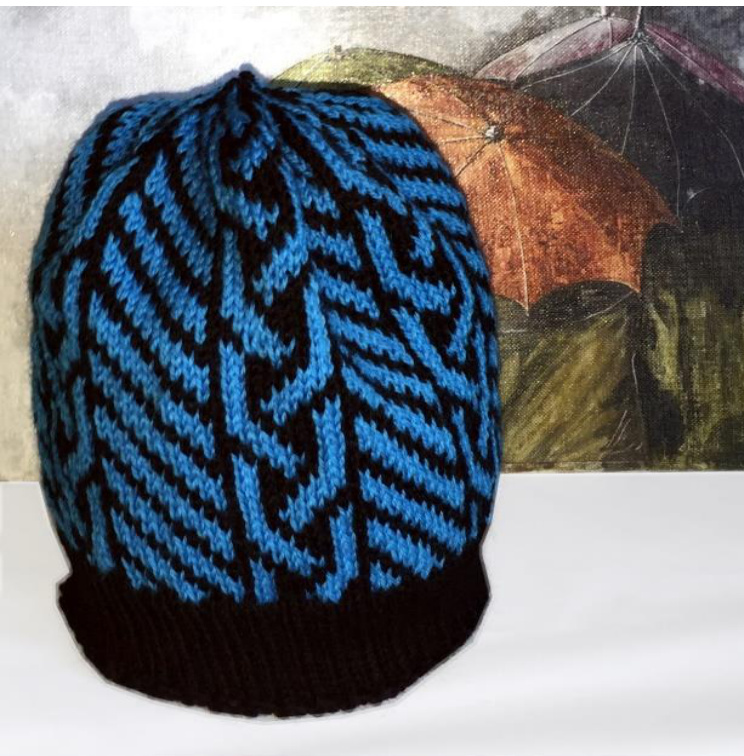
The Allegheny Mountains in eastern West Virginia are a varied landscape rich with natural wonders. One of these, Dolly Sods, is geographically out of place. Situated in generally-temperate West Virginia, Dolly Sods is a high-altitude plateau with flora and fauna normally found much farther north in Canada. The "sods", a local term for open mountaintop meadow, is named for German settler John Dahle. The Dolly Sods hat features stranded color work braids and sloping stripes. Worked in two high-contrast colors will result in an exciting and dynamic hat, while two colors closer in tone or hue will be a treat for a more sophisticated palette.
FINISHEDMEASUREMENTS
Small (20"/51 cm circumference) Medium (22"/55 cm circumference) Large (24"/58.5 cm circumference)
GAUGE
24 stitches = 4" / 10 cm
YARN AND NEEDLES
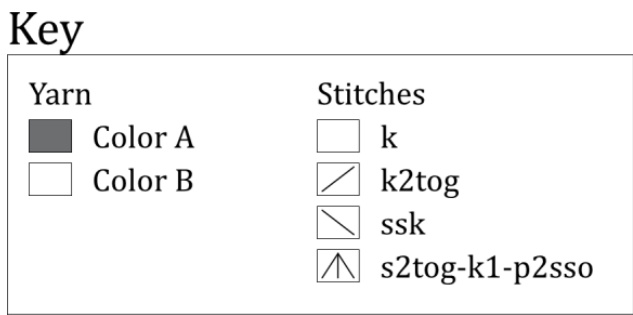
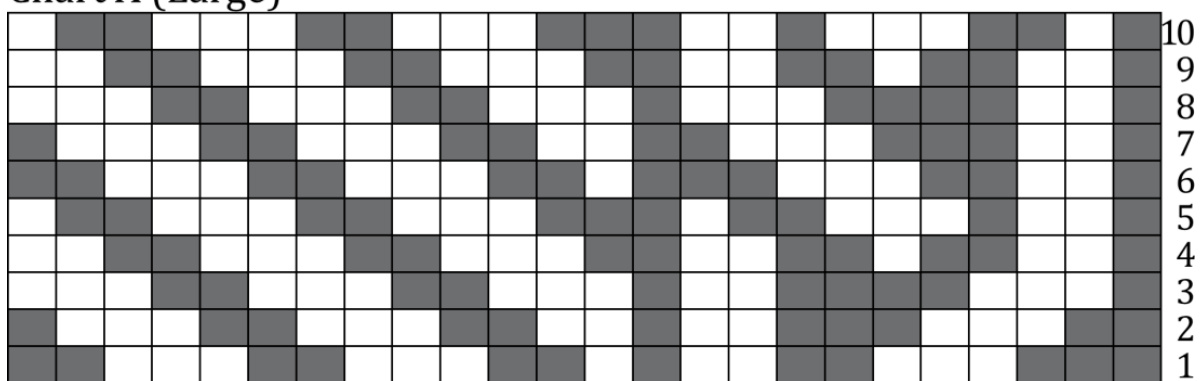
Brown Sheep Nature Spun Sport, or any similar sport weight yarn Color A: 150 yards (138 m) Color B: 100 yards (90 m) US #3/3 mm 16"/40 cm circular needle US #4/3.5 mm 16"/40 cm circular needle US #4/3.5 mm double pointed needles Marker Darning needle Instructions for the hat are written in three sizes—small, medium, and large—-and the three sizes will be shown in that order in the instructions. The color work sections of Dolly Sods are charted and each row should be read from right to left. There are two main sections - main body and crown - and each size has its own chart. Each chart is labeled with Chart A or Chart B and the size in parentheses. Please remember to use the chart for the size you are knitting. When working the fair isle charts, it's important to maintain even tension so that your finished project will be the correct size and your colors will lay evenly next to each other without puckering Or pulling. If you find that you need to adjust the pattern to fit a wider range of sizes, the hat can be easily sized by adding or subtracting stitches to the diagonal stripes section of Chart A. If you adjust the width of Chart A, you may need to work extra decrease rounds at the beginning of Chart B so that it will match the new width of Chart A. ABBREVIATIONSANDCHARTKEY
| K P | knit |
| K2tog SSK | purl knit two stitches together (decreases one stitch) |
| slip first stitch on left needle as if to knit, slip next stitch on left needle as if to knit, insert right needle into the front of both stitches and knit together (decreases one | |
| Sl2tog-k1-p2ss0 | stitch) slip two stitches together as if to knit, knit one, pass both slipped stitches over the knitted stitch (decreases two |
| PM | stitches) placemarker |

With Color A, cast on 120 (132, 144) stitches. Join in the round, and pm to mark beginning/end of round. Ribbing Pattern: \*k2, p1, repeat from \* to end of round Work ribbing for 3.5 (4, 5)"/8.9 (10.25, 12.7) cm (wide, foldable brim) or 1.25 (1.75, 2.25)"/ 3.25 (4.5, 5.75) cm (narrower, flat brim).
MAIN BODY
All sizes:
Work Chart A three times, repeating the chart six times each round, until hat measures 5.5" (6", 6.5") / 14 (15.25, 16.5) cm from the beginning of the hat. End after working Round 10. NOTE: If you knitted a wide brim to fold, measure from the fold.
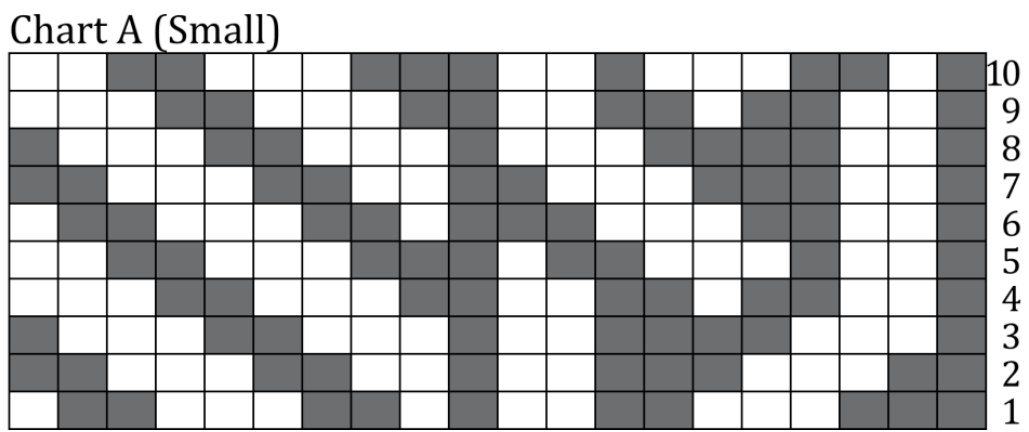
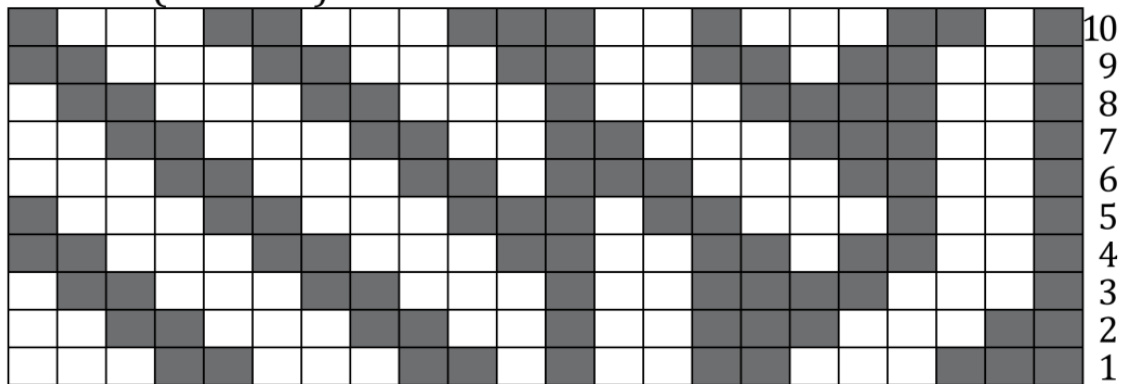
Chart A (Large)
Work Chart B, repeating the chart six times each round. Change to double pointed needles when the circular needle is too long.
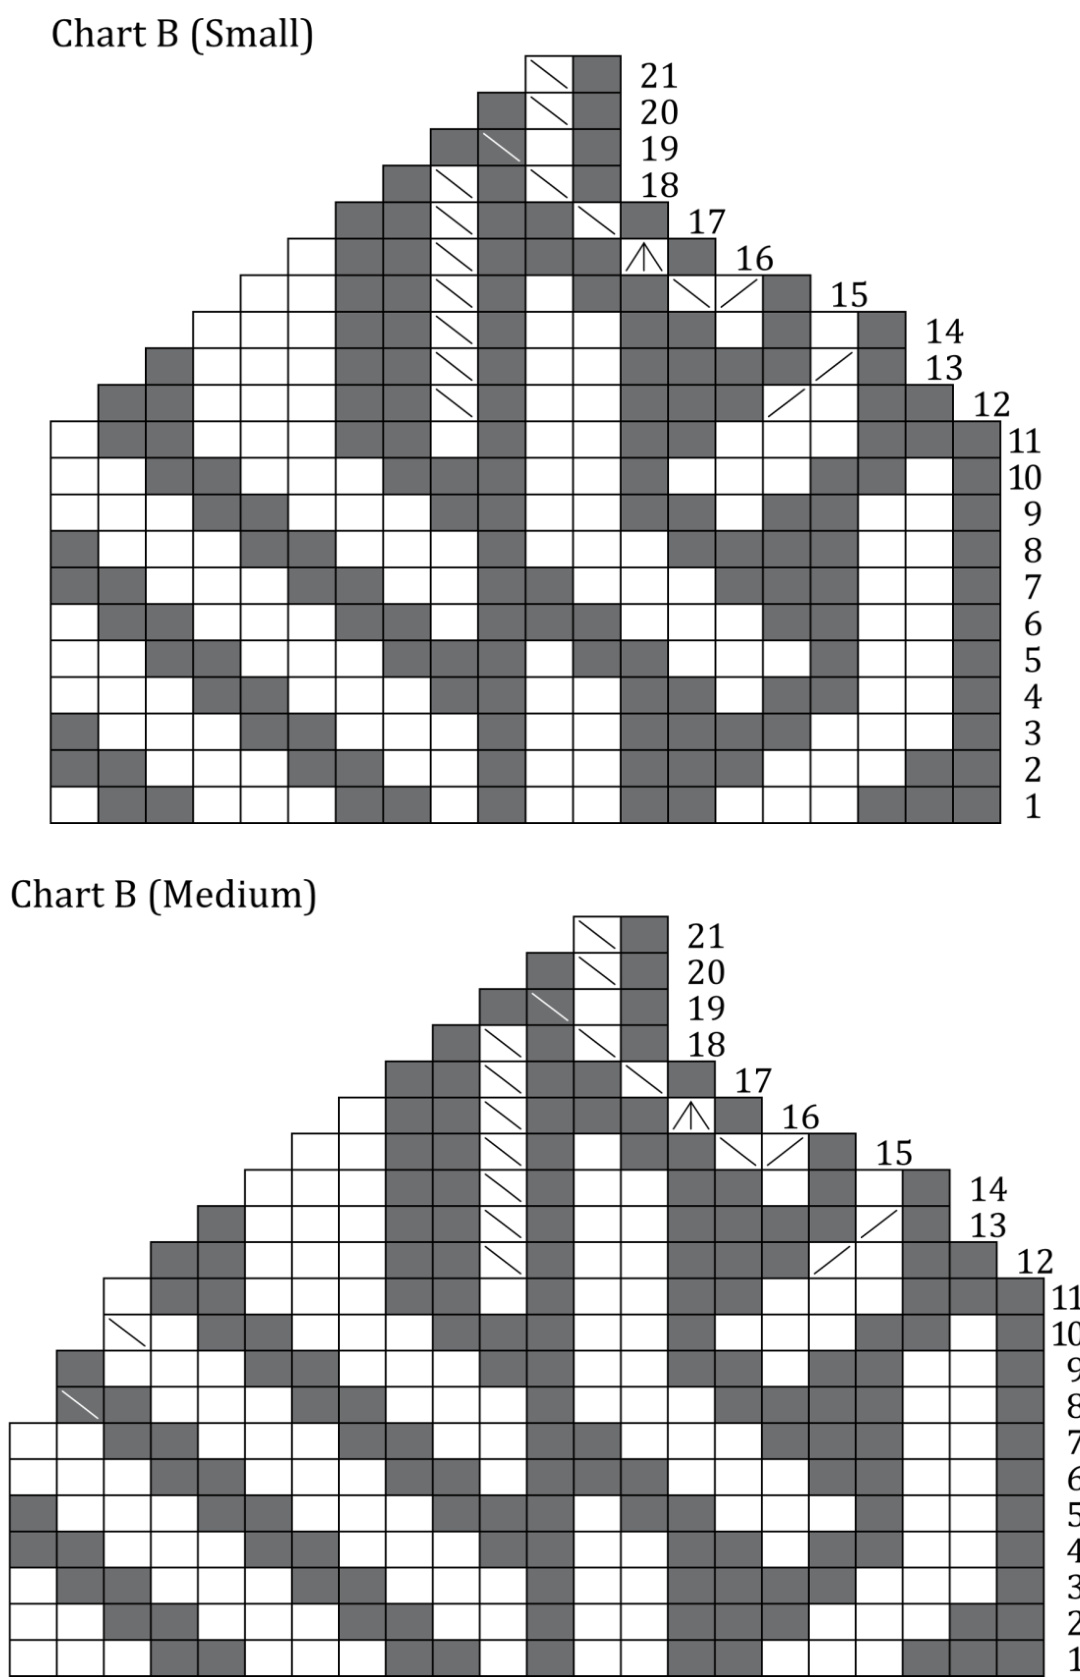


Chart B (Large) Next rounds: Break Color B. With Color A, \*ssk, repeat from \* until you have 6 stitches left. Break yarn and, using a darning needle, thread tail through 6 stitches on needles and pull tight.