"SARAH BISHOP"
A Semicircular Pi Shawl Designed by Priscilla White-Tocker
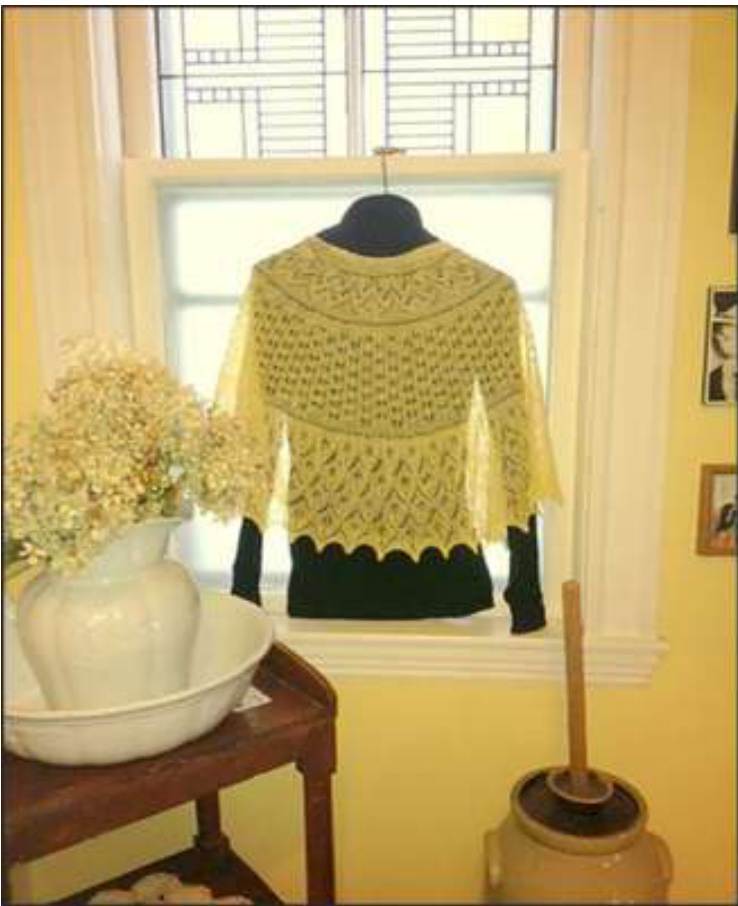
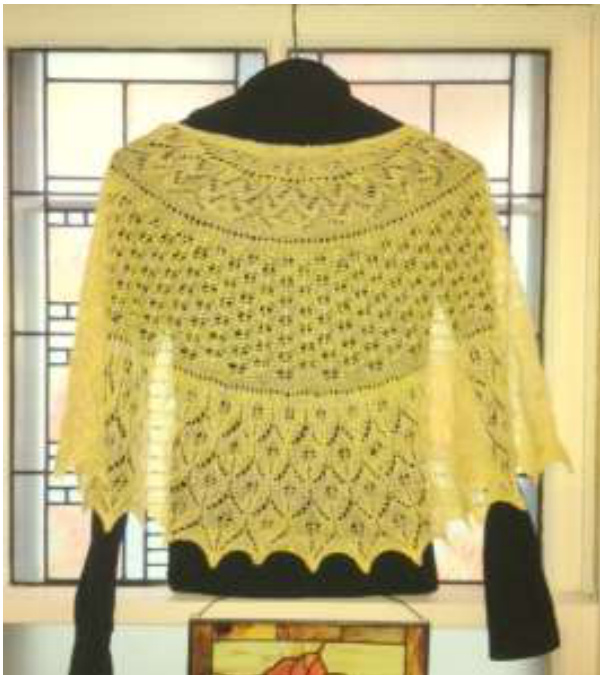
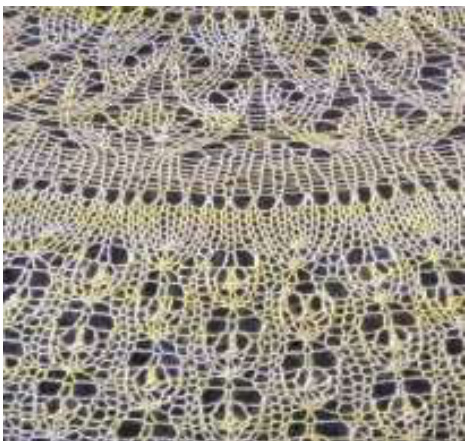
My oldest niece Sarah (the daughter of Pamela of my "Pamela's Cottage" design) is the embodiment of seemingly opposite elements - timeless elegance and playful whimsy. A lovely woman with exquisite taste in clothing, home décor, fine cuisine and elegant entertaining, she also dedicates the majority of her time to children - lots of children! Not only does she have three precious children of her own, but she is also a talented and dedicated teacher of younger children in a Montessori school and her affinity with children brings joy to her home and her work. Thus when designing this shawl I chose lace patterns that combine elegance - as in the Amphora and Oriel lace patterns (Amphora actually refers to "urn" which reminds me of the beautiful urns that Sarah has by her fireplace) - with the playfulness of the bouncy little Dew Drop lace that separates these patterns. This shawl is a half circle shape and uses the Pi Shawl construction. You can increase or decrease the size of your shawl depending upon the number of repeats you do of the final chart, Chart C, which can be repeated up to four times while maintaining the half circle shape. The suggested materials and gauge provided in the instructions were used to create the shawl in this photo, which was knit with two repeats of Chart C and measures 51" along the top edge with a radius of 22". The shawl would be equally lovely if you wished to make it larger by using DK or worsted weight yarn with larger needles. There are only a few simple stitches in the entire shawl, and they are used to create intricate patterns that appear much more difficult to knit than they actually are.
INSTRUCTIONS FOR SHAWL
Suggested Materials: (used for shawl in the photo) - Yarn: Hampden Hil Alpacas Artisan Yarns Alpaca Silk Lace; 2 skeins=1750 yds (1600.2 meters), 200 grams; color Turmeric - Needles: Us# 3 circular needles, recommend at least 27". Shawlin this photo is knit to gauge of 10 st per inch (blocked in stockinette). - Round stitch markers - essential - to mark off the repeats of the pattern within each row - Small tapestry needle for weaving in ends - Large blocking board and rust-proof pins for blocking
Legend:
K= knit P= purl YO= yarn over K2TOG=knit 2 stitches together (creates a right-leaning decrease) SSK=slip two stitches knit wise and separately to the right needle, then knit both together through the front of the stitches (creates a left-leaning decrease) P3TOG= purl 3 stitches together RS = Right Side WS= Wrong Side ST STITCH = may start on either the RS or the WS, depending upon where it falls in the pattern, and is as follows: (RS) P2, K to the end of the row, P2; (ws) P straight across BO = bind off
Chart Legend:
| K (P on WS) | |
| 1 | P (K on WS) |
| YO | |
| K2TOG | |
| SSK | |
| P3TOG | |
| Section to be repeated in each round |
General Notes on the Charts
- The blue shaded areas indicate the sets of stitches that are repeated multiple times in each round. - Each chart is read starting in the lower right hand corner, with row 1 at the bottom of each chart and the rows are read upward. All of the odd numbered rows are RS rows and read from right to left, and all of the even numbered rows are WS rows and read from left to right. - Charts are written to show all of the stitches as they appear on the RS, so when you are knitting the WS rows the K stiches are done as P, and viceversa (seeLegend)
Start to Knit:
1. Cast on 7 stitches and P one row. 2. P2, (yo, K1) to last 2 sts, P2 (10 stitches - this is a RS row) 3. St stitch 2 rows, ending with a RS row. 4. P2, (yo, P1) to last 2 sts, P2 (16 stitches) 5. St stitch 4 rows, ending with a WS row. 6. P2, (yo, K1) to last 2 sts, P2 (28 stitches) 7. St stitch 8 rows, ending with a RS row. 8. P2, (yo, P1) to last 2 sts, P2 (52 stitches) 9. St stitch 8 rows, ending with a WS row. 10. Knit 1 row as follows: P2, \*K1, YO, K2TOG, K2, YO, K2TOG, K1\*, P2 11. St stitch 7 rows, ending with a WS row. 12. P2, (yo, K1) to last 2 stitches, P2 (100 stitches) 13. St stitch 3 rows ending with a WS row. 14. Knit Chart A (Blue shaded area repeated 7 times in each row):
Chart A
| 0 | 0 | 0 | 1 | / | 0 | = | 23 | ||||||||||||||||||
| 22 | |||||||||||||||||||||||||
| 0 | 0 | 0 | / | - | 21 | ||||||||||||||||||||
| - | 0 | - | 20 | ||||||||||||||||||||||
| 0 | / | 0 | / | 0 - | 19 | ||||||||||||||||||||
| 18 | |||||||||||||||||||||||||
| / | 0 | 0 | / | 1 | 17 | ||||||||||||||||||||
| / | 0 | 0 | 1 | 16 15 | |||||||||||||||||||||
| 14 | |||||||||||||||||||||||||
| - | 0 | o | 一 | 13 | |||||||||||||||||||||
| 0 | 0 | 12 | |||||||||||||||||||||||
| / | 0 | 二 | 11 | ||||||||||||||||||||||
| - | 0 | / | 0 | 10 | |||||||||||||||||||||
| / | 0 | 二 | 9 8 | ||||||||||||||||||||||
| 0 | 1 | / | 0 | 》 | / | 0 | 7 | ||||||||||||||||||
| / | 0 | 0 | 一 | 1 | 6 5 | ||||||||||||||||||||
| 0 | 0 | - | 4 3 2 1 | ||||||||||||||||||||||
| 0 | 0 | 1 | / | 0 | 0 | 一 |
15. After completing Chart A, St stitch 6 rows, ending with a RS Row. 16. Then P2 (YO, P1) to the last 2 stitches in the row, P2 (total 196 stitches) 17. St stitch 8 rows, ending with a WS row. 18. Then Knit Chart B 6 times (total of 48 rows, blue shaded area repeated 19 times per row):
Chart B
| 8 | ||||||||||||||||
| 0 | 0 | 7 | ||||||||||||||
| 6 | ||||||||||||||||
| 0 | 0 | 5 | ||||||||||||||
| 4 | ||||||||||||||||
| > | 0 | 0 | 3 | |||||||||||||
| 2 | ||||||||||||||||
| 0 | 0 | L |
After completing all of the repeats of Chart B, St stitch 8 rows, ending with a WS rov 20. P2 (YO, K1) to the last 2 stitches in the row, P2 (388 stitches). 21. St stitch 5 rows ending with a WS row.
22. Then Knit Chart C (Note that you can repeat Chart C up to 4 times, depending upon the desired size for your shawl. If you repeat the Chart more than 4 times you will not be retaining the half circle shape of the shawl. Blue shaded area is repeated 31 times in each row):
Chart C
| 28 | |||||||||||||||||||||||
| 0 | / | 0 | 0 | 1 | 27 | ||||||||||||||||||
| 0 | 26 | ||||||||||||||||||||||
| 0 | 0 | 》 | 0 | 0 | 25 | ||||||||||||||||||
| 24 | |||||||||||||||||||||||
| 0 | 一 | 0 | 0 | 0 | 23 | ||||||||||||||||||
| 22 | |||||||||||||||||||||||
| 0 | 0 | 》 | 一 | 0 | 二 | 21 | |||||||||||||||||
| 20 | |||||||||||||||||||||||
| 0 | / | 0 | 0 | / | 二 | 19 | |||||||||||||||||
| 18 | |||||||||||||||||||||||
| 0 | 0 | 0 | 一 | 17 | |||||||||||||||||||
| 16 | |||||||||||||||||||||||
| 0 | 0 | 0 | 15 | ||||||||||||||||||||
| 14 | |||||||||||||||||||||||
| 0 | 0 | 0 | 1 | 0 | 二 | 13 | |||||||||||||||||
| 0 | - | 1 | 一 | 12 11 | |||||||||||||||||||
| 0 | - | 0 | 0 | - | 10 | ||||||||||||||||||
| 0 | 1 0 0 0 | 一 | 0 0 0 | 0 | 0 1 》 1 | 一 | 0 一 | 0 | 1 0 0 - 0 | / 0 0 0 | 0 | 1 | 二 二 | 9 8 7 6 5 4 3 2 1 | |||||||||
| 0 I I / |
23. Once you have completed your Chart C for the last time, you willthen knit 4 rows, although continue to P2 for the first 2 and last two stitches ofeachrow. BO method. I chose the following Picot Chain BO, also known as the Yarn-Over BO: 1. Knit 2 and use the left needle to lift the right stitch on the right needle over the left stitch and off the needle (as in a standard BO). 2. Insert your left needle into the front of the stitch on the right needle from right to left. Wrap your working strand around the right needle as if to knit it (thus creating your yarn over), and then lift the stitch on your left needle over the yarn over and off the needle. 3. Knit 1, lift the right stitch over the left and off the needle. 4. Repeat steps 2 and 3 until you have bound off the entire circle. Break off yarn and weave in all edges on the wrong side. Now block your shawl making scalloped edges as shown in the photo or, if you prefer, making an even edge around the circle. Pin the top edge of the shawl along the top straight edge of your blocking board, then measure outward from the center of this edge as you block so that the radius is as equal as possible at all points. Make sure that you leave the shawl on your blocking board until it is completely dry, and then you can can unpin, wear, and enjoy your beautiful shawl! If you have any questions about this pattern, please message pwhitocker on Ravelry.