Presto Mitts by Robbyn Kenyon
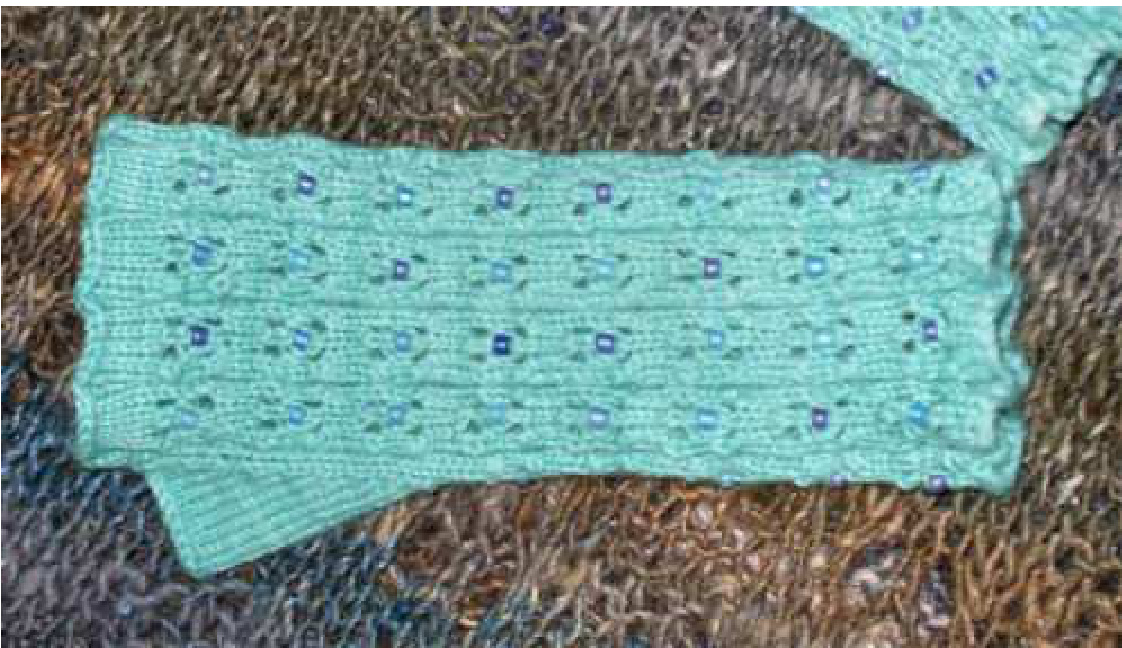
I know, I know. I nearly named these Yamp Mitts - Yet another mitt pattern. I chose the name, instead, to highlight their ease and quickness of construction :) And really, despite the lace (simple) and the beading (only every 1Oth round in pattern) they aren't difficult and hum along fairly quickly. You willikely find there to be most useful indoors, when a little extra is needed to keep those fingers flexible through the colder weather though they would be perfectly appropriate for cool (not frigid!) outdoor temperatures as well. I love fingerless gloves for driving - these would be perfect. These are made with fingering weight merino with a simple lace and bead pattern. The beads circle the entire cuffs of the mitts, but are omitted on the palms so that things like holding a glass of tonic or a steering wheel don't become problematic. They work up fairly quickly and can be done in a weekend - if there isn't a lot on your schedule :) Materials Fingering weight yarn - about 220 yards (around 50 grams) Double pointed needles, size 1 US ( $2.25\;\mathrm{mm})$ for average size. For a larger size, use size 2US $(2.75\;\mathrm{mm})$ needles. About 150 (not quite) size 6 (or E beads) in a color to suit your yarn. A size 12 ( $.75\;\mathrm{mm})$ crochet hook for placing beads Tapestry needle for weaving ends Terms K - Knit P - Purl YO - Yarn over K2tog - Knit 2 stitches together SSK - Slip, slip, knit M1 - Increase 1 stitch by casting on a backward loop B - Place bead. Pick up a bead on the crochet hook and slip hook into first stitch on the left-hand needle. Remove stitch from needle and pass bead over the end of the hook and down onto the stitch. Replace stitch on left-hand needle and knit as usual.

Pattern Cast 21 stitches onto each of three needles and join, being careful not to twist. 63 stitches. Rounds 1, 2 and 3: (K5, P2) 9 times. Round 4: (K2tog, YO, K1, YO, SSK, P2) 9 times. Round 5: (K5, P2) 9 times. Round 6: (K2, B, K2, P2) 9 times. Round 7: (K5, P2) 9 times. Round 8: (SSK, YO, K1, YO, K2tog, P2) 9 times. Rounds 9, 10, 11, 12, 13: (K5, P2) 9 times. Repeat rounds 4 - 13 another 5 times for a total of six repeats of the lace/bead pattern. Gusset, Right Mitt Round 1: K2, M1, K1, M1, K2, P2, (K2tog, YO, K1, YO, SK) 8 times. Round 2: K7, P2, (K5, P2) 8 times. Round 3: K2, M1, K3, M1, K2, P2, (K2, P1, K2, P2) 4 times, (K2, B, K2, P2) 4 times. Round 4: K9, P2, (K5, P2) 8 times. Round 5: K2, M1, K5, M1, K2, P2, (SSK, YO, K2tog) 8 times. Round 6: K11, P2, (K5, P2) 8 times. Round 7: K11, P2, (K5, P2) 8 times. Round 8: K2, M1, K7, M1, K2, P2, (K5, P2) 8 times. Round 9: K13, P2, (K5, P2) 8 times. Round 10: K13, P2, (K5, P2) 8 times. Round 11: K2, M1, K9, M1, K2, P2, (K2tog, YO, K1, YO, SSK, P2) 8 times. Round 12: K15, P2, (K5, P2) 8 times. Round 13: K15, P2, (K2, P1, K2, P2) 4 times, (K2, B, K2, P2) 4 times. Round 14: K2, M1, K11, M1, K2, P2, (K5, P2) 8 times. Round 15: K17, P2, (SSK, YO, K1, YO, K2tog, P2) 8 times. Round 16: K17, P2, (K5, P2) 8 times. Round 17: K2, M1, K13, M1, K2, P2, (K5, P2) 8 times. Round 18: K19, P2, (K5, P2) 8 times. Round 19: K19, P2, (K5, P2) 8 times. Round 20: K2, M1, K15, M1, K2, P2, (K5, P2) 8 times. Round 21: K21, P2, (K2tog, YO, K1, YO, SSK, P2) 8 times. Round 22: K21, P2, (K5, P2) 8 times. Round 23: K2, M1, K17, M1, K2, P2, (K2, P1, K2, P2) 4 times, K2, B, K2, P2) 4 times. Round 24: K23, P2, (K5, P2) 8 times. Round 25: K23, P2, (SSK, YO, K1, YO, K2tog, P2) 8 times. Round 26: K2, M1, K19, M1, K2, P2, (K5, P2) 8 times. Round 27: K25, P2, (K5, P2) 8 times. Round 28: K2, Bind off next 21 stitches, K2, P2, (K5, P2) 8 times. Round 29: K4 (joining one side of the gusset to the other), P2, (K5, P2) 8 times. Round 30: K2, M1, K2, P2, (K5, P2) 8 times. Rounds 31, 32 and 33: (K5, P2) 9 times. Gusset, Left Mitt Exactly the same as for the right mitt, except for rounds 3, 13 and 23: Round 3: K2, M1, K3, M1, K2, P2, (K2, B, K2, P2) 4 times, (K2, P1, K2, P2) 4 times. Round 13: K15, P2, (K2, B, K2, P2) 4 times, (K2, P1, K2, P2) 4 times. Round 23: K2, M1, K17, M1, K2, P2, (K2, B, K2, P2) 4 times, K2, P1, K2, P2) 4 times. Bind off gently in pattern. Weave in ends. Make another one :)
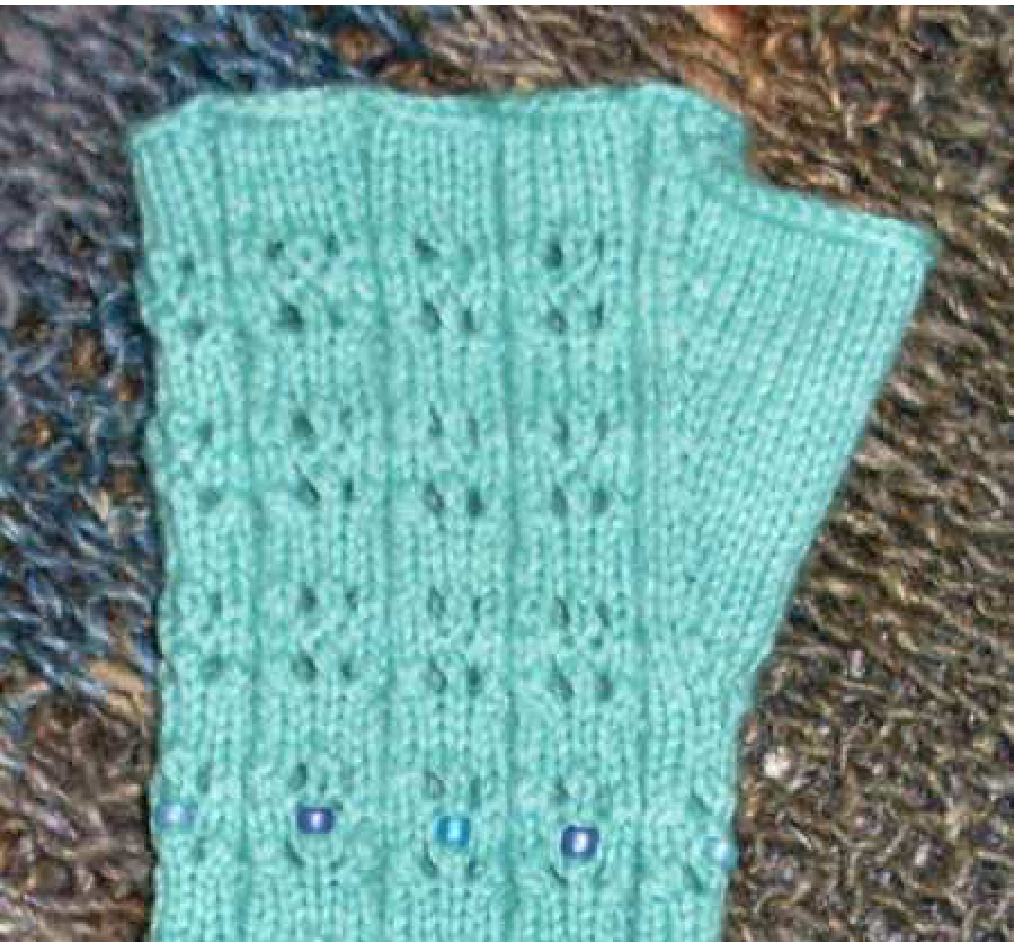
Notes: These are a bit shorter on both the arm and the hand than regular, outdoor, winterwear mitts. That's because I wanted them to provide some warmth (and decoration, of course!) but not be intrusive. Nothing is more off-putting that having to take mitts off every time you want to do something. There are no modeled shots of these because they were made as a gift for a woman with normal size hands. I have mega-paws and when I tried these on, they were obviously too tight and looked it :) I have used this stitch count and the basic $5\textrm{x}2$ ribbing before for mitts of my own (see Glacial Gauntlets of the Wolf) using size 2 US $(2.75\;\mathrm{mm})$ needles which worked out perfectly for me. I had thought going down a needle size would work well for a more normally sized glove and am pleased to see that it did so very nicely. Although not directly stated above, a single ball of sock yarn might do the trick for the pair. I say that with some reservations (YYMV and so forth) because it will depend on what your knitting style is like and (I suspect) whether you're making the average or the large pair. If you have any doubts, it's probably better to have extra yarn on hand.


