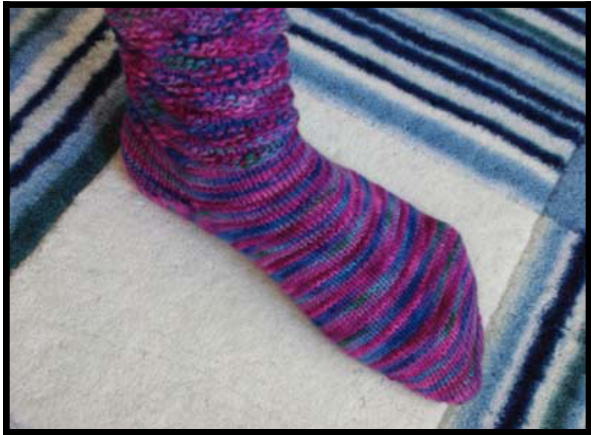
Uzumaki Socks
A Karen Harper Pattern for KnitFrontandBack.com Uzumaki means Spiral or Vortex in Japanese. 1 have always been a little bit in love with spirals and their many meanings. These socks are fantastic for keeping you ankles snuggly warm when it gets chilly and the rib is very easy to do.
Gauge: 6 stitches/inch on 3mm needles Yarn: 2 skeins Colinette Cadenza Color: Florentina Cast on 10 stitches using Turkish cast on method. A great tutorial can be found here: http://misocrafty.squarespace.com/journal/2006/1/ 30/turkish-cast-on-tutorial.html I like this cast on as it leaves no ridge and is just so darn easy. This pattern is written for either the 2 circ or magic loop method. Wrap and turn the following stitch like you did before. Stitches will now have 2 wraps when you pick them up. Turn work. Knit to first wrapped stitch. Pick up stitch and wrap, slip to RH needle, and knit through the back of the stitch. Wrap and turn next stitch (stitches will be double wrapped). Repeat until all stitches have been worked, picking up both wraps with the stitch and either p tbl or k tbl. Sock Toe: Set up round: Knit. Round 1: KFB the first and last stitch on each needle. Round 2: Knit Leg: Work 13 rounds even. You will need to ensure your stitch count is divisible by 8. Decrease or increase around on your last row as needed to get the number. Repeat rounds 1 and 2 until you have 26 stitches on each needle. Try on your sock and see if it just touches your baby toe. You want your sock to be snug so allow for a little stretch. If you need to add more stitches, repeat rounds 1 and 2 until they fit. If you need to remove some do so.
Rib set up rounds as follows:
Set up Round 1: (K4, P4) around Set up Round 2: K2tog, K3, P4, \*K4, P4 repeat from \* until end of round. Rib pattern: K4, P4 around. When you are satisfied with your little toe cap you will keep on knitting in stockinette until the sock tube touches your leg when you try it on. Now is the time to turn your heel YAY! Work in rib pattern until the sock reaches the length in leg that you want. By decreasing ONCE at the beginning of the second set up round you ensure that your rib shifts over 1 stitch each additional round. Clever huh?
Turning the Heel:
Purl across the back to the last stitch, wrap and turn. Knit to last stitch, wrap and turn. Continue until you have 6 stitches (or approximately $20\%$ of whatever number you end up with on each needle) left unwrapped. Continue until sock is desired length, then BO off using EZ's sewn BO. I use this for all my socks, its super fast, easy and wonderfully stretchy! Great link here for a tutorial with pictures: http://www.woolywonder.com/classpages/sewncas toff/sewncastoff.htm Purl across to first wrapped stitch. Pick up wrap and stitch and purl together through the back loop. Make a mate and VOILA! Socks!


