Lady Bugs!
Skill level: Beginner Size: One Size About 5.5in long, 3.5in wide Materials: Pair of US Size 4 (3.5mm) knitting needles Worsted-weight yarn in red and black, much less than 1 ball of each Crochet hook size J (for crocheting antennae) Tapestry needle for sewing together/attaching antennae Some fiberfill stuffing Gauge: Exact gauge is not essential to this project
Notes:
1. Ladybug is knit in two (2) pieces and sewn together 2. Ladybug is knit entirely in Stockinette stitch. 3. When pattern has instructions followed by "- ## st", that is the number of stitches you should have after completing the row. HEAD/BODY (Make 2. One is all black and the other is black and red) Beginning at the top of the head, with black, cast on 6 sts. Row 1: Purl Row 2 (increase row): kfb in each st across - 12 sts Rows 3 - 9: Work in St st, beginning on WS (purl) Row 10 (decrease): \*k, k2tog - rep from \* across - 8 sts Row 11: Purl Row 12: k, k2tog, k2, k2tog, k - 6 sts Row 13: Purl Change to red. (only do this for one piece, the other will be all black) Row 14: Knit Row 15: Purl Row 16 (increase): kfb in each st across - 12 sts Row 17: Purl Row 18: \*k, kfb - rep from \* across - 18 sts Rows 19 - 37: Work in St st, beginning on WS (purl) Row 38 (decrease): \*k, k2tog - rep from \* across - 12 sts Row 39: Purl Row 40 (decrease): k2tog across - 6 sts Do not bind off. Cut yarn, leaving a long tail. Draw tail through remaining 6 sts, pull tog tightly and knot securely.
ANTENNAE (Make 2)
With black, crochet a single chain until desired length is reached (I like to do 6). Cut yarn just above the knot. This is the tip of the antenna. Working on the opposite end (not the tip side), thread remaining yarn through tapestry needle. Insert needle into the top of the head (where you want the antenna to be). Insert the other antenna in the same way. Pull the two yarn ends tight, and tie them together (on Ws) to secure in place.
FINISHING
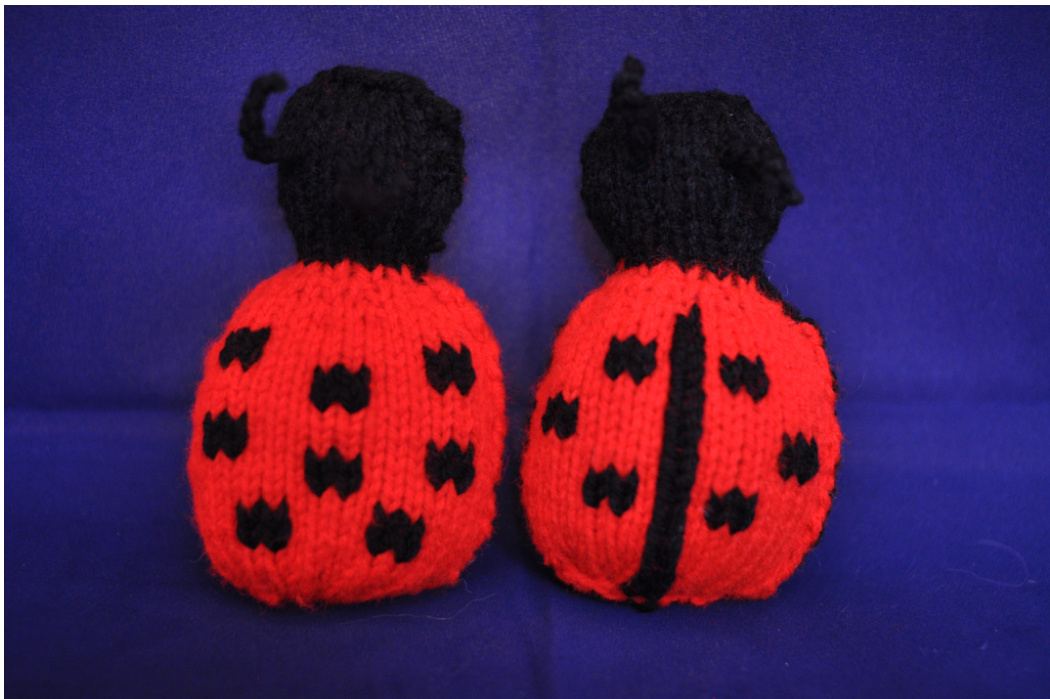
Embroider spots to the red side of the body using the duplicate stitch. I don't follow any specific pattern; I just make 2x2 spots all over. Sometimes I like to embroider a line down the back of the ladybug as well. Seam the head of both pieces together. Stuff lightly. Seam the rest of the body, leaving the bottom open for stuffing. Stuff, and then seam bottom closed. Abbreviations: k - knit p -purl rep - repeat St st - stockinette stitch tog- together kfb - knit into front and back k2tog - knit two stitches together RS - right side WS - wrong side st(s) - stitch(es) nd designed by Victoria Showalter (me!) So please, don't reproduce this pattern. Thanks


