Skills
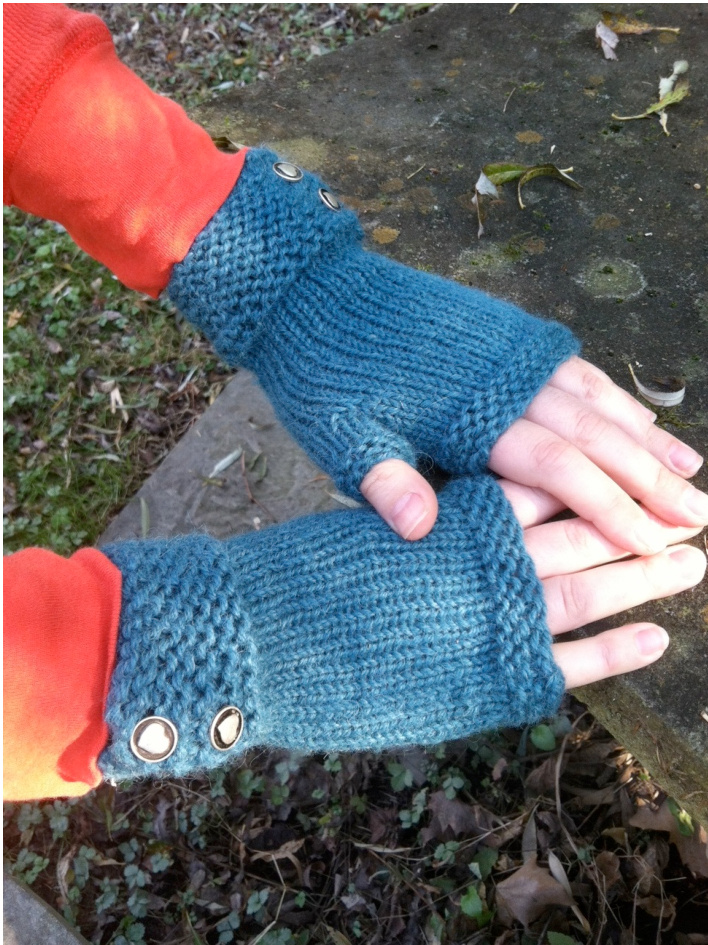
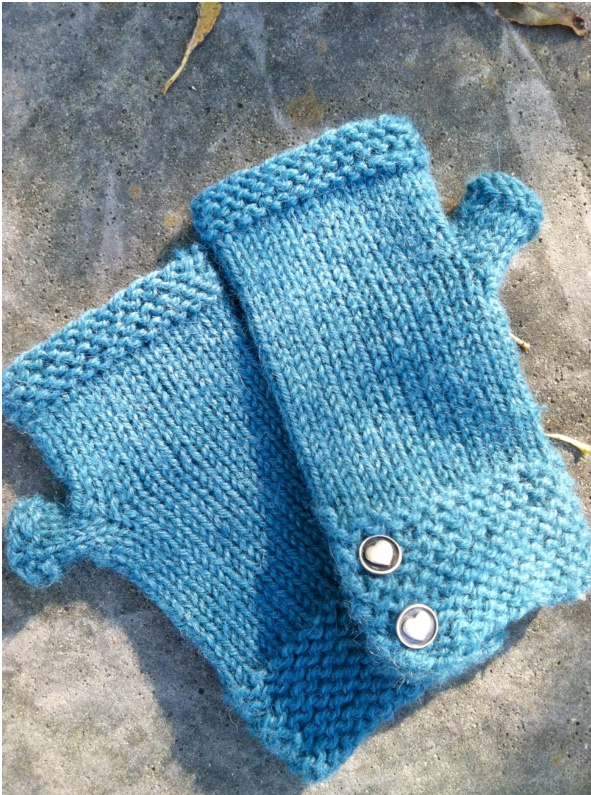
This pattern is appropriate for beginners who have experience working in the round. You will also need to bind off purlwise, and increase by knitting into the front and back of a single stitch (both easy tasks), and it's also a good introduction to the afterthought thumb technique. The mitts are knit in one piece from the wrist up, with the wrist trim knit back-andforth (flat) before joining your work in the round to knit the stockinette stitch portion of the hand. Waste yarn is used to hold a place for the thumbs, with those stitches picked up and knit after the main part of the mitts are finished. No seaming! These mitts knit up quickly, and require only one skein of Cora Color yarn—our own locally shorn and spun New York State wool/alpaca blend from Tahki Yarns. They are inspired by a pair that I saw in Sundance Catalogsimple, stylish, and they sit low enough on the fingers to keep you warm without getting in your way. The buttons provide an extra opportunity to personalize. This is perfect gift knitting, quick and easy so that you have more time to indulge in your egg nog. In fact, I've written out all of the instructions rowby-row so you can check them off as you go, making it easy to keep track if you've already dipped into the punch bowl, or if you're toting these along on holiday shopping trips. Also, there's no purling until the last five rows!
Gauge: 4 stitches and 7 rows per inch
Materials
One skein Cora Color from Tahki Yarns (92 yards/50 grams) Size 8 circular needled with 36in cable (or size needed to obtain gauge) or Size 8 straight and double pointed needles (or size needed to obtain gauge) Waste yarn (10 inches is plenty) Yarn needle (for weaving in ends) 4buttons Also: sewing needle and thread to attach your buttons, depending on size of buttons
Left Mitt
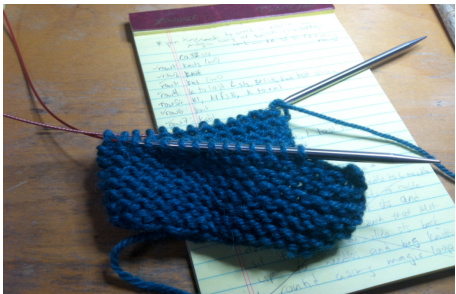
Cast On 32 Stitches Begin by working back and forth in garter stitch as follows: Row 1: Knit Row 2: Knit Row 3: Knit Row 4: Knit to last 2 stitches, bind-off 1 stitch, knit last stitch Row 5: K1, k1f&b, knit to end Row 6: Knit Row 7: Knit Row 8: Knit Row 9: Knit Row 10: Knit to last 2 stitches, bind-off 1 stitch, knit last stitch Row 11: K1, k1f&b, knit to end Row 12: Knit Row 13: Knit Row 14: Bind-off first 4 stitches, knit to end. After working row 14, join your work so that you are knitting in the round, either using a long circular needle for magic loop (see picture at right) or switching to DPNs.
Work stockinette stitch in the round (knit every round) for 2.5 inches Place thumb, as for an afterthought thumb, as follows: knit first 12 stitches, knit 4 stitches using waste yarn, turn your work, purl 4 stitches using waste yarn, turn your work, knit to end of round using your working yarn (not the waste yarn—just let that hang, you will go back to those stitches at the end.) Continue working stockinette stitch in the round (knit every round) until piece measures 4.25 inches from garter trim. Purl 1 row Knit 1 row Purl 1 row Knit 1 row Bind-off purlwise
Right Mitt
Cast On 32 Stitches Begin by working back and forth in garter stitch as follows: Row 1: Knit Row 2: Knit Row 3: Knit Row 4: Knit first 3 stitches, bind-off one stitch, knit to end of row Row 5: Knit to last 3 stitches, k1f&b, knit last two stitches Row 6: Knit Row 7: Knit Row 8: Knit Row 9: Knit Row 10: Knit first 3 stitches, bind-off one stitch, knit to end of row Row 11: Knit to last 3 stitches, k1f&b, knit last two stitches Row 12: Knit Row 13: Knit Row 14:Knit Row 15/Round 1: Bind-off first 4 stitches, join your work so that yo the round, either using a long circular needle for magic loop or swit Work stockinette stitch in the round (knit every round) for 2.5 inches. Place thumb, as for an afterthought thumb, as follows: knit first 12 stitches, knit 4 stitches using waste yarn, turn your work, purl 4 stitches using waste yarn, turn your work, knit to end of round using your working yarn (not the waste yarn—just let that hang, you will go back to those stitches at the end.) Continue working stockinette stitch in the round (knit every round) until piece measures 4.25 inches from garter trim. Purl 1 row Knit 1 row Purl 1 row Knit 1 row Bind-off purlwise
Thumbs
Carefully pick out the waste yarn used as a placeholder for one of your thumbs, putting the loops on your long circular or double-pointed needles as they come free of the waste yarn. Also, pick up one stich on each "side" of the two rows of stitches. You should have 10 thumb stitches on your needles. Reattach working yarn and begin knitting in the round such that the smooth (knit) side is on the outside, matching the hands. Knit every round until thumb measures 0.5 inches. Purl 1 row Knit 1 row Bind-off purlwise Repeat for other thumb.
Finishing
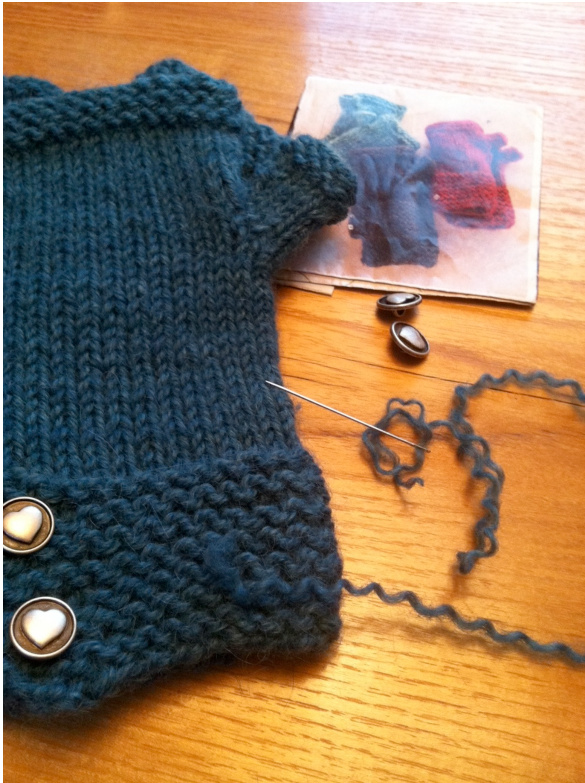
Weave in ends, block mittens (I used a couple of yarn needles to hold the ends of the garter trim where I wanted them to overlap for the buttons so that they blocked out evenly), sew buttons to flap such that they line up with the buttonholes. Note on sewing buttons: I used a small length of leftover Cora and separated the plies to make matching thread in order to sew on my buttons. If you do the same, remember to twist the thread as you work to strengthen the singles— otherwise the yarn may fray and break. If your yarn needle is too big for your buttons, use a large sewing needle. Special thanks to Gail and Meghan at the Cornwall Yarn Shop, for enabling me.


