Mini Hat Ornament
By Gail Bable, copyright November , 2004
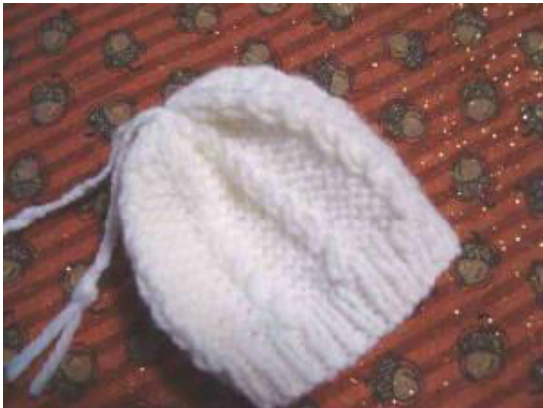
Materials needed: Small amount of fingering weight yarn Yarn needle Size 1 or 2 needles. 2 stitch Cable (2stC): Knit 2 stitches together leaving them on the left needle, then knit in the right hand stitch again, slide to right needle Cast on 36 sts. Brim: Rows 1 to 6: K1, P1 repeat across Hat Body: Row 1: P2, \*2 st.C, P4\*, repeat from \* to \* across ending with a P2 Row 2 and 4: Purl Row 3: P2, \*K2, P4\*, repeat from \* to \*across ending with a P2 Repeat rows 1- 4, 4 more times . Total of five cable repeats Decreasing rows: Row 1: P2, \*2stC, P2, P2 tog\*, repeat from \* to \* across ending with a P2 Row 2 and all even : Purl Row 3: P2, \*K2, P1 , P2 tog, \* repeat from \* to \* across ending with a P2 Row 5: P2 tog, \*K2, P2 tog\*, repeat from \* to \* across ending with a P2 tog Row 7: Break off Yarn and run through stitches with yarn needle to gather top of hat. Seam side and add a pom-pom, I-cord tassel , or braid to the top to finish off your hat.
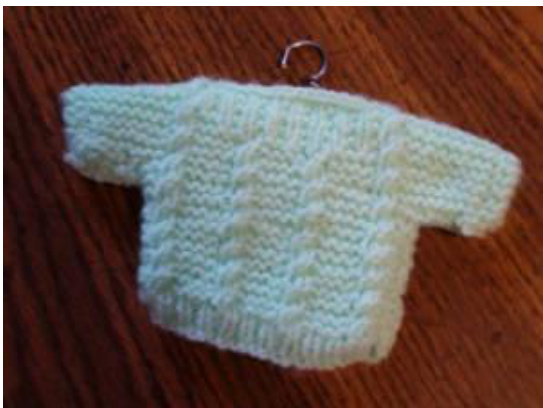
Mini-Sweater
Materials needed: -Size 1 or 2 needles -Baby weight or fingering weight yarn, an ounce orso ( a plain color is recommend so the pattern shows) -Yarn needle Optional -heavy gauge wire and pliers for a hanger Stitch gauge is not important Cable pattern: 2 stitch Cable (2stC): Knit 2 stitches together leaving them on the left needle, then knit in the right hand stitch again, slide to right needle Cast on 24 stitches Row 1-4: K1, P1 across Row 5: P2, \*K2, P4\* across ending with a K2, P2 Row 6: Purl Row 7: P2, \*2stC, P 4\* , repeat across ending with a 2stC, P2 Row 8: Purl Rows 9 - 24: Repeat Rows 5 -8, four more times Row 25: Work Row 5 and cast on 8 stitches Row 26: Work row 6 and cast on 8 stitches (40 sts.) Row 27: K 2, P 8, \*2stC, P4\*3 times, 2stC, P8, K2 Row 28: K2, P36, K2 Row 29: K2, P 8, \*K2, P4\* 3 times, K2, P8, K2 Row 30: same as row 28 Row 31: same as row 27 Row 32: same as row 28 Row 33: K2, P8, K2, P2, \*K1,P1\* 6 times, P2, K2, P8, K2 Row 34: same as 28 Row 35: K2, P8, 2stC, P2, \*K1, P1\* 6 times, P2, 2st.C, P8, K2 Row 36: same as row 28 Row 37:Same as row 33 Row 38: same as row 28 Row 39: K2, P8, 2stC, P2, bind off 12, P2,2stC, P8, K2 Row 40: K2, P12, Cast on 12, P12, K2 You now have half the ornament knit. Work from row 40 to row 1 again to knit the second side of your sweater. On rows 25 and 26 you'll of course be binding off the 8 sleeve stitches instead of casting on and you'll bind off the 24 stitches when you've worked down to row 1. Seam up your sides and sleeve underarms when completed using a mattress stitch on the outside. This also works great in Sport weight yarn casting on only 18 stitches and working the cable pattern only 4 times before casting on for your sleeves. The pattern in P2, \*2stC, P2\* 3 times, 2stC, P2.


