Your Message Here Shawl
By Heather Anderson
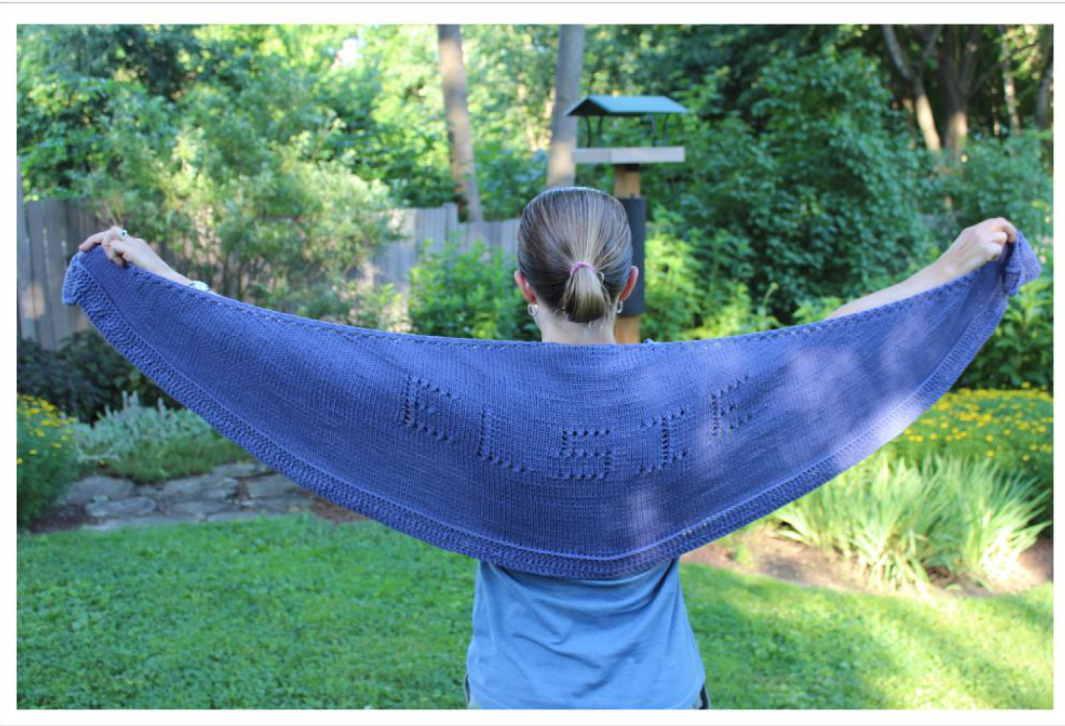
This shawl came about after a very detailed lace shawl that I knit my grandmother sprouted legs and walked away from her nursing home room less than two weeks afterl had given it to her. writing her name in the knitting is my attempt to make sure she gets tokeepthisone! Although this is a pretty simple stockinette shawl, there are many ways you could spiceitupwithgarter ridges orextralacepatterns.Myprimarypurposewastolabel my grandmother's shawl (and make her laugh), but I'm sure there are plenty of messages that are worthy of being knit into a shawl. This could make for an interesting prayer shawl! I lookforward toseeingwhat people deemknit-worthy! My finished shawl was approximately 64" long by 16" deep (at center) after washing and light drying.
Materials:
Aran weight yarn (such as Lion Brand cotton Ease), 450 yds. U.s. Size 8 circular needles, 24" or longer, or size needed to obtain gauge Knitting graph paper (available to print for free online) Gauge: 17 stitches = 4 inches Markers
Graph:
Graph your desired message by using the following information. I made each letter 10 rows high and 10 stitches across (think of that as five sets of two). There are 5 stitches (spaces) between each letter. Each yo that I made was followed by a k2tog to balance it out. so, for the top row of an E where I wanted five yarn overs, I did (yo, k2tog) five times. You'll want to figure out how to center your writing by taking the total number of letter stitches and stitches between the letters and subtracting them from the total number of stitches on your needle. Divide the remaining balance of stitches by two and then you'll know how many "extra" you have on each side. For example: If I had 119 stitches on my needle, and the "ELsiE" graph had 50 stitches for the letters and 20 stitches for the spaces in between letters, I would subtract like this: 119-70= 49. I would then divide 49 by two to see how many "extra" stockinette stitches I would have on either side of my name (don't let that odd number fool you...no one will be able to tell if they are one stitch different). That number will change every row because you will continue to increase, however you may place markers on the first row of your chart knitting so that you know where your chart begins and ends. All ws rows of your chart are purled for this pattern.
Begin:
cO 6 stitches Row 1 (RS): k2, yo, k1, yo, k1, yo, k2 (9 sts) Row 2 (Ws): k2, yo, p1, yo, purl until 2 stitches left, yo, k2 Row 3: k2, yo, k1, yo, knit until 2 stitches left, yo, k2 I repeated rows 2 & 3 until I had 119 stitches (ending with a ws row 2). This gave me enoughroomtowritethefiveletters andfourspacesbetweentheletterswithabout 25 stitches on each side of the name. You may need to repeat rows 2 & 3 more if you are writing something much longer than I wrote.
start writing:
Your rows should go as follows: RS: K2, yo, k1, yo, knit your "extra" stitches (subtract one for the one you just knit), place a marker, knit the first row of the chart you graphed, place a marker, and knit the other set of "extra" stitches until there are two stitches left, yo, k2. Ws: k2, yo, p1, yo, purl across until two stitches are left, yo, k2 Be careful to count the 10 stitches of each letter carefully. If you have only one yo for the top of a letter, you still have eight stitches to knit before you get to the four stitches betweeneachletter.
Happily Knitting:
your chart is complete, you can continue along with the following rows. Row 1 (Ws): k2, yo, p1, yo, purl until 2 stitches left, yo, k2 Row 2: k2, yo, k1, yo, knit until 2 stitches left, yo, k2 I ended my stockinette knitting/increasing when I had 275 stitches (ending on a Ws row). You can continue on to make a larger shawl, just be prepared to use more yarn.
Edging:
At the end of the last ws row, cast on 7 stitches and turn your work. Row 1 (Rs): k2, yo, k2tog, k2, ssk (this absorbs one stitch from the body of the shawl), turn Row 2 (ws): sl1 (purl-wise with yarn in front), k2, yo, k2tog, k2, turn Repeat rows 1 & 2 until all body stitches have been worked. Bind off remaining stitches.
Finishing:
Weave in ends, block as desired, and enjoy sharing your message!


