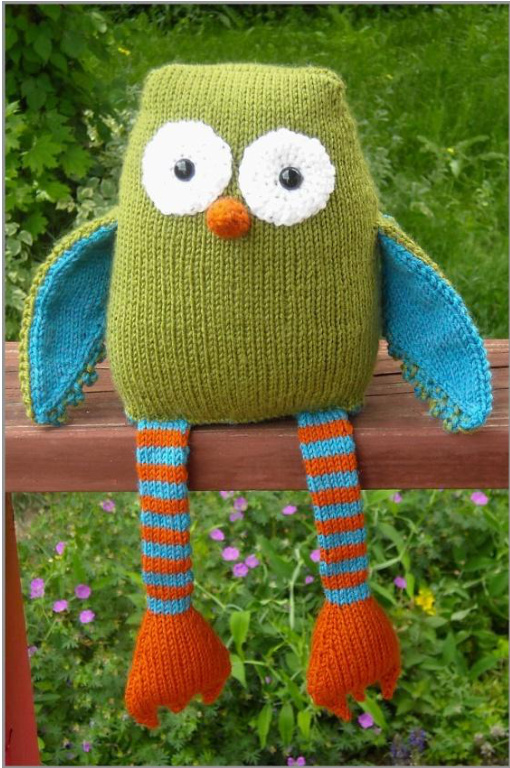
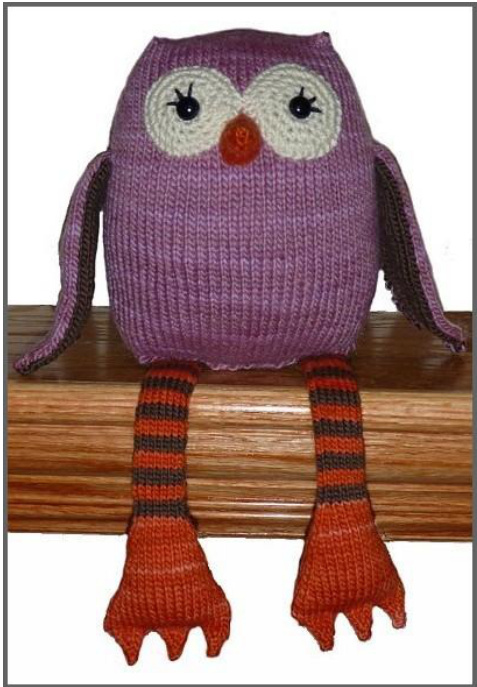
Lucy's OwI
By Rachel Gallagher-Miller
Materials:
· Worsted weight yarn 4 different colors: 150-200 yards MC, 100-120 yards CC1, 45-60 yards CC2, 20-30 yards CC3 (Sample owl at top is made using Malabrigo worsted with Damask Rose as the MC, Dark Earth as CC1, Glazed carrot as CC2, and Natural as CC3 · Size 6 (4mm) needles, including a pair of dpns (you can use the method/needles of your choice, such as Magic Loop, 2 circulars, or dpns) ● Size H (5mm) and I (5.5mm) crochet hooks · 12 mm buttons or safety eyes · Sewing needle to weave in ends & embroider eyelashes ·Stuffing ·Scissors · Black embroidery thread for eyelashes (optional)
List of Abbreviations
K: knit P: purl SC: single crochet Sts: stitches PM: Place marker KFB: knit into the front and back of the same stitch K2tog: knit two stitches together as one DPN: double pointed needle M1F: Make one front, an increase also known as "Make 1 Left". From the front, lift loop between stitches with left needle, knit into back of loop M1B: Make one back, an increase also known as "Make 1 Right". From the back, lift loop between stitches with left needle, knit into front of loop I-cord: Using a dpn, \*Knit a row. Slide row to other end of needle. Do not turn the work. Repeat from \*.
GAUGE AND FINISHED SIZE
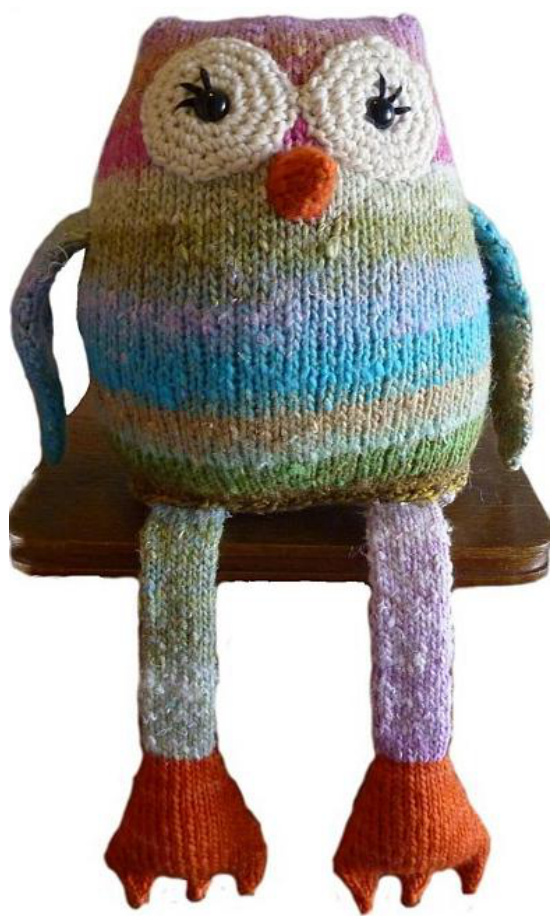
Gauge is really not important. Just use needles a size or two smaller than is recommended for the yarn you've chosen so that you're knitting tight enough that the stuffing won't show through when it's complete. When using a worsted weight yarn on size 6 (4mm) needles the Owl turns out about 14 inches tall from toes to top of his head; his body, alone is 7 inches high and 17.5 inches around, when stuffed and complete. (If you use a lighter yarn your owl will be smaller and if you use a bulkier yarn your owl will be bigger.)
Pattern notes:
· Please read through the entire pattern before starting in order to familiarize yourself with the instructions. · I used dpn's to knit the wings back and forth, and for the toes. · I used a 16" circular needle to knit the body, until it got too small and then I used a 32" circular needle to magic loop the top of the body and the legs. · The body and its parts are all worked separately and then sewn together once complete them. · The website Knitting Help (http:/www.knittinghelp.com/) has awesome videos and technical tutorials for nearly anything you might have trouble with here.
BODY
With CC1 cast on 30 stitches. Beginning and ending with a Purl row, work in stockinette stitch for 15 rows. Break yarn. With MC cast on 4 stitches to your circular needle then knit across the 30 stitches that are on your original needle. Cast on 42 stitches and join to work in the round. Place marker Rows 1-40: Knit all stitches. Row 41: K2tog, K36 (X2) Row 42: K all Row 43: K35, K2tog (X2) Row 44: K all Row 45: K2tog, K34 (X2) Row 46: K all Row 47: K33, K2tog (x2) Row 48: K all Row 49: K2tog, K32 (x2) Row 50: K all Row 51: K31, K2tog (x2) Row 52: K all Row 53: K2tog, K30 (x2) Row 54: K all Row 55: K29, K2tog (x2) Row 56: K all Row 57: K2tog, K28 (x2) Row 58: K all Row 59: K27, K2tog (x2) Row 60: K all Row 61: K2tog, K26 (x2) Row 62: K all Row 63: K25, K2tog (x2) Row 64: K2tog, K24 (x2) Row 65: K23, k2tog (x2)
Using Kitchener Stitch graft all the stitches to close the top of the head. If you prefer you can do this using a 3 needle bind off.
FEET & LEGS (MAKE 2)
Your owl needs two legs and two feet with three toes on each one! So let's start with the toes. I used 2 dpn's and knit the toes as an I-cord. This means at the end of each row, you DO NOT turn the work. Instead, slide it down to the other end of the dpn, pull the working yarn across the back and start the new row on the same side you just worked. Cast on 2 stitches in CC2. Row 1: KFB, K1 Row 2: K1, KFB, K1 Row 3: K1, KFB, K2 Row 4: K2, KFB, K2 Row 5: K all Row 6: K all Make 3 of these toes, slide them all next to each other on one dpn (do NOT cut the yarn after the third toe!). Cast on 18 sts. Join the stitches to work in the round. (36 sts total) Row 1: K all stitches Row 2: K all Row 3: K all Row 4: K2tog, K16 (x2) Row 5: K all Row 6: K15, K2tog (x2) Row 7: K all Row 8: K2tog, K14 (x2) Row 9: K all Row 10: K13, K2tog (x2) Row 11: K all Row 12: K2tog, K12 (x2) Row 13: K all Row 14: K11, K2tog (x2) Row 15: K all Row 16: K2tog, K10 (x2) Row 17: K all Row 18: K9, K2tog (x2) Row 19: K all Row 20: K2tog, K8 (x2) Row 21: K all Row 22: K2tog, K5, K2tog (x2) (14 sts)
Keep CC2 yarn attached if you plan on doing a stripey leg, otherwise go ahead and cut it! If you are doing a stripey leg you can just carry the yarn up the rows as you alternate colors, without cutting it. Next Row: Using CC1 K all stitches. Next, knit your rows alternating 3 rows CC1, 3 rows CC2, until you get to row 40, which you will knit with CC1 (as opposed to switching and knitting one row with CC2!). If you are not striping your legs then knit the 40 rows in CC1. Bind off all stitches. Now, go back and make your owl some more toes, another foot and one more leg!!! I'll be waiting here when you're done. That was fast! So now you have two lovely feet at the ends of two dangly legs. Now is a good time to weave in the yarn ends from the toes (leaving one long one to close the foot) and lightly stuff the foot. Then, using that long end you didn't weave in and a basic whip-stitch, sew the bottom of the foot/toe area closed.
EYE PATCH (MAKE 2)
Using CC3 and the size H (5mm) crochet hook, chain 4 then join to the 1st SC with a slip stitch to make a ring. Row 1: Chain 1, then SC 8 times into the loop you formed with the chain 4. PM for beginning of round. :0 each SC of the first round, join to first SC with slip stitch. (16 SC Row 3: Chain 1, \*1 SC in first SC, 2 SC in next SC. Repeat from \* to end of round. Join to first SC with slip stitch. (24 SC) Row 4: Chain 1, \* 1 SC in first SC, 1 SC in SC, 2 SC in next SC. Repeat from \* to end of round. Join to first SC with slip stitch. (32 SC) Cut a long tail, leaving enough yarn to sew the eye patch to the owl!
NOSE
Leaving a long tail to sew nose to face, CO 14 sts in CC2 and join in the round.
Row 1: K all Row 2: K2tog, K5 (x2) Row 3: K all Row 4: K4, K2tog (x2) Row 5: K all Row 6: K2tog, K3 (x2) Row 7: K all Row 8: K2, K2 tog (x2) Row 9: K all Row 10: K2tog, K1 (x2) Row 11: K2 tog (x2) Cut yarn and pull tail through remaining 2 stitches.
WING (MAKE 2)
at, in stockinette stitch on two needles using the Intarsia technique Cast on 7 stitches with MC, then CO 7 stitches with CC1. (If this is your second wing, your colors should be reversed: CO 7 stitches with CC1 then CO 7 stitches with MC.) You now have one needle with 7 MC stitches next to 7 CC1 stitches. Work all the MC stitches in the MC and the CC1 stitches in the CC1, twisting the two working yarns together as you switch colors to join the two sections of knitting.
Intarsia
is really quite simple, if at times a bit fiddly. It's just a fancy word for knitting with two colors side by side and not leaving a big gap between them. Don't let it intimidate you! It's easy-peasy once you get the hang of it. The trick is to make sure you wrap the yarns around each other when changing colors. You do this by picking up the new color from under the dropped color thereby wrapping them. Give the yarn a little tug in place so that it is snug and the stitches are even. KNIT SIDE: Bring the old yarn in front of the new yarn and pick up the new yarn up from under and behind the old (from the right) and knit the next stitch with the new yarn, trapping the old yarn behind it. PURL SIDE: Drop the old color and pick up the new color from under old color and purl the next stitch with new color. The Purl Bee has a great online tutorial for this technique: http:/www.purlbee.com/intarsia-knitting-tutoriall Row 1: P all sts Row 2: K all Row 3 and all odd numbered rows to 39: P all Row 4: K1, M1B, K to 1 stitch before end, M1F, K Row 6: Repeat Row 4 (Increase Row) (18 sts) Row 8: K all Row 10: Repeat Row 4 (Increase Row) (20 sts) Row 12: Repeat Row 4 (Increase Row) (22 sts) Row 14: K all Row 16: Repeat Row 4 (Increase Row) (24 sts) Row 18: K all Row 20: K all Row 22: K1, SSK, K to 3 stitches before end, K2tog, K1 (Decrease Row) (22 sts) Row 24: K all Row 26: Repeat Row 22 (Decrease Row) (20 sts) Row 28: Repeat Row 22 (Decrease Row) (18 sts) Row 30: K all Row 32: Repeat Row 22 (Decrease Row) (16 sts) Row 34: Repeat Row 22 (Decrease Row) (14 sts) Row 36: Repeat Row 22 (Decrease Row) (12 sts) Row 38: Repeat Row 22 (Decrease Row) (10 sts) Row 40: Repeat Row 22 (Decrease Row) (8 sts) Row 41: P1, P2 tog, P2, P2 tog, P1 (6 sts) Row 42: K1, SSK, K2Tog, K1 (4 sts) Row 43: P2tog, P2tog (2 sts)

At this point, you should have two stitches on your needle, one of each color. Slip those two stitches from your knitting needle onto your size I (5.5mm) crochet hook and fold your wing in half along the color change line. Using one strand of MC and one strand of CC held together, work a picot edging along the open edge of the wing to add a ruffle while at the same time sewing the wing together: All stitches are worked through both one MC edge stitch and one CC edge stitch at the same time. SC first stitch, pulling yarn through both the stitches you have on your hook. \*Skip one stitch, slip stitch in next stitch. Chain three, slip stitch in through the SAME stitch again. Skip one stitch, SC in next stitch. Repeat from \* until you are at the top of the wing, leaving the top edge unstitched so you can attach the wing to the body. This creates a picot edging. Youtube.com has some great videos about crocheting a picot edging, if you need a visual demonstration on this. Now you have one wing!! Go make your second one but first --- Note that for the SECOND wing, you will cast on 7 stitches with CC1 FIRST, then cast on with the MC SECOND. This way, you make a right wing and a left wing.
SEWEM UP, SEW EM UP!!
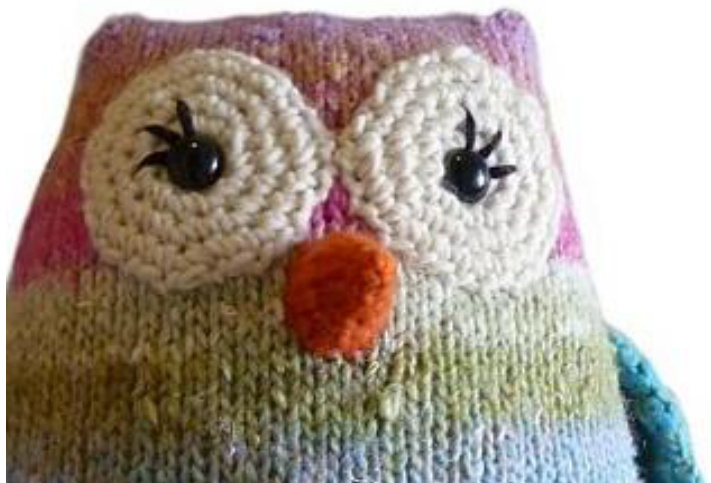
I finish my owl up, but feel free to sew things up however you like Using whipstitch, I sew the eye patches on first - BEFORE I stuffed the owl, so that I can maneuver him easier. I like to position the eyes so that they touch eachother in the middle.I embroider thelashes on through the center of the eye patches then attach the safety eyes. Lightly stuff and sew the nose on, right between and below the eye patches.
Next, I stuff Mr. Owl and pin the legs onto the front of his body at the bottom hemline. Then I sew the bottom flap of the owl closing him right up and also attaching the legs at the same time. Last, I sew on the wings. Just pick a spot that looks good and go for it!
You now have yourself one Fantastic, Owlish buddy! Love, Cuddle Enjoy!
Pattern Information
Help is always free and available! If you have any questions or comments about this pattern please email me at Hipchicks002@yahoo.com or message me on Ravelry: Rachie2084. Huge, heartfelt thanks and appreciation to my wonderful & talented test knitters: Susan aka NoKnitsherlock (page 2), Sammylou1 (page 3), MariaCrafts (page 5), Jenna aka Retrolemon (page 5); and the amazing MissCookie for editing and formatting it all into a pretty pattern. The contents of this pattern and the design within are subject to copyright. You may use this pattern for personal and non-commercial purposes. Without express permission from the designer and copyright holder, Rachel Gallagher-Miller, you may not distribute or sell electronic or paper copies of this pattern and though you may not sell any items produced using the directions or photographs in this pattern, you are warmly encouraged to use this pattern for charitable purposes.


