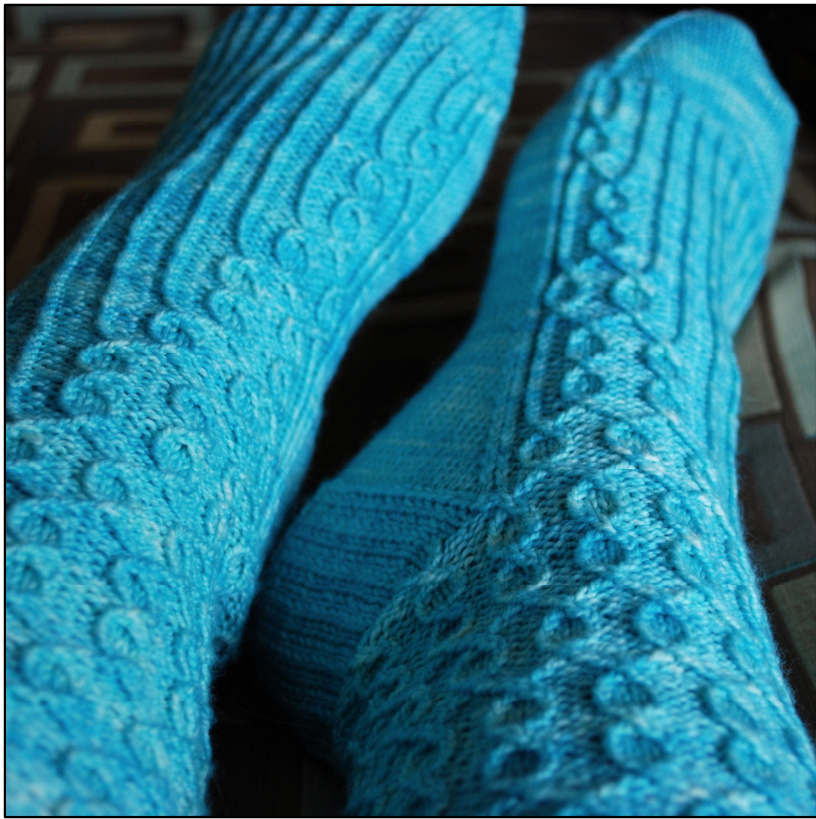
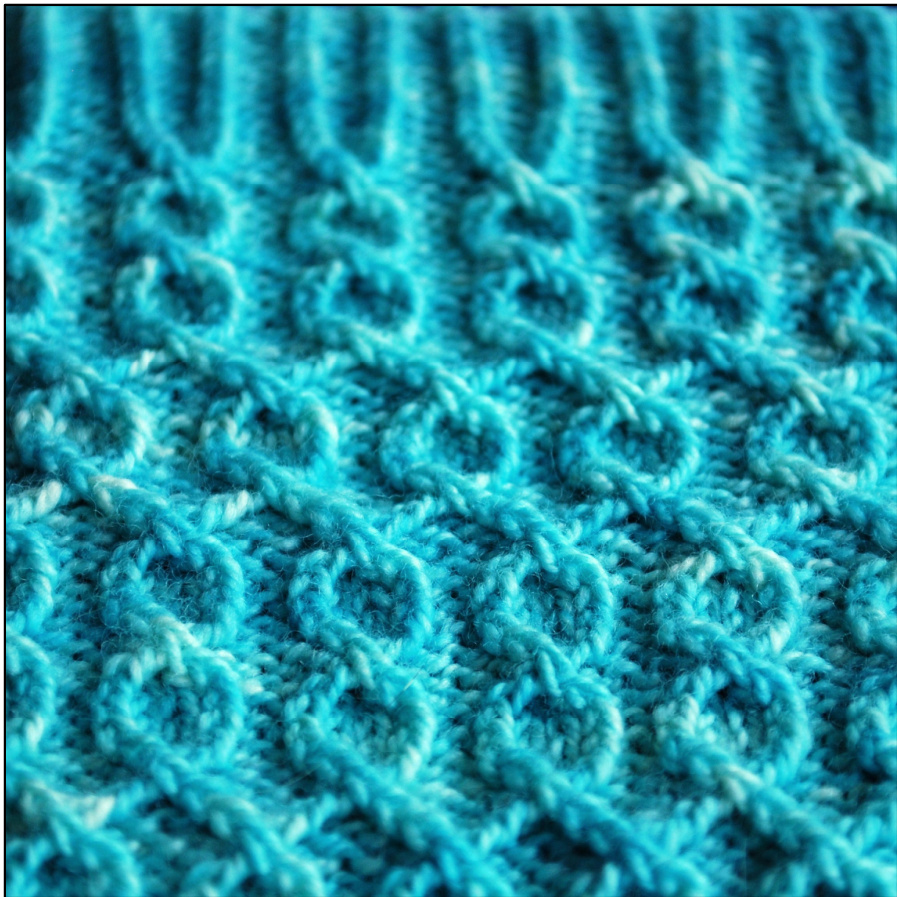
Effervesce
A sock pattern by Kimberly Pieper Small, rounded cables travel up the legs of these socks like the bubbles in a refreshing summer drink. Be sure to pour yourself something fizzy before you cast on! And just in case you need a beverage suggestion, a recipe for sangria blanca is included at the end of the pattern.
Yarn:
Approx. 300-450 yards of solid or semi-solid fingering weight yarn. The sample sock was knit in size M with madelinetosh tosh sock in Iceberg (100% merino, 395 yds/114 g) Other Materials: One set of five 2.50mm dpns (or size required to obtain gauge), tapestry needle.
Gauge and Sizing:
8 stitches per inch in plain stockinette. Three sizes are provided: S (M, L) with circumferences of approximately 7 (7.75, 8.5) unstretched inches around the leg.
Directions:
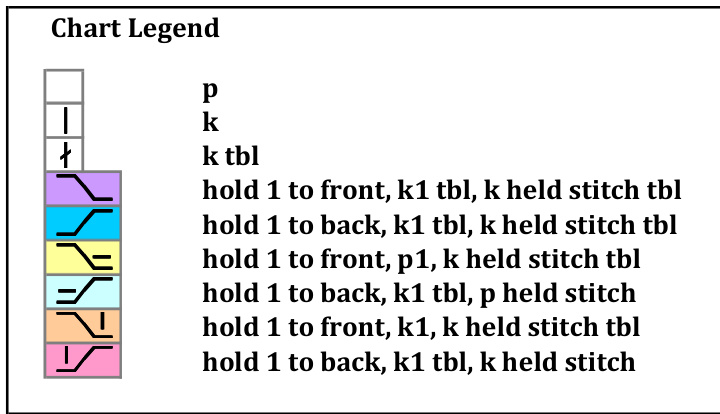
Abbreviations:
Cuff:
Cast on 66 (72, 78) stitches using the long-tail method and distribute the stitches over 4 needles. Work 10 rows of ribbing as follows: kknit ppurl k tbl knit through back loop sl slip k2tog knit 2 together ssk slip slip knit p1, (k1 tbl, p2) to 2 stitches before end, k1 tbl, p1
Leg:
Complete either the right or left leg chart corresponding to your chosen size.
Right sock only: Work the first row (33 (36, 39) stitches) of the foot chart and stop in the middle of the round.
Heel Flap:
The heel flap is worked back and for over the next 33 (36, 39) stitches and is the same for bothsocks. Row 1 (RS): sl1, (sl1, k2) x10 (11, 12), sl1, k1, turn Row 2 (WS): sl1, p32 (35, 38), turn Repeat these 2 rows 13 (15, 17) additional times or until the flap reaches your desired length.
Heel Turn:
Row 1: (RS) sl1, k19 (20, 21), ssk, k1, turn Row 2: (WS) sl1, p8 (7, 6), p2tog, p1, turn Row 3: (RS) sl1, k to 1 stitch before gap, ssk to close gap, k1, turn Row 4: (WS) sl1, p to 1 stitch before gap, p2tog to close gap, p1, turn Repeat rows 3 & 4 until all heel stitches have been worked. 21 (22, 23) heel stitches remain. Knit across 10 (11, 11) stitches. This point will be the new beginning of round and the next needle will become needle 1.
Gusset & Foot:
Knit across the 11 (11, 12) stitches on needle 1 and then pick up one stitch in each chain stitch along the edge of the heel flap. Knit across the instep stitches on needles 2 & 3 according to the appropriate foot chart: begin at row 1 for the left sock or row 2 for the right sock. Pick up stitches along the remaining edge of the heel flap on needle 4 and knit to the end of round. In order to prevent holes from forming, you may find it useful to pick up an extra stitch at the junction of the gusset/instep on either side of the foot (i.e. at the end of needle 1 and the beginning of needle 4).
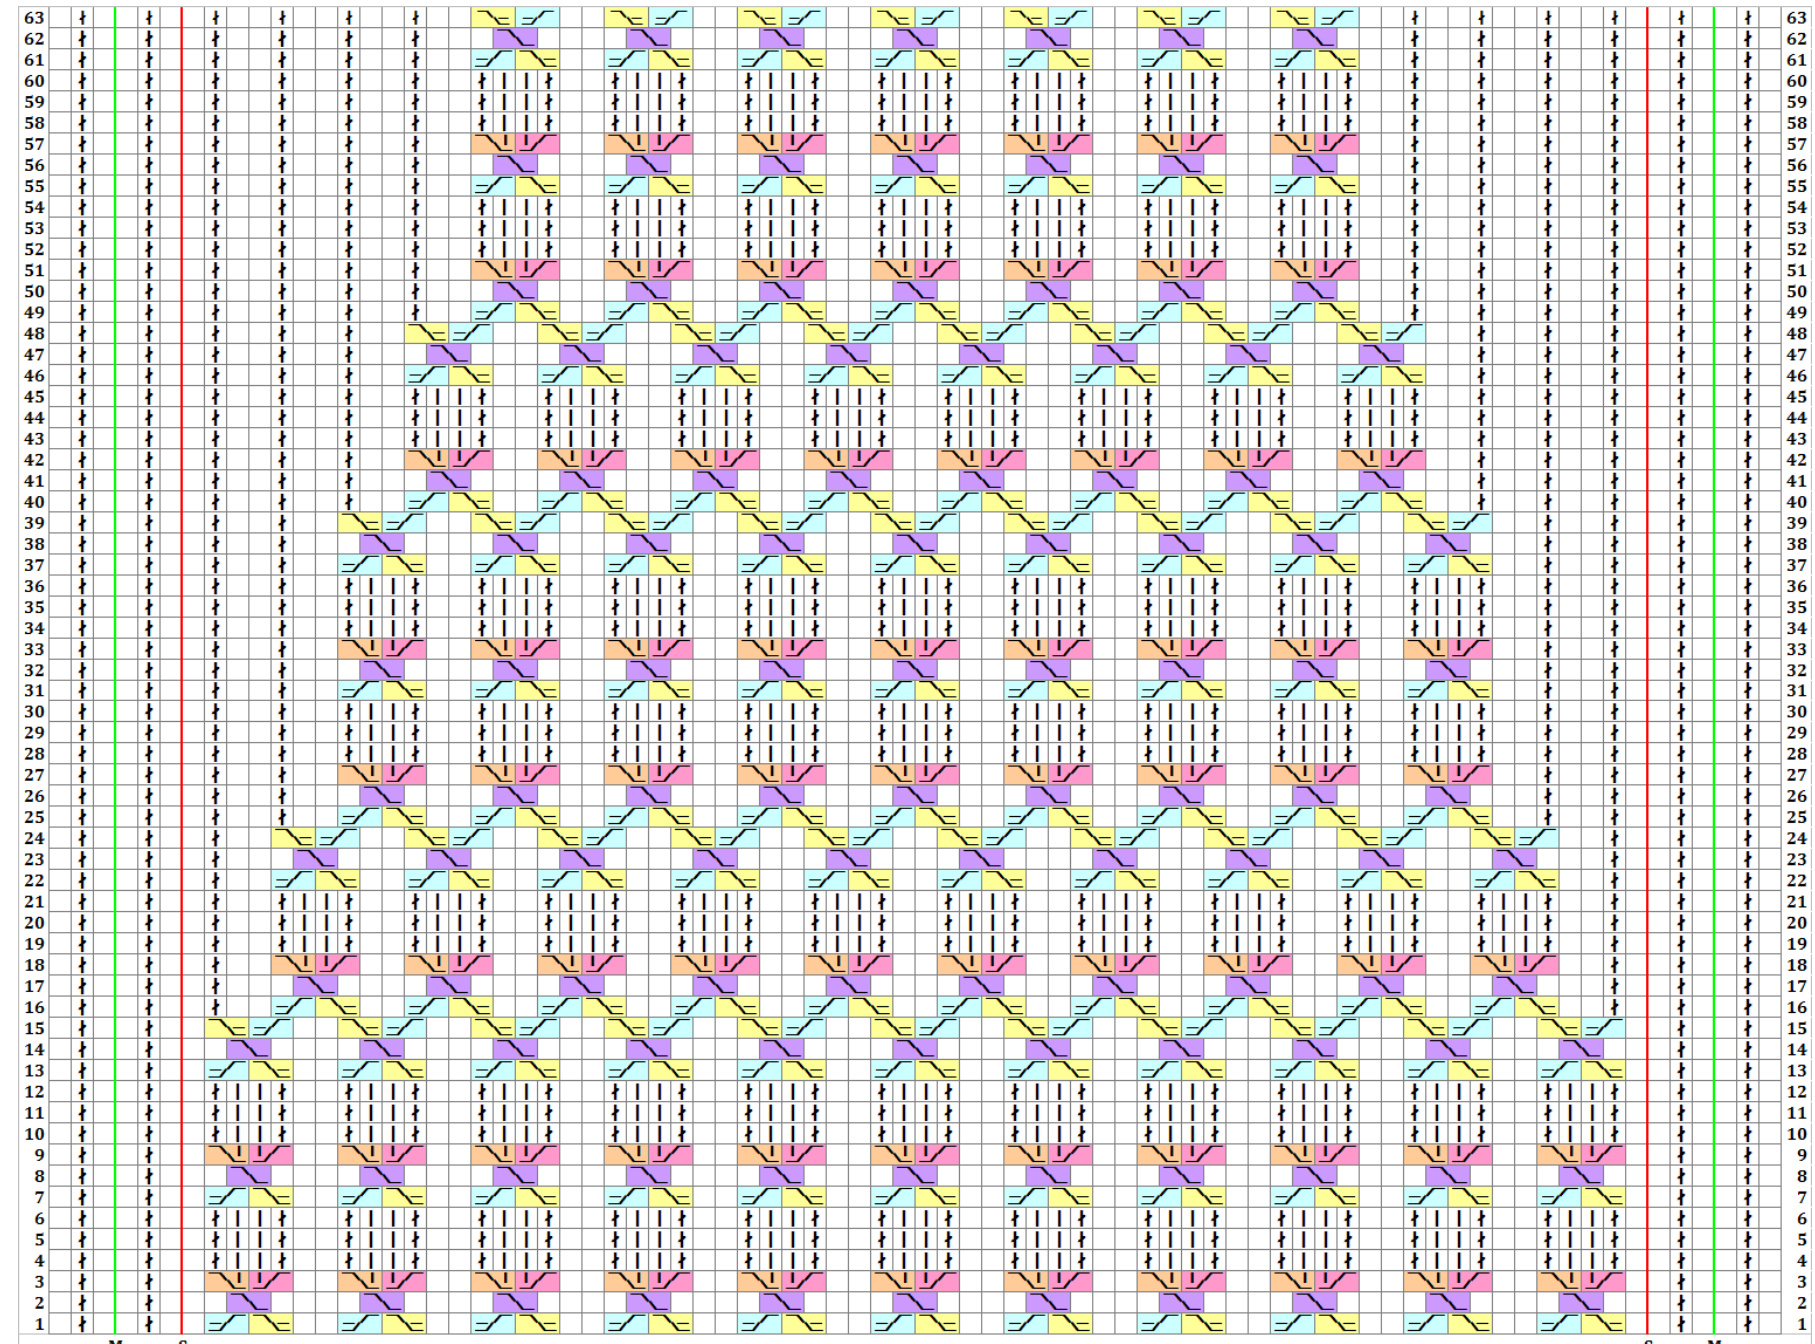
(small = between red lines, medium = between green lines, large = entire chart)
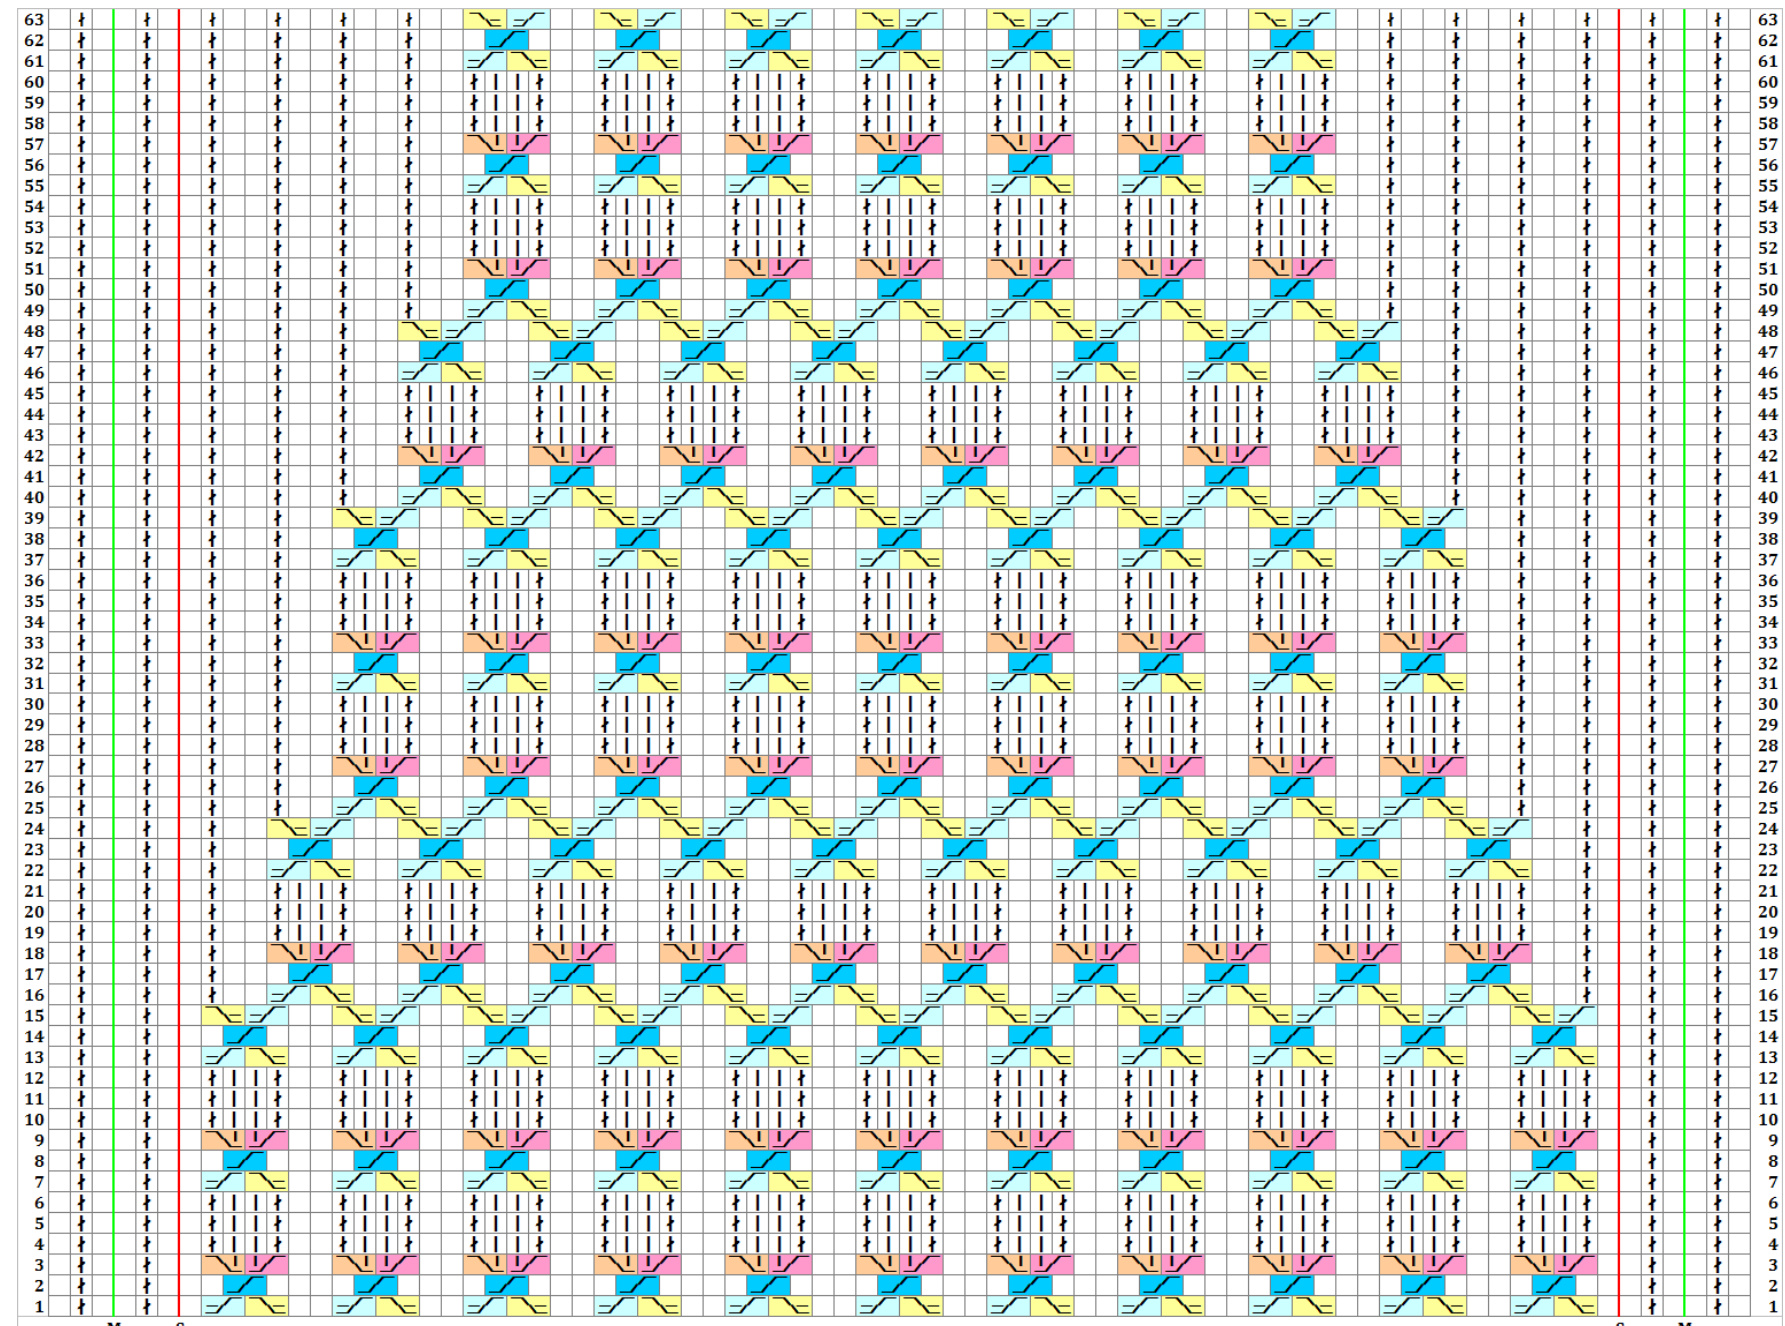
(small = between red lines, medium = between green lines, large = entire chart) Work the gusset decreases as follows: Row 1: kto 3 sts before end of needle 1, k2tog, p1, work needles 2 & 3 according to foot chart, p1, ssk, k to end of round on needle 4 Row 2: kto 1 stitch before instep, p1, work foot chart, p1, k to end of round Repeat these two rows until 33 (36, 39) sole stitches remain. Continue working row 2 only until the foot chart has been completed. You may wish to drop down a needle size for the rest of the sock if it is fitting too loosely at any point after the gusset stitches have been picked up. Once you have reached the end of the foot chart, repeat the following row until you are 1.75 (2.0, 2.25) inches from the desired length: ·1 stitch before instep, p1, work row 58 of foot chart, p1, k to end of roun Note: If you cannot complete the entire chart before reaching the toe, you may omit rows 49-57 for a shorter foot length.
Toe:
Row 1: k to 3 stitches before end of needle 1, k2tog, k2, ssk, k to 3 stitches before end of needle 3, k2tog, k2, ssk, k to end of round Row 2: k all stitches
Repeat these 2 rows until 30 (32, 34) stitches remain. Repeat row 1 only until 14 (16, 18) stitches remain. Knit to the end of needle 1. Graft the toe closed with the kitchener stitch and weave in ends. Make yourself another batch of sangria before you cast on for sock number two!
| M | +++ | ||||||||||||||||||||
| 58 | |||||||||||||||||||||||
| 056554 3:25 550 49 8474645 43 424 40 39 338 3 | |||||||||||||||||||||||
| Z986ππ9GG | |||||||||||||||||||||||
| +++ | |||||||||||||||||||||||
| M | S | ++++ |
Left Foot Chart (small = work to red line, medium = work to green line, large = entire chart)
Sangria Blanca Recipe:
Ingredients:
750 mL bottle dry white wine 500 mL club soda 2 shots Triple Sec 2 lemons, wedged 2 white nectarines, sliced 2 cups halved strawberries 3 tablespoons raw cane sugar
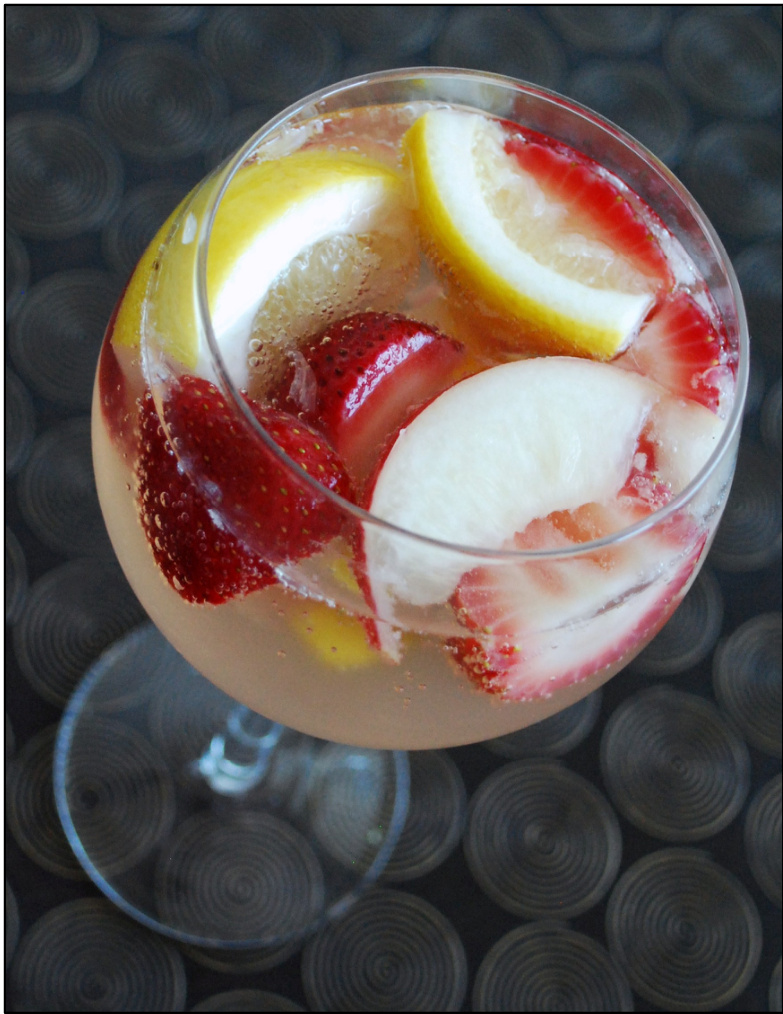
Pour the bottle of wine (cheap wine is totally okay for this, there is no need to splurge) and Triple Sec into a large pitcher and stir in the sugar. Squeeze the lemons into a glass, dispose of any seeds and then add both the juice and wedges to the pitcher. Add in the rest of the fruit and place the mixture into the fridge for several hours to chill. The longer you allow the sangria to sit,the fruitier the drink will be (and the boozier the fruit!). Add the club soda just before serving and enjoy! For an extra treat, remove the fruit before drinking and spoon it over ice cream or yogurt. Mmmmm! This knitting pattern, including all instructions, charts and photographs are ? 2011 by Kimberly Pieper. This pattern may not be copied or offered for sale without the permission of the designer. Please feel free to contact me as purrlescent on Ravelry or at kimberlypieper@gmail.com with any questions or problems you may encounter with the pattern. Many thanks to my test knitters: amachael, captstern, hexenkind, jennann, lifen, meplz, monihw, nj2, quilterx, roocmc, scrambledmegz, snowmagnolia and sockalicious. Some non-knitting test drinkers also approved the sangria!


