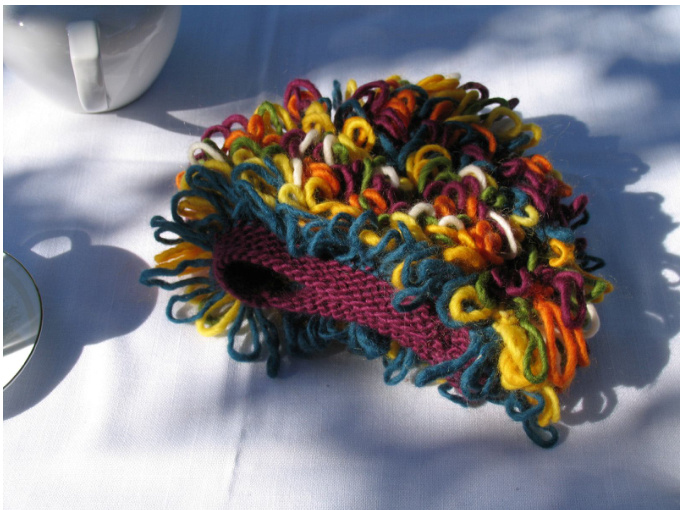
Exuberance by Matt Babcock
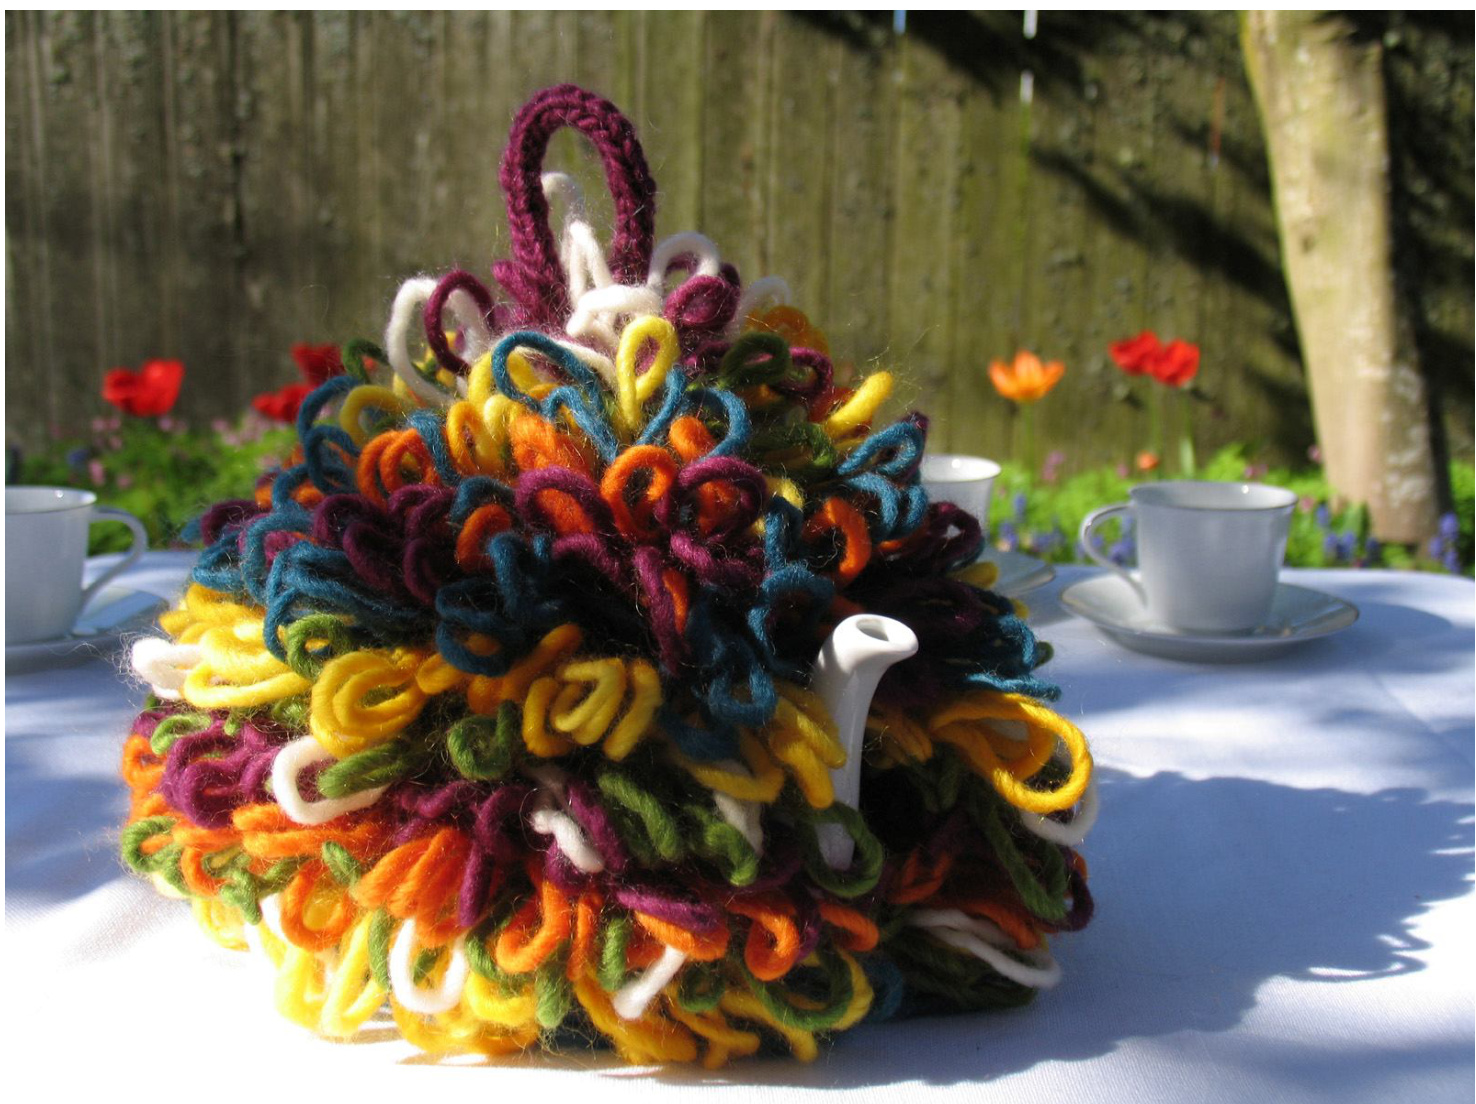
across the table yet so near to you I meet your gaze and stoutly brave distraction for if the love that deep inside me brews boils over from the warmth of my affection the rising tide of effervescent froth might crack the pot and thus unfettered drench us both I beg you darling hold your breath a tiny gasp could start an avalanche of flashing hues and petals' soft caress a joyful riot of fertility a flowery grave for cool contentedness whose fragrance sweet recalls to mind our tea as one who drowning gladly spies the shore heart-felt is my relief: it's time to pour SIZE One: willfit most teapots up to a maximum circumference of 19 inches (excluding handleandspout)
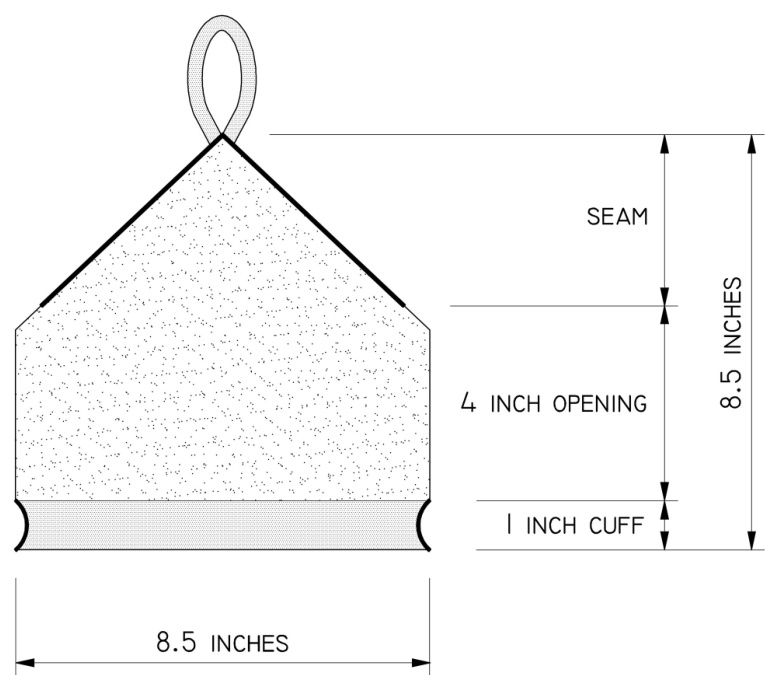
FINISHED MEASUREMENTS
Height: 8.5 inches Inside circumference: 16 inches
MATERIALS The pattern requires a total of 200 g or approx. 220 yd/200m of bulky weight yarn. To make the tea cozy as pictured: Brown Sheep Lamb's Pride Bulky $85\%$ wool, $15\%$ mohair; 125 yd/114 m per 113 g skein] [C1] color: M-28 Chianti; pattern uses approx. 55 yd/50 m [C2] color: M-78 Aztec Turquoise; pattern uses approx. 44 yd/40 m [C3] color: M-240 Prairie Goldenrod; pattern uses approx. 4 yd/40 m [C4] color: M-191 Kiwi; pattern uses approx. 33 yd/30 m [C5] color: M-10 Creme; pattern uses approx. 11 yd/10 m [C6] color: M-22 Autumn Harvest; pattern uses approx. 33 yd/30 m 1 set US #10/6.0mm straight needles (or as required to obtain gauge) 1 set US #9/5.5mm double-point needles (or one size smaller than straight needles) yarn needle GAUGE 13 sts / 16 rows $=4"$ in loop stitch
PATTERN NOTES
For a glossary of standard abbreviations try here
Garter Stitch Knit all rows
Loop Stitch
This stitch is worked from the wrong side of the fabric. 1. Purl into the stitch but do not drop it from the left-hand needle.
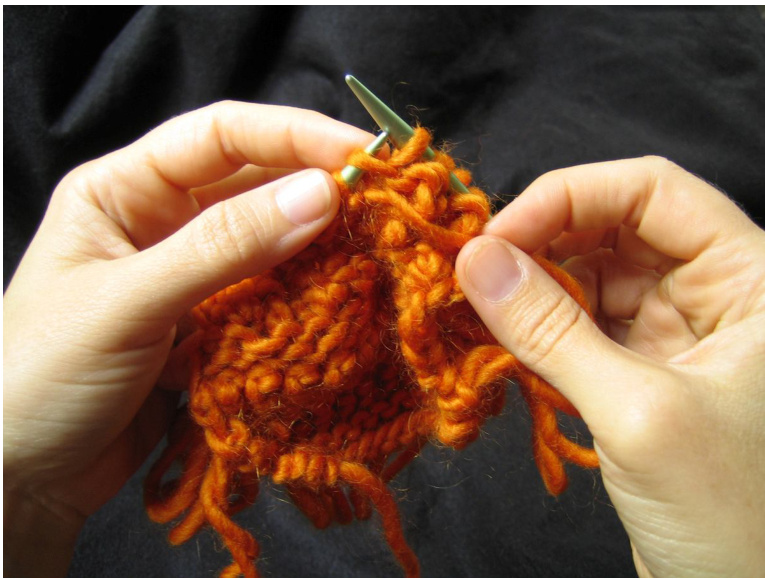
2. Bring the yarn between the needles to the back of the work and wrap it two or three times around your index finger. Wrap the index finger on the hand that you don't use for carrying the working yarn. English knitters will wrap their ieft index fingers. Continental knitters will wrap their right index fingers.
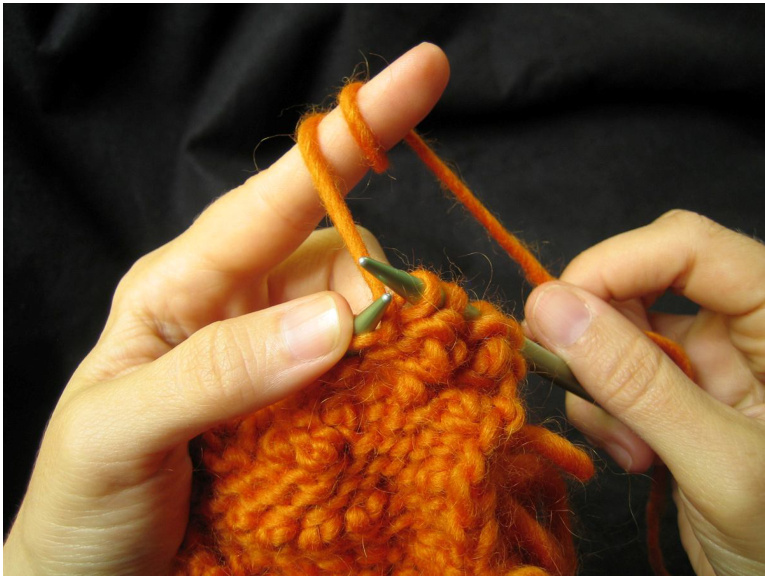
3. Bring the yarn back between the needles to the front of the work.
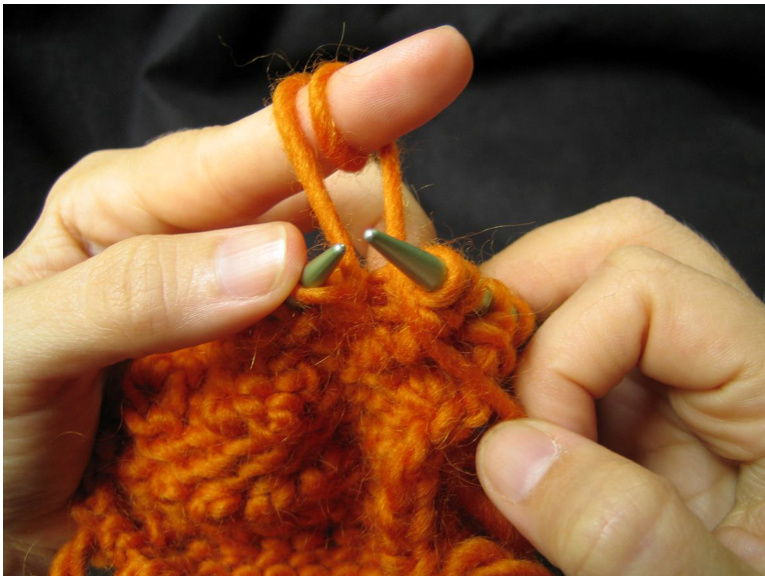
4. Purl into the same stitch again, dropping it from the left-hand needle. Remove your index finger from the wraps. 5. On the right needle you will have 2 new stitches with a loop between them. Insert the left needle through the back of these 2 stitches and purl them together.
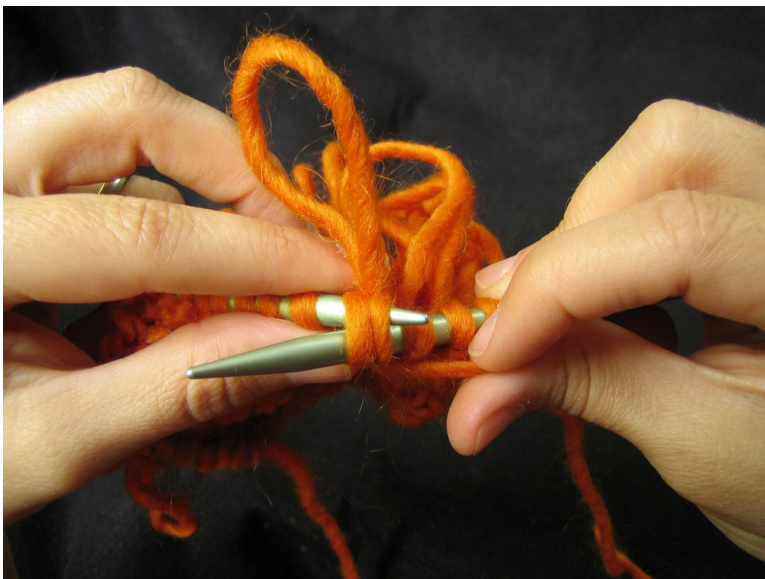
You can vary the length of the loops by changing the way you hold your index finger and by changing the number of wraps. The loops on the pictured tea cozy extend about 2.5 inches from the face of the fabric.
Stranded Colors
A few of the loop stitch rows in the tea cozy as pictured alternate between different colors of yarn, with the floats held to the side facing you (opposite the loops). A photo tutorial on stranded colors can be found here
PATTERN
Panel (make 2)
Cuff CO 27 sts in C1, leaving tail at least 12 inches long Work 1 inch in garter stitch Body All odd numbered rows: K first st, work row in loop stitch, K last st All even numbered rows: K all sts Work first and last sts of all rows loosely Rows 1-12: work even in pattern Rows 13-26: dec 3 sts on every even numbered row (dec 1 near each end of the row and dec 1 near the middle) Rows 27-30: dec 2 sts on rows 28 and 30 (dec 1 near each end of the row) Bind off To make the tea cozy as pictured, work each row in the specified color(s). Numbers in angle brackets $<>$ are the number of stitches remaining after each decrease row. Rows 1-2: C2 Rows 3-4: C3 Row 5: Work in stranded colors: 1 st C4, [1 st C5, 2 sts C4] 8 times, 1 st C5, 1 st C4 Row 6: C4 Rows 7-8: C6 Rows 9-10: C1 Row11: Workin stranded colors:1 stC4,[1 st C5,2sts C4]8times, 1 stC5,1 stC4 Row 12: C4 Rows 13-14: C3 <24 sts> Rows 15-16: C2 $-21$ sts> Rows 17-18: C1 ${<}18$ sts> Rows 19-20: $\mathtt{C6<15}$ sts> Rows 21-22: C2 <12 sts> Rows 23-24: C3 ${<}9$ sts> Row 25: Work in stranded colors: 1 st C4,[1 st C5, 2 sts C4] 2times, 1 st C5, 1 st C4 Row 26: $\complement4\,{<}6$ sts> Rows 27-28: C1 ${<}4$ sts> Rows 29-30: C5 ${<}2$ sts>
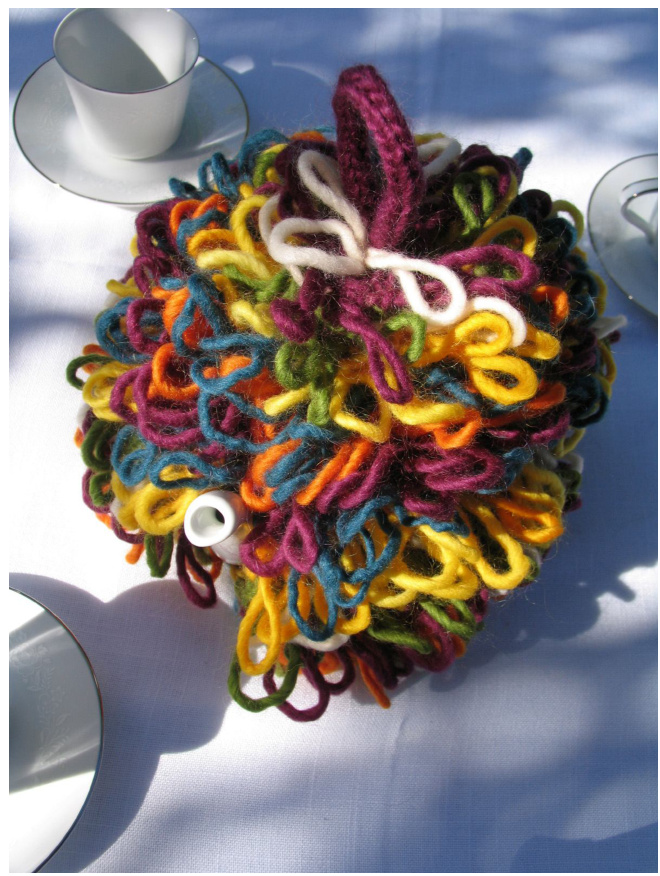
I-cord Loop(make 1)
CO 3 sts in C1 on DPN, leaving tail at least 24 inches long Work 7 inches I-cord Bind off, leaving tail at least 24 inches long Tie the tails together at the base of the I-cord to form a loop
FINISHING
Weave in all ends except for the 12 inch tails from the castons and the tails of the I-cord loop. Place the 2 panels together with looped sides facing in. Using the 12 inch tails from the castons, sew the selvages of the garter stitch cuffs together using overcast stitch. Do not extend the seams into the looped body of the tea cozy. Place the I-cord loop between the two panels. Using the tails of the I-cord loop, sew the upper portion of the selvages together using overcast stitch. Take care not to catch the loop stitches in the seam. Leave a 4 inch opening between the top seam and the cuff seam on each side for the handle and spout of the teapot. If you are following the instructions for the tea cozy as pictured, you will be sewing the top seam with color C1 (the I-cord color) and you will end the top seam at row 17, which is also color C1. Turn the cozy right side out. Using C1, attach the base of the I-cord loop more securely to the body of the cozy with 3 or 4 stitches through each end of the I-cord. Weave in ends of seam yarn.
If you have any questions contact me through Ravelry or sonnetized@gmail.com For more sonnets, visit www.sonnetized.blogspot.com Pattern and images copyright 2009 Matt Babcock


