purlbee.com http://www.purlbee.com/2007/03/06/treeline-striped-cardigan/
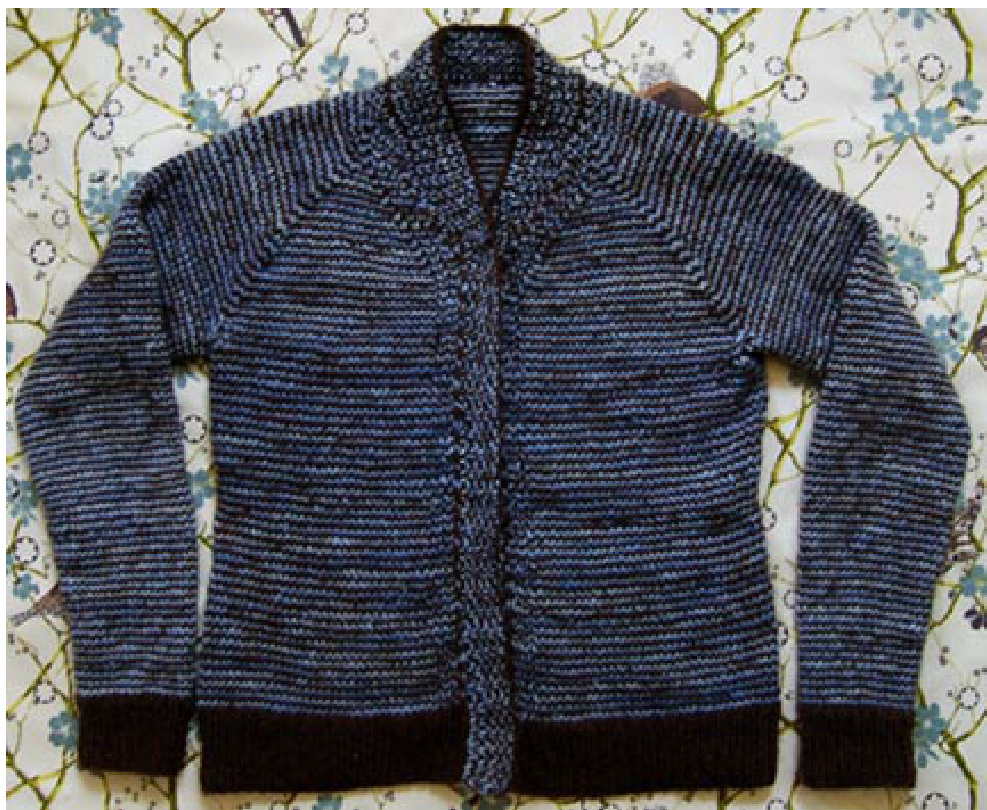
Treeline Striped Cardigan
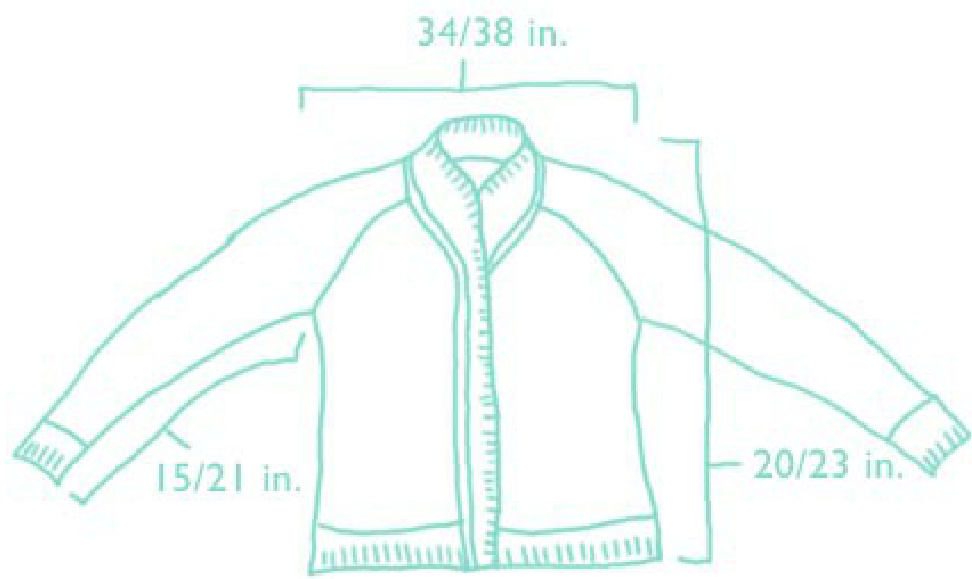
March 6, 2007|Purl Bee FINISHED MEASUREMENTS Adult Small(Adult Medium/Large): Chest: 34(38) inches Length from bottom edge to top of shoulder: 20(23) inches Length from cuff to armhole: 15(21) inches GAUGE 4 stitches per inch, in stockinette stitch MATERIALS YARN 8 Manos del Uruguay worsted weight merino wool yarn: 4 skeins Powder(C) and 4 skeins Coffee (G) 3 balls Rowan Kidsilk Haze in Villain NEEDLES US size 8 32-inch circular needles; I use Addi Turbos US size 8 8-inch Clover circular needles or double-pointed needles
NOTIONS
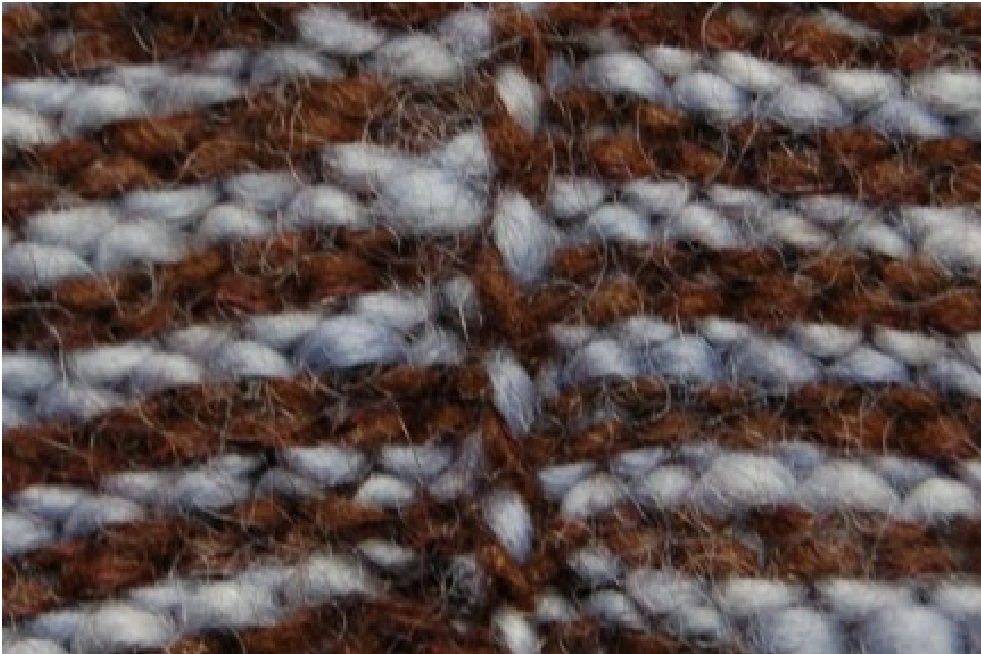
4 stitchmarkers yarnneedle crochet hook, 5 mm, for picking up stitches 8 buttons OR 20-inch zipper OR snap tape for closure (I used organic cotton snap tape, which can easily be dyed to match your sweater) NOTES For the sake of simplicity, and because you may not want to use the same colors I chose, the pattern refers to Color 1 (which is one strand Manos del Uruguay, Powder) and Color 2 (one strand Manos del Uruguay, Coffee, and one strand Rowan Kidsilk Haze, Villain, knit together). This pattern employs a neat technique for knitting stripes in stockinette stitch that are only one row high, but aren't in the round. The entire body of the sweater as well as the border is knit this way. This is how it works: Row 1: on the Right Side of the work, knit across with Color 1. Row 2: on the Right Side of the work (this is possible because you are using a circular needle), knit across with color 2. Row 3: on the Wrong Side of the work, purl across with Color 1. Row 4: on the Wrong Side of the work (this is possible because you are using a circular needle), purl across with Color 2 SLEEVES (MAKE TWO) With Color 2 and short circular needles or dpn, CO 32(38) stitches. Join into a round, taking care not to twist stitches. Place a marker at the beginning of the round. Round 1 : \*K1, p1, repeat from \* to end of round. Continue k1, p1 ribbing until sleeve measures 3 inches, about 18 rounds. STRIPESINTHEROUND Now we introduce Color 1. Leave a 6-inch long tail of Color 1, just as if you were starting a new ball of yarn. Do not break yarn for Color 2. Round 1 (with Color 1): Knit. Round 2 (with Color 2): Knit. Repeat these rounds 2(3) times more (for a total of 6 (8) rounds).
INCREASE ROUND
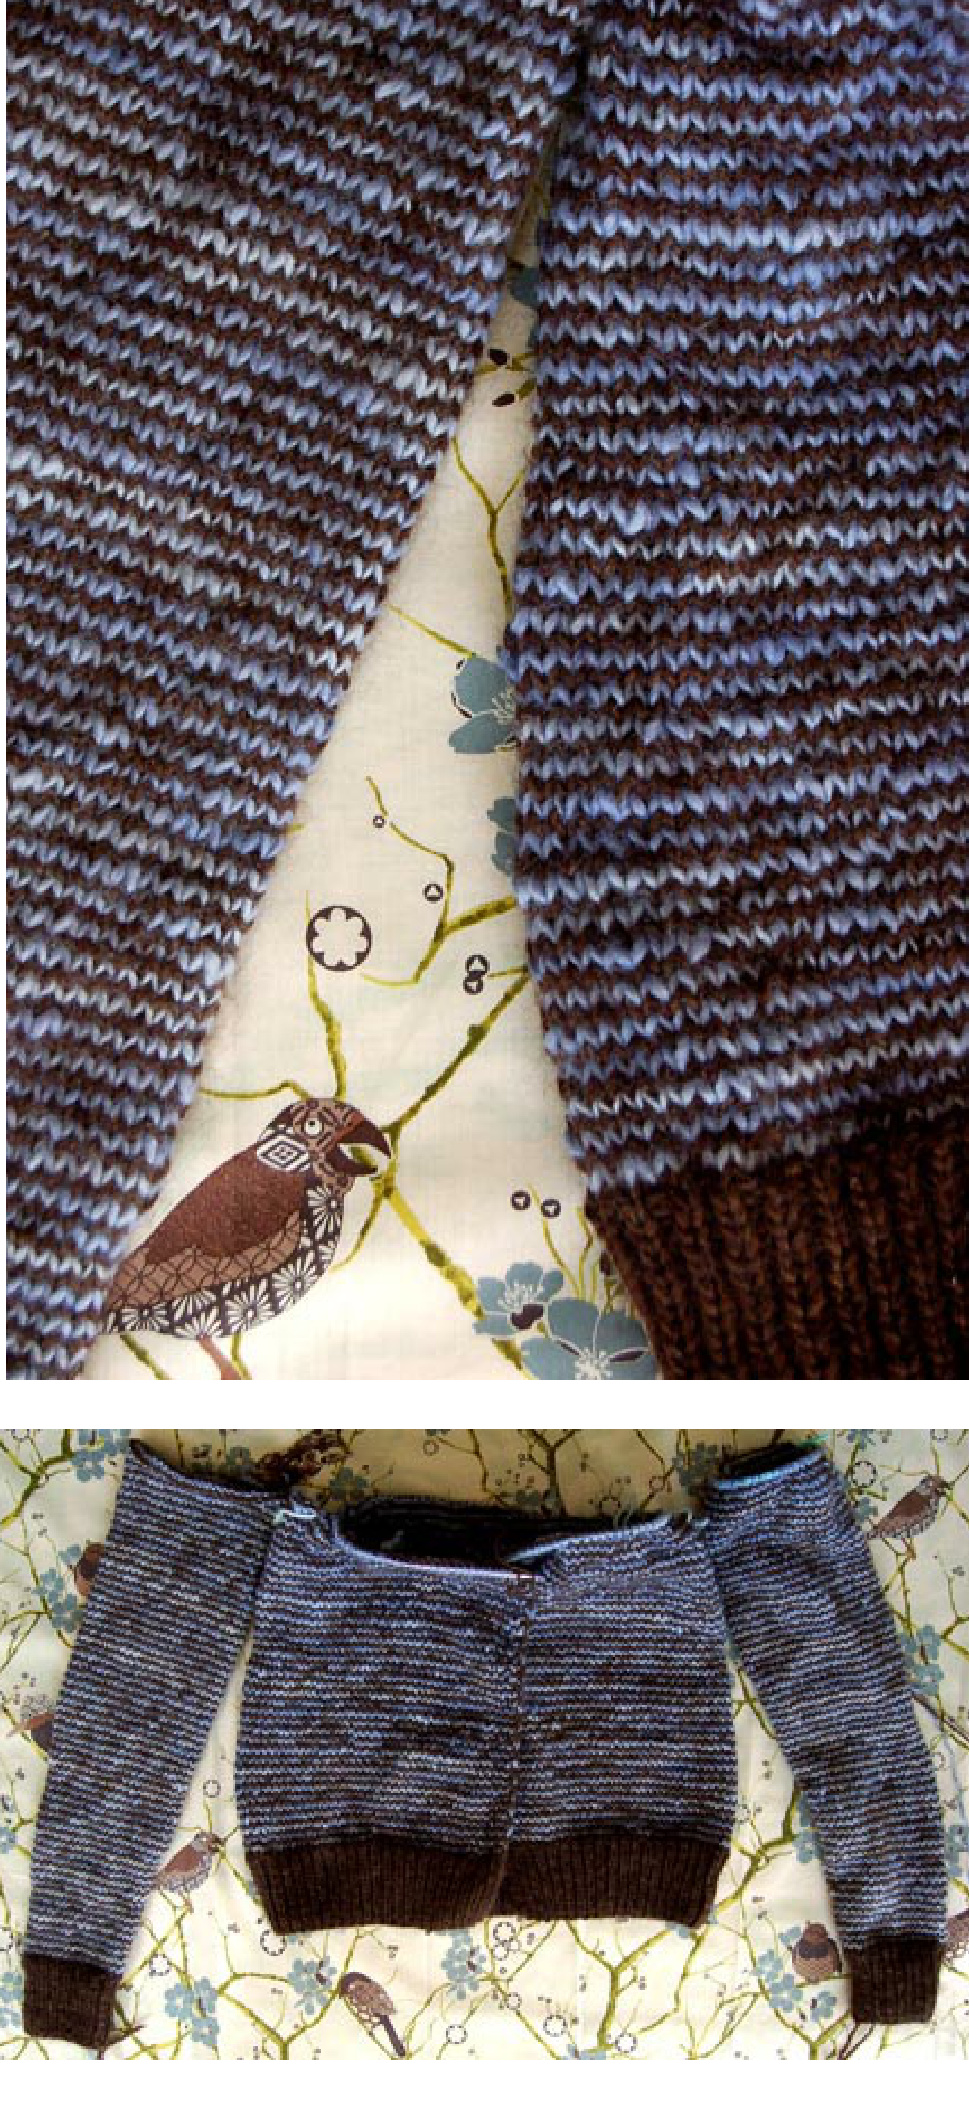
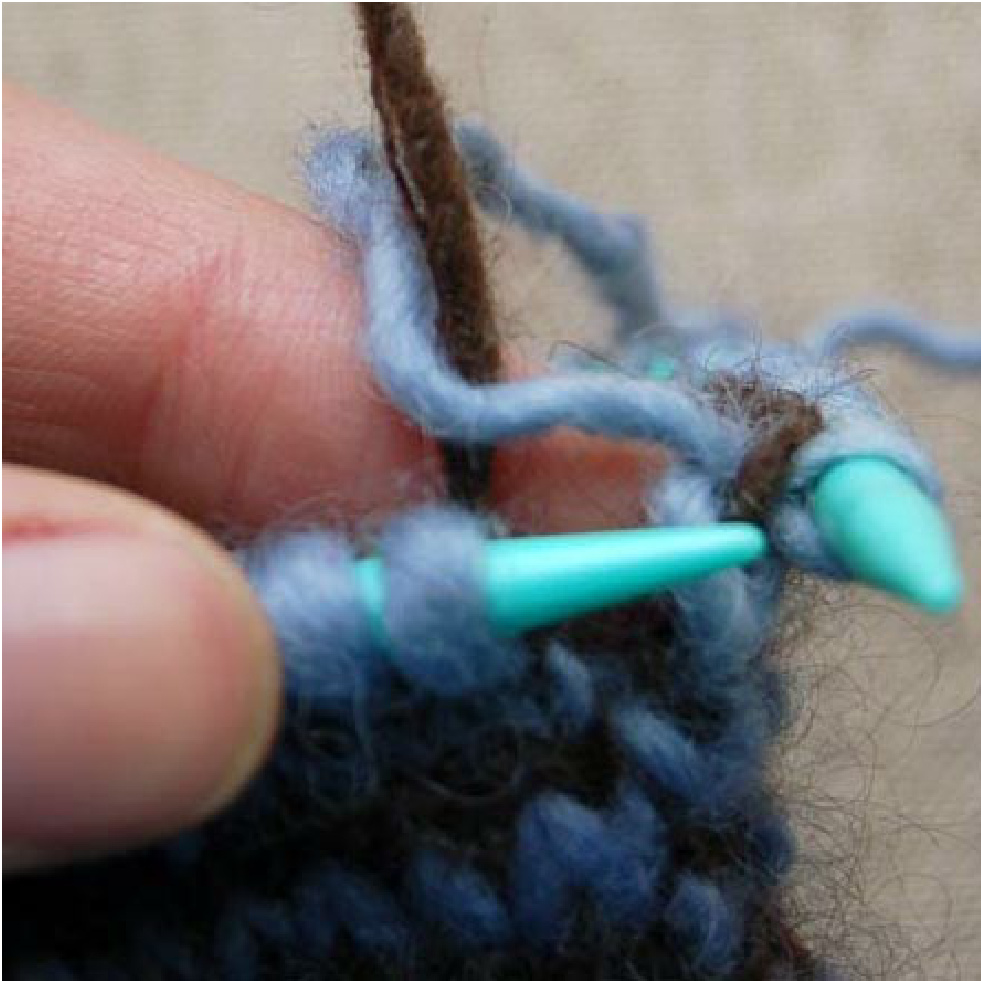
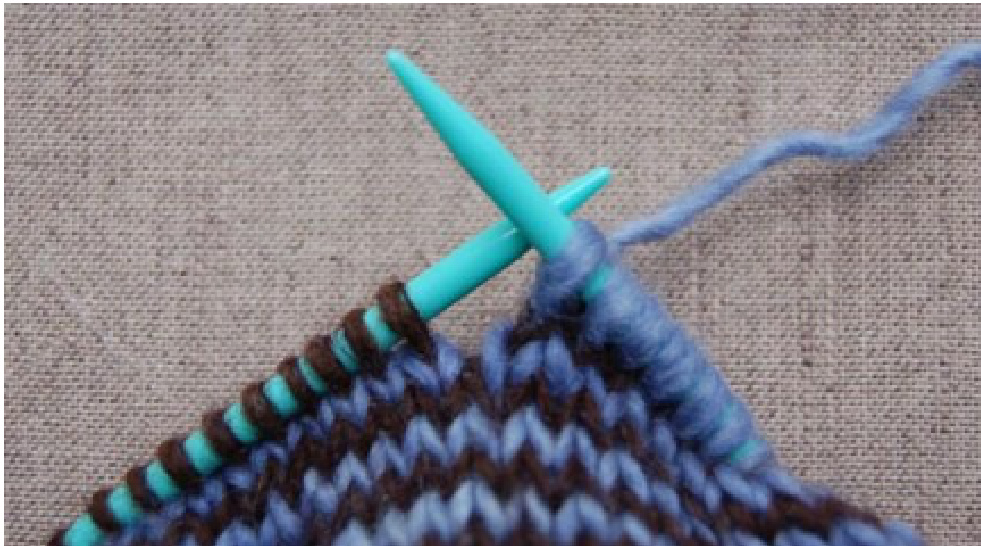
Next round: Kf&b, k to 2 stitches before end of round, kf&b, knit last stitch. Continue to work in this manner, increasing one stitch on either side of the marker every 6(8) rounds 8(7) times more, until there are 50(54) stitchesontheneedle. Continue knitting (no more increases) until the sleeve is 17(20) inches long. Here's what it looks like in progress, resting color on the left and active color on the right as you knit it. Because you are knitting stripes that are only one row tall, there is a very slight, almost negligible, jog in the color from one row to the next. The jog becomes more visible with wider stripes of two or more rows. If you want to eliminate this interruption, you can read a good summary of Meg Swansen's Jogless Jog on NonaKnits. As you twist the yarn the same way at the beginning of each round, it makes a nice neat detail on the inside of the knitting: Final Round (with Color 1): Knit to end of round, remove marker, K 3(4). Place previous 6(8) stitches on a holder. 44(46) working stitches Break yarn, leaving a tail. Setasidethefirstsleeve andmakeasecondonethesameasthefirst. BOTTOMBORDERRIBBING With Color 2, CO 136(152) stitches onto circular needle. Row 1: Slip 1, p1, (k1, p1) to end of row, ending on a k1. Continue K1, P1 Rib until body measures 2(3) inches; ending on a wrong side (WS) row.
BEGINBODY STRIPES
Rows 1 and 2 are both worked on the Right Side (RS) of the garment: Row 1 (with Color 1): Slip 1, p1, (k1, p1) twice, k to last 6 stitches, then (p1, k1) three times. Row 2 (with Color 2): Slip 1, p1, (k1, p1) twice, k to last 6 stitches, then (p1, k1) three times. Rows 3 and 4 are worked on the Wrong Side (WS) of the garment: Row 3 (with Color 1): Slip 1, k1, (p1, k1) twice, k to last 6 stitches, then (k1, p1) two times, k1, slip 1. Row 4 (with Color 2): Slip 1, k1, (p1, k1) twice, k to last 6 stitches, then (k1, p1) two times, k1, slip 1. Repeat Rows 1 through 4, working two rows on the RS and two on the WS as established, until piece measures 14(16) inches, or desired length to underarm.
YOKEPREPARATION
Next Row (with Color 1 on the RS): Slip 1, p1, (k1, p1) twice, then k 31(34), place previous 6(8) stitches on a holder, k 68 (76), place previous 6(8) stitches on a holder, k 25 (28), then (p1, k1) three times. 124(136) total working stitches: 31(34) stitches for each front and 62(68) stitches for the back. Now we join together the sleeves and the body with just one row of knitting. This is one of my favorite parts about kniting in the round (even though this is a cardigan, which is knit back and forth, not actually in a round).
JOIN SLEEVES TO BODY
Joining Row (Color 2 on the RS): Slip 1, p1, (k1, p1) twice, k 25 (28) across the right front panel, place marker, k 44(46) across right sleeve, place marker, k 62 (68) across back, pm, k 44 (46) across left sleeve, place marker, k 25 (28) of left front, (p1, k1) three times. You wil have 212 (228) stitches, divided by four markers indicating the front and back of the shoulders (which is where all the action takes place). Color 2 is at the left front edge. The next two rows are worked on the WS: Row 1(with Color 1): Slip 1, k1, (p1, k1) twice, p to last 6 stitches, (k1, p1) two times, k2. Row 2(with Color 2): Slip 1, k1, (p1, k1) twice, p to last 6 stitches, (k1, p1) two times, k2.
YOKE
BEGINRAGLANSHAPING
Row 1 (with Color 1 on the RS): Slip 1, p1, (k1, p1) twice, \*k to 2 stitches before next marker, ssk, slip marker, k2tog, repeat from \* 3 more times, k to last 6 stitches, then (p1, k1) three times. 8 stitches decreased Row 2 (with Color 2 on the RS): Slip 1, p1, (k1, p1) twice, k to last 6 stitches, then (p1, k1) three times. Row 3 (with Color 1 on the WS): Slip 1, k1, (p1, k1) twice, p to last 6 stitches, (k1, p1) two times, k2. Row 4 (with Color 2 on the WS): Slip 1, k1, (p1, k1) twice, p to last 6 stitches, (k1, p1) two times, k2. Repeat these four rows 3(3) more times. 180(196) stitches remaining.
BEGINNECKEDGESHAPING
Row 1 (with Color 1 on the RS): Slip 1, p1, (k1, p1) twice, k2tog, \*k to 2 stitches before marker, ssk, slip marker, k2tog, repeat from \* 3 more times, k to last 8 stitches, k2tog, then (p1, k1) three times. 10 stitches decreased Row 2 (with Color 2 on the RS): Slip 1, p1, (k1, p1) twice, k to last 6 stitches, then (p1, k1) three times. Row 3 (with Color 1 on the WS): Slip 1, k1, (p1, k1) twice, p2tog, \*p to 2 stitches before marker, p2tog, slip marker, p2tog, repeat from \* 3 more times, p to last 8 sts, p2tog, then (k1, p1) two times, k1. 10 stitches decreased Row 4 (with Color 2 on the WS): Slip 1, k1, (p1, k1) twice, p to last 6 stitches, then (k1, p1) two times, k1. Repeat these four rows 3(7) more times. 100(36) stitches remaining. For Adult Small sweater ONLY, repeat the following four rows 4 times, until 28 stitches remain: Row 1 (with Color 1 on the RS): Slip 1, p1, (k1, p1) twice, k2tog, \*k to 2 stitches before marker, ssk, slip marker, k2tog, repeat from \* 3 more times, k to last 8 sts, k2tog, then (p1, k1) three times. 10 stitches decreased Row 2 (with Color 2 on the RS): Slip 1, p1, (k1, p1) twice, k to last 6 stitches, then (p1, k1) three times.
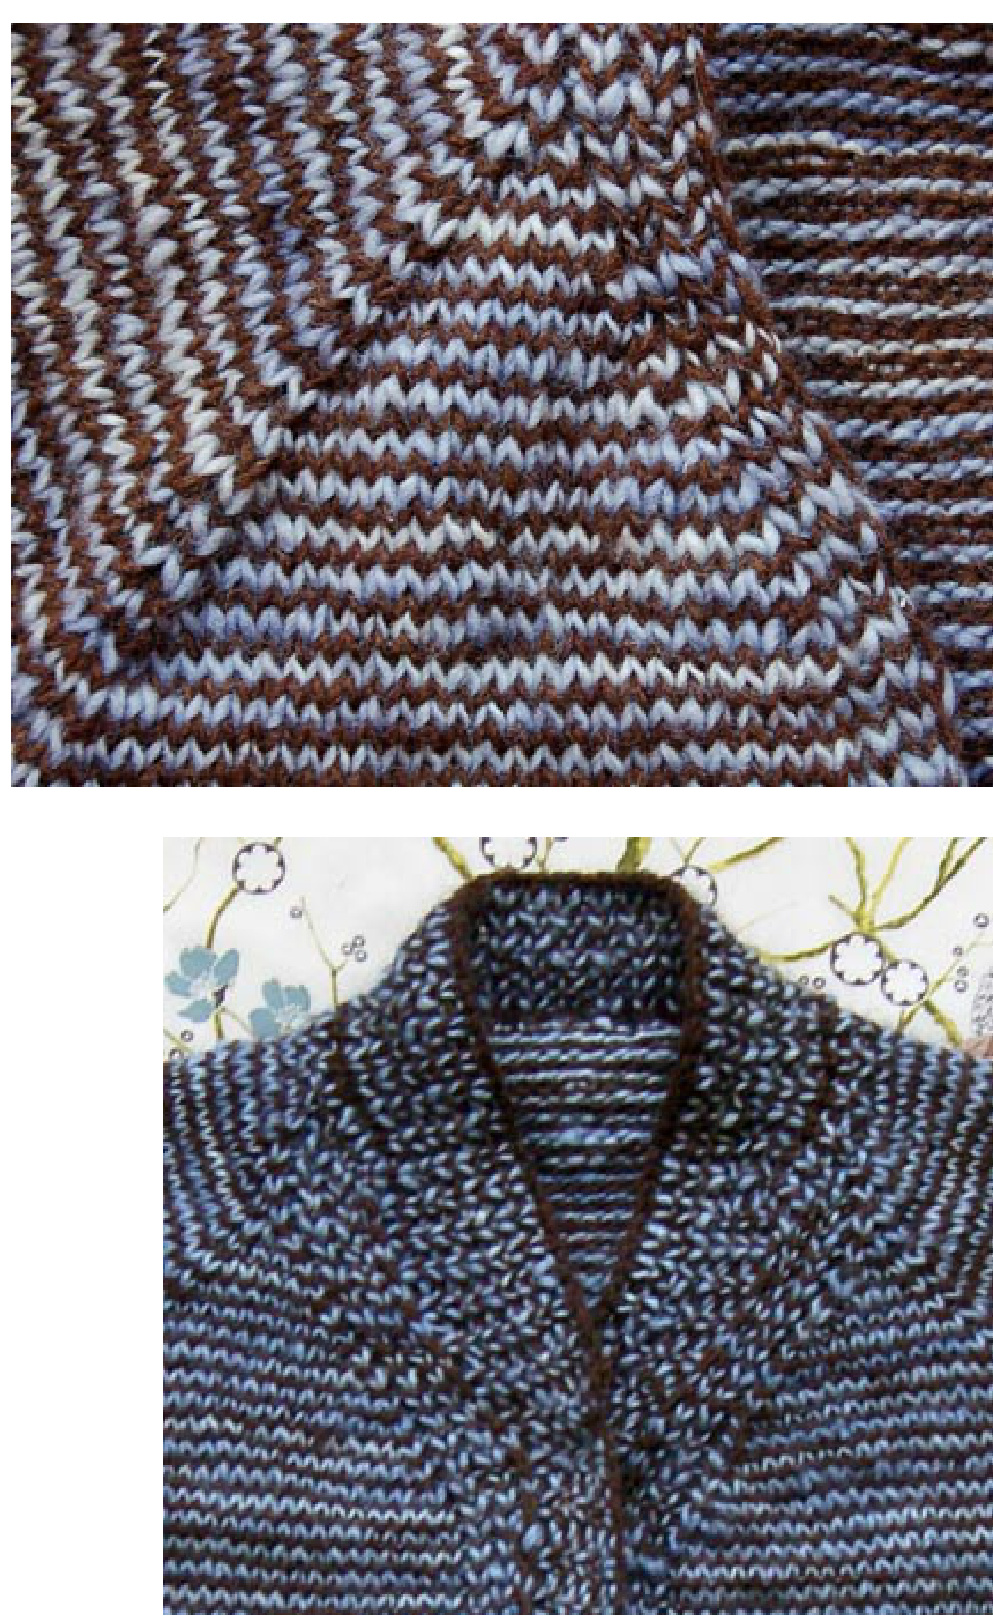
Row3(with Color1 on the Ws): Slip 1,k1, (p, k1)twice,\*pto 2 stitches before marker, p2tog, slip marker, p2tog, repeat from \* 3 more times, pto last 6 stitches, then (k1, p1) two times, k1. 152 stitches remaining. Row 4 (with Color 2 on the WS): Slip 1, k1, (p1, k1) twice, p to last 6 stitches, then (k1, p1) two times, k1. Now is the perfect time to try on your cardigan. COLLARAND BORDER
BACK OF COLLAR
Row 1 (with Color 1 on RS): Slip 1, p1, \*(k1, p1) repeat from \* to end of row, pick up and knit one stitch at neck edge. Row 2 (with Color 2 on RS): Slip 1, p1, \*(k1, p1) repeat from \* to end of row, pick up and knit one stitch at neck edge. Row 3 (with Color 1 on WS): Slip 1, k1, \*(p1, k1) repeat from \* to end of row, pick up and knit one stitch at neck edge. Row 4 (with Color 2 on WS): Slip 1, k1, \*(p1, k1) repeat from \* to end of row, pick up and knit one stitch at neck edge. Repeat Rows 1-4 one more time. You now have 32(40) sts on the needle. Break yarn, leaving long tails to weave in later. PICKUPANDKNITEDGESTITCHES With Color 1 at the RS right front edge, pick up and knit one stitch for each row all the way up the right front edge until you reach the collar stitches. Knit across 32(40) collar stitches with Color 1 yarn, then pick up and knit one stitchfor eachrow along the left front edge. You now have both front edges and the collar stitches on the needle, and you are ready to knit the border. The total number of stitches on the needle will depend on how long you made the body of the cardigan.
KNITBORDER
Row 1 (with Color 2 on RS): Slip 1, p1, \*(k1, p1) repeat from \* to end of row. Row 2 (with Color 1 on WS): Slip 1, k1, \*(p1, k1) repeat from \* to end of row. Row 3 (with Color 2 on WS): Slip 1, k1, \*(p1, k1) repeat from \* to end of row. Row 4 (with Color 1 on RS): Slip 1, p1, \*(k1, p1) repeat from \* to end of row. Repeat these four rows 2 times. Work Rows 1 and 2 one moretime. Using Color 2, bind off loosely in k1, p1 Rib. Try your sweater on right away, without stopping to weave in any ends.
FINISHING BITS
Weave in your ends and sew together underarms. Attach your buttons, zipper, snaps, or strategic safety pins for fastening the front of your cardigan. Enjoy!