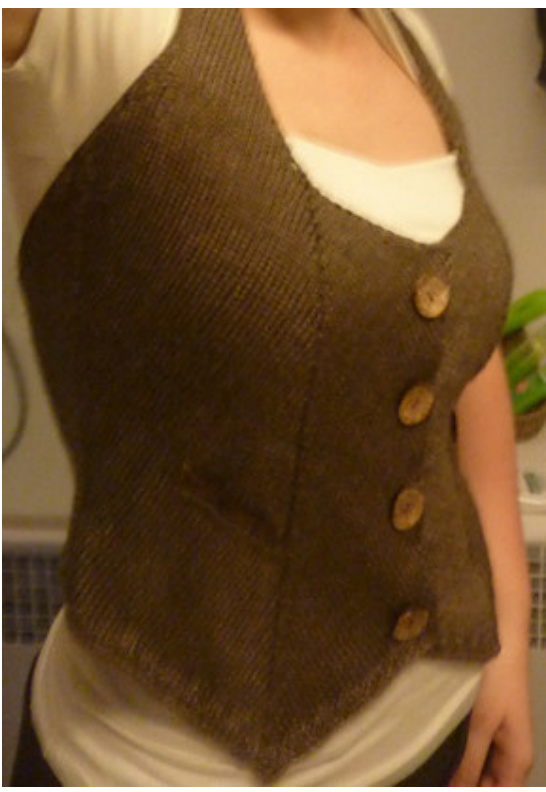
WAITRESS
THIS VEST IS KNITTED IN ONE PART, BEGINNING WITH THE BOTTOM PART. THE FRONTS ARE SEPARATED FROM THE BACK BYA"YARN OVER" LINE, WHICH GIVESTHAT TAILORED SHAPE. THE SAMEIS DONE AT THE MIDDLE OF EACH FRONT.
SIZES:
This is more a recipe a real pattern. Instructions are for size M (bust : 95 cm, waist $72\subset\mathfrak{m}.$ 一 Following your gauge and you measurements, modify the number of stitches (see further : cast on). This vest is easy to try on as you go, so don't hesitate to modify it for a better fit.
REQUIREMENTS:
DK shiny yarn (gauge : 10 cm/4" square : 22 st/30 rows)(Yarn used in model : Phildar canasta, color Poivre) Quantity : 160 g. Needles : 3,5 mm circular needles (US : 4) 4 mm circular needles (US: 6) 4 buttons (mine are 2cm/0.8" diameter) 4 snapfasteners
Therearenobutonhols, becauslindthy streth thgaement. |use snapfasteners between 2 layers and place decorative buttons. Ribbon : $2,5\subset\mathsf{m}/\mathsf{l}\,^{\ast}$ width and 40 cm/ 16" length Allalongthewok youwill havetknit instocintte stitch withfowing shai:

Marker A: K. 3 st. together at the stitch marker A (to form a V shape). All central stitches from the 3 ones will form an “alignment". Previous central stitches must be the central stitch when you k3tog 2 rows further. Marker B : Yarn over before stitchmarker B for the right side part Yarn over after stmkr B for left side part OnWS, no shaping. Purl each stitch. Purl yo's from previous row through back loop to avoid holes. Note: Alwaist increase and decrease is done on back part. CAST $O N$ : (number of st. is given for size M, finished measurements : back : 36 m, each side $24c m$ (in orange) ( $12\subset\mathfrak{m}$ along central sid (in red) and 17 cm along side part(in yellow) Front forms a triangle, so your number of st. is easy to find :remind your maths :length of cental side $(r e d)^{2}+$ length of side part (yllow) 2 $=$ total length (hypotenuse $=$ orange)2 Cast on 233 st (formy measurements) intotal, usinga3,5 mm needle (ongtalcast on-a4,5m tail in your left hand). When you cast on : make 29 st (right enter part), place stmkr A,
LEFT CENTER PART / LEFT SIDE PART / BACK PART / RIGT SIDE PART / RIGHT CENTER PART

RIBBING:
Make 4 rows of k2/p2 ribbing with the 3,5 mm/4 needle. Don't forget to k. 3 st. together at the first stmkr A, Yarn over before stmkr B for the right side part, yarn over after stmkr B for left side part, k. 3 st. together at the second stmkr A. To obtain a neat ribbing make sure you change stitch as you change part)
BODY -STOCKINETTE :
Continue in stockinette st. with 4 mm/6 needles. Don't forget to k. 3 st. together at the first stmkr A, yarn over before stmkr B for the right side part, yarn over after stmkr B for left side part, k. 3 st. together at the second stmkr A. 3rd row after ribbing : decrease 1 st. at each side of the back part. Decrease every 4 rows till 8 st. are decreased at each side in total. Decreasing method : decrease at 2 st. from the “side" line : left side: k2tog. right side : sl1 , k1, pass slipst. over k1
Short rows (optional:
After 11 cm/4.5" (total height), make short rows at the middle of back part for 10 cm wide (central stitches).
Back part binding off:
After 14,5 cm/6" (total height), leave 17 central st. on a 3,5mm/4 circular needle.
Continue each side separately.
Next row, leave 5 st more at each side on the circular needle, Next row, leave 4 st more .. Next row, leave 3 st more .. Don't forget to k. 3 st. together at the first stmkr A, yarn over before stmkr B for the right side part, yarn over after stmkr B for left side part, k. 3 st. together at the second stmkr A. Leave 2 st more each row on the circular needle until you reach stmrk B. Take off stmkr B. Leave 1 st more each row on the circular needle until there's only 18 st. remaining On the needle (see further “straps"). Waist increases: At the same time, after 16 cm/6.5", increase 1 st on each side (at 2 st from stmkr B - always on back part) Increase every 6 row (3 increases each side in total).
Front part binding off:
After 24,5 cm/9.5", bind off center part of half front. When you reach edge st. (WS for right front, R for left front). Leave last st. on circular needle (don't knit). Turn. Pass this I st stitch over 2'd st. Don't forget to k. 3 st. together at the stmkr A. Take off stmkr A when you reach it and continue same decrease.
Straps:
Reminder : You are now decreasing ist each row on both sides of the stap,. followings 2 different methods. When there are only 18 st. remaining on the needle, knit straight on arm edge and continue the decreases on central edge. (no more st. are put on $3,5\,\mathrm{mm}/4$ Circular needes) Strap curve : 12 rows further : make 1 between 2 first st. on arm side. 4 rows further: make 1 ( 5 times in total). Continue decreasing on central edge. When there are only 4 st remaining on needle, work this way : every 4 rows, make 1 between 2 first st. on central side and k2tog on arm side. Try it to know how long to make your straps. You have to reach the back of your head. Finish other side.
Circular ribbing:
Take all st that are left on the $3,5\,\mathrm{mm}/4$ circular needle and pick up st along straps (1 each row) to join in round. Beginning behind the head, knit in $2/2$ ribbing. Pick up new st when needed to avoid holes between garnement and ribbing. Try it on after 2 rows, there are risks of knitting it too tight (l speak from experience). Bind off loosely after4 rows. FINISHING: Block garnement.
Buttons:
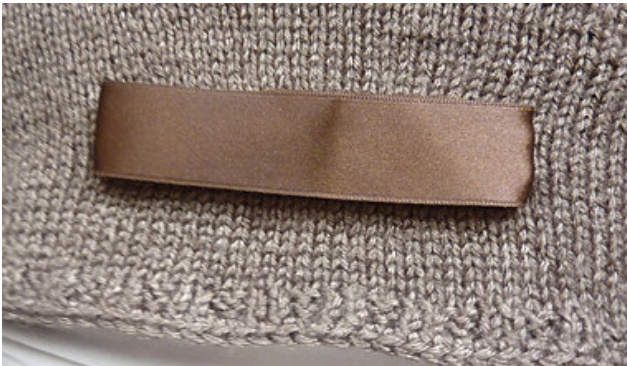
Sew 4 buttons on the right side equally along the side of your choice. Place 4 snapfasteners inside, to match buttons. You can add 3 more snapfasteners between buttons if you prefer. Back ribbon: Take a ribbon (23 cm/9" length). Burn the extremities. Make a bow and sew both edges. Sew it to middle of back garnement at 4 $\mathsf{c m}/\mathsf{i}\,,\mathsf{5}^{\mathsf{\,\prime}\mathsf{1}}$ total height (sew only inferior layer so that sewing are invisible)
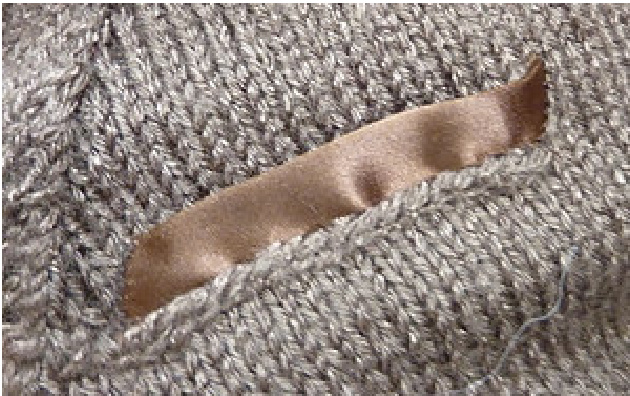
Pockets:
Take a $7~\mathsf{c m}/2,75^{\,\circ}$ ribbon. Fold it in 2 (lengthwise). Iron it to achieve neat finish. Place it on each side part, following side of rows. There are 2 options $:$ Sew it or make a crochet chain of the same length through knitting fabric and sew it under the chain (see picture - sew above chain but under chain layer to make sewing invisible)