Knitted Ladvbirds
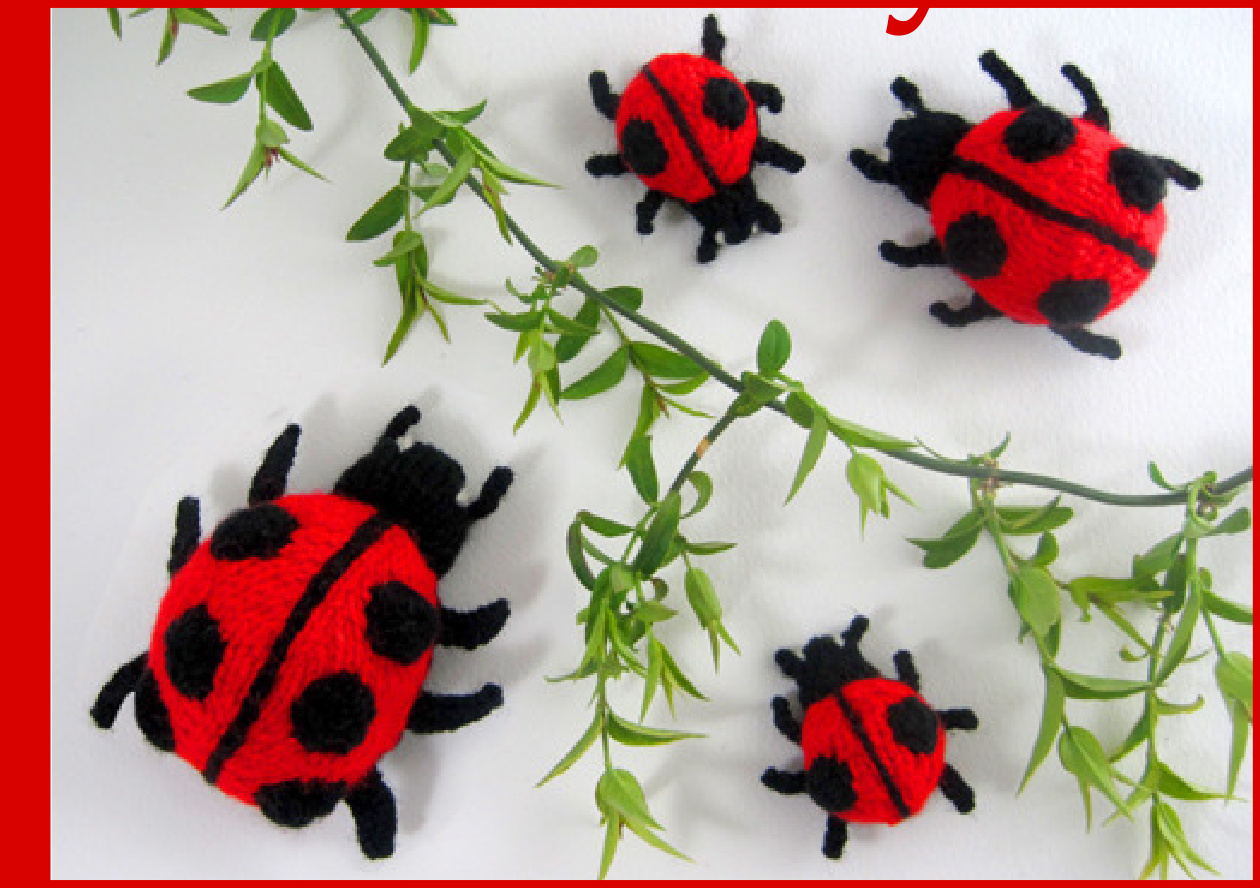
with 2, 4 or 6 spots. So they can also be used as a counting game to help children learn how to add up.
To make a ladybird, you need:
Needles: 3 1%4 mm (size 10, US 3) Yarn: Scraps of yarn in bright red, black and white. The ladybirds in the picture were made with a wool-polyester mix double knit yarn. Sportweight yarn is also suitable Tapestry needle for sewing up Polyester toy stuffing Scissors
How easy is it to make?
Quite easy! The red dome of each ladybird is knitted in one piece, with a bit of increasing and decreasing. Making up the ladybirds can be a bit fiddly with the legs and antennae, but there are tips for making a simpler version if you prefer. The spots are made by casting on some stitches, then gathering the stitches into a circle.
Make a shiny beetle button badge
The small ladybird pattern can also be knitted in metallic thread, to make a shiny beetle. Use black or dark grey yarn for the legs, head and underbelly. Attach a safety pin to make it into a button badge. A donation from downloads of ladybird patterns is made to the charity Sustain, which is a UK charity that works to persuade gardeners and local authorities to cultivate bee-friendly and ladybird-friendly plants and use less pesticides on their land, see: www.capitalbee.org. Sustain also runs The Big Dig project (www.bigdig.org.uk) and the Capital Growth campaign (www.capitalgrowth.org) to promote community food growing that is also wildlife-friendly.
How to make a knitted ladybird
WHAT STITCHES ARE USED?
The ladybird pattern is designed to be as simple as possible, using only stocking stitch. Stocking stitch means alternating rows of plain (k) and purl (p). If you prefer working every row in plain (called garter stitch), this makes a more textured finish for the ladybird, so you might find it a bit harder to attach the knitted spots. Try sewing on circles of black felt instead.
ABBREVIATIONS
k = knit or plain p = purl st(s) = stitch(es) inc = increase tog = together cm = centimetres in = inches numbers in (round brackets) give the total number of rows or stitches at this point numbers in [square brackets] will change when a row is repeated \* or + = the start of an instruction that will be returned to later in the pattern \*\* or ++ = the end of an instruction that will be returned to later in the pattern
YARN AND TENSION
To make a ladybird of about 10cm or 4in in length, head to end: using double knit yarn and working in stocking stitch, using 3 14 mm (size 10, US 3) needles, work 26 stitches and 34 rows to 10cm (4 inches). However, tension and the type of yarn are not critical. If your work is tighter, your needles smaller or your yarn thinner, your toy will simply be a bit smaller and use less yarn. If your work is looser, your needles bigger or your yarn thicker, your toy will simply be a bit bigger. Only with big changes to any of these elements may problems occur. For example, it is difficult to work at small scale with very chunky wool. And if you use bigger needles with thinner yarn, the stuffing will show through.
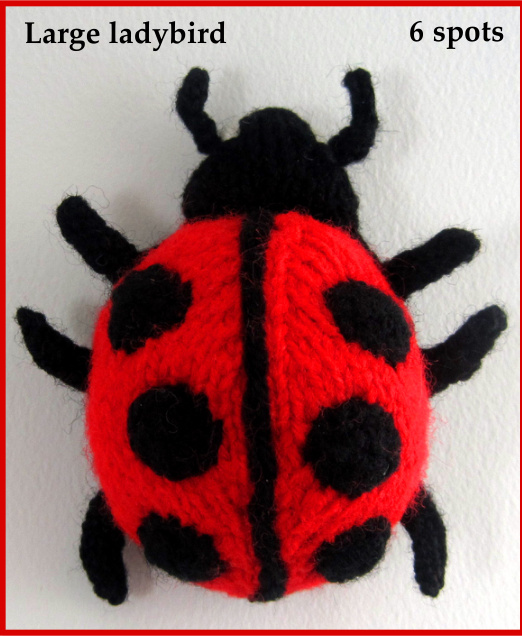
Large ladybird (6 spots)
LARGE LADYBIRD SHELL
Make one, using red yarn Cast on 4 sts in red yarn, leaving a tail of yarn to sew up the start of the shell. First row: p. Next row: inc 1 st into each of the 4 sts (8 sts total). Next row: \* Next row: k[2], inc 1 st into each of the next 4 sts, k[2]. Next row: p. \*\* Repeat from \* to \*\* twice more, increasing the number in the [square brackets] by 2 each time until you have 20 sts total, ending on a p row. Next row: k9, inc 1 st into each of the next 2 sts, k9 (22 sts total). Next row: p. Next row: k10, inc 1 st into each of the next 2 sts, k10 (24 sts total). Next row: p. Working in stocking-stitch and starting with a k row, work 6 rows (19 rows total). Next row: k10, k2 tog twice, k10 (22 sts remain). Next row: p. Next row: k9, k2 tog twice, k9 (20 sts remain). Next row: p. + Next row: k[6], k2 tog four times,k[6]. Next row: p. ++ Repeat from + to ++, reducing the number in the [square brackets] by 2 each time until 4 sts remain, ending on a p row. Cast off, leaving a tail of yarn to sew up the end of the shell.
LARGE LADYBIRD UNDERBELLY
Make one, using black yarn Cast on 6 sts in black yarn. First row: p. Next row: inc 1 st into each of the first 2 sts, k2, inc 1 st into each of the last 2 sts (10 sts total). Next row: p. Next row: inc 1 st into each of the first 2 sts, k6, inc 1 st into each of the last 2 sts (14 sts total). Next row: p. Next row: inc 1 st into first st, k12, inc 1 st into last st (16 sts total). Next row: p. Next row: inc 1 st into first st, k14, inc 1 st into last st (18 sts total). Next row: p. Continuing in stocking-stitch and starting with a k row, work 12 rows (21 rows total). Next row: k2 tog, k14, k2 tog (16 sts remain). Next row: p. Next row: k2 tog, k12, k2 tog (14 sts remain). Next row: p. Next row: k2 tog twice, k6, k2 tog twice (10 sts remain). Next row: p. Next row: k2 tog twice, k2, k2 tog twice (6 sts remain). Next row: p. Cast off.
LARGE LADYBIRD HEAD
Make one, using black yarn Cast on 18 sts in black yarn. In stocking stitch, and starting with a k row, work 6 rows. Next row: k2 tog, k5, k2 tog twice, k5, k2 tog (14 sts remain). Next row: p. Next row: k2 tog, k3, k2 tog twice, k3, k2 tog (10 sts remain). Next row: p. Cast off. To make up the large ladybird, follow the instructions on page 3.
LARGE LADYBIRD SPOTS
For a 6-spot ladybird, make 6, using black yarn. Or make this a 4-spot or 2-spot ladybird if you prefer Cast on 12 sts in black yarn. First row: p. Next row: k2 tog six times (6 sts remain). Break off the yarn leaving a long tail. Use a tapestry needle to thread the end of the yarn through the remaining stitches and pull tight, then use the tail of yarn to sew the short edges of the spot together, and then (when the ladybird is ready) the spot to the ladybird's shell.
Medium ladybird (4 spots)
MEDIUM LADYBIRD SHELL
Make one, using red yarn Cast on 4 sts in red yarn, leaving a tail of yarn to sew up the start of the shell. First row: p. Next row: inc 1 st into each of the 4 sts (8 sts total). Next row: p. Next row: k2, inc 1 st into each of the next 4 sts, k2 (12 sts total). Next row: p. Next row: k5, inc 1 st into each of the next 2 sts, k5 (14 sts total). Next row: p. Next row: k6, inc 1 st into each of the next 2 sts, k6 (16 sts total). Next row: p. Working in stocking-stitch and starting with
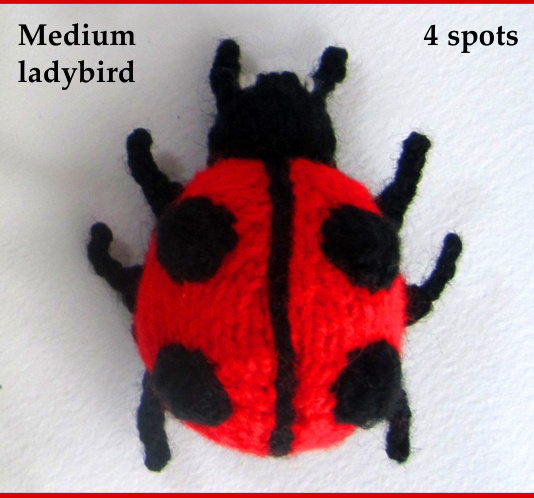
a k row, work 4 rows (13 rows total). Next row: k6, k2 tog twice, k6 (14 sts remain). Next row: p. Next row: k5, k2 tog twice, k5 (12 sts remain). Next row: p. Next row: k2, k2 tog four times, k2 (8 sts remain). Next row: p. Next row: k2 tog four times (4 sts remain). Next row: p. Cast off, leaving a tail of yarn to sew up the end of the shell.
MEDIUM LADYBIRD UNDERBELLY
Make one, using black yarn Cast on 4 sts in black yarn. First row: p. Next row: inc 1 st into each of the 4 sts (8 sts total). Next row: p. Next row: inc 1 st into first st, k6, inc 1 st into last st (10 sts total). Next row: p. Next row: inc 1 st into first st, k8, inc 1 st into last st (12 sts total). Next row: p. Continuing in stocking stitch and starting with a k row, work 8 rows (15 rows total). Next row: k2 tog, k8, k2 tog (10 sts remain). Next row: p. Next row: k2 tog, k6, k2 tog (8 sts remain). Next row: p. Next row: k2 tog four times (4 sts remain). Next row: p. Cast off.
MEDIUM LADYBIRD HEAD
Make one, using black yarn Cast on 12 sts in black yarn. In stocking stitch, and starting with a k row, work 4rows. Next row: k2 tog, k2, k2 tog twice, k2, k2 tog (8 sts remain). Next row: p. Cast off. To make up the medium ladybird, follow the instructions below.
MEDIUM LADYBIRD SPOTS
For a 4-spot ladybird, make 4, using black yarn. Or make this a 2-spot ladybird if you prefer Cast on 8 sts in black yarn. First row: p. Next row: k2 tog four times (4 sts remain). Break off the yarn leaving a long tail. Use a tapestry needle to thread the end of the yarn through the remaining stitches and pull tight, then use the tail of yarn to sew the short edges of the spot together, and then (when the ladybird is ready) the spot to the ladybird's shell.
Instructions for making up the ladybirds

SHELL AND UNDERBELLY
LADYBIRDHEAD
Templates for small, medium and large ladybird legs. Cut six in black felt
Fold the shell piece in half with smooth side out. Use a tail of yarn to join the few cast-on stitches at the back of the ladybird to complete the curved line of the dome. Do the same at the front of the ladybird with the few cast-off stitches. Fill the shell with stuffing. Lay the underbelly over the hole, smooth side out. Using a tapestry needle and black yarn, join the shell to the underbelly all around the edge (note: for an extra neat seam, work a line of chainstitch all around the join). For large and medium ladybirds, work an embroidered line of chainstitch (see diagram), using black yarn, across the middle of the shell, to make the dividing line between
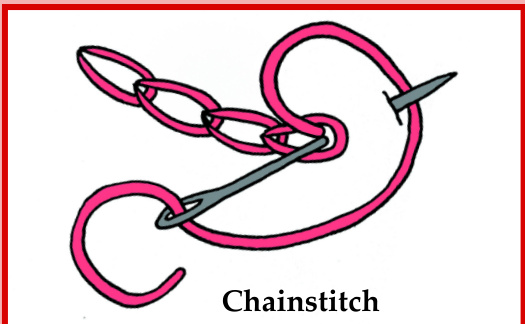
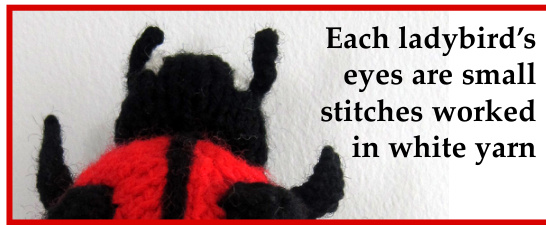
the two wings. For the small ladybird, work the same black yarn line but in a single line of stitching. With smooth sides on the outside, fold the head piece in half and join the seams to make a cushion shape. Before you get all the way round, fill with stuffing and sew closed, then sew at the front of the shell. Using white yarn, sew a few stitches at either side of the head to make two eyes.
LEGS AND ANTENNAE
There are two ways to make the legs and antennae: 1. With black felt. This method is a bit simpler, but the toys will be less suitable for small children as they can come off. Cut six legs from black felt using one of the templates. Use black thread to sew the end of each leg to the ladybird.
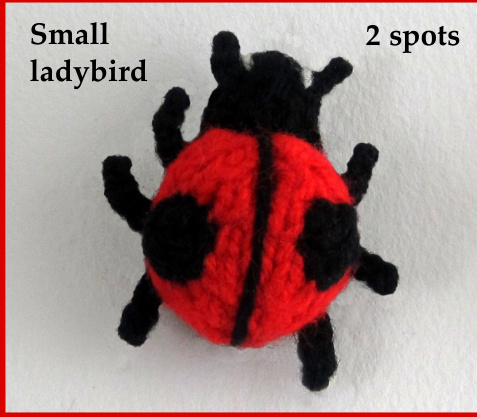
Small ladybird (2 spots)
SMALL LADYBIRD SHELL Make one, using red yarn Cast on 4 sts in red yarn, leaving a tail of yarn to sew up the start of the shell. First row: p. Next row: inc 1 st into each of the 4 sts (8 sts total). Next row: p. Next row: k3, inc 1 st into each of the next 2 sts, k3 (10 sts total). Next row: p. Continuing in stocking stitch and starting with a k row, work 4 rows (9 rows total). Next row: k3, k2 tog twice, k3 (8 sts remain). Next row: p. Next row: k2 tog four times (4 sts remain). Next row: p. Cast off, leaving a tail of yarn to sew up the end of the shell.
SMALL LADYBIRD UNDERBELLY
Make one, using black yarn Cast on 3 sts in black yarn. First row: p.
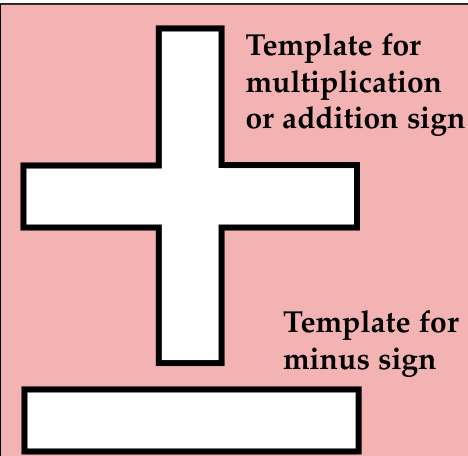
Template for two dots to turn a minus sign into a division sign Next row: inc 1 st into each of the 3 sts (6 sts total). Next row: p. Next row: inc 1 st into first st, k4, inc 1 st into last st (8 sts total). Next row: p. Continuing in stocking stitch and starting with a k row, work 4 rows (9 rows total). Next row: k2 tog, k4, k2 tog (6 sts remain). Next row: p. Next row: k2 tog three times (3 sts remain). Next row: p. Cast off.
SMALL LADYBIRD HEAD
Make one, using black yarn Cast on 8 sts in black yarn. In stocking stitch, and starting with a p row, work 3 rows. Next row: k2 tog four times (4 sts remain). Next row: p. Cast off. To make up the small ladybird, follow the instructions on page 3.
SMALL LADYBIRD SPOTS For a 2-spot ladybird, make 2, using black yarn Cast on 6 sts in black yarn. First row: k2 tog 3 times (3 sts remain). Break off the yarn leaving a long tail. Use a tapestry needle to thread the end of the yarn through the remaining stitches and pull tight, then use the tail of yarn to sew the short edges of the spot together, and then the spot to the ladybird's shell.

hese knitted ladybirds make nice ornaments or badges. However, they I have also been designed to be used as a counting game to help young children learn about numbers. Use the templates provided to cut out some symbols in either black card or black felt. Then the ladybird spots can be used for practising basic mathematics - addition, subtraction, division and multiplication. Two ladybird spots plus two ladybird spots equals four!
Copyright Kath Dalmeny, 2013. More patterns for knitted toys by this designer can be downloaded on the wonderful Ravelry website at: www.ravelry.com/designers/kath-dalmeny


