Flanneny
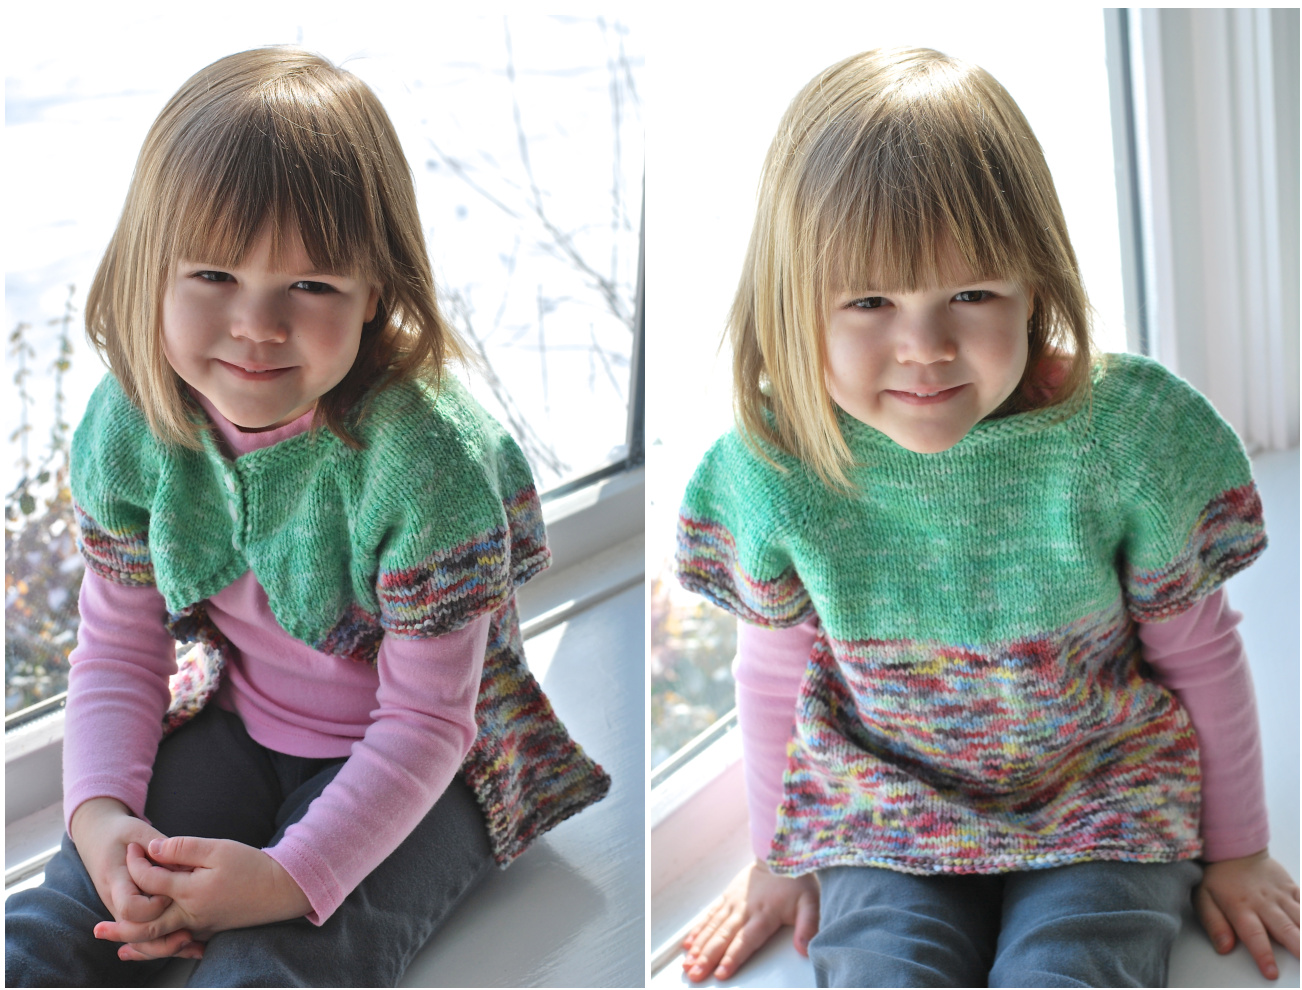
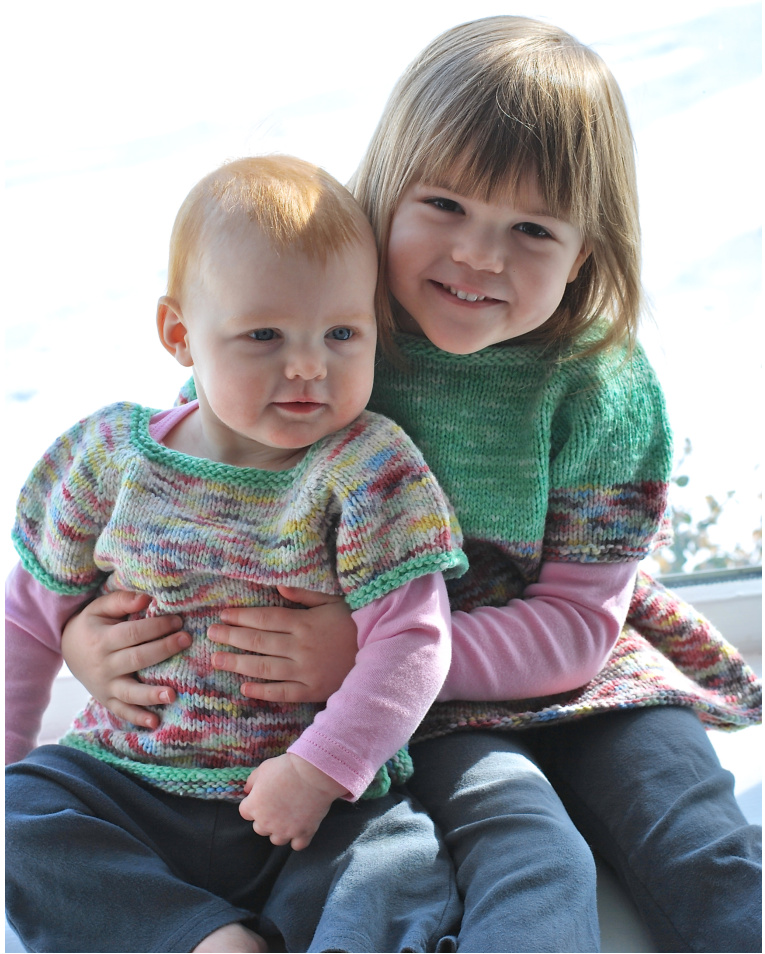
Flannery is a simple and quick knit. This pretty pinafore or cardigan is seamless, raglan-style, and worked from the top down. Features include a button closure and short, slightly puffed sleeves. It is reversible and can be worn either as a pinafore (button closure in the back) or as a cardigan (button closure in the front). Instructions for sweater/tunic or dress length are included. Also, intarsia can be used to create button plackets in a contrasting color from the body of the cardigan if desired. Layer it over a special outfit for extra warmth. Embellish it in any number of ways, as the imagination desires! Gauge: 20 stitches & 28 rows to 4 inches / 1ocm in stockinette stitch on size US 7 / 4.5 mm needles Size: 3mo (6m0, 12mo, 18m0, 2T, 4T) Chest measurement (approx): 19 (20, 22, 23, 24, 27) inches / 48 (51, 56, 58.5, 61, 68.5) cm
Materizls
Yarn: Worsted weight yarn Appr0ximately 300 (350, 400, 450, 500, 550) yards Yardage will vary depending on the options you choose. When in doubt, purchase the extra skein! If using a contrasting color for the collar, edges, and hem, it should be about 2o% of the total yardage. Needles: Size 7 / 4.5 mm, 16" / 40 cm & 24" / 60 cm or longer circular needle (or size needed to obtain gauge) Other: Tapestry needle Waste yarn 6 Stitch markers Measuring tape Buttons, 1/2" Skills: Basic knitting techniques (knit, purl, increasing, decreasing), backwards loop cast on (or preferred other method for casting on in the middle of a row), intarsia (if desired)
Abbreviations
BO: bind off CC:contrasting color CO: cast on K: knit KFB: an increase worked by knitting into the front and back of a stitch before slipping it off the left needle MiB: an increase worked by picking up the yarn between two stitches from the back and knitting into the front loop MC: main color M1F: an increase worked by picking up the yarn between two stitches from the front and knitting into the back loop P: purl P2tog: a decrease worked by purling two stitches together PM: place marker RH: right hand RS: right side PU: pick up a stitch SM: slip marker WS: wrong side YO: yarn over Note: Pattern instructions are indicated for the smallest size, with larger sizes appearing in parentheses. If there are no parentheses, the instruction applies to all sizes. Before knitting, it is strongly encouraged that you read through the pattern completely. It may be helpful to highlight the desired options in your chosen size before beginning the project.
Cast on
Using MC or CC if desired, CO with US size 7 needle (or needle size used to obtain gauge) 6o (6o, 64, 64, 68, 68) stitches as follows: CO 3, PM, CO 9 (9, 10, 10, 11, 11), PM, CO 10, PM, CO 16 (16, 18, 18, 20, 20), PM, CO 10, PM, CO 9 (9, 10, 10, 11, 11), PM, CO 3 The 3 stitches at the start & end of the work willform the button placket section at the back of the garment. The stitches from thestart of the CO until the2d marker &from the5 marker until the end are the lft and right sides of the back of the pinafore. The stitches between the 2d & 3"d markers and the 4th & 5th markers are the sleeves. The stitches between the3d &4 markers are the front of the pinafore. You may wish to use 2 stitch markers of a different color or style from the other 4 to mark the stitches of the button placket. Proceed onto collar.
Collan
The collar will be worked in Garter Stitch Flat, and all markers will be slipped as you come to them. After the collar is finished, Garter Stitch Flat will be continued as the yoke is worked in the button placket sections only. Garter Stitch Flat Row 1 (WS): Knit to end Row 2 (RS): Knit to end Row 3: Knit to end Work Garter Stitch Flat as above. Switch to MC or CC if desired.
Buttonhole α fleeve increases
Now work a buttonhole & sleeve section increases as follows: Row 1 (RS): \*K3, SM, knit to one stitch before 2"d marker, MiF, K1, SM, \*\*M1B, K1, MiF, K1 repeat from \*\* to 1 stitch before 3"d marker, K1, SM, K1, MiB, knit to one stitch before 4 marker, M1F, K1, SM, \*\*MiB, K1, M1F, K repeat from \* to stitch before 5" marker,K1, SM, K, MiB, knit to 6" marker, SM, K1, YO, KZtog Row 2 (WS): K3, SM, purl to 6"h marker, SM, K3 Total number of stitches left on the needles will be 84 (84, 88, 88, 92, 92). As the yoke is formed, buttonholes will be worked on a RS row approximately 1 inch / 2.5cm (or every 7 rows) apart by working K1, YO, K2tog in the button placket section as above. Space 1 (1, 2, 2, 3, 3) buttonholes in the button placket section. Proceed onto yoke.
Yoke
Continue to work Garter Stitch Flat in the button placket sections. Remember to work the buttonhole rows as directed above. Intarsia may be used to continue CC in the button placket sections at the back of the garment if desired. Row 1 (RS): K3, SM, \*knit to one stitch before next marker, M1F, K1, SM, K1, M1B repeat from \* for each marker until 6th marker, SM, K3 Row 2 (WS): K3, SM, purl to 6th marker, SM, K3 Repeat above until there are 26 (26, 28, 30, 36, 38) stitches in each sleeve. Total number of stitches left on the needles will be 108 (108, 120, 128, 156, 164). End after completing a WS row.
tpper yoke shazping
Next work the following rows, which will continue increases in all sections except the right and left back sections. Row 1 (RS): K3, SM, K2tog, \*knit to one stitch before next marker, M1F, K1, SM, K1, M1B repeat from \* for each marker until 5th marker, SM, knit to two stitches before 6th marker, SSK, SM, K3 Row 2 (WS): K3, SM, purl to 6th marker, SM, K3 Repeat above until there are 38 (36, 42, 42, 40, 44) stitches in each sleeve. Total number of stitches left on the needles will be 144 (138, 162, 164, 168, 182). End after completing a WS row.
Mid&le yoke shaping
The lower part of the back sections of the pinafore will now be shaped by decreases while increases are continued in the sleeves and front section. Be sure to work the rows below for your chosen size as directed. Row 1 (RS): K3, SM, K2tog, K1, K2tog, \*knit to one stitch before next marker, M1F, K1, SM, K1, M1B repeat from \* for each marker until 5" marker, SM, knit to 5 stitches before 6" marker, SSK, K1, SSK, SM, K3 Row 2 (WS): K3, SM, purl to 6th marker, SM, K3 Repeat the two rows above o (4, 0, 1, 2, 3) times. Total number of stitches left on the needles will be 144 (154, 162, 168, 176, 194). Proceed on to final yoke shaping. Finzl yoke shazping Row 1 (RS): K3, SM, K2tog, K1, K2tog, K1, K2tog, \*knit to one stitch before next marker, MiF, K1, SM, K1, M1B repeat from \* for each marker until 5th marker, SM, knit to 8 stitches before 6th marker, SSK, K1, SSK, K1, SSK, SM, K3 Row 2 (WS): K3, SM, purl to 6th marker, SM, K3 Repeat above until there are 44 (46, 48, 50, 52, 58) stitches in each sleeve. Total number of stitches left on the needles will be 150 (156, 168, 174, 184, 202). End after completing a RS row. Next, work a decrease row on the WS in the two sleeve sections only as follows for chosen size. Continue to work even in stockinette in the front and back sections on this row. This will help to create slightly full cap stylesleeves. For 3 mo size: P1, [P2tog, P3] 2 times, [P2tog, P2] 5 times, [P2tog, P3] 2 times, P2tog, P1 For 6 mo size: P1, [P2tog, P3] 3 times, [P2tog, P2] 3 times, [P2tog, P3] 3 times, P2tog, P1 For 12 mo size: P1, [P2tog, P3] 4 times, [P2tog, P2] 1 time, [P2tog, P3] 4 times, P2tog, P1 For 18 mo size: P2, [P2tog, P3] 9 times, P2tog, P1 For 2T size: P2, [P2tog, P4] 1 time, [P2tog, P3] 7 times, [P2tog, P4] 1 time, P2tog, P1 For 4T size: P2, [P2tog, P4] 4 times, [P2tog, P3] 1 time, [P2tog, P4] 4 times, P2tog, P1 Total stitches for each sleeve should be 34 (36, 38, 40, 42, 48). Total number of stitches left on the needles will be 130 (136, 148, 154, 164, 182). Proceed on to divide the sleeves.
Dixide the sleeves
In order to divide the sleeves, work as follows: K3, SM, knit to 2"d marker & remove it, place 34 (36, 38, 40, 42, 48) sleeve stitches on to waste yarn, CO 1 stitch onto RH needle for all sizes using the backwards loop or your desired method, slip 3"d marker, knit to 4t marker & remove it, place 34 (36, 38, 40, 42, 48) sleeve stitches on to waste yarn, slip 5" marker, CO 1 stitch onto RH needle for all sizes using the backwards loop or your desired method, knit to end. Four stitch markers remain. Total number of stitches left on needles will be 64 (66, 74, 76, 82, 88). Continue the remainder of the yoke & slip all markers as you come to them by working the pattern as Writtenbelow: Row 1 (WS): K3, SM, purl to 4th marker, SM, K3 Row 2 (RS): K3, SM, knit to 4th marker, SM, K3 Repeat Rows 1 & 2 above for 5 (5, 7, 7, 11, 11) rows. End after completing a WS row.
Pinafore body
The lower part of the pinafore will now be given an A-line shape. Work the A-line instructions as written below. Row 1 (RS): Knit to one stitch before 2"d marker, MiF, K1, SM, MiB, knit to 3"d marker, M1F, SM, K1, MiB, knit to end Row 2 (WS): K3, SM, purl to 4h marker, SM, K3 Row 3: Knit to end Row 4: K3, SM, purl to 4" marker, SM, K3 Row 5: Knit to end Row 6: K3, SM, purl to 4" marker, SM, K3 For dress length, repeat Rows 1-6 until work measures approximately 11 (13, 15, 16, 18, 20) inches / 28 (33, 38, 40.5, 46, 51) cm or o.5 inch / cm short of desired length. For sweater/tunic length, repeat Rows 1-6 until work measures approximately 9.5 (11,11.5, 12, 12.5, 13.5) inches / 24 (28, 29, 30, 32, 34) cm from cast on edge. If CC is desired for garment hem, switch to CC on the final RS row. End after completing a RS row. Proceed on to garment hem.
Garment Hem
The remainder of the garment hem will be in Garter Stitch Flat. Garter Stitch Flat Row 1 (WS): Knit to end Row 2 (RS): Knit to end Row 3: Knit to end Work Garter Stitch Flat as above. BO loosely in pattern.
Sleeves
Remove waste yarn and place 34 (36, 38, 40, 42, 48) stitches onto size US 7 DPN or 12" circulars. Stitches will be picked up under the arm, and you will then knit in the round. Join yarn and PU 1, PM, PU 1 for all sizes. Total stitches for each sleeve should be 36 (38, 40, 42, 44, 50). The marker serves as the beginning of the round. Knit two rounds. Begin the cuff of the sleeve. Switch to CC if desired and knit one round. The remainder of the cuff will be in Garter Stitch In The Round. Garter Stitch In The Round Round 1: Purl to end Round 2: Knit to end Round 3: Purl to end :k a total of 3 rounds in Garter Stitch In The Round for the cuff. BO loosely in pattern
Finishing
ttach buttons. Weave in all ends and block. Place on your special little one and enjoy
Acknowle&gements
I would like to thank all of my wonderful testers for their invaluable comments and assistance. To my sources of inspiration and to my family, thank you for your love and support! Email: odaleefibers@gmail.com Ravelry username: edgbar
Copyright
@Emily Barbee of Odale Fibers, 2o15. This pattern is for personal home use only. You may make garments from it as gifts or donate to charities and fundraisers. Commercial use of this pattern is a violation of the copyright. Selling products made from this pattern or distributing this pattern in any manner is prohibited unless I, Emily Barbee, have granted express written permission.