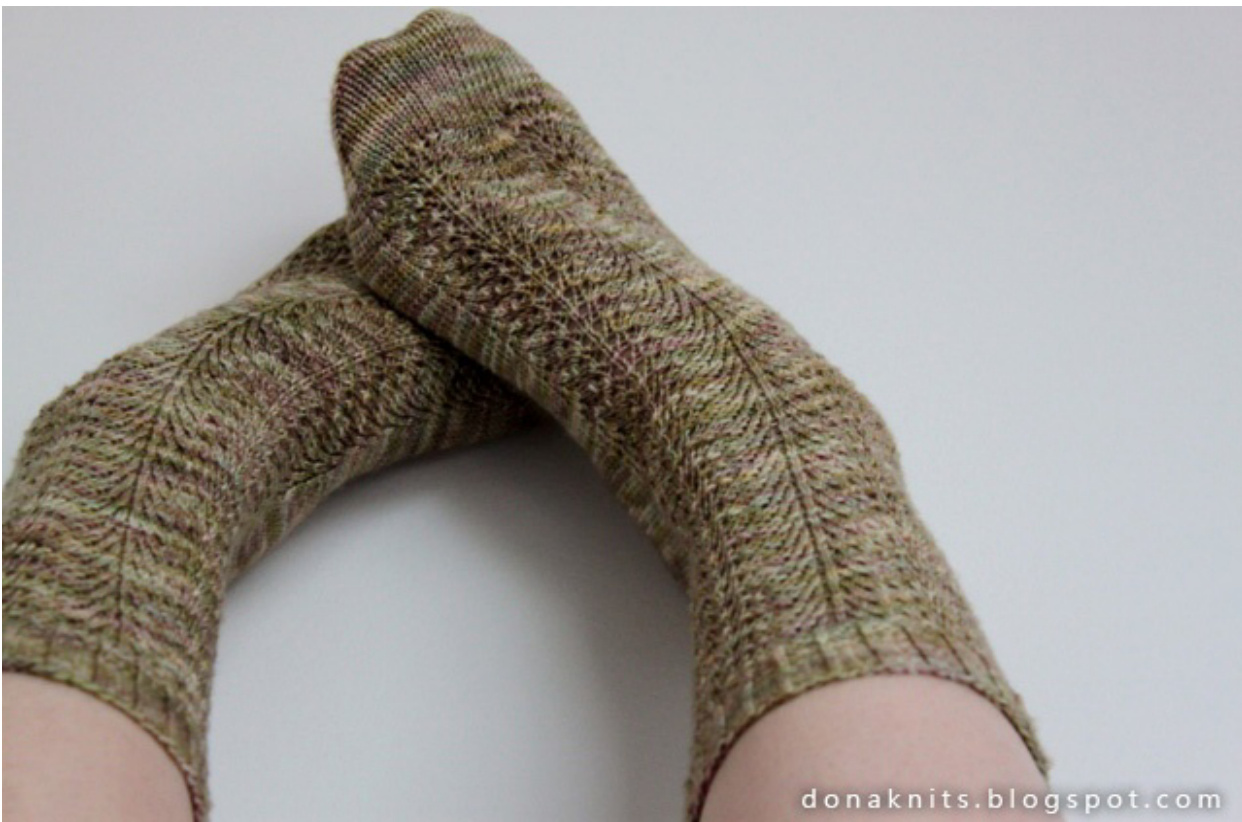
By the Seine River
I imagined these socks during my stay in Paris. The waves and lines remind me the Seine River. It should fit a standard woman's foot and is meant to be a good beginner sock. Also, this pattern should suit any variegated, solid or semi-solid sock yarn. Hope you will enjoy this pattern!
Important notice:
These socks are meant to be knitted using the Magic Loop or 2 circular needles method, but can easily be converted for double pointed needles. k of leg/sole. Rib pattern for the back of the leg, and stockinette stitch for the sole Needle B: front of the leg/instep. Feather and fan pattern on the front of the leg and on the instep. Gauge: 8st = 1 inch in stockinette st in the round. 13st = 1 inch in rib pattern, unstretched, in the round. Yarn: Any fingering yarn that gives you the right gauge. Approx. 350-400m / 100gr. Sample shown in Araucania Botany Lace. Materials: One or two 2.5mm, 80cm circular needle(s) or any other size that gives you gauge. Tapestry Needle Stitch marker (optional) By the Seine River 2012 Copyright @ by Dona Knits Design. All rights reserved. Instructions: Sizing tip: You can alter the diameter of your sock by using smaller or larger needles.
CUFF:
CO 72. Replace your stitches evenly on 2 needles (36st on both needles) and join in the round being careful not to twist stitches. Place a marker if you wish after the first stitch of needle A to mark the beginning of the round. Rib Pattern: P1, Ktbl, \*P2, Ktbl\* along, end with P1. Work 14 rounds.
LEG:
Set up row: Continue in ribbing pattern on needle A. For needle B, K across. Leg pattern: Needle A: every row is worked in ribbing. Begin working feather and fan chart on needle B.

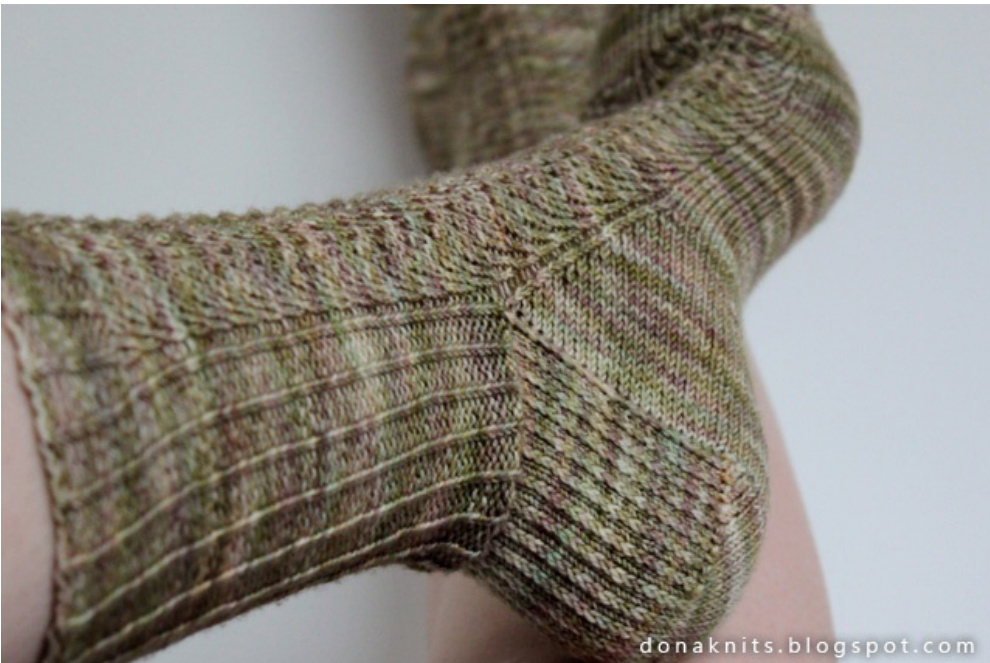
Chart Symbols: : Knit / : K2tog 0 : yo Work until 6" from beginning or until desired length, ending with row 4 of the chart. HEEL: Worked on needle A only. Needle B simply holds the instep stitches. Fitting tip: Heel flap length should be almost the same length as your own heel. If you have a high instep, you might want to lengthen the flap to fit your foot perfectly. If you do so, you'll pick up more stitches and decreasemore to returnback to72st total. Heel Flap: (Knitted back and forth on 36st) On RS, the first st is slipped knitwise, and on WS, the first st is slipped purlwise. (RS) R1: \*SI1, K1\* (WS) R2: SI1, \*P\* Repeat R1 & R2 for 18 times total, or more if needed (see notes above) Heel Turn: On RS, the first st is slipped knitwise, and on WS, the first st is slipped purlwise. (RS) R1: Sl1, K until last 15st, ssk, K1. Turn your work. (WS) R2: Sl1, P until last 15st, P2tog, P1. Turn your work. (RS) R3: Sl1, K8, ssk, K1. Turn your work (WS) R4: Sl1, P9, P2tog, P1. Turn your work (RS) R5: Sl1, K10, ssk, K1. Turn your work (WS) R6: Sl1, P11, P2tog, P1. Turn your work .... Continue working in this manner, until all heel stitches have been worked. You should have 22 heel sts. Next Row: Sl1, K across heel. By the Seine River 2012 Copyright @ by Dona Knits Design. All rights reserved.
FOOT:
Gusset decrease set-up rounds: (You'll be working again in the round from now on) Pick up 18 stitches for gusset (or more if you did a longer heel flap), work instep chart, row 1 (needle B), pick up 18 stitches (or more if you did a longer heel flap), work the heel stitches.
Next :
Needle A: Ktbl the picked up stitches Needle B: Work row 2 of the chart. Needle A: Ktbl the picked up stitches and K the heel stitches, K until end of needle A. Rearrange the stitches, so that you have Needle A: gusset and heel stitches; Needle B: instep stitches. Having more stitches on needle A than on needle B is perfectly normal. The beginning of the round is at the beginning of needle B (instep). You are now ready to begin the gusset decreases.
Gusset decreases:
R1: Needle B: Continue working the instep as established on chart. Needle A: ssk, K until last 2 stitches, K2tog. R2: Plain round. Work the instep as established on needle B, K all the sts on needle A. Continue in this manner, working R1 & R2 until you have 36 st on each Needle B (instep) & Needle A (sole). Continue working in pattern (st st for sole, feather and fan chart for instep) until you have reached your desired foot length. (total foot length minus 2"/5cm) End on row 3 or 4 of the chart.
TOE:
Toe Decreases:
R1: K1, ssk, K until last 3 sts, K2tog, K1, on both needle A & B R2: K all stitches, on both needle A & B. Repeat R1 & R2 until you have 12 sts left on each needle A & B (24 sts total) Cut the yarn leaving a long tail and graft the remaining stitches. Weave in all ends. Soak and block. Enjoy! http://donaknits.blogspot.com By the Seine River 2012 Copyright @ by Dona Knits Design. All rights reserved.
Abbreviations:
CO : Cast on (RS) : Right side (WS) : Wrong side St(s) : stitch St st : Stockinette stitch K : Knit Ktbl : Knit through the back loop. P :Purl Yo : yarnover K2tog : Knit 2 stitches together. P2tog : Purl 2 stitches together. Ssk : Slip one stitch, then slip the nt Copyright 2012 Dona Knits Design All rights reserved. This pattern, including text and images, is an original Dona Knits design. You may print and use this pattern only for your personal use. Please do not reproduce or sell the pattern or sell items that are knitted from this pattern without my written permission. Sl1: Slip 1 stitch. Slip knitwise on RS rows, Slip purlwise on WS rows.