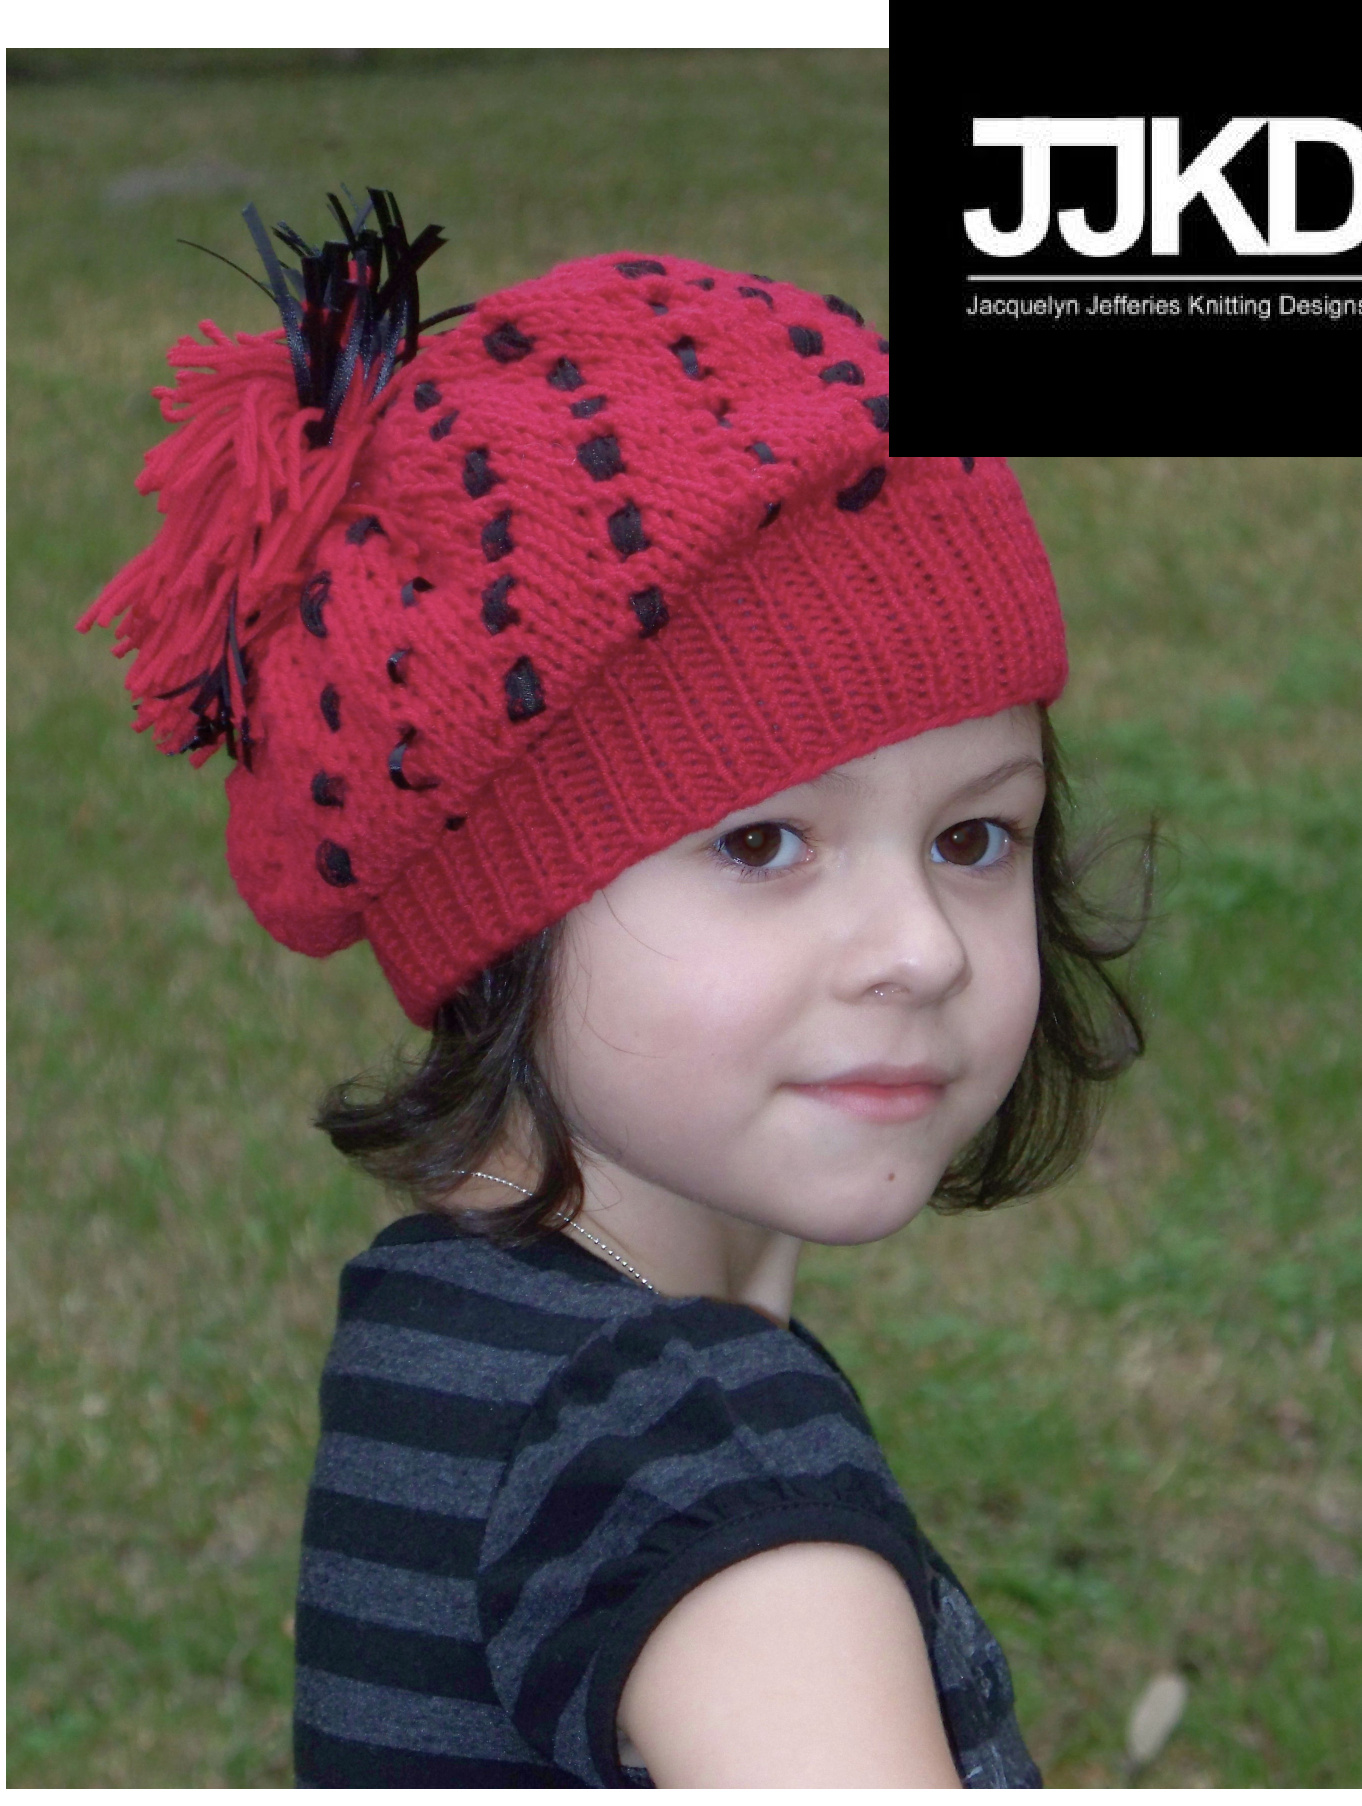
ZEEBAD
Zeebad is the worsted version of Zebedee. My quest to keep the patterns as similar as possible resulted in a few extra options for the worsted version of this hat. If knit to pattern specs it has more of a slouchy beret shape than Zebedee. For a fitted hat you can choose one size smaller than you normally would or decrease the number of repeats of the eyelet section by one. This version looks equally well laced or unlaced if knit in a plain textured yarn like the one shown. DIFFICULTY: appropriate for a beginner. It requires basic increasing and decreasing knowledge.
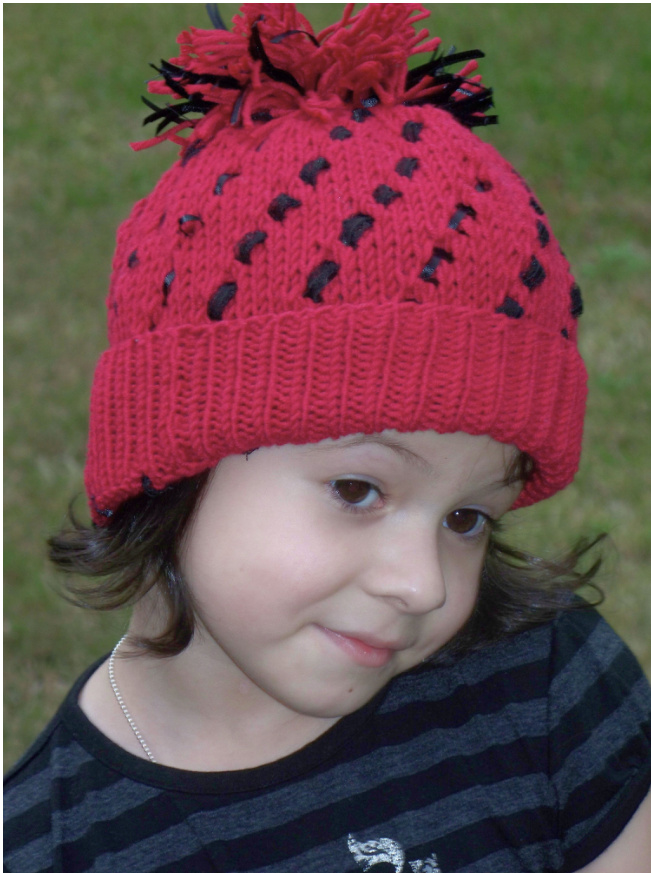
SIZE P- Preemie [XS- Baby, S-Toddler, M- child, L- ladies, XL men] (Shown in sizes M)
FINISHEDMEASUREMENTS
Circumference 12[14, 16, 18, 20, 22] inches
MATERIALS
Any worsted weight yarn 120 [130, 150, 164, 220, 240] yards Yarns shown: Shokay Shambala in color Strawberry- took 1 full skein (but I used quite a bit for the pouf) 1 set US #4/5.5mm DPNs or small circular needle 1 set US #7/ 6mm DPNs or small circular needle Yarn needle 3-4 yards of ribbon (3/8-5/8 width works best) GAUGE 20 sts/24 rows = 4" in stockinette stitch
PATTERN
With smaller needles CO 6o[72, 78, 90, 102, 108] sts and distribute evenly across needles (if you are working with DPNs). Join and pm to mark beg of round. Work in 1X± ribbing for 1[2, 2, 2.5,3, 3] inches.
Eyelet pattern
Row 1: \* k4, yo, k2tog, rep from \*. Row 3: \* k3, yo, k2tog, k1, rep from \* Row 5: \* k2, yo, k2tog, k2, rep from \* Row 7: \* k1, yo, k2tog, k3, rep from \* Row 9: \* yo, k2tog, k4, rep from \* Row 1o: kto end. Remove marker. Slip 1st st of the round to end of the last needle and replace marker before repeating eyelet sequence. Repeat eyelet sequence 2 [2, 3,3, 4, 5]times.(Forafitted hat you can decrease this number by one) Crown decreases: (Switch to DPNs for crown decreases) Row 1: \*k2, k2tog, yo, k2tog, rep from \* (50, 6o, 65, 75, 85, 90 sts) Row 2 and all even rows: k Row 3: \*k2tog, yo, k2tog, k1, rep from \* (40, 48, 52, 6o, 68, 72 sts) Row 5: \*k2tog, k2tog, y0, rep from \* (30, 36, 39, 45, 51, 54 sts) Row 7-8: k Row 9: k2tog across [sizes S, M, L will end in k1] (15, 18, 20, 23, 26, 27 sts) Row 10: k Row 11:k2tog across [sizes P, M, XL will end in k1] (8, 9, 10, 12, 13, 14 sts) Cut yarn and draw tail through remaining sts.
FINISHING
Weave in ends.
Lacing the eyelets:
Cut 6 [7, 8, 9, 10, 11] pieces of ribbon measuring 8[8, 10, 10, 10, X] inches. Fold the edge of the ribbon under and tack it down on the inside of the hat just below the eyelet using a sewing needle and matching thread. Lace the ribbon in and out ofthe eyelets following the vertical spiral pattern. At the top tuck the tail to the inside of the hat and tack it in the same manner. Repeat this step for each eyelet that borders the ribbing section. Making the pouf: Using something like a DVD case, wind yarn around the width until the pouf is as full as desired. Cut through all layers of the yarn at each end and set these pieces aside. Cut several lengths of ribbon to the same length as the yarn. Now using both cut yarn and cut ribbon stack them neatly alternating them so that they will be evenly mixed when the pouf is tied together. Using a 12 inch length of yarn, gather the center of the stack and tie it securely. Attach this to the top or front side of your hat (for a vintage cloche look) and weave in any remaining ends.
| ABBREVIATIONS | |
| Beg- beginning | rep- repeat |
| BO-bind off | RS-right side |
| CO-cast on | sl- slip |
| Cont-continue | SSK-slip, slip, knit |
| k- knit | sts- stitches |
| k2tog- knit two together | WS-wrong side |
| p- purl | YO-yarn over |
Zeebad ? 2008 Jacquelyn Jefferies. All rights reserved.


