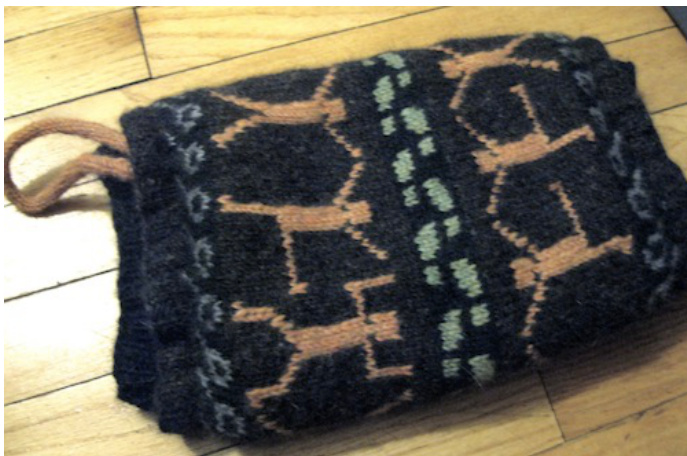
DAHCIHG MEH MUFF
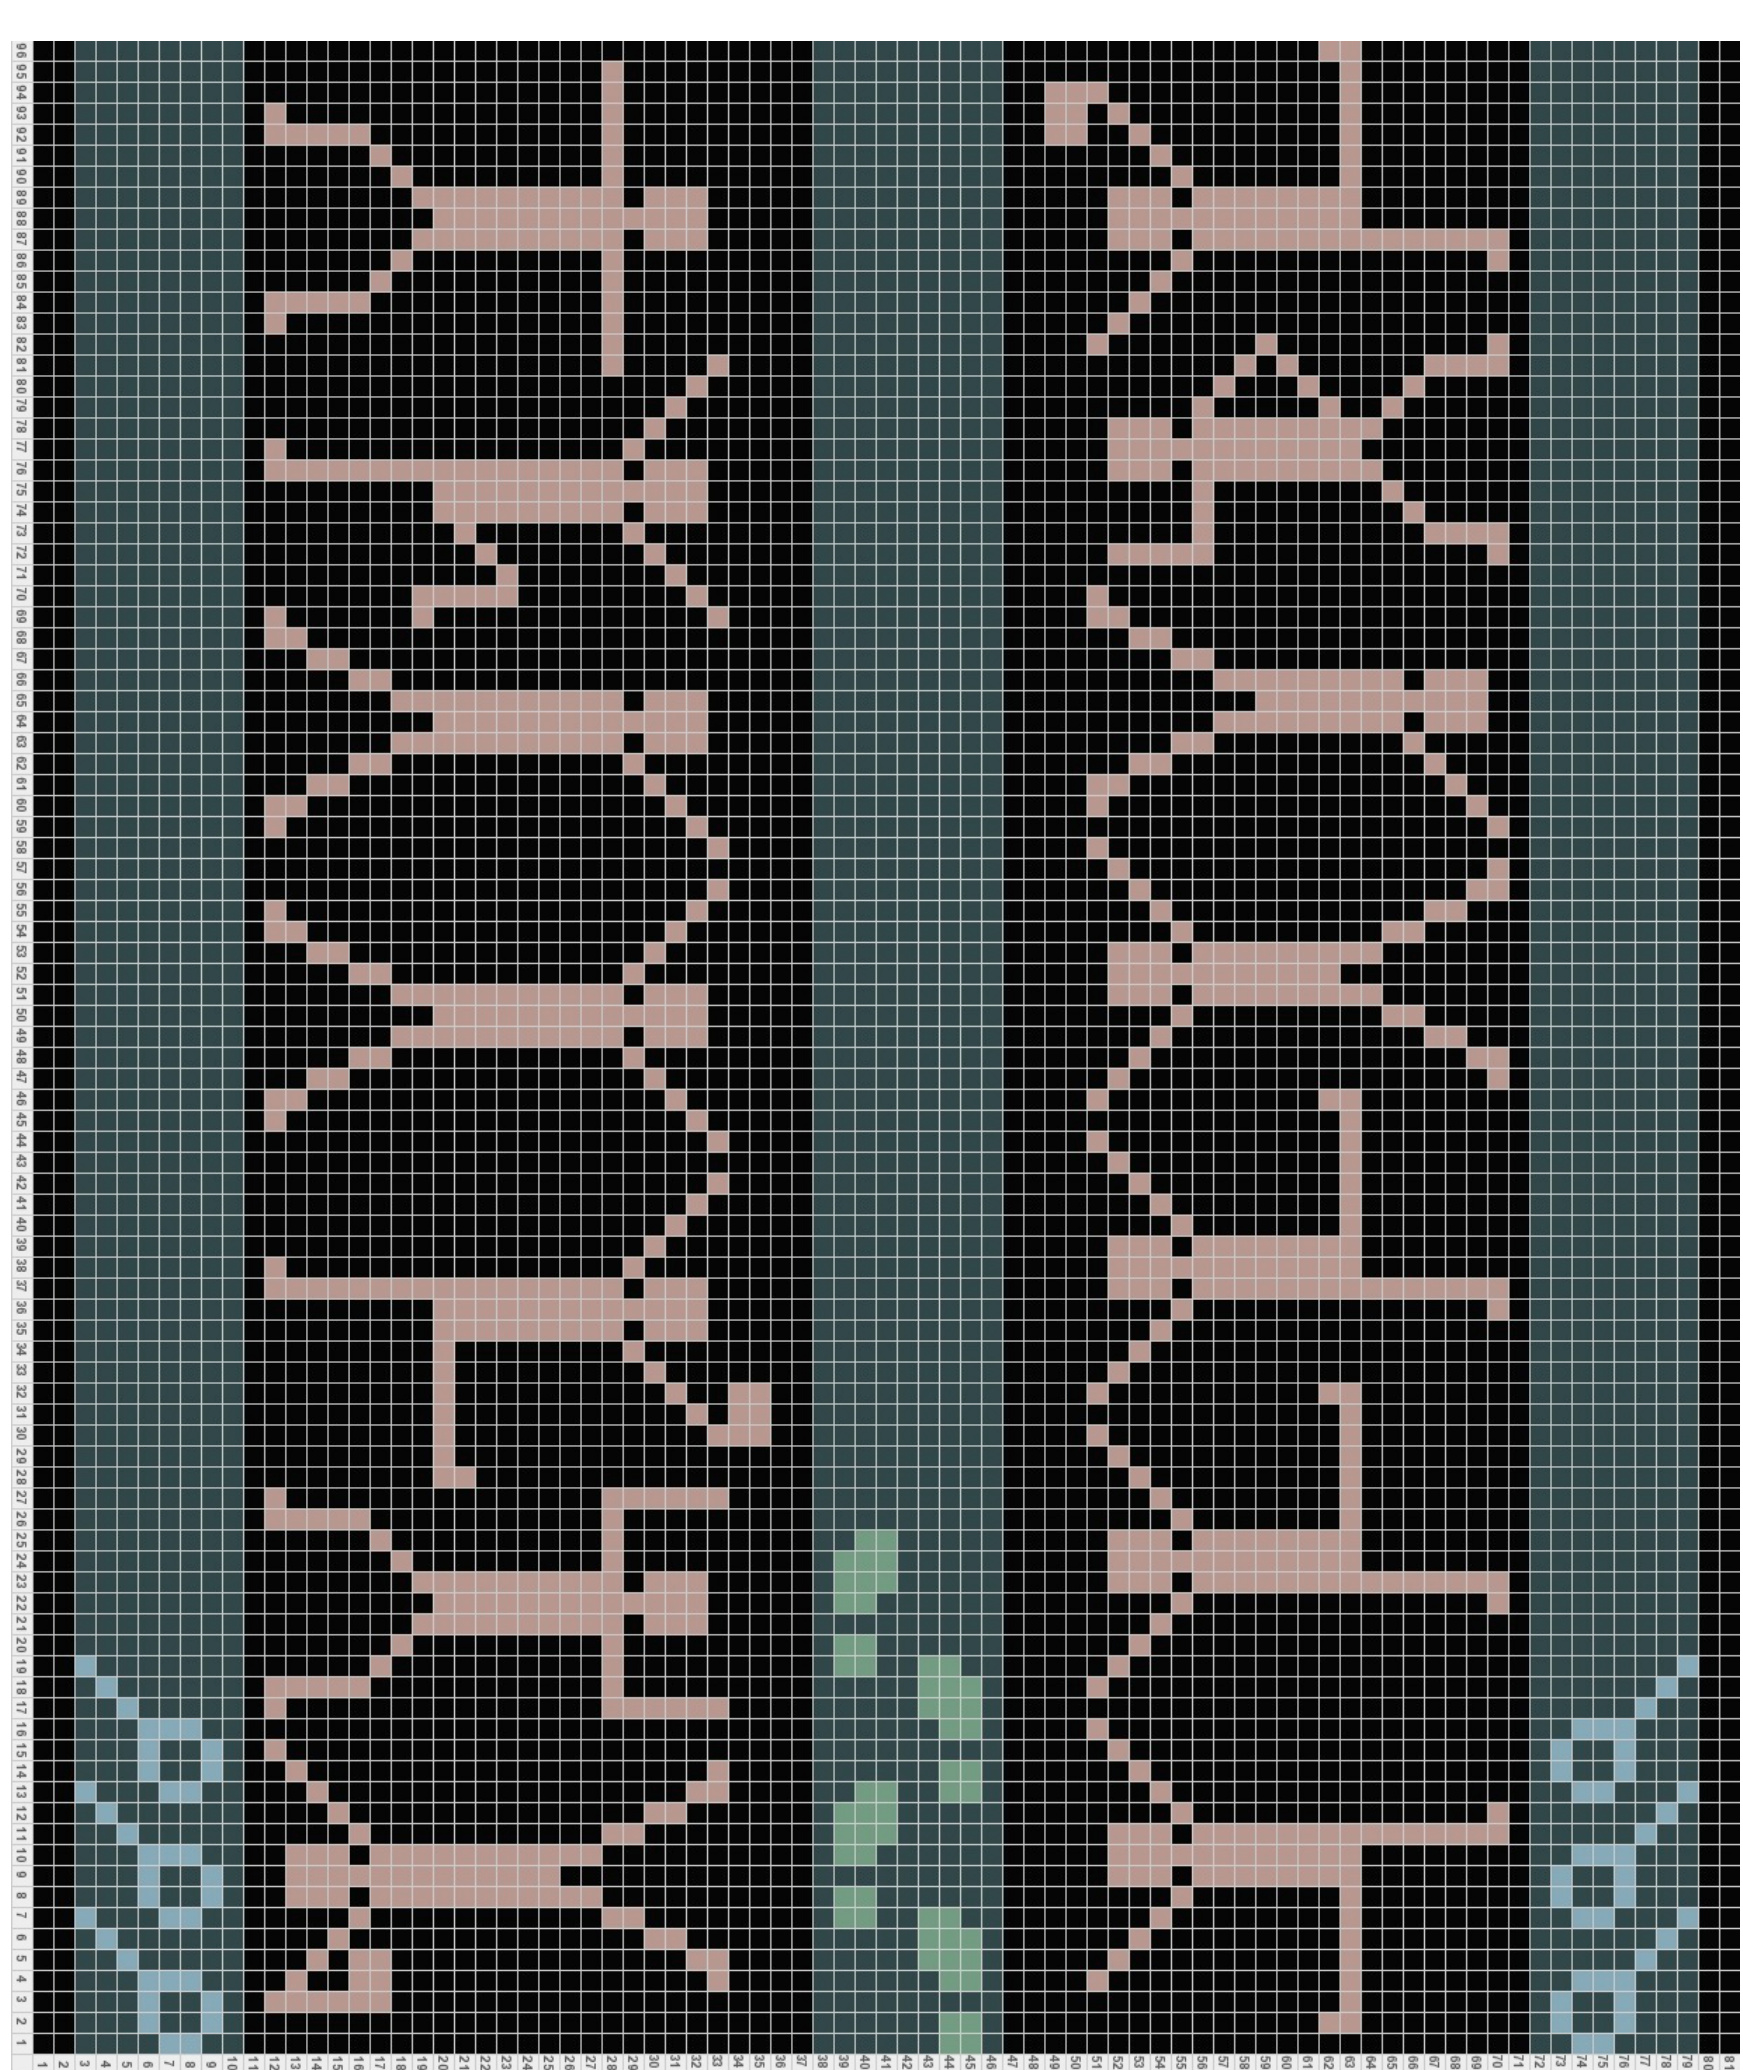
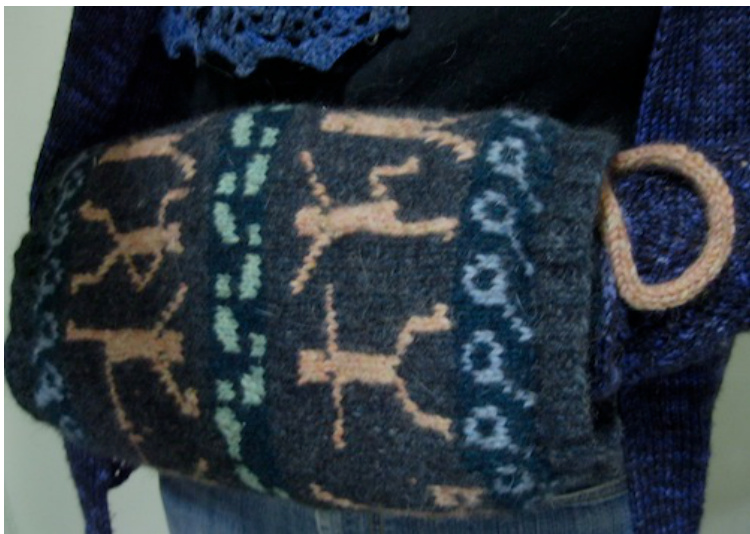
The dancing stick figures on the outside of the muff are from the Sherlock Holmes story "The Adventure of the Dancing Men," found in The Return of Sherlock Holmes by Sir Arthur Conan Doyle. They are part of an alphanumeric substitution cipher used by the villain of the story to hide messages in plain sight. I have used them to encode my knitting chart with the words "Baker St" and "Irreglr" (YXXYX, YYXYY), so you can proclaim your allegiance to the greatest sleuth of all time whenever you carry this muff.
Supplies
Yarn: worsted weight. Recommended: wool or wool blend, especially wool + possum or wool + alpaca Shown: Zealana Apsire Heron yarn colors (50 g each): 1 ball charcoal, 1 bottle green, 1 cloud blue, 1 coral, and 2 lichen. Outer layer and wrist strap: 260 yd total charcoal: 110 yd bottle (dark) green: 50 yd cloud blue: 25 yd coral: 50 yd lichen (light green): 25 yd Inner layer and pocket: 170 yd (yardages are approximate) Thrumming: alpaca roving, between 1.5 and 2.5 ounces, depending on how warm you want the muff to be. I used about 2.5 ounces. Needles: US size 4, or 3.5 mm Yarn needle Stick pins
Gauge
YYX 6 stitches, 7.5 rows per inch. This is a small gauge for worsted weight yarn, to make the fabric tighter and more wind-proof.
Key terms
thrum: insert the right needle into the first loop on the left needle as if to knit, pull (not cut) a 3- inch piece of roving from the batt, about twice as thick as your yarn. Lay the roving against the working yarn, so that the fibers run parallel to the yarn, and pull it through with the yarn as you knit one stitch. You will see an oversized stitch made of yarn and roving on the right side and the loose, fluffy roving on the wrong side. If you need visual instructions, there are several videos on thrumming available on Youtube and knitting help websites.
Outer Layer
Long-tail cast on: 96 stitches (16 inches). Join in the round. Work 3 rounds of 2x2 ribbing (k2, p2, repeat). Begin stranded colorwork chart. If using the magic loop method, be especially careful to make sure that the yarn has plenty of slack when “floating" across from one needle to the other. The final piece will be about 12 inches tall, including the ribbing. The fair isle bands with the magnifying glasses and footprints should repeat all the way around even though this is not shown in the chart. Work 3 rounds of 2x2 ribbing. Bind off in pattern (knit bindoff 2, purl bindoff 2, etc.)
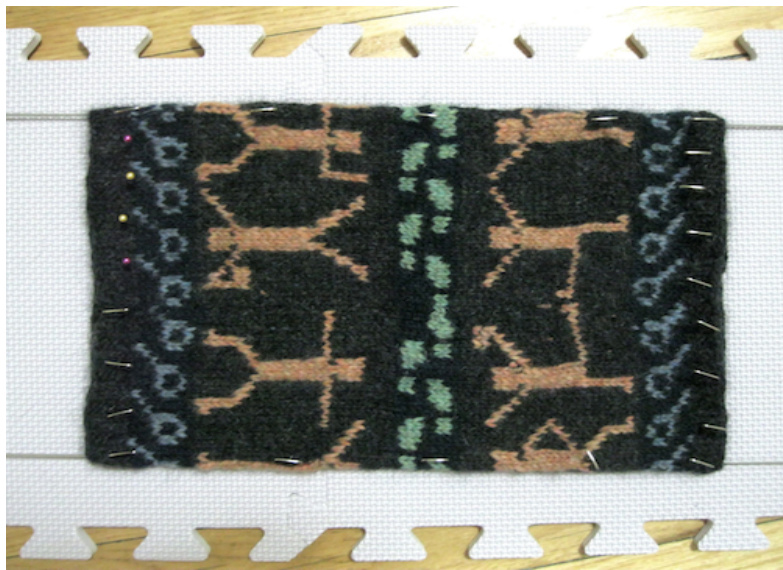
Block the outer layer, stretching it gently so that it measures 11 inches long (not including the ribbing on either end) and 8 inches wide.
Inner layer
Long-tail cast on: 63 stitches. Join in the round. Ribbing: (The ribbing rounds will actually have the wrong side facing out on the final product. ) Rounds 1-2: K, P2, repeat to end. Round 3: K, M1L, P2, K, P2, K, P2, repeat to end (70 sts). Rounds 4-5: K2, P2, K, P2, K, P2 repeat to end (70 sts). Round 6: K2, P2, K, M1L, P2, K, P2 repeat to end (77 sts). Rounds 7-8: K2, P2, K2, P2, K, P2 repeat to end (77 sts). Round 9: K2, P2, K2, P2, K, M1L, P2 repeat to end (84 sts). Rounds 10-11: K2, P2, repeat to end (84 sts). Knit 3 rounds.
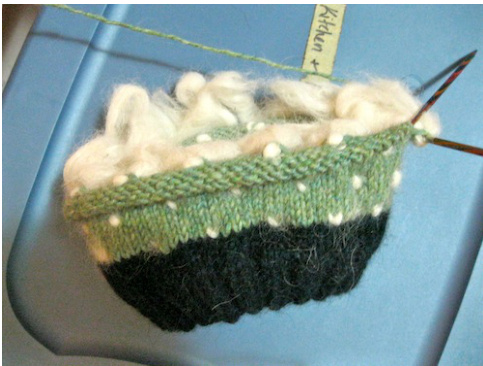
Thrummed Section: Round 1: k2, thrum, [k5, thrum] repeat until 3 stitches remain, k3. Rounds 2-6: Knit. Round 7: [k5, thrum] repeat to end. Rounds 8-12: Knit. Repeat rounds 1-12 a total of 8 times, Repeat round 1. Ribbing: Knit 3 rounds. Rounds 1-2: K2, P2, repeat to end (84 sts). Round 3: K2tog, P2, K2, P2, K2, P2, repeat to end (77 sts). Rounds 4-5: K, P2, K2, P2, K2, P2, repeat to end (77 sts). Round 6: K, P2, K2tog, P2, K2, P2, repeat to end (70 sts). Rounds 7-8: K, P2, K, P2, K2, P2, repeat to end (70 sts). Round 9: K, P2, K, P2, K2tog, P2, repeat to end (63 sts). Rounds 10-11: K, P2, repeat to end (63 sts). Bind off in pattern (K. P2).
Inside Pocket
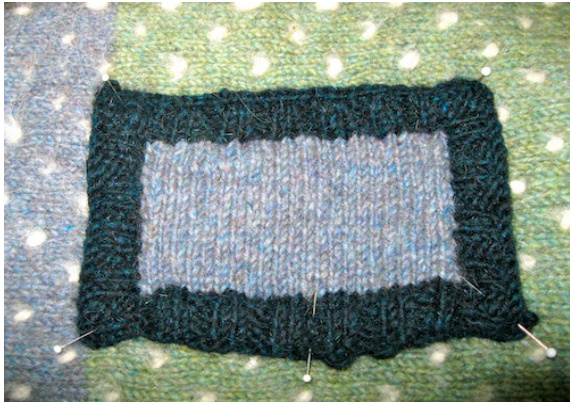
Long-tail cast on 24 stitches (4 inches). Work 4 rows of 2x2 ribbing (worked flat). Work 21 rows of stockinette stitch. Work 4 rows of 2x2 ribbing. Bind off. On the left side of the piece, pick up 22 stitches. Work 1 row of stockinette stitch (right side facing). Work 4 rows of 2x2 ribbing. Knit bind off. Do the same on the right side. The pocket should measure around 3x5 inches, big enough for a mobile phone or small wallet. Block gently if needed to get the edges and corners straight.
Wrist strap
Knit a 4-stitch i-cord about 12-14 inches long and bind off
Assembly
1. Weave in all ends before beginning assembly. 2. Pin the pocket to the inner thrummed layer with the short sides parallel to the open ends of the tube, centered between them. Sew the pocket to the inner layer along the two short sides and one long side. You might consider reinforcing the top corners of the pocket with some extra stitches.
3. Pin both ends of the wrist strap at the top of the outer layer, opposite the colorwork join, on the wrong side so that they will be sandwiched inside the muff's seam in the next step and sew firmly in place. 4. Turn the inner layer inside out so that the thrumming is on the outside and the pocket on the inside:
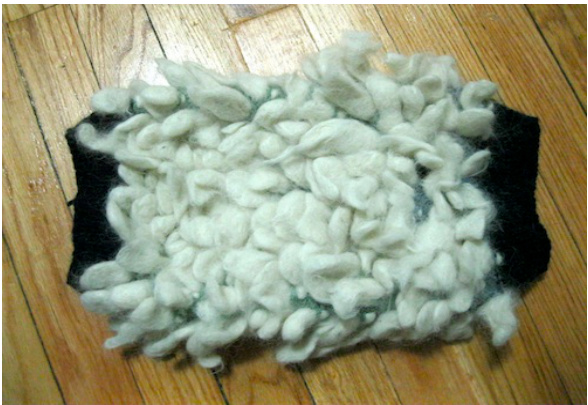
You might need to separate the tufts of alpaca fiber from each other; they have a tendency to felt together while you're knitting, which could constrict the inner layer. The place where the ribbing meets the stockinette stitches is the stitching line to attach it to the outer layer. Find the point along this line that lines up with the center of the pocket and insert a pin. Fold the inner layer in half with the first pins right on the fold to find the opposite side from the first pins and insert another pin in the stitching line-- you have just divided the seam in two halves. Fold in half again, this time with the pins touching in the middle of the work and insert two more pins at the folds. The seam is now divided into fourths. Do the same at both ends of thetube. The stitching line for the outer layer is the point where the colorwork meets the ribbing. Divide the outer layer the same way you did with the inner layer, starting with the point where the colorwork rounds begin and end, dividing the outer layer into fourths along the stitching line. Do the same at both ends of the tube.
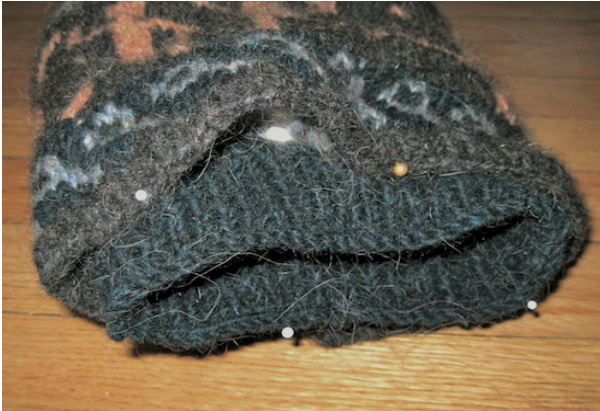
Being careful not to dislodge the pins, insert the inner layer into the outer layer with the thrumming sandwiched between the two knitted layers and use your fingers to poke in any alpaca fibers that are sticking out. Line up the pins at the colorwork join in the outer layer with the pins at the bottom of the inner layer, which are the ones closest to the bottom edge of the pocket. (You don't want to end up with an upside-down pocket!) Remove one pin and use the other one to pin the two layers together. Line up the other pins in the same way. You can add more pins along the seam line as you wish, making them as evenly spaced as possible. 5. Make sure once more that none of the thrumming is peeking out of the seam lines, and be sure to catch the ends of the i-cord again, as you sew the two layers together at both ends. Use a running stitch in the main color (black) or use a decorative stitch in a contrasting color.
Personalizing this pattern
Some muffs do have a neck strap; you could add one easily by knitting a ribbed strap like you would for a very skinny reversible scarf and pinning the ends into the seam at the point opposite the colorwork join. You should reinforce the stitching here somehow since it will become a point of high stress on the yarn. If you want a muff that is less toasty, omit the roving and thrumming and make the inner layer only about an inch smaller than the outer layer by adding a few more cast on stitches. If you're not sold on the Sherlock Holmes theme, I still recommend two-stranded colorwork just for that added warmth and visual interest. A fair isle book such as Mary Jane Mucklestone's 200 Fair Isle Motifs will help you plan your design, and you can find a free colorwork chart maker at www.tricksyknitter.com.
This pattern is for personal use only.