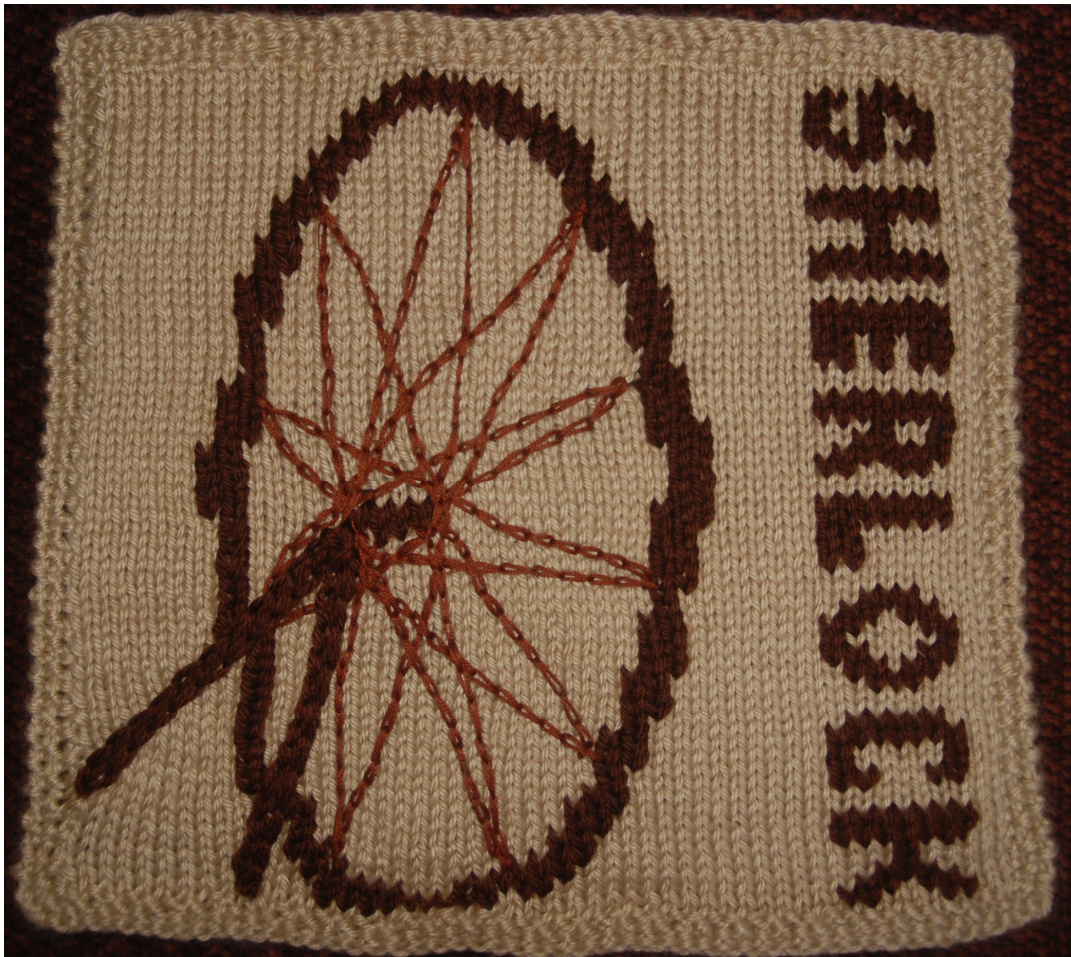
Sherlock Title Square
by mrsalemp 10" blanket square for the 221b Blanket KAL (aka The "Shlanket" - thank you niamhybeag)
85 yards cream worsted yarn (Caron Simply Soft Bone) 20 yards brown worsted yarn (Caron Simply Soft Chocolate) Brown embroidery floss (slightly less than one skein) Size 5 (3.75mm) knitting needles Crochet Hook (I used size ‘F') Embroidery Needle Optional - T-pins, safety pins and a ruler My gauge for a 2 inch square was 11 stitches and 14 rows. Notes: -l used a light worsted yarn, but after adjusting the pattern (a couple times) I realized I needed more stitches in order to make the shaping look right. Not wanting to change yarns, I went to smaller needles in order to keep a 10 inch square. I suggest using sport weight yarn and adjusting your needle size to get gauge. While my yarn choice worked, I think lighter weight yarn would have been easier to stitch onto. -l used duplicate stitch to add on letters and the wheel. If you decide to use intarsia/stranding, then your yarn usage will change. 'heel spokes and main supports were done with crocheted chain stitch embroidery,
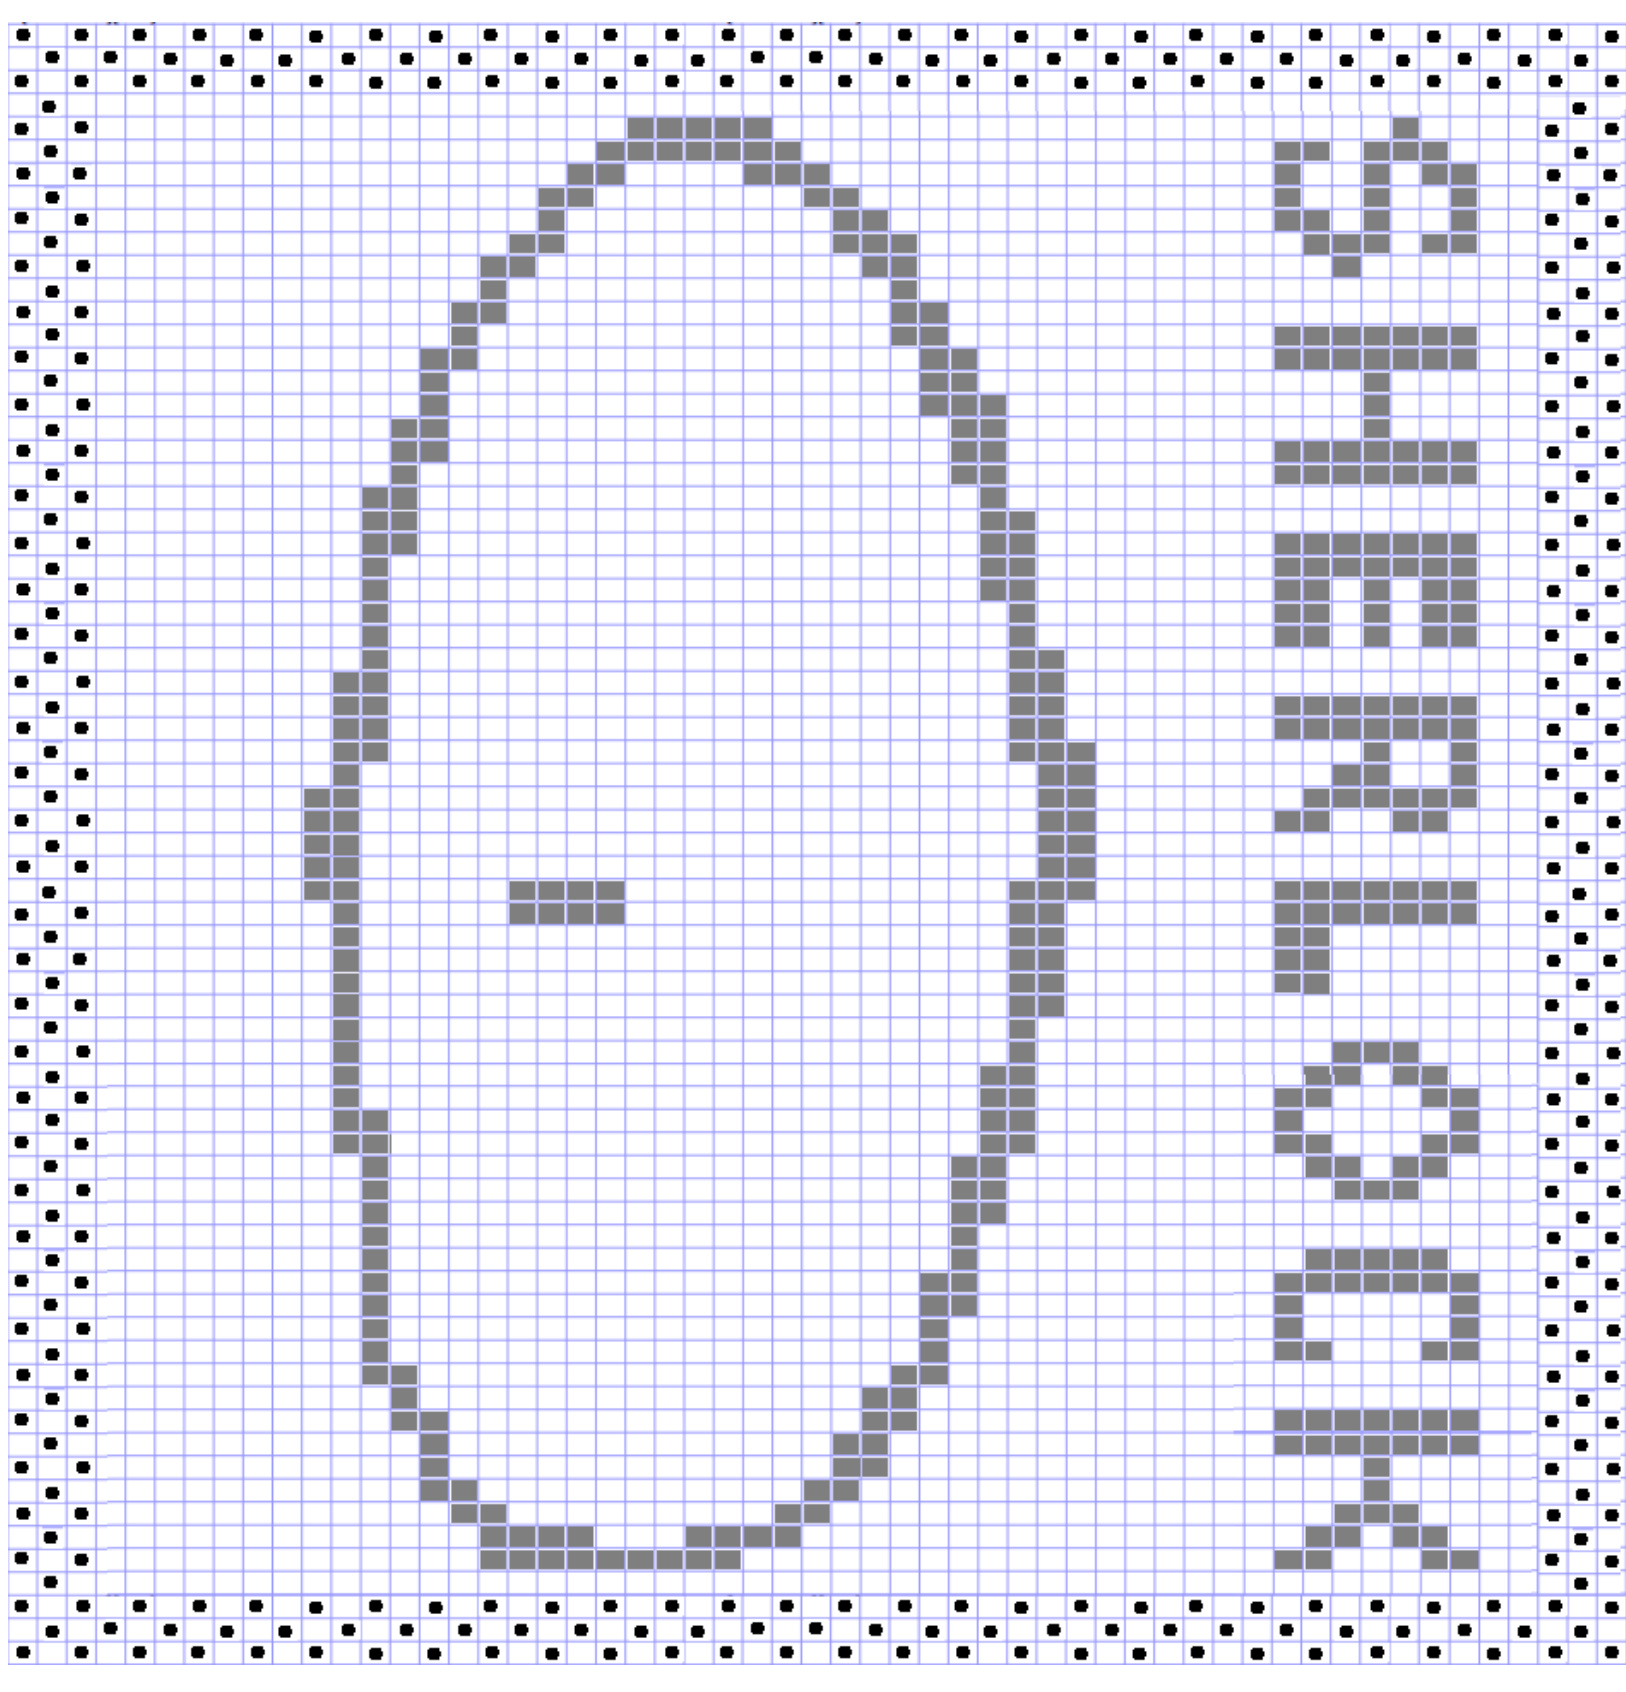
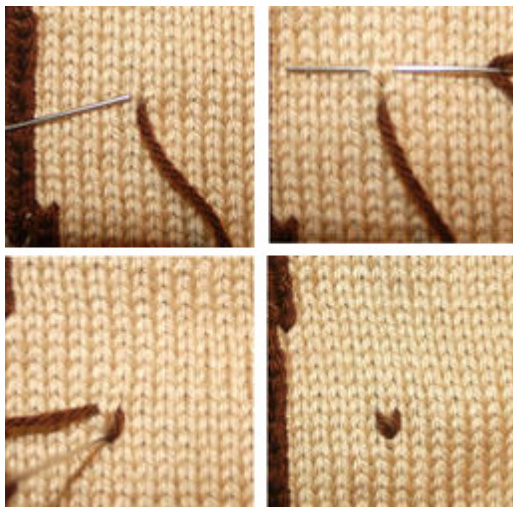
CO 55. The borders are seed stitch - Purl on the RS/Knit on the WS Knit on the RS/Purl on the WS The square is knit using only the lighter color. The shaded areas are where you will be using duplicate stitch to add the brown after you have finished. After all the duplicate stitch is done you move on to the embroidery for the spokes and main supports of the wheel. Bring your yarn from the back of the square through the point in the bottom of "v" of your stitch. Thread the needle from right to left behind the stitch above the one you are covering. Bring the yarn back to your starting point and thread through to the back of the square. Pull snug, but not too tight. This video (from Planet Purl) is a good demonstration http://www.youtube.com/watch?v=oE9YXLYBNCw
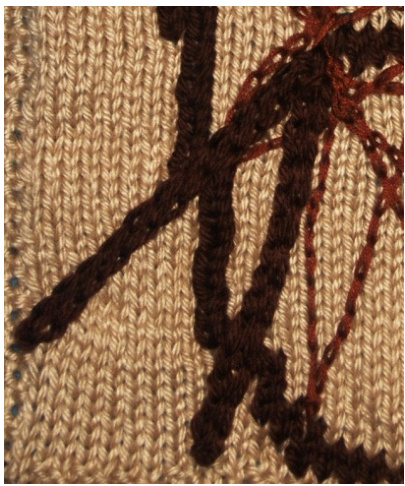
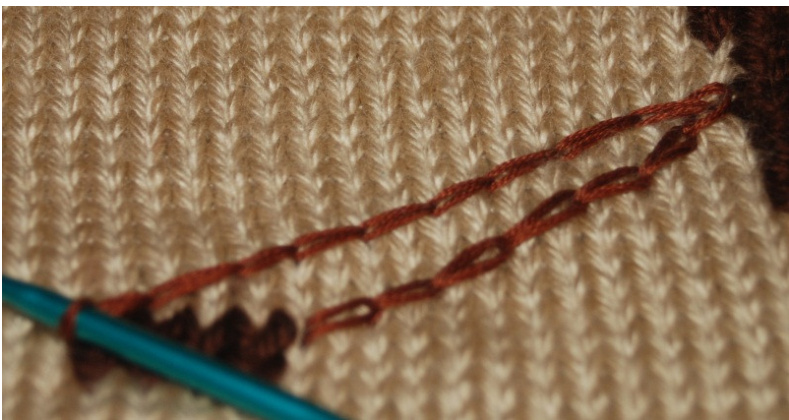
Using Crochet to embroider
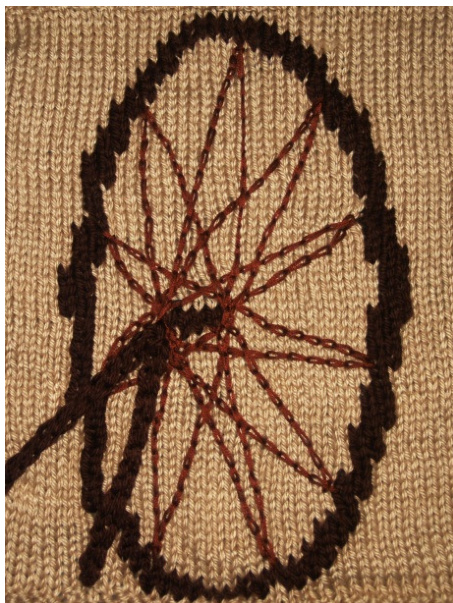
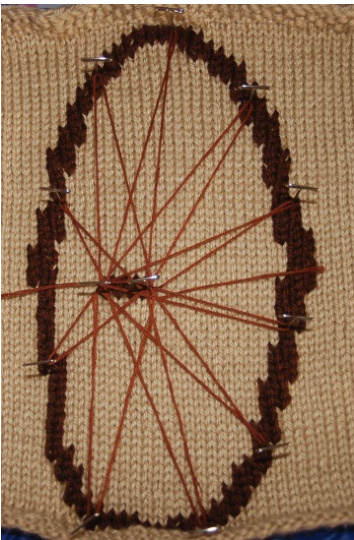
When deciding how to place the spokes I first stuck T-pins around the edge of the wheel and on each side of the center bar and then wrapped the string around adjusting pins where needed. After I was happy with how they looked, I removed the T-pins and replaced them with safety pins to mark the spots.
Starting with your embroidery floss under the work, use your crochet hook to pull the floss through to the top. Chain stitch on the surface, pulling the floss from under the work for each stitch. This is a little hard to explain, but the first bit of this video (by Susan B Anderson) shows it perfectly: http://www.youtube.com/watch?v=1MZrvZBtM9c
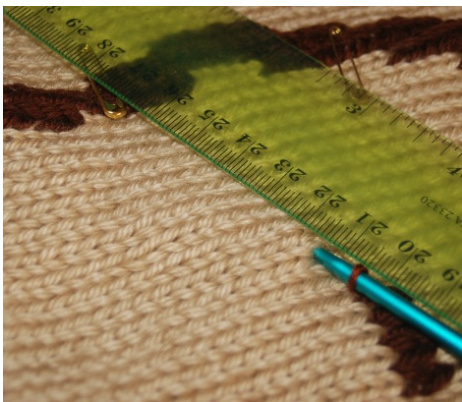
Starting from one side of the center bar I worked to the first pin, a ruler can help guide your line to keep it straight. Then I turned the work and headed back to the opposite side of the center bar.
I continued this way for each pinned spot, making sure every outer point connected with both sides of the center bar. This is how you get the look of overlapping spokes. You can do more or less spokes than I did, whatever you think looks best. The most important thing to remember is do not pull on the stitches too tightly or it will warp the shape of your work. The two main supports for the wheel use the same yarn as your duplicate stitch. They both start from the left hand side of the center bar, and I did two rows on the chain stitch for each to make them look more substantial.