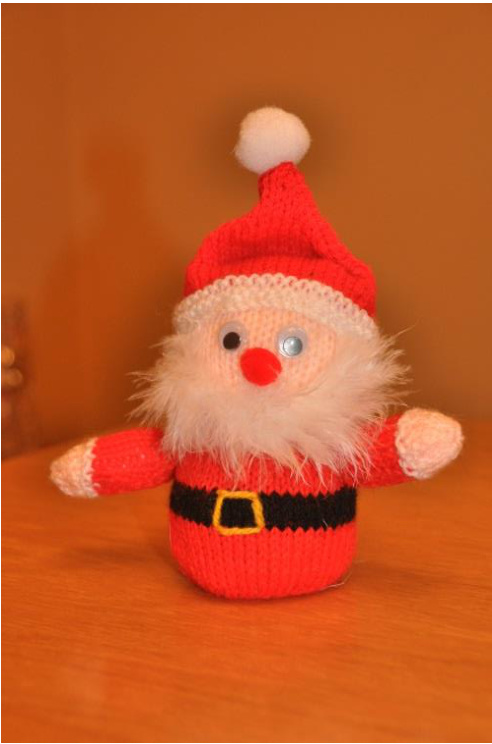
KNITTED SANTA
Needles = Size 3%mm Double knitting wool in following colours Bright Red, Flesh colour, small amount of black, fairly small amount of white scrap of yellow for buckle Stuffing Approx 10cms of Marabou trim for beard 2 medium sized googly eyes 1 small/medium red pompom for nose 1 medium white pompom for end of hat BODY Cast on 25 stitches in red. Knit twice into almost every stitch to make about 46 stitches Starting with a purl row continue in stocking stitch ( purl 1 row, knit 1 row) for 9 rows Change to black wool and continue in stocking stitch for 4 rows Change back to red and stocking stitch for 6 rows On next row knit 2 together in almost every stitch to get back to 25 stitches Purl 1 row. Change to flesh colour and knit across the row, knitting twice into every alternate stitch (about 37 stitches) Continue in stocking stitch for 18 rows Knit 2 together across the row Purl 2 together across the row Cut wool about 12 inches away from your knitting, thread onto a needle and thread the stitches onto the needle, but do not drawup tightly. Sew the edges of the piece together (which will be the back of the Santa) to make a tube using the ends of the wool from beginning and ends of the rows.( Don't use the thread which is through the top of head stitches.) Leave the top of the head open and loose. Only sew to the bottom of the black belt. Leave the lower red portion open at the back otherwise the Chocolate Orange will not fit in. Sew a running thread around the tube where the red knitting ends and the flesh of the head starts and draw up tightly and fasten up to make the neck. Stuff the head well to make a firm ball and draw up the stitches at the top of the head tightly and fasten off.
ARMS (knit 2)
Cast on 12 stitches in red. Knit 6 rows in stocking stitch. Change to white wool and knit 4 rows in garter stitch (knit every row) Change to flesh colour and stocking stitch for 4 rows Knit 2 together across the row. Cut the wool away from the work and thread onto needle. Slip stitches onto needle and draw up tightly. Fold arm piece right sides together and join the seam. Turn right side out. Stuff well and attach to body in correct place (above belt but not too far round the sides). It helps to put the Chocolate Orange into the body at this point to get the position looking right. HAT Cast on 48 stitches in white and knit 4 rows in garter stitch Change to red and knit 2 rows in stocking stitch Next row: Knit 2 together, knit 10, knit 2 together, knit 20, knit 2 together, knit 10, knit 2 together. Next row and every alternate row: Purl Next row: Knit 2 together, knit 9, knit 2 together, knit 18, knit 2 together, knit 9, knit 2 together. Next knit row: Knit 2 tog, knit 8, knit 2 tog, knit 16, knit 2 tog, knit 8, knit 2 tog. Continue in this way, decreasing the number of stitches on each knit row until 8 stitches remain Knit 2 together across the row. Purl 1row Knit2together Purl 2 together and fasten off. Fold the hat right sides together and sew up the back seam. Attach white bobble to the point of the hat
TO FINISH OFF
Glue the eyes and nose in place and glue the beard on next. Wait until dry and then position the hat, tucking the ends of the Marabou trim up under the hat and sew the hat to Santa's head along the white lower border. Bend the top of the hat to face forward, rather than it sticking straight up to give a bit more character. Sew a single strand square with the yellow wool to make a buckle in the centre of the black belt.