Ringele
fingerless mitts

You need (size xs - s):
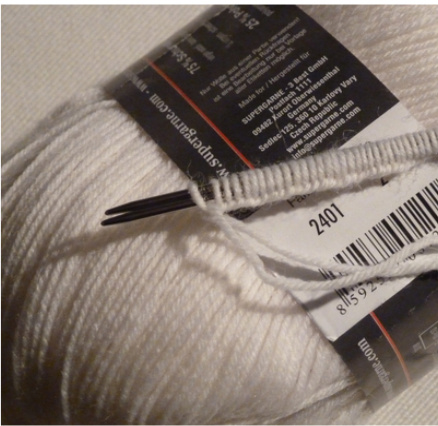
Needles: 1 Circular and 5 DPNS (needle size 0 / 2,00 mm) Yarn: Fingering Sock Yarn 420m/100 g \~ 40-50 g Main colour 5-10 g of every CC Contrast colour (purple, blue, green, yellow, orange, red & black) 2 stitch markers Scissors & Darning Needle
Techniques:
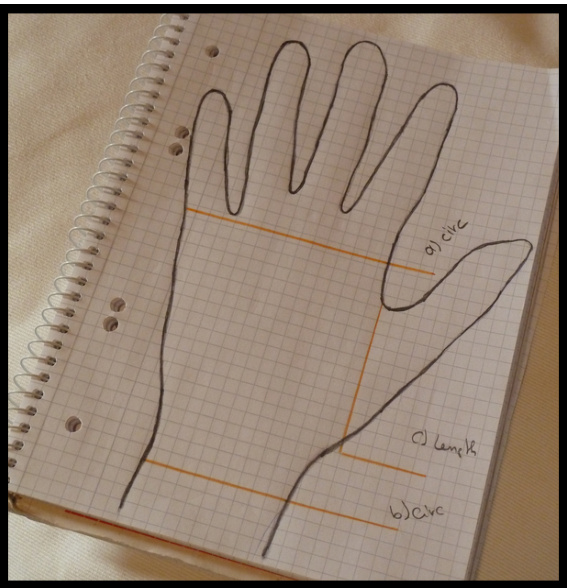
cast on, knitting in the round (magic loop), knit, purl, increase (described), bind off Your measurements and gauge (stockinette): a) circumference hand: b) circumference wrist: c) length of thumb:
Your Gauge (5 x 5 cm / 2 x 2 inch): . stitches x .... rows
Ohkey! Here's the plan! :-)
What we're going to do is basically knit a tube (knitting in the round) and we're going to knit a gusset and thumb attached to the tube. You can adjust this tutorial to every kind of yarn and every size - all you need is your measurements and your gauge. But to keep this simple (and because I like thin knits so much more than bulky ones) in this tutorial it's all described for needles size 0 / 2,00 mm and fingering sock yarn (420 m / 100 g). For all of you who already know what they are doing, you'll find a short description / instructions of the mitts at the end of the tutorial. The rest ... follow me! ;-) The reference size of the mitts is the circumference of your hand (without the thumb): Here the mitts should sit comfortable, but not loosely (=> we need a little bit of negative ease). For example these are my measurements (size xs-S): a) 17,5 cm (hand) b) 15,0 cm (wrist) c) 7,0 cm (thumb) You don't have to measure like you would have to for constructing a rocket, you just want to have a very educated guess, so don't bother to go for the last mm ;-) Since the mitts should sit kind of snuggly around the wrist you should choose a size to knit between size a) and size b). My gauge has been: 19 stitches x 30 rows (5 x 5 cm / 2 x 2 inch) And I wanted to knit the mitts with about 15,5 cm circumference. So for me that meant that I did knit the mitts casting on 60 stitches. If your gauge is different, then the only thing you have to keep in mind that the number you cast on should be divisible by2.
1. Step - Cast On
Cast on 60 (your number of) stitches in main colour (e.g. white) with circular needles, join in the round and be careful not to twist. I usually do a long tail cast-on over two needles(!), because the cast on has to be really stretchy so that the cuff of the mitt will go over your hand including your thumb (widest part of your hand).
But of course you can do every stretchy cast on you like. If you don't know how to cast on, you might have a look at one of the numerous videos on youtube. There you'll also find video tutorials on how to knit in the round with one circular needle, using the magic loop method.
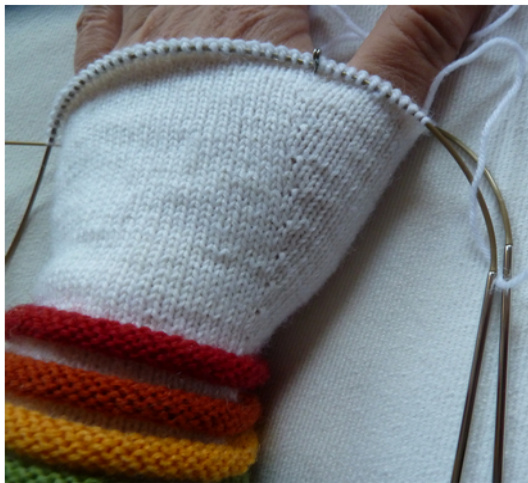
2. Step - Cuff
5 rounds: \* knit 1, purl 1 - continue from \* to the end of the row 1 round: knit all stitches
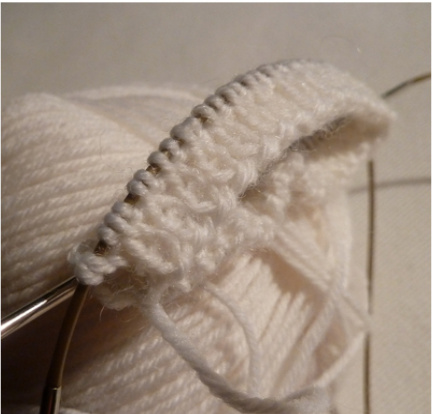
That's all - cuff done! :-) This is a good point to check gauge! Meaning: just try it on! If the cuff goes over your hand and sits comfortable on your wrist, then everything is all right. If not - please adjust (it's only a few rows, so better to start now again if you're off with stitches than when half of the mitt is already knitted)
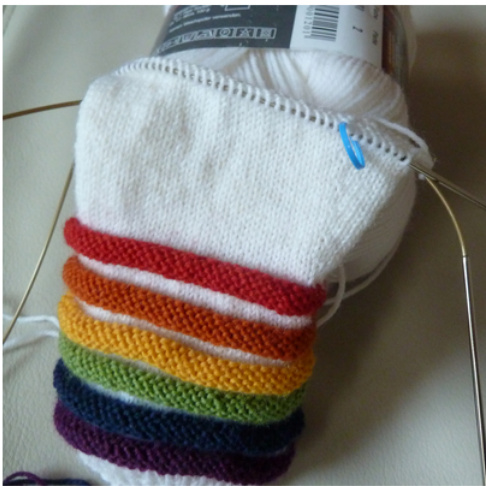
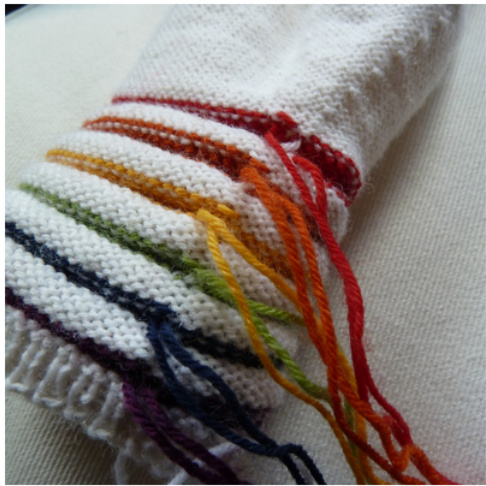
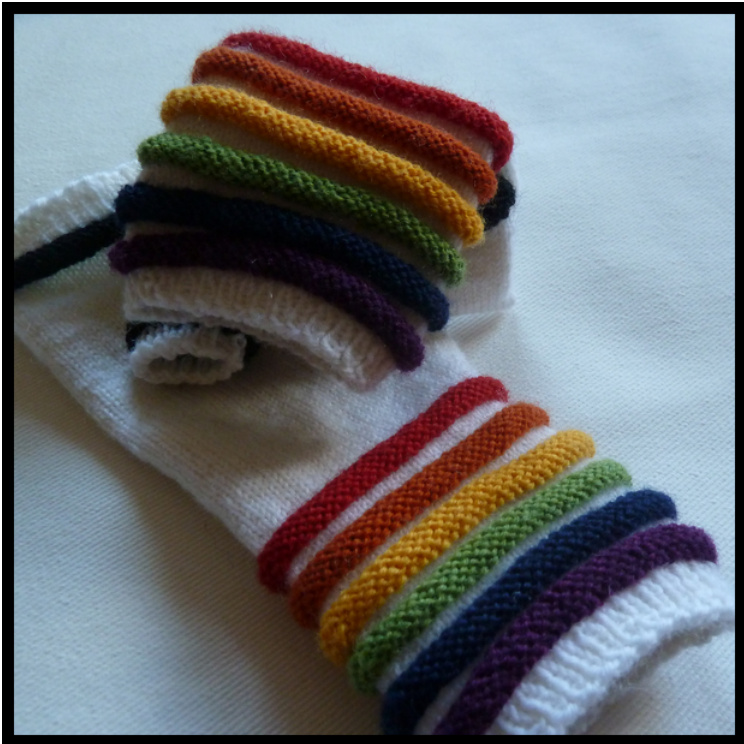
3. Step - Rings
Choose your first contrast colour (e.g. purple) and start knitting (don't cut your main colour, you just let it hang loose in the back):
First ring:
Contrast colour: 1 round: knit all stitches next 5 rounds: purl all stitches If you're knitting different colours then you're done with the the first colour and you can cut this yarn, leaving a tail to weave in at the end. If you're using only one contrast colour then just also let it hang like you did with the main colour and get yarn of your main colour. Main colour: next 5 rounds: knit in main colour (white) Just be careful not to pull too much, just give the yarn a little bit of space to go over the 6 rounds you just knitted in your first contrast colour. Second - all rings:
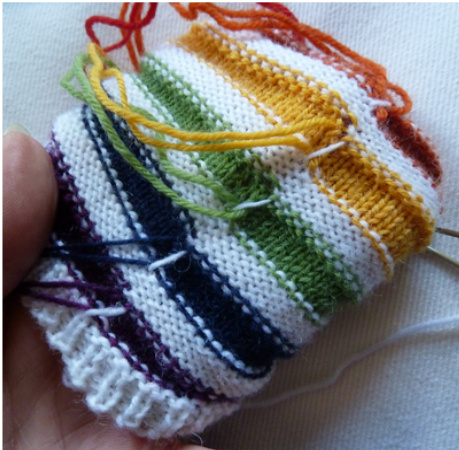
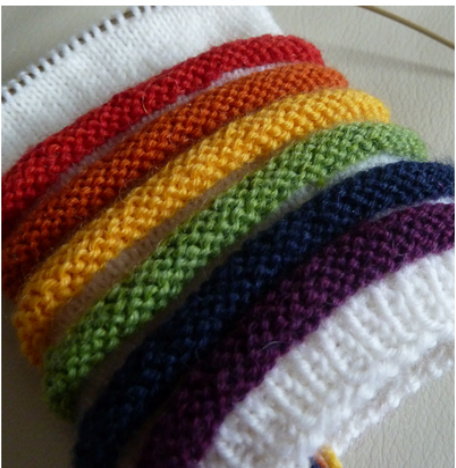
repeat directions of first ring for all rings you want to knit (rainbow: 6 colours - purple, blue, green, yellow, orange, red)
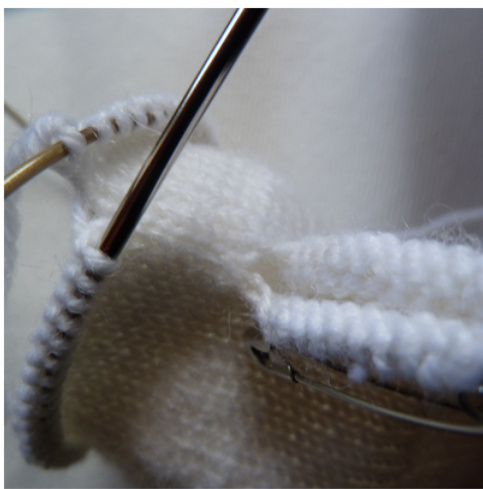
4. Step - Gusset (thumb)
knit 1, make 1 knit (with left needle, lift yarn inbetween stitches, knit through backloop), place marker, knit to last stitch, place marker, make 1 knit, knit one => 2 stitches, marker, 58 stitches, marker, 2 stitches knit 3 rows (knit 2, move marker, knit 58, move marker, knit 2) knit to marker, m1k (make 1 knit), move marker, knit to marker, move marker, m1k, knit to end of row (=> 3 sts - m - 58 sts - m - 3 sts) knit3rows
repeat these 4 rows until there are 10 stitches on either side of the marker (and still 58 sts in the middle). Now please measure (see c) length of thumb), if your gusset is long enough! If not, you can add another increase / 4 rounds.
5. Step - Hand
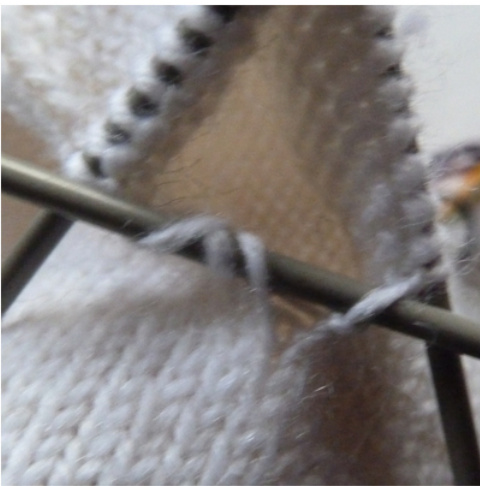
Now comes a part that's little bit tricky - the set up row where you put the thumb stitches on hold and start to knit in the round again without them: knit 10, m1k, move marker, knit 58, remove marker, m1k, put the last 10 stitches of the row onhold put the first 10 stitches (next row) also on hold, remove marker and start again to knit in the round (60 stitches: 58 stitches that have been in between markers + the two increased stitches of the set up row)
Now just knit with main colour until the mitt reaches over your knuckles / desired length to last (black) ring (17 rows). Join contrast colour (black) and again don't cut yarn of main colour. Using black yarn knit: 1 roundknit 5 rounds purl Cut black with tail. Back to main colour (white): 1 round knit 5 rounds: \* knit 1, purl 1 - continue from \* to the end of the row Same as cuff - just reversed! Loosely bind off! Yeeha! :-) now you have the biggest part of your mitt! Congratulations! :-)
6. Step - Let's finish the thumb
Again, this will be a little bit tricky, but you can do it! Here's the overview (now you need your dpns): first you have to pick up the stitches that have been on hold second: pick up two stitches additionally from the downside (the two stitches you increased on the set up row for the hand) and

one stitch at either side at the corner (=2 sts).
makes: 2x10 + 2 + 2 = 24 sts I know, that doesn't look nice at the moment, but believe me as soon as you knit your first round it's all nice and tidy again :-) Next step is to equally divide the stitches onto the needles: on either side of your ,new stitches" move one st from left and one st from right onto the needle (=6 sts) and the remaining 18 stitches you just equally divide out on three needles (6-6-6-6 sts / 4 needles). Now you start with main colour (leaving a little bit of a longer tail) knitting the needle where your picked up stitches are on: This is now how your thumb should look like. k1, knit the picked up stitches through back loop, k1 knit the other three needles => first round done!

And you already managed the hardest part, the rest ist just a piece of cake! :-) knit another 9 rounds:
Now: same as hand, we need a black ring (and please don't cut main colour) - Take a scrap of black yarn and: 1 round knit 5 rounds purl cut black yarn (leaving tail) Back to main colour: knit 1 round knit 3 rounds 1 knit, 1 purl Cast off!
Thumb done! :-)
7. Step - Hardest part: Weaving in ends! ;-)
Turn mitt on wrong side and if there are still little holes on your thumb, just use the tail to close them.
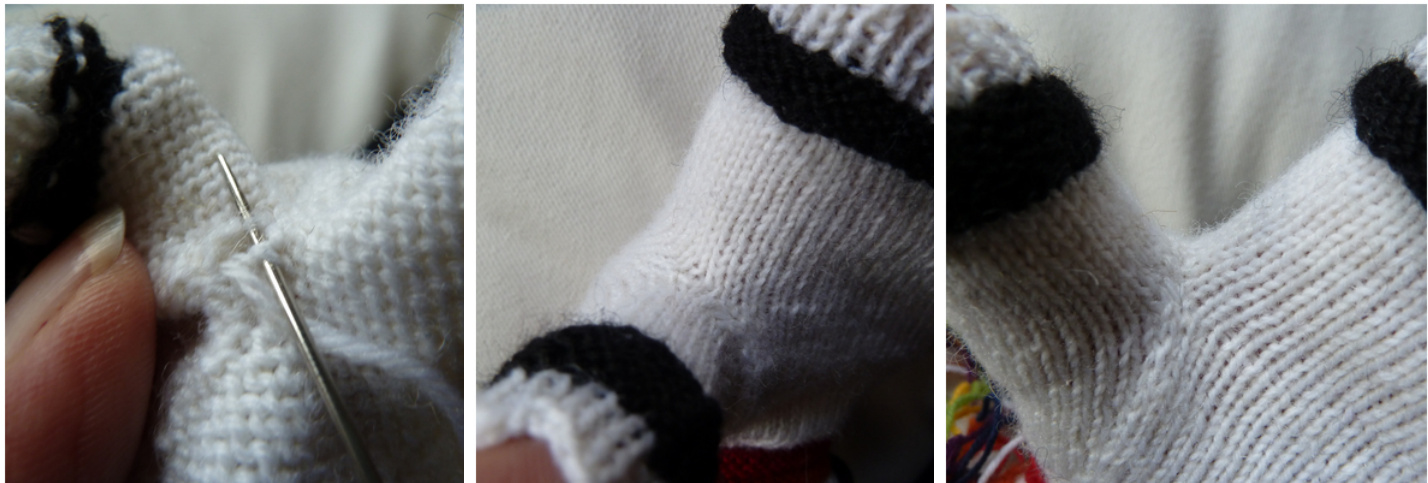
Weave in all the other, remaining threads and ...
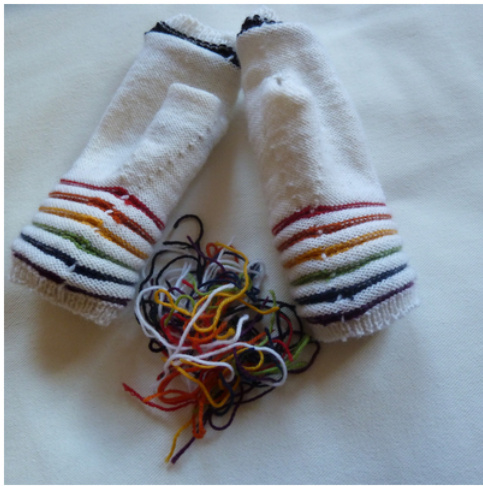
Tadaa!! :-)))
Personal Note:
Please, please - do me a favour :-) If you find anything that's unclear or (most probably) some strange phrases (let me be specific: faults!) in English grammar or wording, please be the best English teacher and give me feedback! :-) You can reach me: On Ravelry: m0onb3am Via e-mail: ela@ela-m.net
Thank you! :-)
Short Instructions:
cO: MC (white) CO 60 sts
Cuff:
5rows: \*k1, p1 - from \*: repeat to end of row 1 row: k
Rings:
CC (purple, blue, green, yellow, orange, red) 1 row: k 5 rows: p MC (white) 5 rows: k Repeat for every CC
Gusset Thumb:
1. row: k1, m1k, pm, k58, m1k, k1 next 3 rows: k 5. row: k to marker, m1k, mm, k58, mm, m1k, k to end of row next 3 rows: k repeat increases from 5th row on until you have 10 sts before and after marker (including the 3 rows knit)
Hand:
set up row: k 10, mm, m1k, k58, m1k, remove m, put last 10 sts on hold put first 10 sts on hold, remove marker start knitting in the round again. Knit a total of 17 rounds CC (black) 1 row: k 5 rows: p MC (white) 1 row: k 5 rows: \*k1, p1 - from \* repeat to end of row BO
Thumb:
pick up 4 sts (2 increased set up row hand + 2 sts at each corner) divide 24 sts equally on 4 needles (1 st gusset increases from left and right onto needle with picked up sts), start knitting in the round, starting with needle that holds picked up sts. 10 rows:k CC (black): knit one ring (1r k, 5 r p) MC (white): 1 row k, 3 rows \*k1, p1 (\* to end) BO, weave in ends...
Done! :-)
Abbrevations:
| MC: | |
| CC: | main colour contrastcolour |
| CO: | cast on (long tail cast on) |
| BO: | bind off (stretchy bind off) |
| st / sts: | stitch / stitches |
| r: | row, round |
| k: | knit |
| p: | jnd |
| ktbl: m1 / m1k: | knit throughback loop |
| with left needle, pick up yarn in between stitches, knit through back loop | |
| n: | needle |
| m: | marker |
| pm: | place marker |
| mm: | move marker |
| rm: | removemarker |


