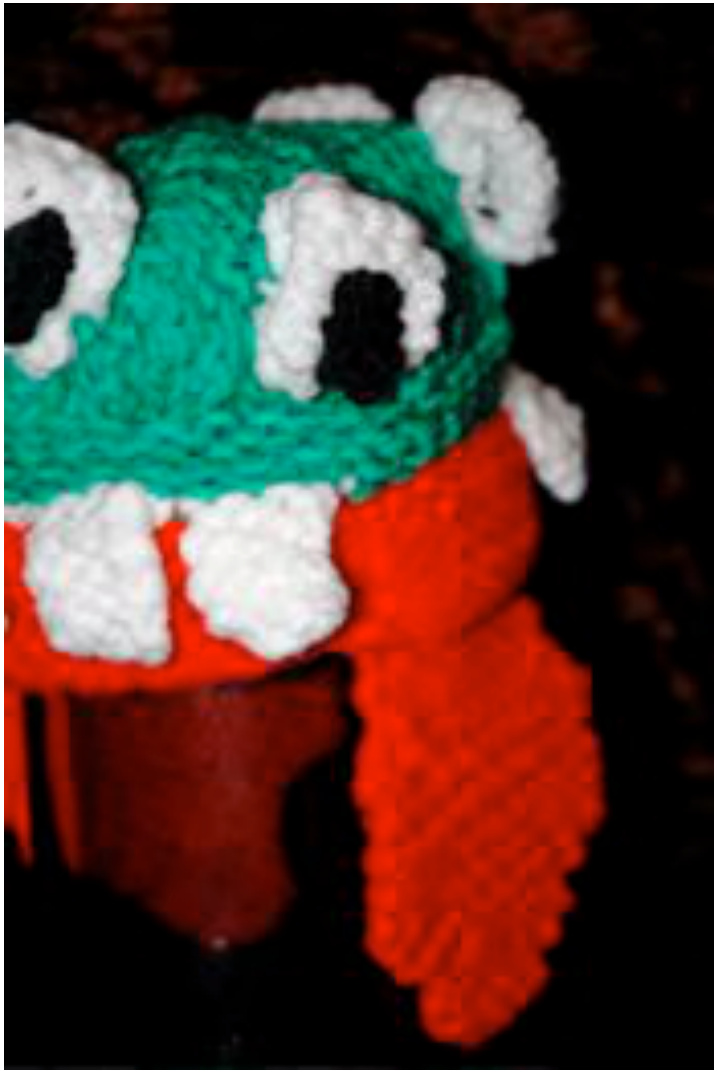
"Sleyes" Monster Skull Cap (in green) 2008 Helen Jacobs-Grant
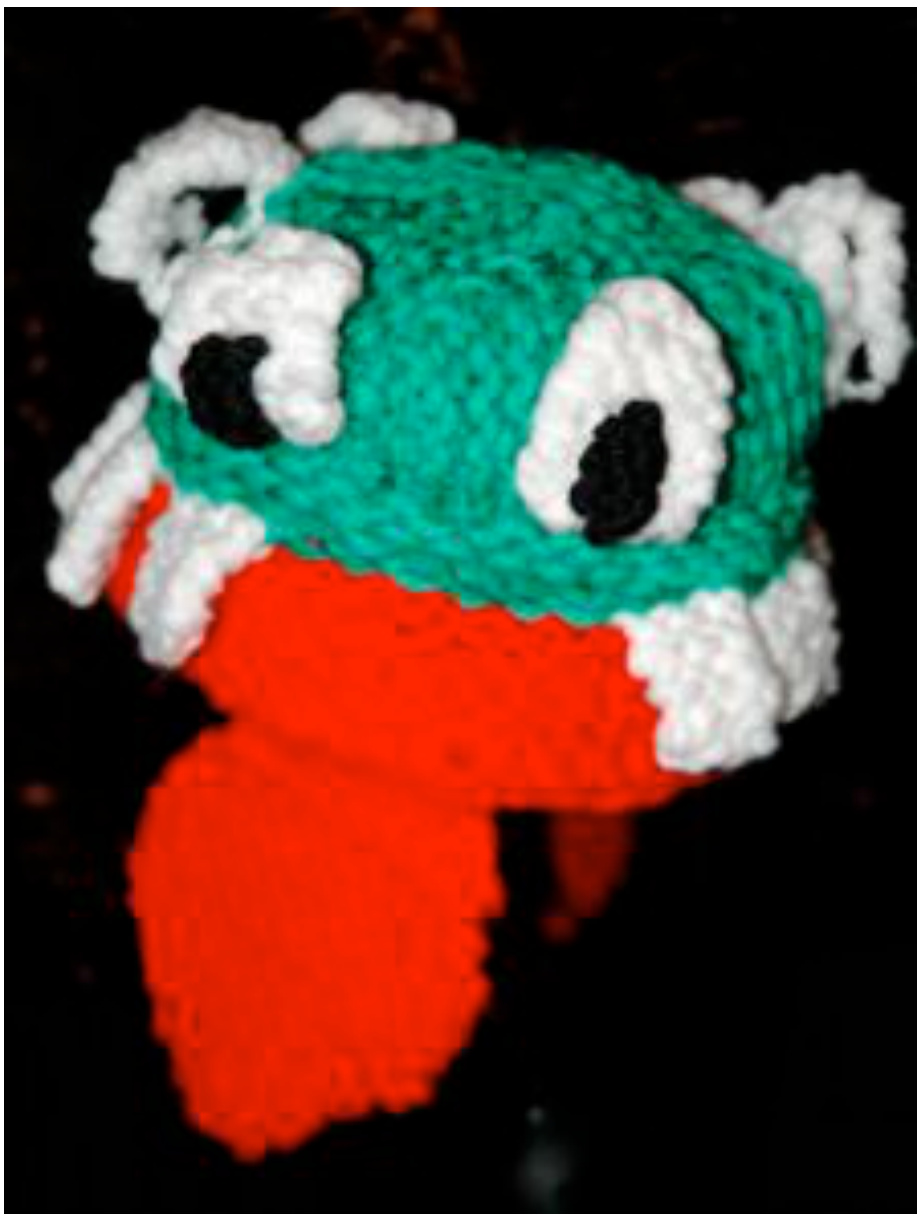
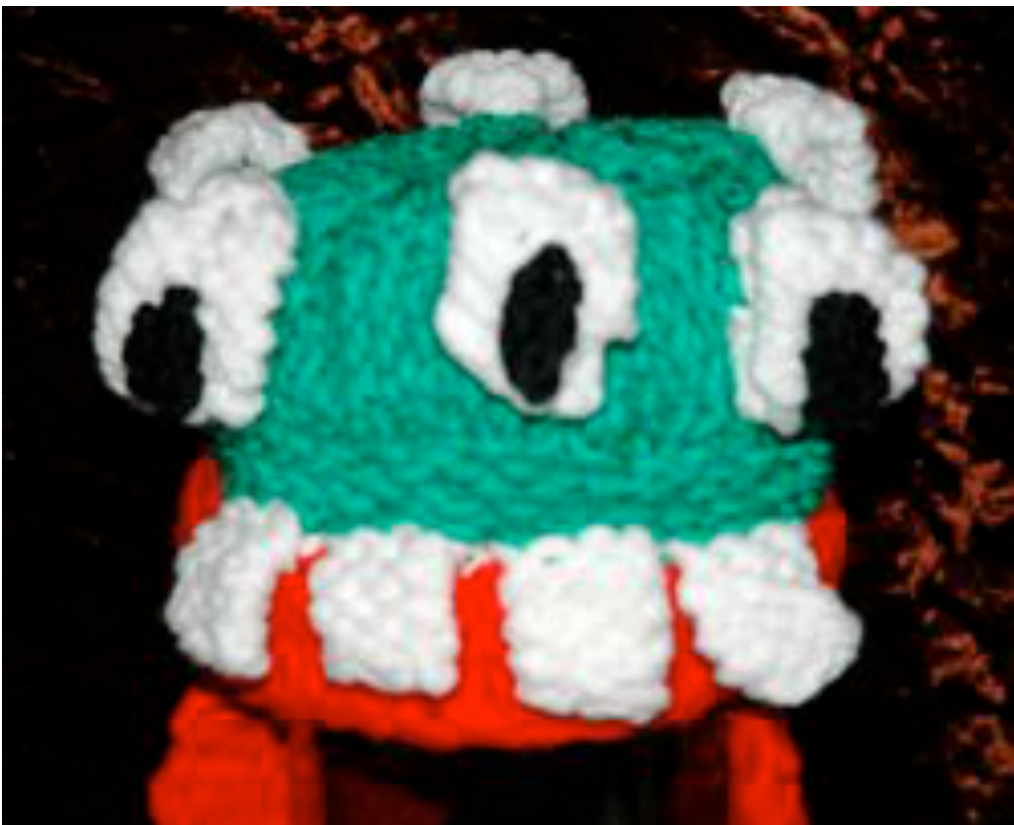
The idea behind "Sleyes" came from a drawing by my seven year old son Ivan who drew a sketch of an Alien Monster with six eyes and two very long tongues. The teeth and tongue pieces are knitted directly into the hat so that there is no loss of stretch to the knitted fabric around the rim. The entire hat is knitted in garter stitch which gives a lovely texture that somehow suits the Alien Monster theme. I really enjoyed designing and knitting this novelty childs' hat and I hope you enjoy making one as well. All my love as always Helen x
PATTERN NOTES :
Boys age 5 to 12 years - cast on 12 stitches as shown in the pattern for the top section Boys age 12 to teenagers - cast on 13 to 15 pegs Adults - cast on 17 to 18 pegs Use two strands together throughout the pattern for a nice warm snug fitting novelty hat. Knitted so that the earflap tongues can be worn down covering the ears or hidden up inside the center of the hat.
Materials :
3/4 inch gauge 36 peg round hat loom (green knifty knitter) loom hook tapestry needle
Yarn :
$1\times50\mathfrak{g}$ balls Snuggly Chunky in green and $1\times50\mathfrak{g}$ darker green Robin DK both yarns held together as one 20g in white for the eyeballs and teeth 5g in black for the puplis 30g in red for the mouth rim and tongue earflaps ALTERNATIVES : any chunky weight or DK yarn in bright colours will work well with this pattern
Stitches :
crochet cast on garter stitch (one garter stitch row is made up of one knit row followed by one purl row) short row shaping in garter stitch flat panel bind off
Instructions :
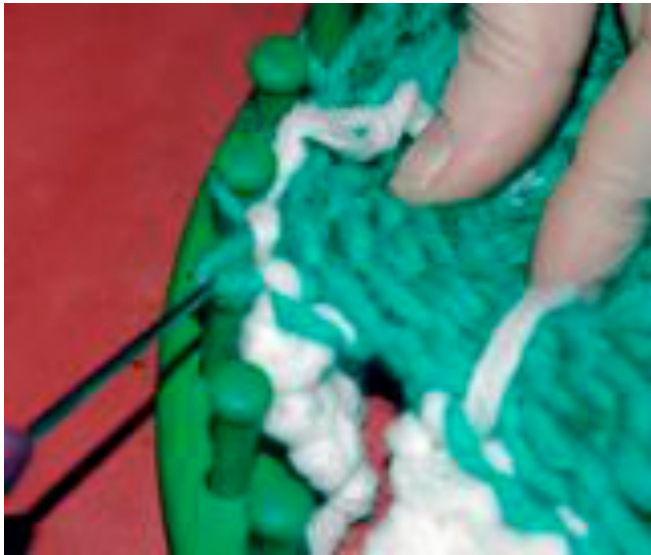
using green two strands together crochet cast on 12 stitches row $1:$ knit row row 2: purl row row 3 : knit till three remaining stitches, lift next stitch, wrap peg, place stitch back on peg row 4 : turn, purl to end row 5 : knit till four remaining stitches, lift next stitch, wrap peg, place stitch back on peg row 6 : turn, purl to end row 7 : knit till five remaining stitches, lift next stitch, wrap peg, place stitch back on peg row 8 : turn, purl to end continue decreasing each row until there are only three single stitches remaining next row : knit all pegs, any pegs with two stitches just knit them off together asone next row : purl you have completed one out of six sections of your circle top piece, congratulations. Repeat pattern again until you have completed six sections Bind off neatly using the flat panel bind off method. lay out flat and put a book or other flat weight on top to flatten, leave for about an hour so that the stitches can relax a little. With wrong sides facing, carefully seam together the cast on and bind off rows. Flatten out to a circle shape. It may help to leave to rest for about an hour so that the stitches relax a little before moving on to the next part. With the wrong side facing upwards, place the loops from around the edging of your circle onto your large hat loom. Please do not worry if the circle is completely stretched, yarn has 'memory' and it will go back into its proper shape once you knit the sides. Using green, Thread working yarn through the last stitch on the row, pull to the back and tie in a secure knot, pull working yarn forwards in between the last peg and first peg on your loom. First row, wrap all the pegs once. There should now be two loops on each peg. Next row : knit row, knit the two stitches on each peg off together as one. Next row : purl Next row : knit Next row : purl Next row : knit Next row : purl
Teeth Rows :
FIRST TOOTH :
change to white Next row : knit 3 Next row : turn, purl 3 Next row : turn, knit 3 Next row : turn, purl 3 Next row : turn, knit 3 Next row : turn, purl 3 Next row : turn, knit 3 Next row : turn, purl 3 Bind off loosely as follows : knit first and second stitch, place second stitch on to first stitch, lift bottom loop over top then place the remaining stitch on peg 2. knit peg 3, place stitch on peg 2, lift bottom loop over top, place remaining stitch on peg 3 cut working yarn thread through last stitch, pull snugly taking tooth off the loom.
SECOND TOOTH :
Add white yarn to next stitch Next row : knit 3 Next row : turn, purl 3 Next row : turn, knit 3 Next row : turn, purl 3 Next row : turn, knit 3 Next row : turn, purl 3 Next row : turn, knit 3 Next row : turn, purl 3 Next row : turn, knit 3 Next row : turn, purl 3 Bind off loosely as follows : knit first and second stitch, place second stitch on to first stitch, lift bottom loop over top then place the remaining stitch on peg 2. knit peg 3, place stitch on peg 2, lift bottom loop over top, place remaining stitch on peg 3 cut working yarn thread through last stitch, pull snugly taking tooth off the loom. You have just knitted two different length teeth shapes. Knit two more the same on the next six pegs so that you have four teeth in a row. Miss out the next six pegs and repeat your four teeth shapes, two of each length, so that you have eight teeth altogether hanging downwards and $\sin x$ pegs each side of the loom which have only one green stitch on each of them.
Mouth and Tongue Earflaps :
Carefully lift the three green stitches which are set in between the first row of white stitches of each tooth on the inside of the hat and place them back on to the loom.
Be sure to push all your teeth and any white yarn tails downwards so that you only have green showing around the edge of the loom. You should now have one green stitch on each peg all the way around the loom. Attach red yarn to the back of the last stitch in the row and pull forwards towards you so that it comes out between the last peg and first peg of the row. row 1:knit row 2: purl rows 3 to 8 : repeat rows 1 and 2loosely bind off all the way around. Lift the six green stitches from in between the red stitches on the inside of the rim where there are no teeth and place them back on the loom, six pegs each side will be for the two tongue earflaps. Attach red yarn to the first stitch on one side, you will be working one set of six stitches only first then repeating the rows on the other set of six stitches to form your second earflap tongue piece. complete five garter stitch rows next row : crochet cast on one stitch at the start of the row, knit row, crochet cast on one stitch at the end of the row next row : purl all eight stitches next row : knit row next row : purl row next row : next row : crochet cast on one stitch at the start of the row, knit row, crochet cast on one stitch at the end of the row next row : purl all ten stitches next row : knit row next row : purl row next row : knit row next row : purl row next row : knit row next row : purl row next row : knit row next row : purl row next row : knit 2, lift the 2nd stitch on to the first peg, lift bottom loop off, move stitch from the 1st peg to 2nd peg, knit to end of row, move the last stitch on to the peg before, lift bottom loop off, pull working yarn neatly. next row : purl next row : knit 2, lift the 2nd stitch on to the first peg, lift bottom loop off, move stitch from the 1st peg to 2nd peg, knit to end of row, move the last stitch on to the peg before, lift bottom loop off, pull working yarn neatly. next row : purl next row : knit next row : purl next row : knit 2, lift the 2nd stitch on to the first peg, lift bottom loop off, move stitch from the 1st peg to 2nd peg, knit to end of row, move the last stitch on to the peg before, lift bottom loop off, pull working yarn neatly. next row : purl bind off your row of four stitches. Make the second earflap on your other set of six stitches which should still be on the loom.
Eyeballs : (make six)
using white, cast on two stitches row $1:$ purl row 2 : knit row 3 : purl row 4 : cast on 1 stitch, knit row, cast on 1 stitch at the end of the row row 5 : purl row 6 : knit row 7 : purl row 8: knit row 9 : purl row 10 : knit row 1l : purl row 12 : knit row 13 : purl row 14 : knit 2,lift second stitch on to first stitch, lift bottom loop over top. one then place remaining stitch on empty peg, knit row, move last stitch on to the peg before, lift bottom loop over top one, pull working yarn neatly. row 15 : purl row 16 : knit row 17 : purl bind off. fold the two ends under and tie the yarn tails together from each end. Using black, cast on 2 stitches row 1: purl row 2 : knit row 3 : purl row 4 : knit row 5 : purl row 6 : knit row 7 : purl row 8 : lift 1st stitch on to 2nd stitch, lift off bottom stitch over the top, cut working yarn, thread through remaining stitch, take off the loom and pull to secure. Make five more then sew them on to the six white eye pieces.
Finishing Up :
turn hat inside out and weave in any yarn ends. turn back the right way and sew your six eyes on to the top of the hat. take lots of photographs :) enjoy! Every efforthasbeenmade to ensure that this patten iscorret and feof erors.However, if you dond anything that needs to have changes applied, please forward the details on to me so that I may make the amendmentspersonally. HelenJacobs-Grant myheartexposed@me.com
All rights reserved please do not copy or reproduce this pattern or claim it as your own. You may save a download of this pattern to your computer and print it out for your own personal use only. Please do not reproduce the pattern in any other format.


