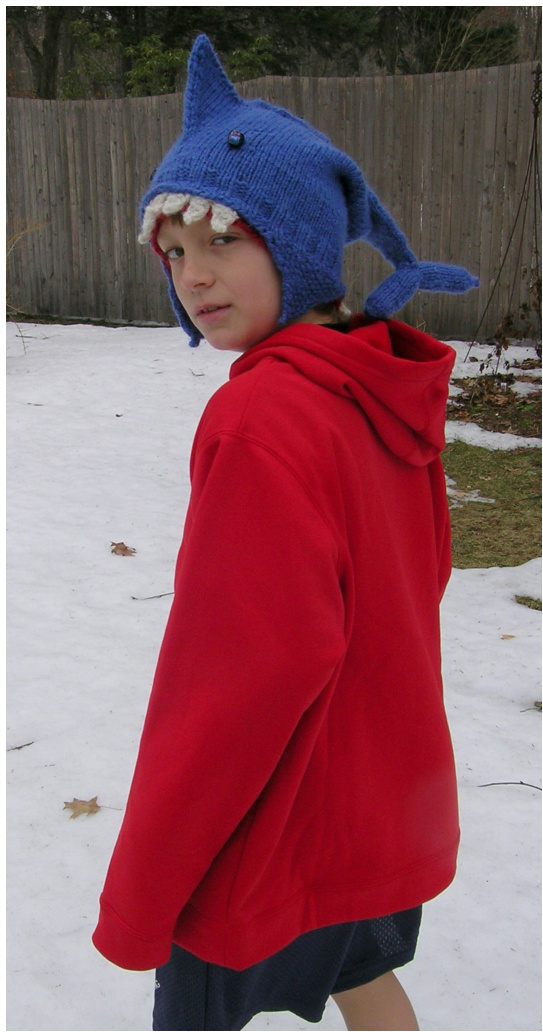
This is a hat that I originally knit for my boyfriend as a gift. He wanted a hat that “looked like a shark is latched on to my head". I came up with this hat. It is comfortable, fun and not for the easily embarrassed! Designedkit byAllnMacAliste, wih ntetestinhtsbDebie ad hVelwww.livleblogsotm

Materials
Adult hat: Size 9 (5.5mm) & size 8 (5mm) DPNs (circular needles optional for last third of hat) Child's hat: Size 8 (5mm) & size 6 $(4.5\mathrm{mm})$ DPNs (circular needles optional for last third of hat) Yarn: 2 Skeins Bernat Softee Chunky in blue-grey, or any substitute chunky/bulky weight yarnt hat meets gauge (14 sts and $24\,\mathrm{{rows}=4^{\circ}}$ in st st), small amount of red yarn in similar weight, and white yarn for teth Body Optional: White flt for teeth, and Heece for lining. Polyester fiberfll stuffng Using larger needles, CO 10 st. Join in circle, being careful not to twist. Work st st for 5 rounds. (k1, m1) twice, k1, (m1, k1) twice $=18$ stitches (k1, m1) twice, k5, (m1, k1) twice $=26$ stitches (k1, m1) twice, k9, (m1, k1) twice $=34$ stitches Continue increasing like this, with 4 more st in the center group on each round, until your piece is 82 st. Work 5 rounds in st st. On the next round, k41, then CO 24 stitches by backward loop method for dorsal fin. On the next round, k41, then CO 12 stitches by backward loop method for one side of dorsal fin. Place stitch marker. CO 12 more stitches for other side of dorsal fin. K to end of round. Work 3 rounds in st st. Knit to 2 st before stitch marker, k2 tog, ssk, knit to end of round. Knit 1 round straight. Continue with these 2 rounds, decreasing before and afer the stitch marker on every other round until back to $80\;{\mathrm{st.}}$ Work 8 rounds in st st. Switch to smaller needles. Work $2\mathrm{x}2$ ribbing for $1\!-\!1/2$ inches. Switch to red yarn and continue ribbing for 1-1/2 inches. This is the inside of the mouth. BO loosely.
Tail
CO 2 sts.
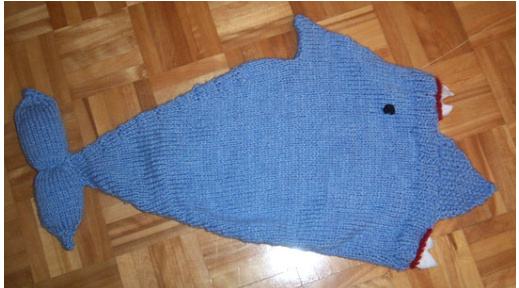
Working in st st throughout, work 2 rows. On the third row, inc one into each st. Next k row, inc one st into each st (8 sts). Next k row, inc one st into first st, k2, inc one st into next 2 sts, k2, inc one st into last st (12 sts) K 29 rows. You should have 36 rows total. Next row, (k2tog, k2, k2tog) twice (8 sts). Next k row, k2tog four times (4 sts). Next k row, k2tog twice (2 sts). Next row; Purl. CO. Stuff loosely with polyfll stuffng its washable), sewing edge closed as you go. Attach the tail to the end of the body, using the photos for reference. After securing to the body, wrap a strand around the tail and pullsomewhat tightly. This creates the groove between the tail fins. Secure the yarn and weave in all ends up to this point.
Fins
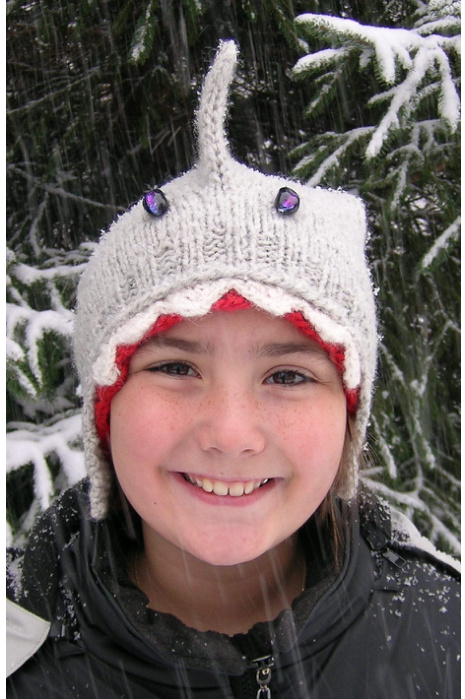
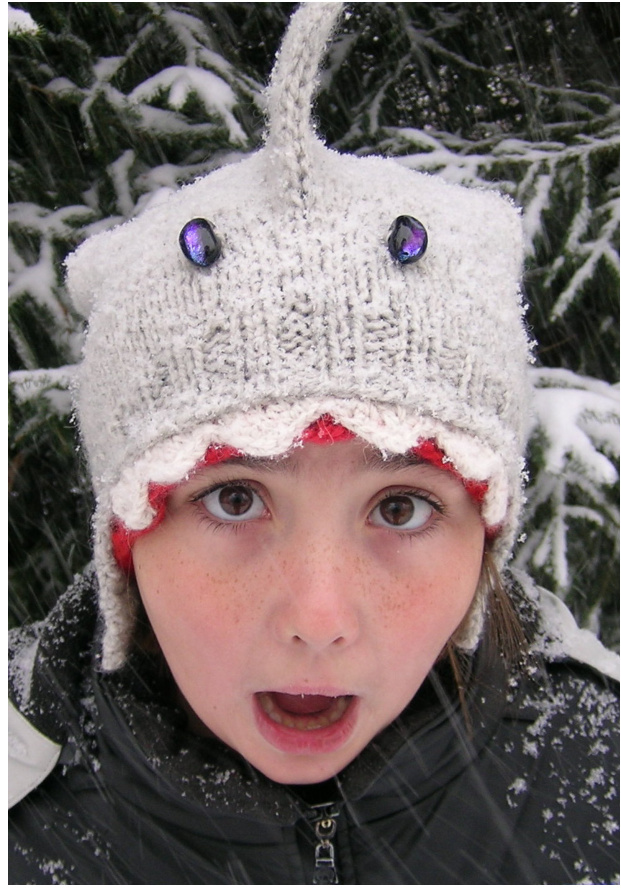
For the two earfap fins: Eyeball and measure out 18 sts equally on each side, and place markers to mark those sts. For reference, there should be 22 sts in the front of the hat, 22 in the back, and 18 between each marker. Pick up the stitches on one side. In seed st: First row: k2tog, cont in pattern. Second row: p2tog, cont in pattern. Continue working these two rows until two sts remain, then BO. Make the second earfap the same way. Stitch up back of dorsal fin. For eyes, you can either sew on beads, buttons, or embroider them.. Weave in ends.
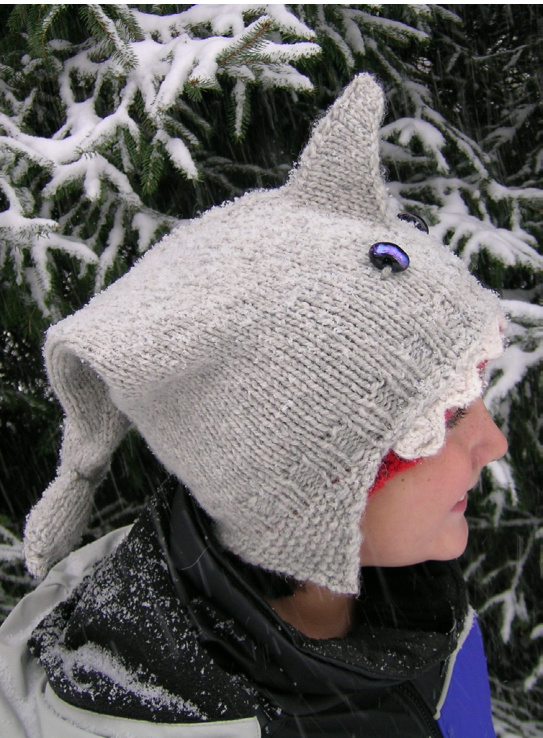
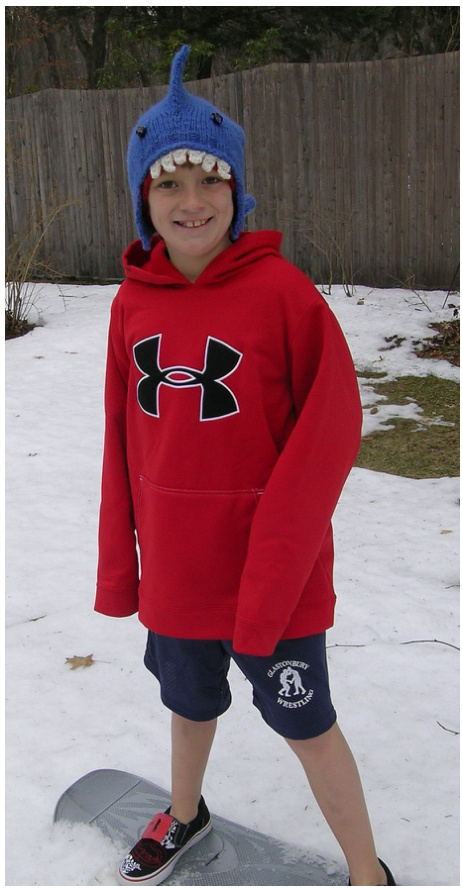
For the teeth, there are two options. Knit, which takes longer but produces nicer results, or cut out with felt, which is quick but teeth have a tendency to curl slightly. Felt teeth (as in adult hat pictured): simply cut out teeth to the shape you would like using white felt, and sew them onto the body CO edge of the hat. Knit teeth (as in child's hats): On the front of the hat, between the earfaps, measure out 5 sts per tooth. You may want to mark the teeth with stitch markers, using the photos for a guide. For each tooth, pick up 5 sts. P 1 row. K1, sl wyif, k1, k1, sl wyif, k1. Sl wyif, k1, sl wyif, pl, sl wyif, k1, sl wyif. K1, sl wyif, sl-k2tog-psso, sl wyif, k1. P2tog, p1, sp. Sl wyif, sl-k2tog-psso.
Copyright Irpormation
This pattern is $\copyright$ 2008 The Knitting Ninja (Allison MacAlister). You may make copies for your own personal use, but you may not sell copies of the pattern. You may sell the hats that you make, provided that credit is given to myself (Allison MacAlister/The Knitting Ninja) for the design. If you have any questions about what you can or can't do with this pat tern, please feel fre to contact me via the contact details on my blog. www.knittingninja.com. Special thanks to Debbie & Leah Varrell (www.livnletlrn.blogspot.com) for test-knitting my hat(twice), helping me proof the pattern, adding notes/corrections, and for being generally awesome people. Knit on, ladies!
Like this pattern?
Please let me know! I would love to see finished hats, positive/negative feedback, suggestions for improvements, or to be informed of any mistakes/errata in this pattern. Please don't hesitate to email me at allisonmacalister@gmail.com. If you enjoyed this pattern, I happily accept PayPal donations through my blog, at www.knittingninja.com. Thanks for choosing my pattern! Happy knitting! Cut yarn and draw through remaining st, pulltightly. If you wish, you may repeat this process in the back of the hat for back teth. Continuing to use smaller needles, pick up 80 st in k2p2 along the lower edge of the body color, matching the ribbing stitches, just above the red and teeth. Do 3 rounds of k2p2 ribbing. BO loosely. This is to give the impression that the red and the teeth are inside the mouth.
Finrishing
Weave in any leftover ends. If you used an acrylic yarn or otherwise wish to warm up the hat, line with feece. If needed, stuff dorsal fin and lower body/tail area very loosely with polyfill and sew in with feece.

Always make sure your hat fits your recipient!


