Cuppycake
2 colors Worsted weight yarn >Color A for the ribbing >Color B for the ruffle and crown Size 6 (4mm) Size 9 (5.5mm) Gauge: 5sts/in Size: Child, very stretchy though. To fit an adult just add an inch or two for more height. Cast On 65 stitches with your size 6 needles and Color A, join to work in the round being careful not to twist stitches. (Use whatever stretchy cast on you are most comfortable with.) Place stitch marker to mark beginning of round. Work Mixed Rib Stitch for 3-4 inches (8-10cm) Mixed RibStitch: \*K2, P1, K1, P1\* Repeat to end of round Leave these stitches on the needle. Using a size 9 needle and Color B, cast on for your ruffle. Use any cast on you are comfortable with. The directions for the ruffle depends on how ruffly you want your ruffle to be. For only a slightly ruffled look, cast on twice as many stitches as your original CO of 65 (so 130); for a bit more ruffled look cast on three times as many (195); for a really ruffled look cast on 4 times as many (260).
Slightly Ruffled:
With Color B, CO 130, join to work in the round being careful not to twist stitches. Knit 3rounds During this next round you will be decreasing and attaching to the brim at the same time. So for each stitch you make, slip one Color A stitch from that needle onto your Color B needle and then K3tog (knitting 2 Color B's together with 1 Color A). Do this all the way around until you have both colors joined onto the size 9 needles and only have 65 stitches left (All of these stitches will now be Color B. Break off Color A.) Go to Crown Instructions. Bit More Ruffled: (slightly more tricky due to the K4tog's) With Color B, CO 195, join to work in the round being careful not to twist stitches. Knit 3 rounds During this next round you will be decreasing and attaching to the brim at the same time. So for each stitch you make, slip one Color A stitch from that needle onto your Color B needle and then K4tog (knitting 3 Color B's together with 1 Color A). Do this all the way around until you have both colors joined onto the size 9 needles and only have 65 stitches left. (All of these stitches will now be Color B. Break off Color A.) Go to Crown Instructions.
Really Ruffled: (aka Rufflicious)
With Color B, CO 260, join to work in the round being careful not to twist stitches. Knit 2rounds K2tog\* to the end of round During this next round you will be decreasing and attaching to the brim at the same time. So for each stitch you make, slip one Color A stitch from that needle onto your Color B needle and then K3tog (knitting 2 Color B's together with 1 Color A). Do this all the way around until you have both colors joined onto the size 9 needles and only have 65 stitches left. (All of these stitches will now be Color B. Break off Color A.) Go to Crown Instructions.
Crown Instructions:
You now have 65 stitches on your needles and you need to increase to 69. You will be increasing while establishing the pattern. Round 1: K7, P1, K1, P1, K5, KFB, P1, K1, P1, K7, P1, K1, P1, K5, KFB, P1, K1, P1, K5, KFB, P1, K1, P1, K7, P1, K1, P1, K5, KFB, P1, K1 (69sts) Round 2: P1, \*K7, P1, K1, P1\* \*Repeat around. (Note: K7, P1, K1, P1 is the established pattern to create the ridges. Having it offset by one is what creates the swirl effect.) \*\*Work the K7, P1, K1, P1, pattern continuously slipping the stitch marker as you get to it. You will continue to K7, P1, K1, P1 until hat is 7-8 inches tall (18-20cm). You will notice as you knit the hat that each time you come to a purl stitch (on the previous row) you will be making your last knit stitch for that section. By realizing this I was able to knit and only count my p,k,p stitches - I would just knit until I got to a purl, then knit one more, then I knew I had to purl 1, knit 1, purl 1.
Decreases:
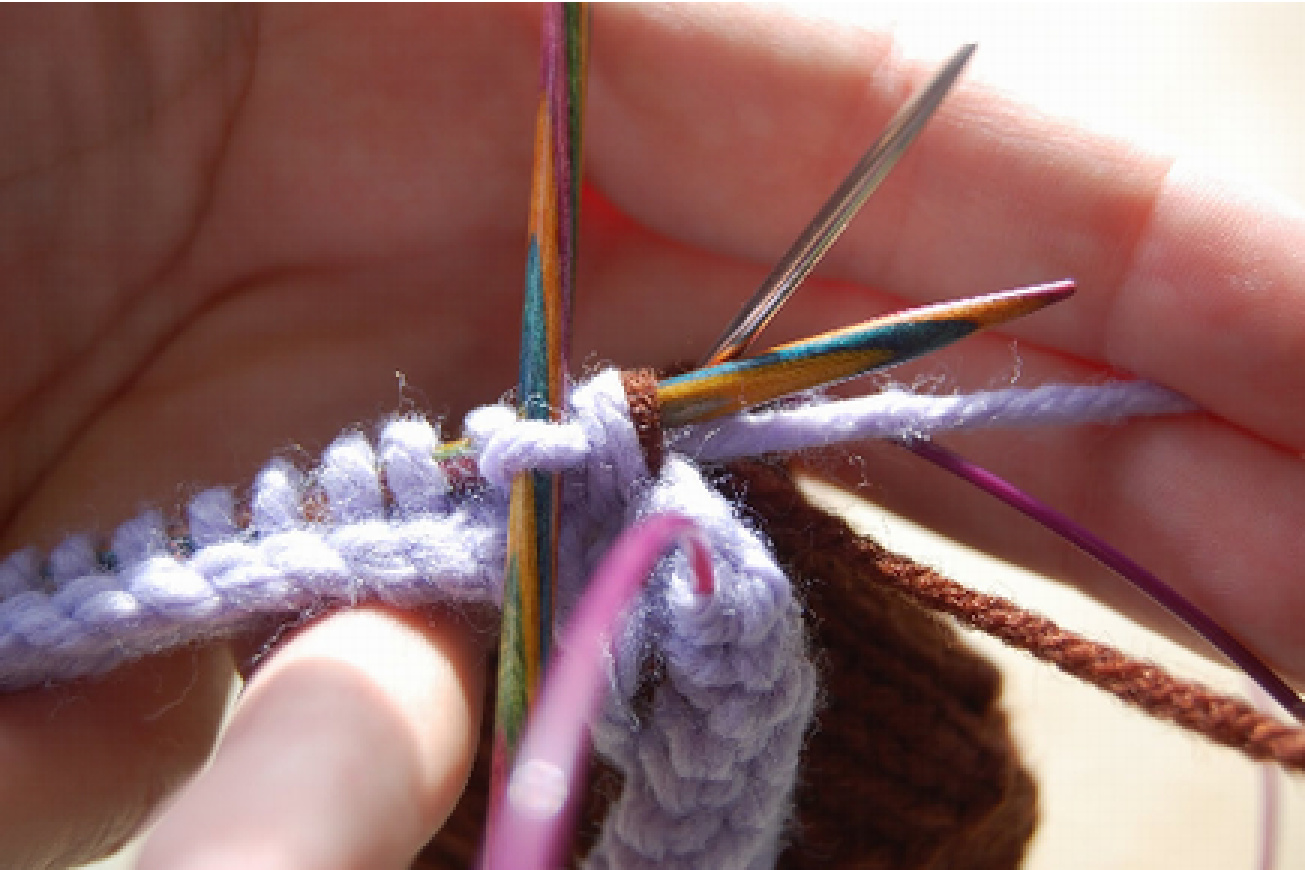
Move your stitch marker so that your first decrease round begins after the next 'P,K,P'. You might have to adjust where the stitch marker is as you work the decrease in pattern. It is okay to do this. The purpose in the stitch marker here is just to let you know you made all of the decreases for that round. DRound 1: \*K2tog TBL, K3, K2tog TBL, P1, K1, P1\* Repeat 6 times; K2tog TBL, K3, K2tog TBL, P1, K1, remove marker, P1, replace marker for new beginning of row. (55sts total) DRounds 2&3: Knit in established K5, P1, K1, P1 pattern, being sure to place marker after last P1, K1, P1 DRound 4: \*K2tog TBL, K1, K2tog TBL, P1, K1, P1\* Repeat 6 times; K2tog TBL, K1, K2tog TBL, P1, K1, remove marker, P1, replace marker for new beginning of row. (41sts total) DRound 5: Knit in established K3, P1, K1, P1 pattern, being sure to place marker after last P1, K1, P1 DRound 6: \*K2tog TBL, K1, P2tog, P1\* Repeat 6 times; K2tog TBL, K1, P2tog, remove marker, P1, replace marker for new beginning of row. (27sts total) DRound 7: \*K2, P2\* around, being sure to place marker after last P2 DRound 8: \*K2tog TBL, P2tog\* around (remove marker to purl the last two together), replace marker for new beginning of row. (13st total) DRound 9: \*K1, P1\* around DRound 10: \*K2tog\* 6 times; K1 (7sts total) Break yarn and pull through remaining stitches. Tie off and weave in ends. Alternate version: lf you would like a more pointed cupcake, then do more pattern rounds in between the decrease rounds. For a swirl on top repeat DRound 7 several times and then decrease to a point. Decorate as desired. Some suggestions: Pom pom 'cherry'; beads or sequins for 'sprinkles'; knit cherry \~ pattern via Ellen Kapusniak Knitted Cherry \~ excerpted from Ellen Kapusniak's Iea Cosy Trio Using 4 mm needles and red DK, cast on 4 sts. Rows 1 and 2: kfb in every stitch Rows 3-6: starting with a purl row, work in ss Rows 7-8: k2tog to end Bindoff Assemble cherry by rolling up a small amount of polyester toy filling into a ball and stuffing it into the piece, then stitch up around the filling to form a ball. You can use a polystyrene bead for the filling if you prefer or scraps of yarn. Sew the cherry in place on top in the middle. Tea Cosy Trio can be found on Ellen Kapusniak's website Knitti Politi: http://www.knittipoliti.com/ourshop/cat 662348-PDF-Knitting-Patterns.html In this picture, both the ribbed stitches and the ruffle stitches are shown on the needles. The ribbed stitches are the brown ones and are on the metal needle. The ruffle stitches are purple andareonthecolorfulneedle.
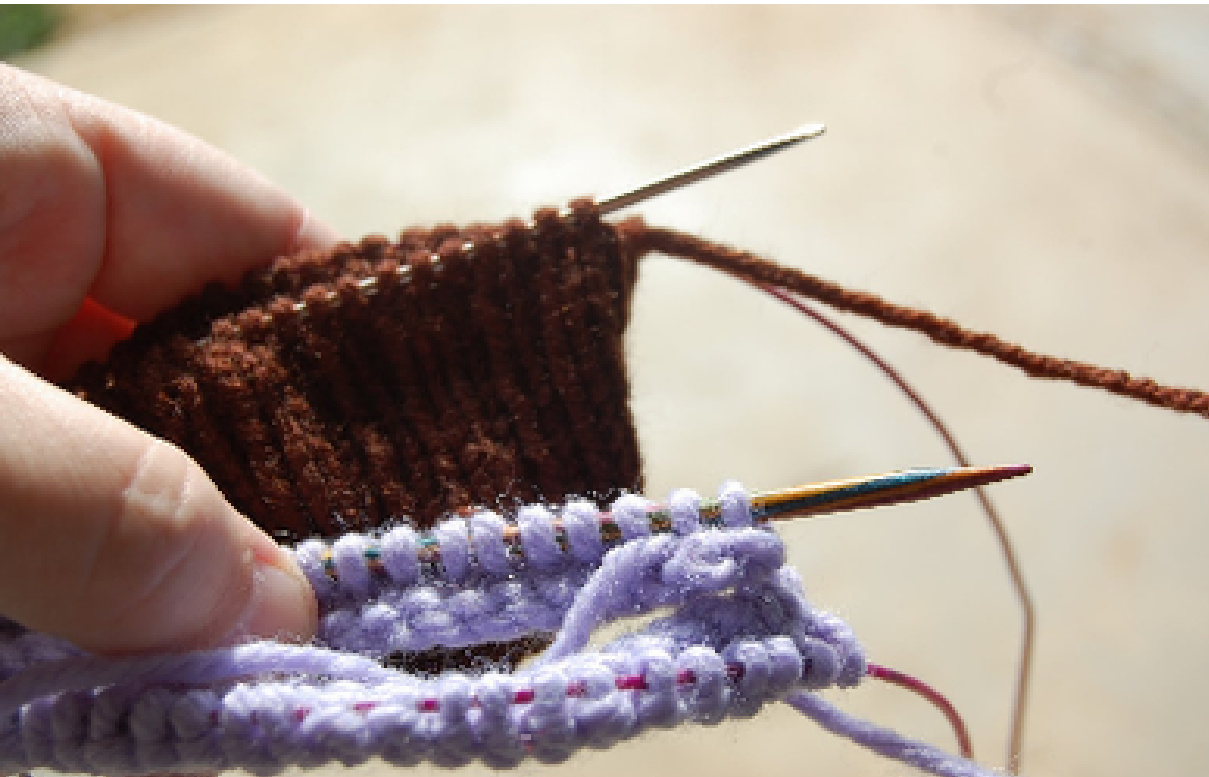
Insert your ruffle needle into the first rib stitch to pick it up as if to knit
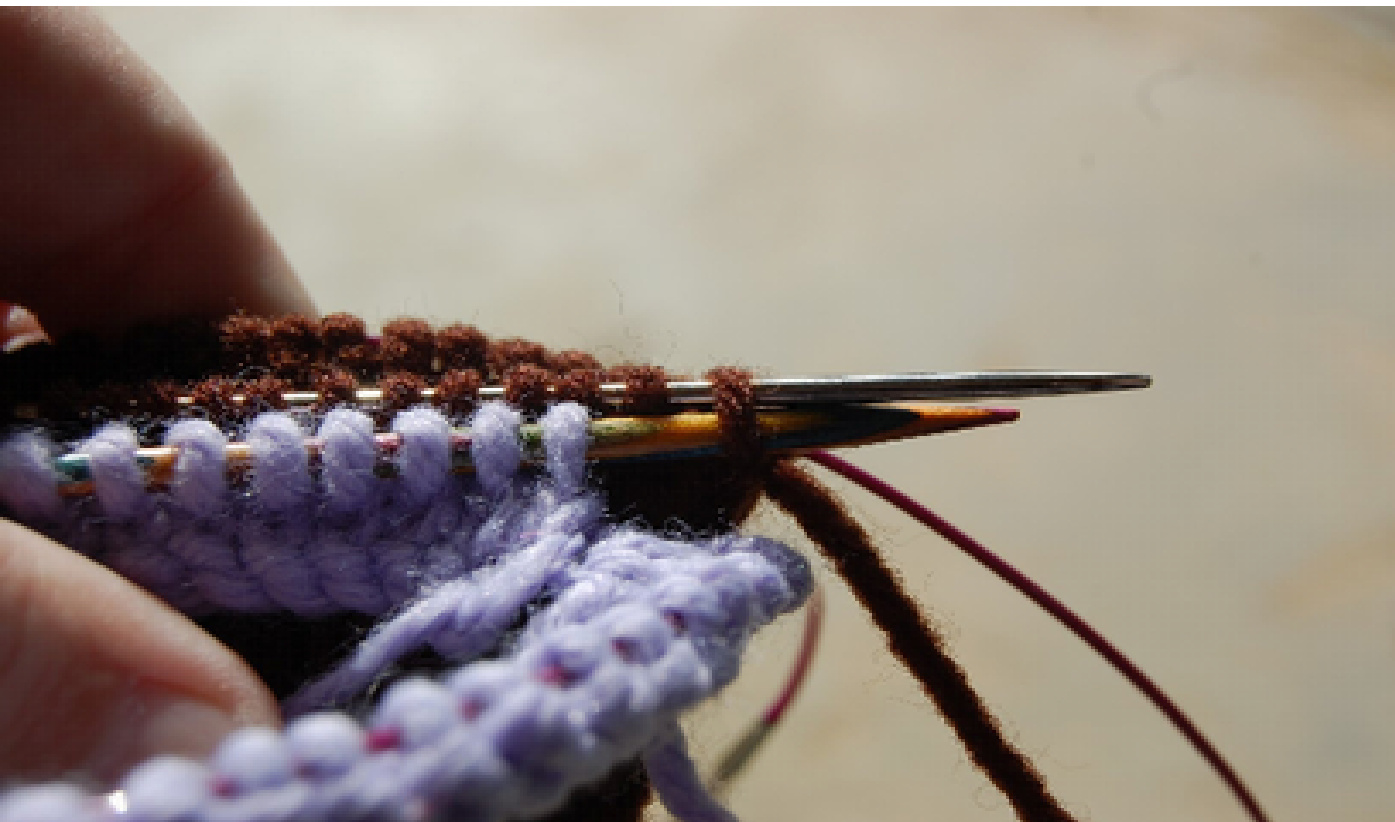
Slide the rib stitch off of the its needle and onto the ruffle needle.
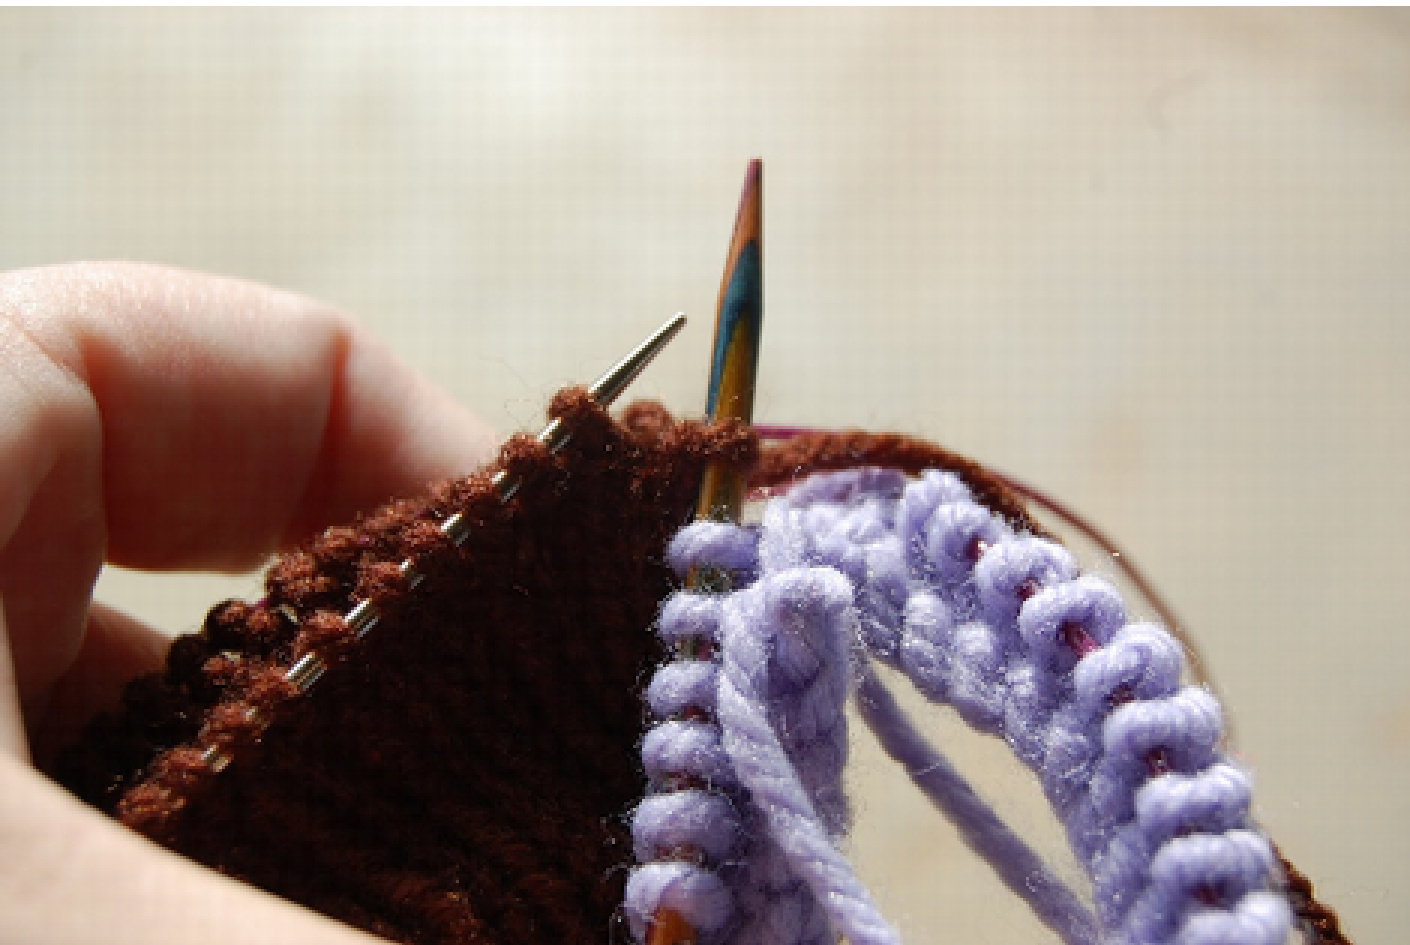
working needle into 2 ruffle stitches and 1 rib stitch to create a knit-3-togethe
ur ruffle yarn (in this case, the purple) as usual and pull through all 3 stitches
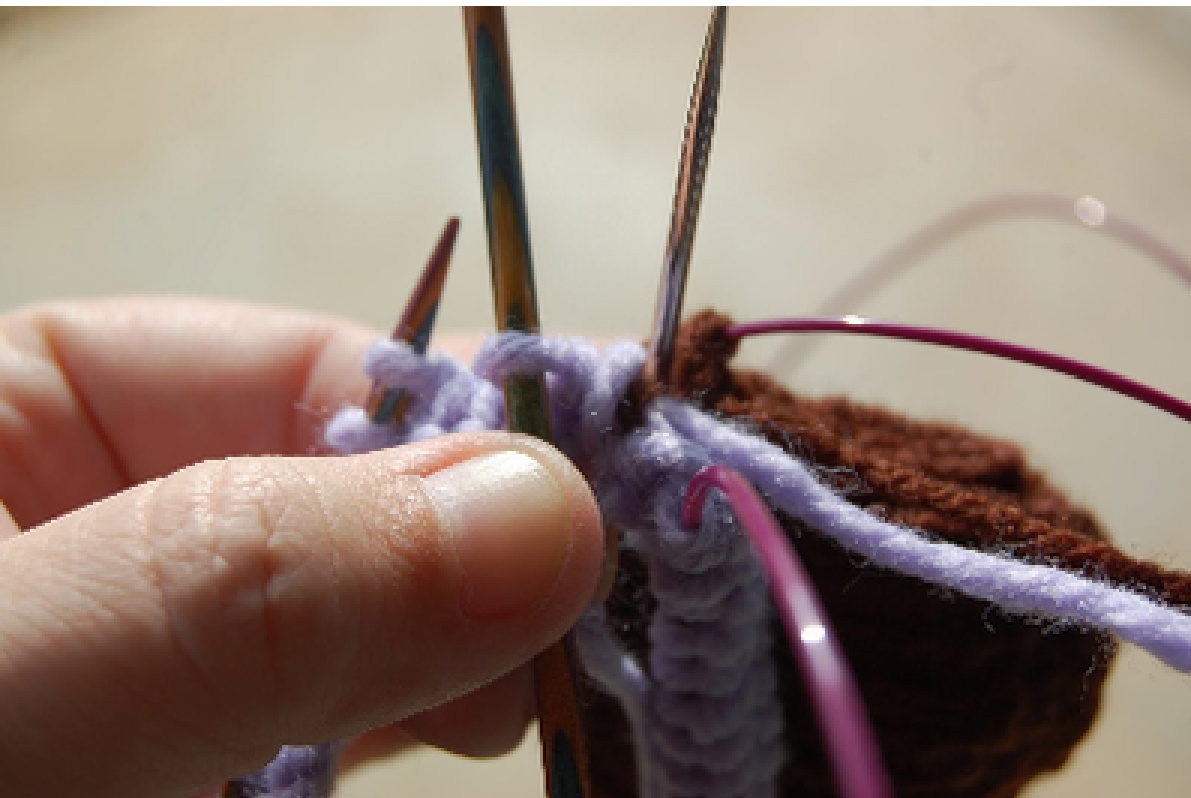
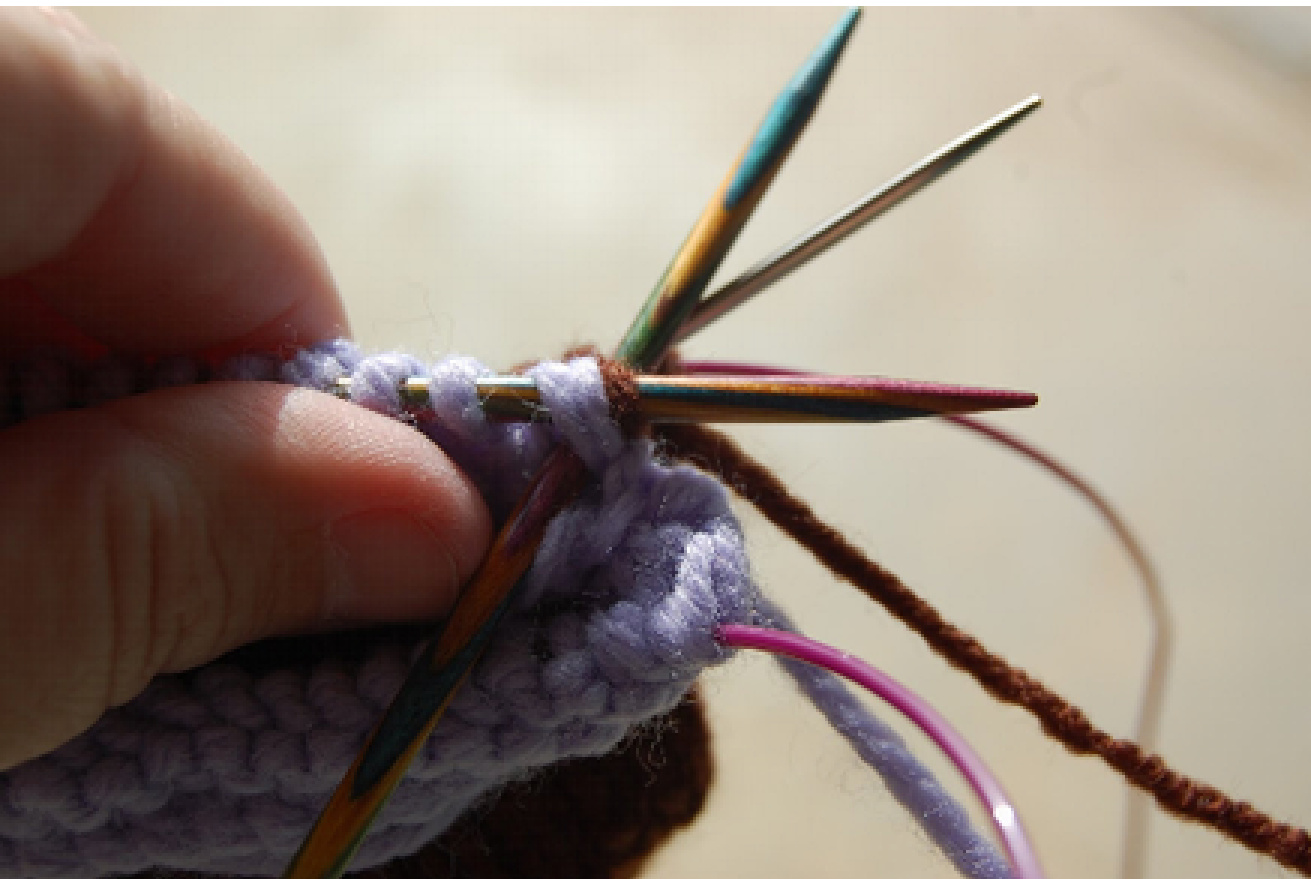
The new stitch is on the working needle and your ribbed part is now connected to your ruffle. Continue in this manner all the way around.

Once you have finished the round of K3tog, your project will look like this. You have now fully connected your ribbing and your ruffle and are ready to knit the top part. You are through working with Color A (the color used for ribbing) and will continue working with Color B (the color used for the ruffle/top).


