Frankie's Knitted Stuff
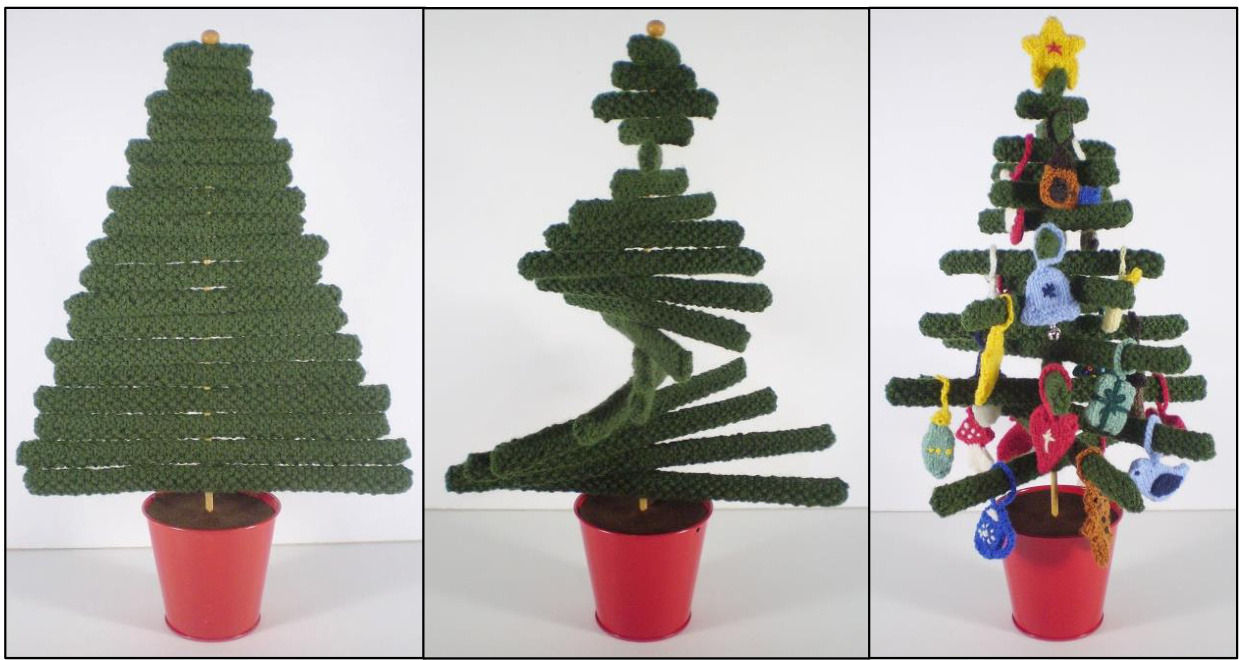
Every home should have a knitted Christmas tree - well, every knitter's home anyway - and this Needle Tree is easy to knit and fun to decorate. It stands about 36 cm / 14" tall and has adjustable branches. Lay them flat for storage and open them out when it's time to decorate the tree. The trunk of the tree is a wooden knitting needle and it sits in a metal bucket filled with clay. The branches are knitted strips, stiffened with plastic canvas; these are simple to knit and don't take very long. This pattern is for the tree only; there are also 24 patterns for the little knitted decorations which turn the tree into an Advent Calendar and another pattern for a bag to hold all the decorations. At the end of this pattern is a detailed list of everything you will need to make a tree, all 24 decorations and the bag to keep them in. For the tree you will need plastic canvas, a knitting needle, a pot, some air drying clay and a piece of felt. Let's deal with these one at a time ...
Plastic Canvas
The plastic canvas should be Ultra Stiff and have 7 bars to the inch. A sheet measuring 131/2 x 221/2" (the size I buy) will be big enough to make two trees. For one tree you will need a piece about 9 x 18". There are 18 branches on the tree, nine different sizes with two branches of each size. Each branch is made up of two strips of plastic canvas. Have I lost you already? What this means is that you will need to cut four plastic strips in each size, 36 in all. All the strips are three bars wide; cut four in each of the following nine lengths: 12, 18, 24, 30, 36, 42, 48, 54 and 60 bars.
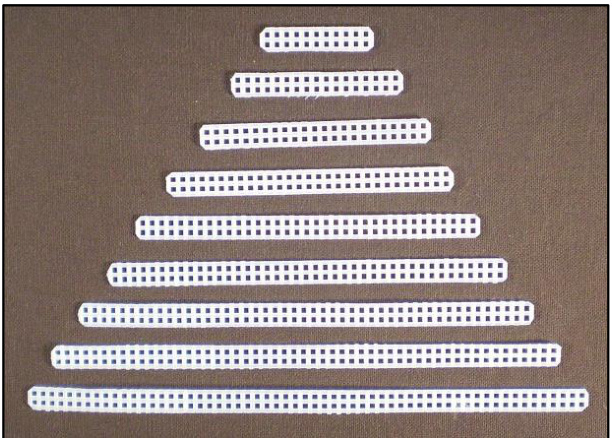
Trim the corners of each strip to stop them poking through the knitting. This picture shows one set of plastic strips. You will need to cut four sets of these nine strips to make one tree.
Knitting Needle
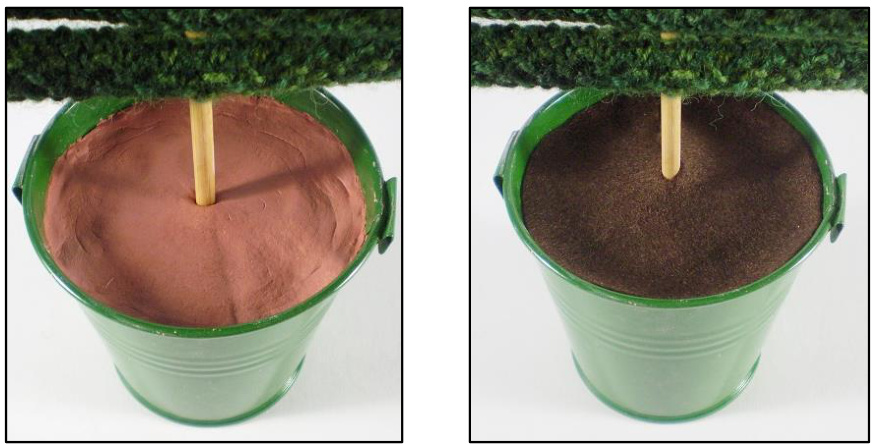
The knitting needle for the trunk should be a long one - about 34 cm / 1314" long - don't choose one with too big a stop on the end or you won't be able to fit a star on to it. A wooden needle looks best and it should be about 4 mm thick, although one size bigger or smaller would probably be fine. I made two trees and used metal buckets for my pots; they are about 8 cm / 3" tall and measure the same across the top. As you can see, my two pots are slightly different. Both had metal handles which I took off and the green one also had little tabs sticking up which I folded down.
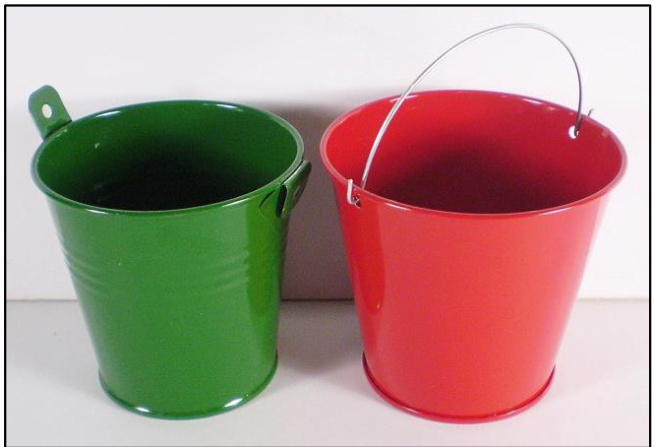
You could also use small plant pots, perhaps terracotta ones, if you can find them in the right size. Clay This anchors the tree in its pot. I used air drying clay which comes in white or terracotta. One 1kg pack will fill two pots Felt
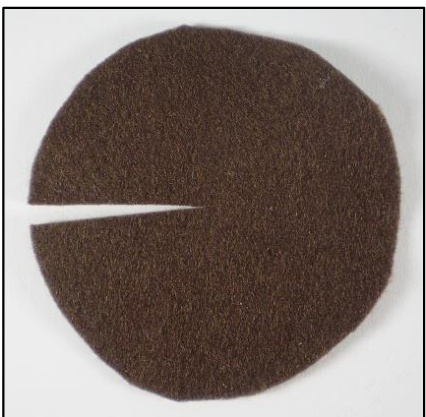
I didn't like the colour of the clay so I added a circle of brown felt to tidy it up a bit. Cut a circle the same size as the top of your pot (you can trim it to fit later) and then fold it into four to crease it. Open the circle out and cut along one of the creases to the centre. This cut will let you fit the felt round the trunk of the tree. Instead of the felt, you could paint the top of the clay or cover it with beads, fake snow or anything else you can think of.
Knitting the Branches
Now that we've assembled the bare bones of the tree it's time for some actual knitting. For this you will need a pair of 3.25 mm / US size 3 needles and about 40g of DK weight yarn for one tree. I knitted two trees, using Sirdar Country Style DK (155 m / 50g, shade 610, Village Green) for one and 21" Century Yarn's DK (285 m / 100g) in Forest for the other. You will also need one 2.75 mm / US size 2 needle.
Tension
Aim for a tension of about 7 stitches and 12 rows to 2.5 cm / 1"2 when working in moss stitch (US seed stitch) on 3.25mm needles. Each pair of plastic canvas strips is covered with one strip of knitting. These are all worked the same, although the number of stitches increases as the branches get longer. Using the long tail method and 3.25 mm needles, cast on one stitch for each plastic canvas bar of the branch you are covering, minus one. So, for the 12 bar branch cast on 11 stitches, for the 18 bar branch cast on 17 stitches and so on. 12 bar branch Cast on 11 stitches. 18 bar branch Cast on 17 stitches. 24 bar branch Cast on 23 stitches. 30 bar branch Cast on 29 stitches. 36 bar branch Cast on 35 stitches. 42 bar branch Cast on 41 stitches. 48 bar branch Cast on 47 stitches. 54 bar branch Cast on 53 stitches. 60 bar branch Cast on 59 stitches. Work four rows in moss stitch: Every row: K1, \*P1, K1, repeat from \* to end. Now, using a 2.75 mm needle, work one row in purl for the fold. Change back to the 3.25 mm needles and work another four rows in moss stitch. Cast off knitwise, working K2tog at the end of the row. Leave a long tail for sewing up, about twice the length of the knitted strip. Fold the knitted strip in half and sew one short end closed. Then oversew / whipstitch the long sides together, inserting the two plastic canvas strips as you go. Close the second short seam and fasten off.
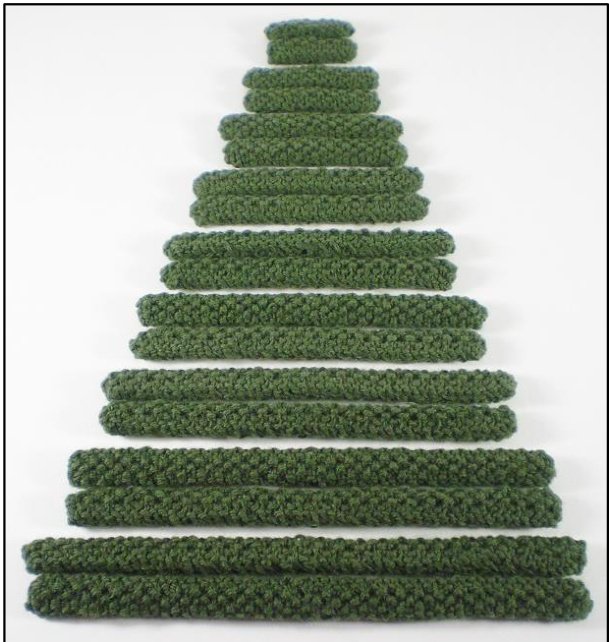
All 18 branches, two in each length
Putting the Tree Together
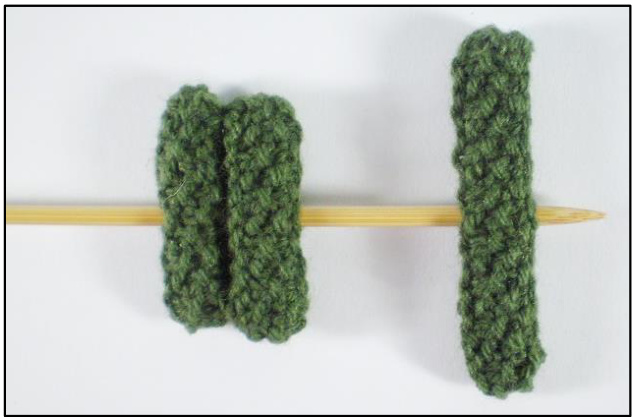
The next thing to do is to put the branches on the trunk. Starting with the smallest branches, thread them in turn on to your long wooden knitting needle. Make sure that the needle slides between the two pieces of plastic and that it is right in the middle of each branch.
Once all the branches are in place it's time to plant the tree. Fill your chosen pot with clay, squashing it well down and making sure the top is smooth and firm. Then push the point of the needle down into the middle of the clay until it reaches the bottom of the pot. The clay will take a long time to harden, depending on how warm your house is. Mine is cold and it took about a week. Once it is hard you can top it with the felt circle. Try this on the tree for size; you can take it off and trim it if needed. As well as trimming the circle down to size I found I needed to trim the cut edge slightly too so that the two edges didn't overlap.
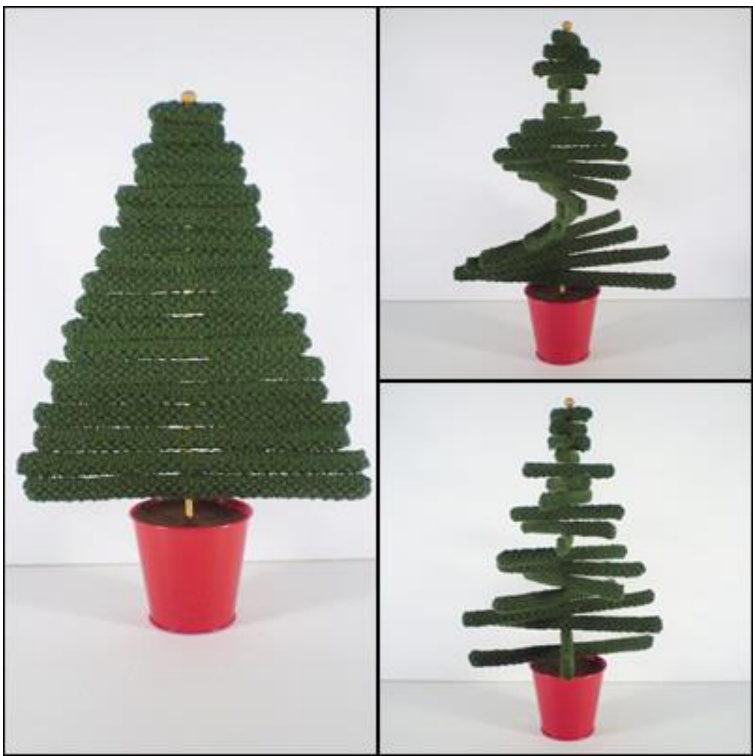
That's the tree finished. Now you can have fun arranging the branches. I like them in a tight spiral, although that's not a particularly practical shape if you want to add decorations.
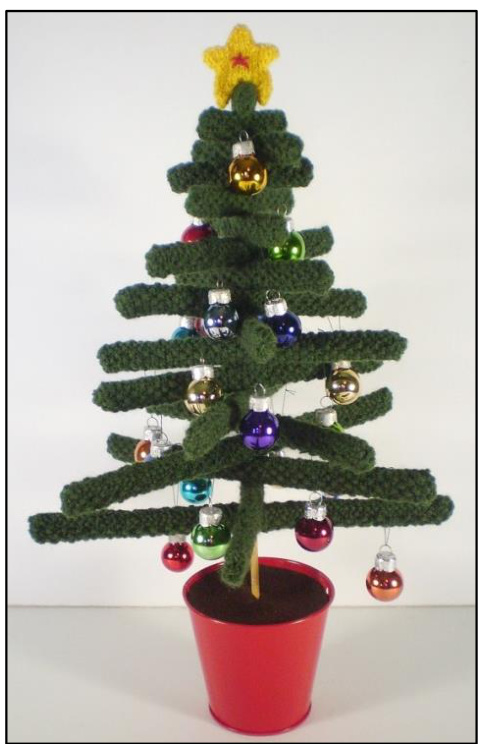
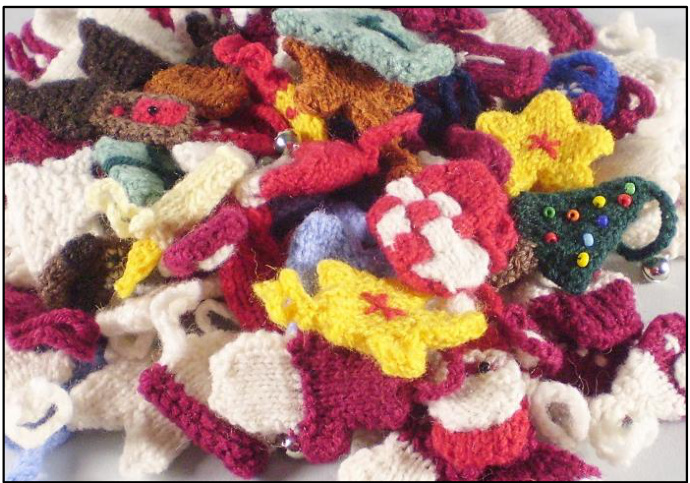
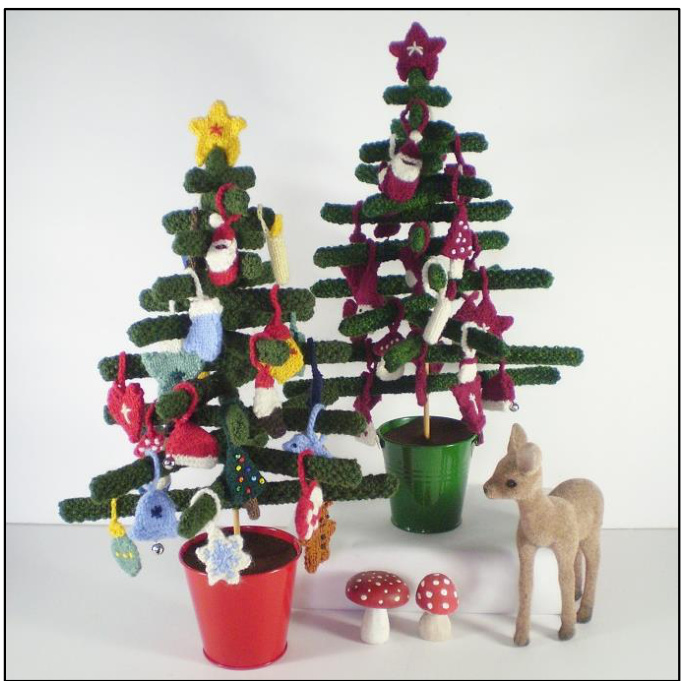
Or ... you can knit 24 little decorations, using just two colours (red and cream) or lots of colours. You can leave tree as it is or add some decorations. These tiny baubles measuring about 2 cm / 3%" across are just the right size.
Abbreviations
K knit P purl K2tog knit two stitches together Frankie Brown, 2015. My patterns are for personal use only and should not be used to knit items for sale. Please do not use them for teaching purposes without my permission.
Needle Tree Materials List
Plastic Canvas. Ultra Stiff, 7 bars per inch. You will need about 9 x 18" for one tree, 131/2 x 221/2" for tw0. Needle Long wooden knitting needle (about 34 cm / 1314"), roughly 4 mm. One size smaller or bigger would probably be fine and the length is a bit flexible too. Pot Small metal bucket (8 cm / 3" across top, 8 cm / 3" tall). These are often sold as party favours. Air-Drying Clay One 1kg pack will fill two pots. Felt Brown felt to cover the top of the clay, inside the pot. More Knitting Needles These ones are actually for knitting with! 3.25 mm / US size 3 and 2.75 mm / US size 2 for the tree and bag. 2.25 mm / US size 1 for the decorations. I used double pointed needles for these as the number of stitches is small. You will also need a small crochet hook (2.5 mm or thereabouts) for the hanging loops. If you don't crochet you could use loops of yarn or ribbon instead.
Yarn
Green DK weight yarn for the tree branches. You will need about 40g for one tree. I used Sirdar Country Style DK (155 m / 50g, shade 610, Village Green) for one tree and 21" Century Yarn's DK (285 m / 100g) in Forest for the other. The decorations are knitted in 4 ply yarn; aim for something with a length of around 400 m / 100g. I used the following: Red and Cream Decorations Sirdar Country Style 4 ply (226 m / 50g), shades 418, Garnet and 411, Cream. 30g of each colour made two sets of decorations with the colours reversed for the second set. If you are knitting a bag to match these decorations see the notes later in this list about yarn quantities. Multi-colour Decorations I used a mixture of yarns for these in lots of different colours; each decoration is tiny so this is a good opportunity to use up leftover yarn.
Decorations Bag
This is knitted in 4 ply yarn of the same weight as that used for the decorations. You will need about 30g of the main colour and less than 10g of the contrast. If you are making the red and cream decorations and a bag or bags to match you will need: One set of decorations + one bag One 50g ball in each colour. Two sets of decorations + two bags Two 50g balls in each colour. Two sets of decorations + one bag Two 50g balls of one and one of the other colour. If you are making two sets of decorations and two bags you will need to reverse the colours for the second set of decorations and for the second bag. Bits and Bobs You will also need: Seed beads for decoration: red or cream for the red and cream decorations and a mixture of bright colours for the multicoloured ones. Black seed beads for eyes. Small metal bells, about 6 - 7 mm / 1%4", two for each set of decorations. Small buttons, about 15 mm / 12" for the decorations bag, three for each bag. Fabric to line the decorations bag. Sewing thread to match the seed beads.