
Text and images by Lolly's Crafty Crochet & Laura Tegg, all rights reserved. No pattern may be reproduced or distributed —- mechanically, electronically, or by any other means, including photocopying, without written permission. Finished products created with this pattern may be used for commercial sale. It is appreciated if design credit to Lolly's Crafty Crochet is listed in finished products.
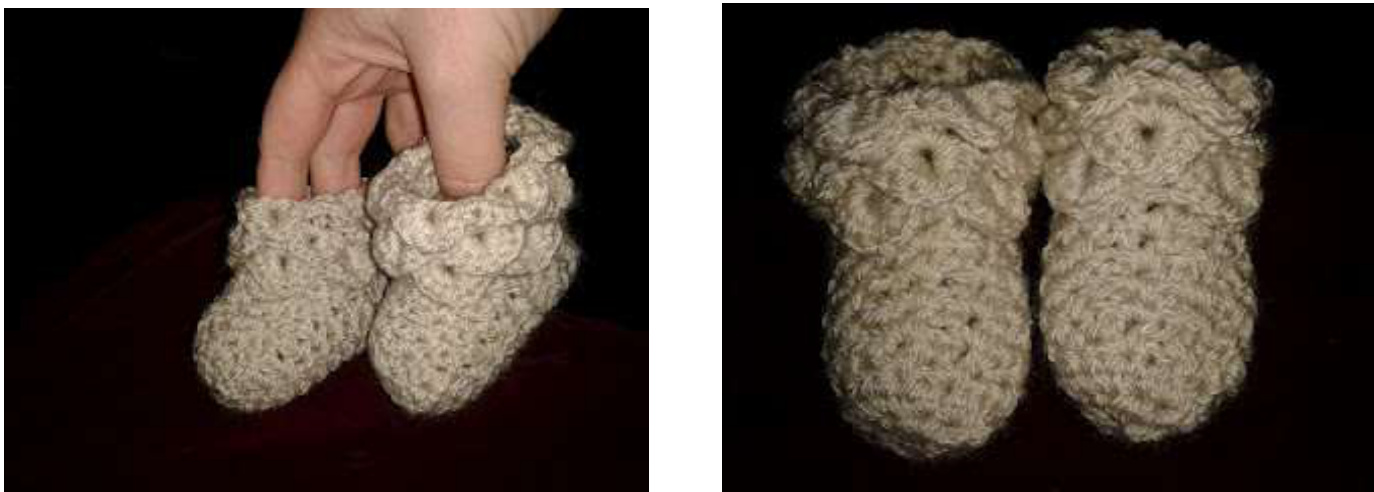
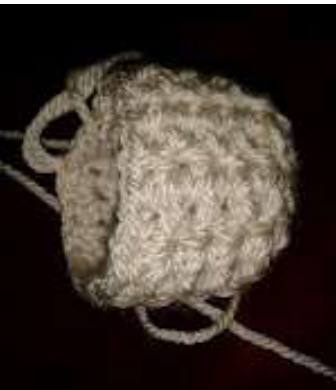
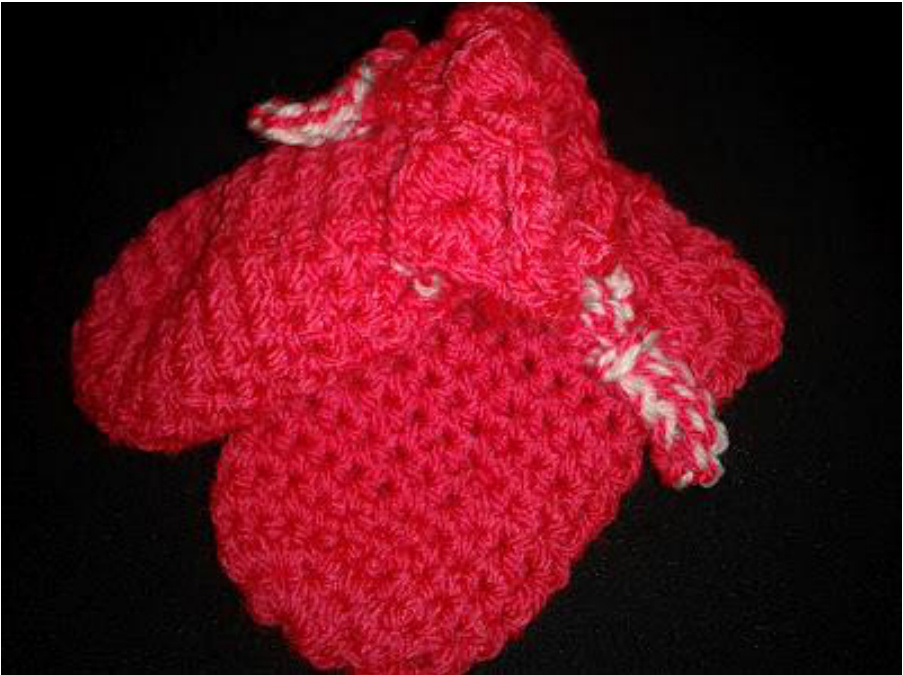
My Gorgeous Little Crocodile Stitch Booties!
Initially it can be difficult to get your head around the crocodile stitch but with the help of a couple of brilliant tutorials (linked to below) you can master it! And once you have you'l find that it's really quite easy and there'll be no stopping you!
What is the crocodile crochet stitch?
The stitch is formed with a two-row repeat, a row of v stitches, followed by a row of scales. The scales are worked in front of the v sitches with clusters of front post half double crochets (fphdcs) from top to bottom, then from bottom to top. A good video tutorial can be viewed here - although please note the changes from the pattern used below - i.e. the amount of stitches worked and front post hdc's as opposed to dc's as this pattern is for little people! http://www.youtube.com/watch?v=lbewLEjax1l A written tutorial on the stitch plus photographs (AND another free crocodile crochei pattern for a hat!) can be found at: http://cats-rockin-crochet.blogspot.com/2011/08/crochet-crocodile-stitch-adult hat.html Size: 0-6 months, app. 10 cm foot length. Materials per bootie: 25g of yarn in one colour (l used dk Special by Stylecraft, shade 1218 'Parchment') Hook: 4mm crochet hook Stitches used: st(s) - stitch(es) ch - chain stitch hdc - half double crochet sl st - slip stitch
Special stitches used:
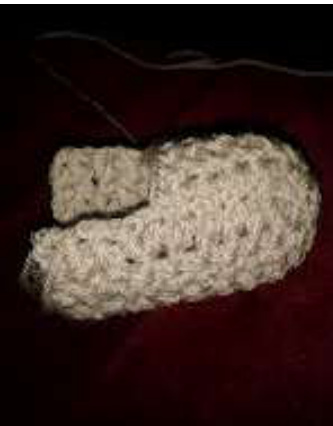
v st - work one hdc, ch 1 and hdc again into same st fphdc - yo and insert hook from the front to the back around the post of the hdc of previous row. Complete as for a regular hdc stitch. NB. This pattern works the toe of the bootie towards the heel. Rnd 1: Ch2 (remember the loop you put on the hook is not classed as a ch), join with sl st in first ch to form a circle. Rnd 2: Ch2 (counts as first hdc), hdc 9 into centre of circle, join with sl st to first st (10 hdc in total) Rnd 3: Ch2, 1hdc in same st, then 2 hdc in each st around the work, join with sl st to first st (20 hdc in total) Rnd 4: Ch2, ch1 and hdc in same st \*skip next st, then work a v stitch in next st\*, repeat from \* to \* around, join final v st to first with sl st. This row and rows 5 to 8 form the toe areaofthebootie. Rnd 5 - 8: Repeat row 4 working the v st in each ch 1 space of the row belows v st
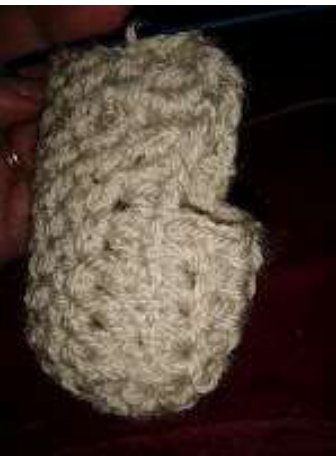
Rnd 9: Ch2, ch1, hdc in same st, then work six further v stitches into ch 1 spaces on the row below, turn the work (this row and following two form the side and back of bootie). Rnds 10 - 12: Ch2, ch1, hdc in same space, then v st into each of the seven v st ch 1 spacesbelow\*
Now pull together both sides of heel and using several sc's connect them, working through all four loops.
Turn the bootie inside out. Fasten off.
Now for the fun bit! The Crocodile Crochet Cuff!
To make bootie's cuff you should begin by attaching the yarn in the middle of the heel. Rnd 1: Ch 3, hdc in same stitch,\* skip 1 ch, v st in next ch, rep from \* around; join with sl st in top of first hdc. - (make sure that you have 10 v sts) Rnd 2: Ch 2 (counts as a hdc), working from top to bottom around post of first hdc of first V-st, work 3 fphdc, turn work so v st is sideways, ch 1, working from bottom to top around post of second hdc of v st, work 4 fphdc , \* skip next v st, working from top to bottom work 4 fphdc around post of first hdc of next v st, ch 1, turn work so v st is sideways, working from bottom to top around post of second hdc of v st, work 4 fphdc, rep from \* around; join with sl st in top of first hdc.- (5 scales in total) Rnd 3: Ch 3, hdc in same st, yo, insert hook in sp in the centre of the scales below and complete a v st, \*v st in next ch 1 sp, yo, insert hook in sp in the centre of the scales below and complete a v st, repeat from \* to \* around; join with sl st in top of first hdc - (9 Vsts) Rnd 4: Repeat rnd 2 into alternate v st Rnd 5: Repeat rnd 3 Rnd 6: Repeat rnd 2 into alternate v st Fasten off! Make another! I hope you like this pattern! If you have any problems with it please don't hesitate to let me know and I'll see if I can help!

Text and images by Lolly's Crafty Crochet & Laura Tegg, all rights reserved. No pattern may be reproduced or distributed — mechanically, electronically, or by any other means, including photocopying, without written permission. Finished products created with this pattern may be used for commercial sale. It is appreciated if design credit to Lolly's Crafty Crochet is listed in finished products.
Crocodile Stitch Baby Mittens
Proclaiming my love of the crocodile stitch once again! Here is my pattern for baby mittens with a crocodile stitch cuff - please see my free pattern for Crocodile Stitch Booties for links to tutorials on the stitch. Size: 0-6 months
Materials per Mitten
25g of yarn (l used dk Special by Stylecraft in shades 'Pomegranate' and 'Cream') 3mm crochet hook Stitches used: st(s) - stitch(es) ch - chain stitch hdc - half double crochet sl st - slip stitch
Special stitches used:
v st - work one hdc, ch 1 and hdc again into same st fphdc - yo and insert hook from the front to the back around the post of the hdc of previous row. Complete as for a regular hdc stitch. NB. This pattern works from the tip of the fingers towards the wrist. Ch 4, join to form ring Rnd 1: Ch 2, work 9 hdc into centre of the ring, join (10hdc) Rnd 2: Ch 2 work hdc in same st, work 2hdc in each st around, join. (20hd Rnds 3-10: Ch 2, work hdc in each st around, join. (20hdc) Rnd 11: Ch 1, sc in same st, \*ch 1, skip 1 st, sc in next st\* . Work \* to \* around. join to first SC. Rnd 12: Ch 3, hdc in same stitch,\* skip 1 ch, v st in next ch, rep from \* around into ch1 space of row below; join with sl st in top of first hdc. - (make sure that you have 10 v sts) Rnd 13:Ch 2 (counts as a hdc), working from top to bottom around post of first hdc of first V-st, work 3 fphdc, turn work so v st is sideways, working from bottom to top around post of second hdc of v st, work 4 fphdc , \* skip next v st, working from top to bottom work 4 fphdc around post of first hdc of next v st, ch 1, turn work so v st is sideways, working from bottom to top around post of second hdc of v st, work 4 fphdc, rep from \* around; join with sl st in top of first hdc.- (5 scales in total) Rnd 14: Ch 3, hdc in same st, yo, insert hook in sp in the centre of the scales below and complete a v st, \*v st in next ch 1 sp, yo, insert hook in sp in the centre of the scales below and complete a v st, repeat from \* to \* around; join with sl st in top of first hdc - (10 v sts) Rnd 15: Repeat rnd 13 into alternate v st Fasten off. Ties: Hold together cream yarn and pink yarn, ch 50 tightly, weave through ch spaces in row11. Make another! I hope you like this pattern! If you have any problems with it please don't hesitate to let me know and I'll see if I can help!

Text and images by Lolly's Crafty Crochet & Laura Tegg, all rights reserved. No pattern may be reproduced or distributed — mechanically, electronically, or by any other means, including photocopying, without written permission. Finished products created with this pattern may be used for commercial sale. It is appreciated if design credit to Lolly's Crafty Crochet is listed in finished products.
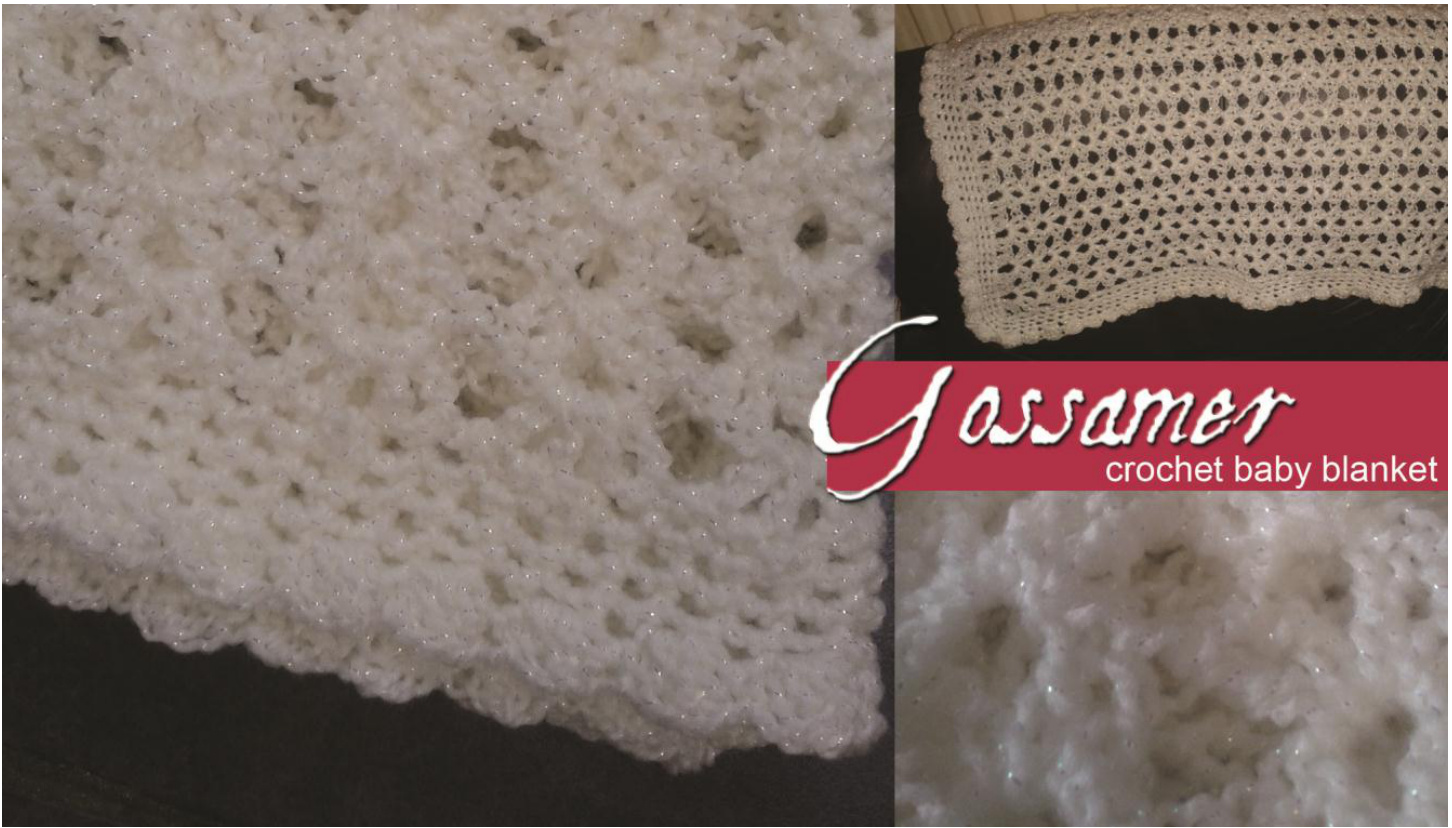
Gossamer Crochet Baby Blanket
This pattern is so simple and works up quickly with neat edges even without the border! It's light weight too, so perfect for a pram blanket and it's also lacy so would be fantastic made larger in white for a christening! Skill level: Beginner Sizes: Any size you wish to make! US terminology used Yarn: DK/Light Worsted/8ply baby yarn - I used Jarol Mother of Pearl in shade 3013 (cream) Hook: 6.5mm (K) Gauge: Not particularly important. Abbreviations: Chain (ch) Double Crochet (dc) Slip Stitch (sl st) Space (sp) Stitch (st)
Special stitches:
Bobbles on edging - dc3tog (dc6tog) - To dcXtog - \*YO, insert hook in next st, YO, pull up a loop, YO, draw through two loops\*, repeat from \* to \* twice (five) times, YO, and draw through all loops on hook.
Blanket
Ch64 - you can chain any size you like as long as it is a multiple of 4 to make a baby blanket, lapghan or afghan. This made a 24inch blanket, without the border for me. Row 1: 2dc in 5th ch from the hook, ch2, 2dc in nxt ch, \* skip 2 ch, 2dc in next ch, ch2, 2dc in next ch, repeat from \* to last 3 chs, skip 2 ch, 1dc in last ch, turn. : 2: Ch4, [2dc, ch2, 2dc] in each ch2 space, ending 1dc in 3rd ch of ch3, tui Repeat row 2 until you reach the desired length.
Edging
Round 1: Work 1 round of sc all the way around your project. When you get to the corners, ch 2 to form the corner space. At the end of the round, join the end to the beginning with a sl st. Rounds 2-4: Repeat round 1 so you have 4 rows of sc. Round 5: Work alternate dc3tog in one st, sc in next st around (creates bobble edging). Work dc6tog in ch2 space of corners. I hope you like this pattern! If you have any problems with it please don't hesitate to let me know and I'll see if I can help!

Text and images by Lolly's Crafty Crochet & Laura Tegg, all rights reserved. No pattern may be reproduced or distributed — mechanically, electronically, or by any other means, including photocopying, without written permission. Finished products created with this pattern may be used for commercial sale. It is appreciated if design credit to Lolly's Crafty Crochet is listed in finished products.
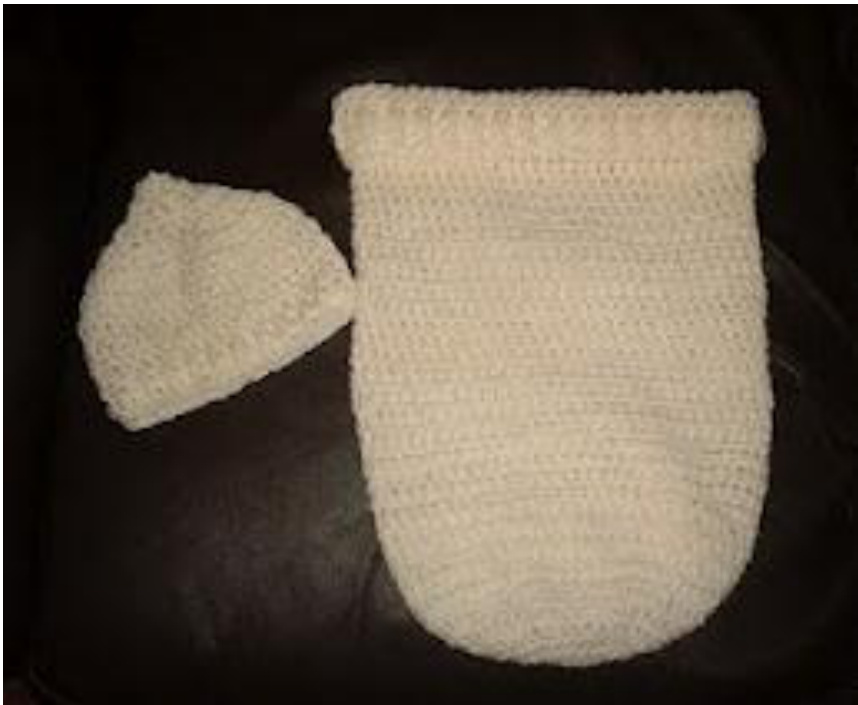
Cosy Newborn Cocoon & Little Pixie Hat
Here is my beautiful pattern for a Cosy Newborn Cocoon & Little Pixie Hat / both work up very quickly, brilliant if you're looking for a quick gift to make Please do not hesitate to let me know if there are any problems or if you need any clarification about this pattern.
General Information
Yarn: I used one 100g skein double knit Stylecraft in cream for the cocoon and less than 1/4 skein for the hat Hook: 5mm Gauge: Not important Cocoon dimensions: Circumference = 26cm Length = 38cm Hat dimensions: Circumference = 15cm Length = 14cm Terminology: US
Cocoon
Ch 3 Rd 1: 11 hdc in 4th ch from hook, join with slst in top of ch 3 (12hdc) Rd 2: ch 3 (counts as hdc now and throughout), 2 hdc in each st around , join Rd 3: ch 3, 1 hdc in same st as joining, \*hdc in next st, 2 hdc in next st, rep from\* until end, join Rd 4: ch 3, 1 hdc in same st as joining, \*hdc in next 2 sts, 2 hdc in next st, rep from\* until end, join Rd 5: ch 3, 1 hdc in same st as joining, \*hdc in next 3 sts, 2 hdc in next st, rep from\* until end, join Rd 6: ch 3, 1 hdc in same st as joining, \*hdc in next 4 sts, 2 hdc in next st, rep from\* until end, join Rds 7 - 10: ch4, dc in every stitch around, join Rds 11 - 14: ch3, hdc in every stitch around, join Repeat pattern from rd 7 to 14 until the piece measures 38 cm. You could finish the piece off here by chaining 1 and slip stitching all the way around and hiding the ends, but it does look extra cosy and very professional with the...
Chunky Band
Rds 15 & 16: Ch3, herringbone hdc all the way around (yo, insert hook into stitch, yo, pull through (3 loops on hook), pull first loop through second loop on hook (without another yo), then yo and draw through 2 rem loops on hook), join Rd 17: Ch4, dc all the way around Rds 18 & 19: Ch4, then alternate fpdc and bpdc (see below) all the way around, join fpdc = yo, starting from the front, place hook from front to back to front around the post of st in row below, pull through a loop, complete as a dc bpdc = yo, starting from the back, place hook from back to front to back around post of st in row below, pull through a loop, complete as a dc. Rd 20: Ch1, sl st all the way around. down the piece from the herringbone hdc to create the lovely chunky band Hide any ends and you're done!
Little Pixie Hat
Ch3. join to form a ring with a slip stitch Rd 1: Ch3 (counts as dc now and throughout), 4 dc into centre of the ring, join to top of ch3 with slst (5 dc) Rd 2: Ch3. dc into same stitch. \*\*dc into next stitch, 2 dc into next stitch\*\* Repeat from \*\* around, join to top of chain 3 with slst Rds 3 - 6: Repeat rd 2. Rd 7 - 11: Ch3. dc into each stitch around. join to top of chain 3 with a slip stitch Rd 12: Ch4, then alternate fpdc and bpdc (see above) all the way around, join Rd 13: Ch1, slst all the way around. Fasten off and weave in ends.

Text and images by Lolly's Crafty Crochet & Laura Tegg, all rights reserved. No pattern may be reproduced or distributed - mechanically, electronically, or by any other means, including photocopying, without written permission. Finished products created with this pattern may be used for commercial sale. It is appreciated if design credit to Lolly's Crafty Crochet is listed in finished products.
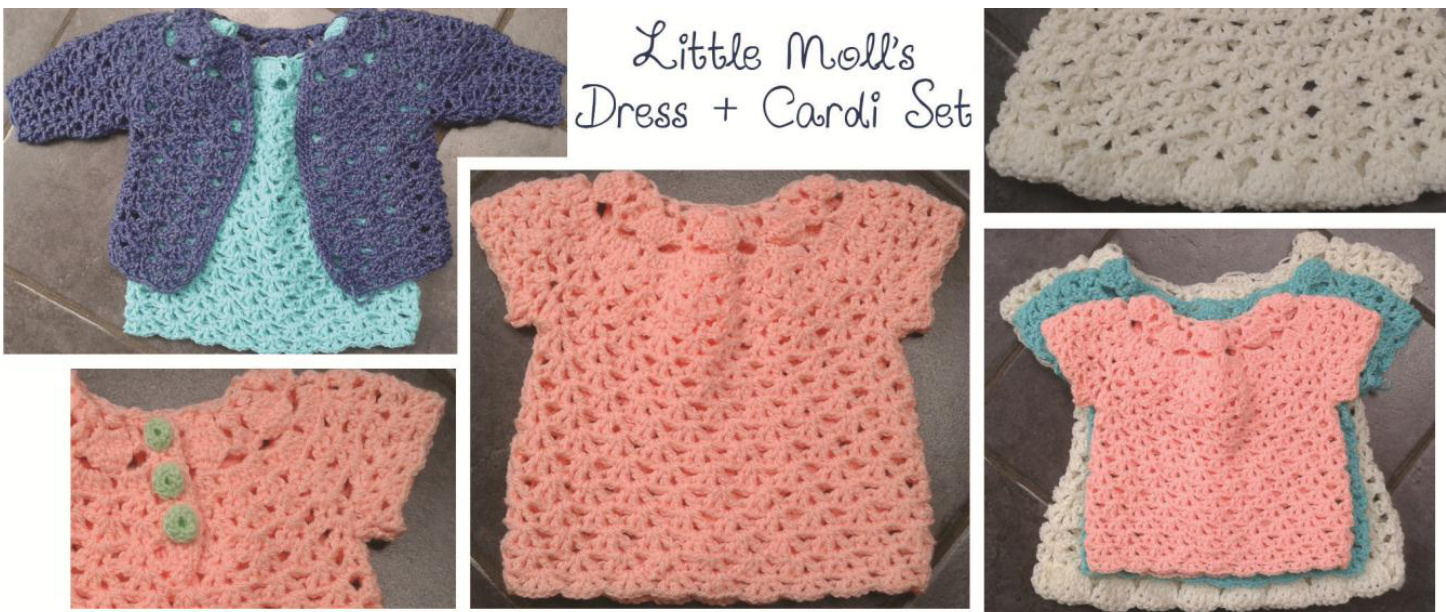
Little Moll's Dress & Cardigan Set - 3 Sizes
Yarn: DK/Light Worsted/8ply baby yarn Each size is made using a different sized hook: 5mm (H) hook: 6 - 12 mth size Gauge: 1 3dc shell is 1.4 inch wide, 3 rows of shells make 2.5 inches 4.5mm hook (G7): 3 - 6 mth size - 18 inch chest Gauge: 1 3dc shell makes 1 inch wide, 3 rows of shells make 2 inches 3.5mm (E) hook: 0 - 3 mth size - 16 12 inch chest Gauge: 1 3dc shell makes 0.8 inch wide, 3 rows of shells make 1.5 inche
Terminology: US
Abbreviations:
Yarn Over (yo) Beginning (beg) Loop (lp) Slip Stitch (sl st) Chain (ch) Repeat (rep) Space (sp) Double Crochet (dc) Single Crochet (sc) Stitch (st) Half Double Crochet (hdc) Skip (skp) Triple/Treble (tr)
Special Stitches
3dc Shell: Dc, ch1, dc, ch1, dc 4dc Shell: Dc, ch1, dc, ch1, dc, ch1, dc Dc5tog: Yo, insert hook into next st and draw up a loop, yo and draw through two loops on the hook - two loops remain on the hook - \*yo, insert hook into next st and draw up another loop, yo insert hook into next st and pull through first two loops - three loops remain on hook\*, repeat from \* to \* until 6 loops remain on hook, yo and pull through all loops on hook. Hdc2tog: Yo, insert hook into sp indicated and draw up a loop, keeping all three loops on hook, yo again, insert hook into same sp and draw up another loop, yo and pullthrough all 5 loops on the hook. Hdc3tog: Yo, insert hook into sp indicated and draw up a loop, keeping all three loops on hook, yo again, insert hook into same sp and draw up another loop, keeping all 5 loops on the hook, yo again, insert hook into same sp and draw up another loop , yo and pull through all 7 loops on the hook. Hdc4tog: Yo, insert hook into first sp indicated and draw up a loop, keeping all three loops on hook, yo again, insert hook into same sp and draw up another loop, keeping all 5 loops on the hook, yo again, insert hook into next sp indicated and draw up another loop , keeping all 7 loops on the hook yo again, insert hook into same sp and draw up another loop, yo and pull through all 9 loops on the hook. Triple/Treble Crochet: Yo hook twice, insert hook into stitch, yo hook and draw yarn through stitch - four loops on the hook - yo and pull through two loops, - three loops on hook - yo and pull through two loops, yo and pull through the last two loops on the hook.
Pattern Notes
Pattern is worked from the neck down. There are two dress options, a simple shift or a fuller skirted version. Cap sleeves, button bands and a collar are worked onto the dress after the body is made. Button bands, a collar and long sleeves are worked onto the cardigan after the body is made.
Dress/Cardigan
Ch56 Row 1: 5 dc in 5th ch from hook, \* skp 2 ch, in next ch, dc, ch 2 and dc, skip 2 ch, 5 dc in next ch. Repeat from \* across, ending with skip 2 ch, dc in last ch, turn (9 groups of 5dc). Row 2: Ch6, dc5tog into 5dc of row below (see special stitches above), ch1 to secure the cluster, ch6, sl st in next ch2 sp, ch6. Repeat from \* across, ending with dc5tog cluster, ch2, dc in top st of turning ch. turn. Row 3: Ch3 (counts as a dc), 2dc in first ch2 sp, work 5dc in each 6ch sp across ending with 2dc in last sp, dc in top st of turning ch. Turn (16 sets of 5 dc with 3dc at either end). Row 4: Ch4 (counts as a dc and a ch1), skip 1st st, \*in next st work a 3dc shell (see special stitches above) skip 2 sts repeat from \* across, ending with ch1, dc in top st of turning ch. turn (28 3dc shells made). Row 5 & 6: Ch3 (counts as a dc), work across placing a 3dc shell in second ch1 of each shell, dc in top st of turning ch, turn.
! as follows for both versions of the dress..see page 4 for the cardiga
Row 7: Ch3 (counts as a dc), work across placing a 3dc shell in second ch1 of each shell in the first 4 shells, skp next 5 shells (arm hole made), work across placing a 3dc shell in second ch1 of each shell in the next 10 shells, skip next 5 shells (other arm hole made), work across remaining 4 shells placing a 3dc shell in second ch1 of each shell, dc in top st of turning chain and then attach this dc to the ch3 with a sl st to join and make the dress - you will now be working in rounds (18 shells). Round 8: Ch4, dc, ch1, dc into same st (counts as a 3dc shell), work a 3dc shell in second ch1 of each shell around, joining last to first with a sl st. (19 shells).
Continue as follows for the simple shift dress..
Round 9 - 19: Sl st into first ch1 sp, sl st into second ch1 sp, ch4, dc, ch1, dc into same st (counts as a 3dc shell), work a 3dc shell into second ch1 of each shell around joining last to first with a sl st. (19 3dc shells). Tie off and hide loose ends.
Continue as follows for the fuller skirted dress...
Round 9 - 13: Sl st into first ch1 sp, sl st into second ch1 sp, ch4, dc, ch1, dc into same st (counts as a 3dc shell), work a 3dc shell into second ch1 of each shell around joining last to first with a sl st. (19 3dc shells). Rounds 14 - 17: Sl st into first ch1 sp, sl st into second ch1 sp, ch4, dc, ch1, dc, ch1, dc into same st (counts as a 4dc shell), work a 4dc shell in second ch1 of each shell around joining last to first with a sl st. (19 4dc shells) Round 18: Sl st into first ch1 sp, sl st into second ch1 sp, ch4, 5 tr into same st, work 6tr into centre ch1 sp of each 4dc shell around, joining last to first with a sl st. (19 groups of 6trs). Round 19: Ch1 (counts as a sc), sc into each st around (114 sc). Tie off and weave in ends.
Dress Collar
Attach yarn to the back of the dress at the neck at the top of the split on the left hand side. Ch2 (counts as a hdc), \*work hdc3tog (see special stitches section above) in big loose loop, work hdc4tog over the next two ch sps (see special stitches section above), repeat from \* around the neck, working a hdc into last st. Rotate the piece to work down the split at the back of the dress to create the button band - so do not tie off and continue as follows...
Dress Button Band
Row 1: Ch2 (counts as a hdc) work 2hdc into each dc ch sp down towards the bottom of the split, turn. Row 2: Ch2 (counts as a hdc) work a hdc into each st accross. Tie off and weave in ends.
DressButton HoleBand
Row 1: Attach yarn to bottom of the split on the left hand side. Ch1 (counts as a sc), and work 3sc in each dc sp up towards the neck, sc in last st at the neck, turn. Row 2: Ch1 (counts as a sc), sc in next st, \*ch2, skp 2 sts, sc in next 3 sts, repeat from \* twice, sc in each st to end, turn. Row 3: Ch1 (counts as a sc), sc in each st across, putting 2sc into each ch2 space (creates button holes). Tie off and hide ends.
Dress Sleeves
Row 1: Attach thread in the centre under the arm, ch4, dc, ch1, dc (counts as a 3dc shell), work 3dc shells into 2nd ch1 of each shell on body, you should have 8 shells around, join last to first with a sl st. Row 2: Sl st into first ch1 sp, sl st into second ch1 sp, ch4, dc, ch1, dc (counts as a 3dc shell), work 3dc shells into 2nd ch1 of each shell on body, join last to first with a sl st. Tie off and weave in ends.
Cardigan Cont/d..
Row 7: Ch3 (counts as a dc), work across placing a 3dc shell in second ch1 of each shell in the first 4 shells, skp next 5 shells (arm hole made), work across placing a 3dc shell in second ch1 of each shell in the next 10 shells, skip next 5 shells (other arm hole made), work across remaining 4 shells placing a 3dc shell in second ch1 of each shell, dc in top st of turning chain, turn. Rows 8 - 16: Ch3 (counts as a dc), work across placing a 3dc shell in second ch1 of each shell, dc in top st of turning ch, turn. Do not fasten off, rotate work to work up the front of the cardigan to create the button hole band.
Cardigan Button Hole Band
Row 1: Ch1 (counts as a sc), work sc in first dc ch sp, work 2 sc in each dc ch sp up the front of the cardigan up to the neck, placing one sc in last st, turn. Row 2: Ch1, sc in next st, \*ch2, skp 2 sts, sc in next 4 sts, repeat from \* four times to end and turn (5 ch2 sps create button holes), turn. Row 3: Ch1, sc in each st across, putting 2sc into each ch2 space (creates button holes). Again, do not fasten off, rotate work to work the collar around the neck.
Cardigan Collar
Row 1: Ch2 (counts as a hdc), \*work hdc2tog in first ch sp, \*work hdc3tog (see special stitches section above) in big loose loop, work hdc4tog over the next two ch sps (see special stitches section), repeat from \* around the neck, working hdc2tog in last ch sp and a hdc into the last st. fasten off, rotate the piece to work down the front to create the button banr
Cardigan Button Band
, work 2sc in each dc ch sp down the work, ending with a sc in last st, turn. Row 2 -3: Ch1, sc in each st across, turn. Fasten off and hide ends.
Cardigan Sleeves
Row 1: Attach thread in the centre under the arm, ch4, dc, ch1, dc (counts as a 3dc shell), work 3dc shells into 2nd ch1 of each shell on body, you should have 8 shells around, join last to first with a sl st (8 3dc shells). Rows 2 - 4: Sl st into first ch1 sp, sl st into second ch1 sp, ch4, dc, ch1, dc (counts as a 3dc shell), work 3dc shells into 2nd ch1 of each shell around, join last to first with a sl st (8 3dcshells). Row 5: Sl st into first ch1 sp, sl st into second ch1 sp, ch4, dc (creates a v st), work dc, ch1, dc (v st) into second ch1 sp of each shell around, join last v st to first with a sl st (8 v Ssts) Rows 6 - 9: Sl st into centre of v st below, ch4, dc (creates a v st), work dc, ch1, dc (v st) into ch1 sp of each v st around on body, join last v st to first with a sl st. Tie off and weave in ends.
Baby Soft Buttons
Round 1: Ch2, work 8hdc into first loop on hook, sl st last hdc to first to form a round. Round 2: Sl st into each st around but into front loop only. Tie off leaving a long tail with which to sew onto body of dress/cardigan.

Text and images by Lolly's Crafty Crochet & Laura Tegg, all rights reserved. No pattern may be reproduced or distributed — mechanically, electronically, or by any other means, including photocopying, without written permission. Finished products created with this pattern may be used for commercial sale. It is appreciated if design credit to Lolly's Crafty Crochet is listed in finished products.
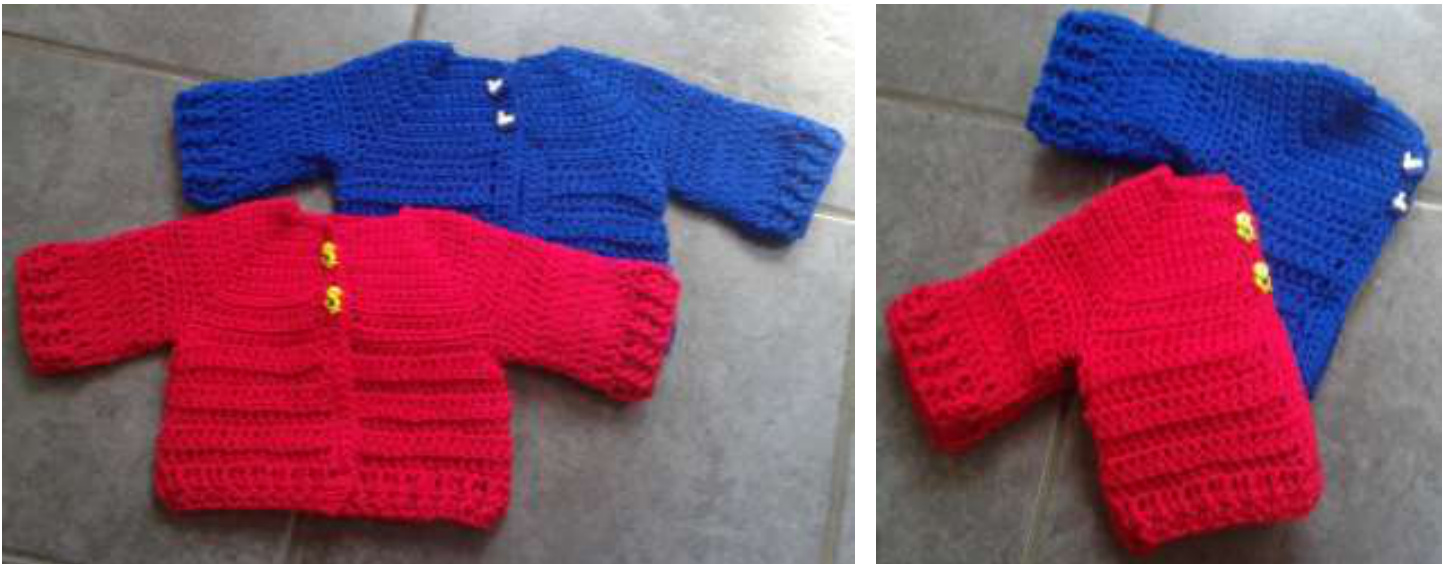
Chunky Monkey Cardigan
Size: Newborn to 3 months - 16/17 inch chest measurement Yarn: 75g of 3/Light/DK/Worsted Weight/8ply yarn Hook: H hook (5mm) Gauge: 4sc stitches and 2 sc rows per inch (2.5cm) in the yoke. Terminology: US Beginning (beg) Half Double Crochet (hdc) Single Crochet (sc) Space (sp) Chain (ch) Loop (Ip) Skip (skp) Stitch (st) Double Crochet (dc) Repeat (rep) Slip Stitch (sl st) Yarn Over (yo)
Special Stitches
Front Post Double Crochet (fpdc) - yo and insert hook from the front to the back around the post of the dc of previous row. Complete as for a regular dc stitch. ?Back Post Double Crochet (bpdc) - yo and insert hook from the back to the front around the post of the dc of previous row. Complete as for a regular dc stitch. Single Crochet Two Together (sc2tog) - insert hook into next stitch, draw up a loop, insert hook into next stitch and draw up a loop (3 loops on hook). Finally, yo and draw through3 loops.
Body
Ch31 Row 1: Sc into 2nd st on hook and into each st across, turn Row 2: Ch1, sc in next 5 sts (front), 3 sc in next st, 1 sc in each of the next 3 sts (shoulder), 3 sc in next st, 1 sc in each of the next 10 sc (back), 3 sc in next st, 1 sc in each of the next 3 sts (shoulder), 3 sc in next st, 1 sc in each of the next 5 sts (front), turn. 's 3 & 4: Ch1, 1 sc in each sc and 3 sc in center sc of each 3sc group, turn Rows 5 - 12: Starting by ch1 and working a row of sc, work 7 more rows increasing in same way (working 3sc into corner sts) every other row. Row 13: Ch 2, hdc in each st across, turn. Row 14: Ch2, work increase row as before BUT this time with hdc (3hdc on corners), turn. Row 15: Work hdc's across to centre of first 3hdc group, ch 5, skip across to centre hdc of next 3hdc group and continue to hdc across back to centre of next 3hdc group, ch 5, skip shoulder sts across to final 3hdc group and continue to hdc across to the end. Turn. Row 16: Ch2, work hdc across, placing 5hd into ch5 space, turn. ow 17- 22: Ch3, dc across into the back loops only, turn. Do not fasten off
Button hole band
Row 1: At end of row 22, ch1, work 2sc in each dc end stitch and 1sc in each sc end st up front side of cardigan, turn. Row 2: Ch1, work sc in each st, placing buttonholes where you like. (buttonhole: sc, ch2, sk 2 st, sc in next st), turn. Row 3: Ch1, sc in each st, working 2sc in ch2 sps. Fasten off.
Button band
Attach yarn to neck on opposite side and work 3 rows of sc (as 1st row of button hole band but without the button holes). Do not fasten off.
Ribbing along the bottom
Row 1: Turn work, ch3 and work a dc into centre of bottom of button band, then work dc's into each st across the bottom, finishing with a dc in centre of bottom of button hole band and another at the end, turn. Row 2: Ch2, work alternate fpdc and bpdc across, turn. Row 3: Ch2, work one more row alternate fpdc and bpdc, fasten off.
Sleeves
Round 1: Attach yarn to under arm in centre. Ch1 (counts as a sc), work 27 sc equally around the sleeves, join last sc to ch1 with a sl st. Round 2: Ch1 (counts as an sc), sc in each st around, join last to ch1 with a sl st. Round 3: Ch1, \*work sc2tog in next st, sc in next 7 sts, repeat from \* around, joining last Sc to ch1 with a sl st.. Round 4 & 5: Ch2, hdc around, joining last to ch2 with a sl st. Round 6: Ch3, dc around, joining last dc to ch3 with a sl st. ound 7 - 9: Ch3, dc into the back loops only, joining last to ch3 with a sl st. Round 10: Ch3, dc around, joining last to ch3 with a sl st. Repeat for other arm, attach buttons and you're done! I hope you like this patern! If you have any problems with it please don't hesitate to contact me (LollysCC) via Ravelry or via my Lolly's Crafty Crochet Facebook page and I'll see if I can help!


