
Text and images by Lolly's Crafty Crochet & Laura Tegg, all rights reserved. No pattern may be reproduced or distributed —mechanically,electronically, or by any other means, including photocopying, without written permission. Finished products created with this pattern may be used for commercial sale. Design credit should be given to Lolly's Crafty Crochet when finished productsare listedforsale.
INTERMEDIATE
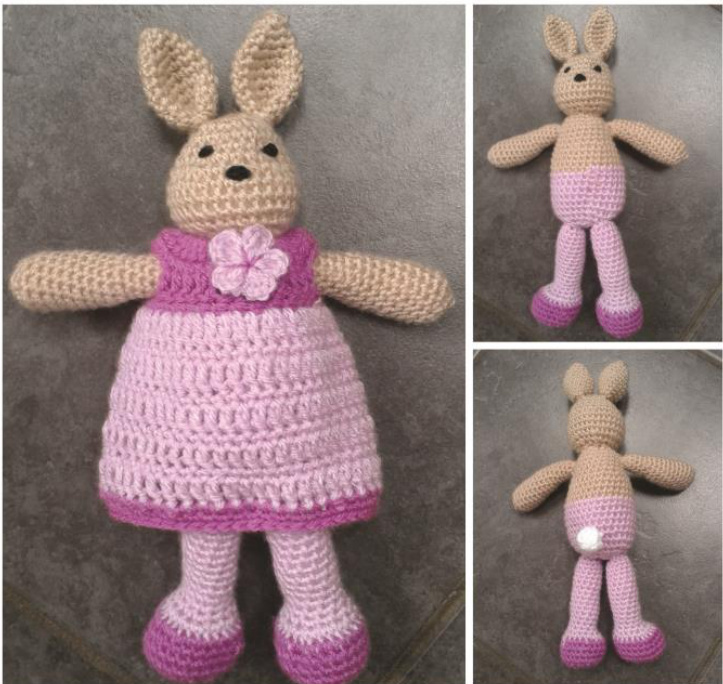
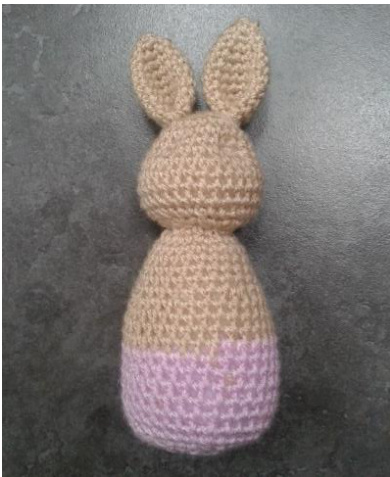
Beautiful Viola the bunny measures 10 inches from the tip of her cutelittle ears to the bottom of her stylish little shoes. She works up quickly using light worsted/dk yarn.With safe embroidered eyes, a cute white tail and a pretty flowery dress she is suretobeloved and awelcomeaddition to anyone'shome! WUhat you nill need: Yarn: 3/Light/Worsted/ DK/8ply yarn Less than 25g of each of the following: MC - Colour you wish to use for her body CC1 - Colour used for tights and dress CC2 - Colour used for shoes and dress A small amount of black yarn for embroidering the eyes and nose and a small amount of white yarn for the tail.
Hooks:
D (3.25mm) - in the UK you can use a 3mm hook. You will use this for all decrease rounds. G (4mm) Gauge: 16 stitches and 20 rows in single crochet using 4mm hook = 4 inches (10cm) BE SURE TO CHECK YOUR GAUGE. When you match the gauge in a pattern, your project will be the size specified in the pattern and the materials specified in the pattern will be sufficient. If it takes you fewer stitches and rows, try using a smaller size hook; if more stitches and rows, try a larger size hook. Terminology: US Other items needed: Stitch marker Tapestry needle Stuffing Pbbrerialions: Chain (ch) Double Crochet (dc) Half Double Crochet (hdc) Lp (lp) Next (nxt) Single Crochet (sc) Space (sp) Skip (skp) Stitch (st) Slip Stitch (sl st) Yarn Over (yo)
Special Slitches
Sc2tog: Insert hook in nxt st, yo and pull up a Ip (2 Ips on hook), insert hook in nxt st, yo and pull up Ip (3 Ips on hook), yo and draw through all 3 Ips on hook Palern Start
Head
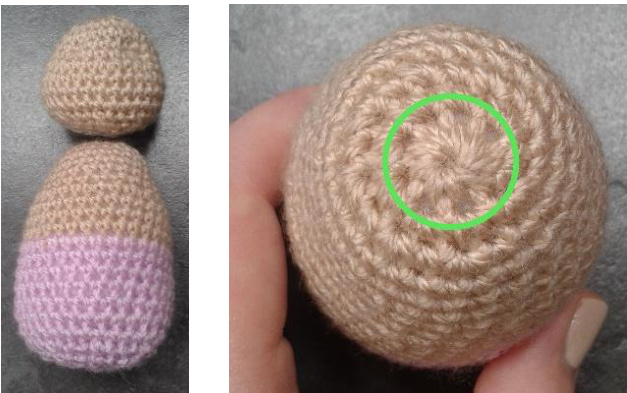
Head is crocheted in continuous spirals from the nose up, without joining the rounds from the bottom up to the top of the head. You will need a stitch marker to keep track of where the beginning of each round starts; move the marker up to the first stitch of the nxt round after finishing the previous one. Round 1: Starting with MC and a G hook make a magic circle and work 8sc into the ring (8sts) Round 2: Work 2sc into each st around (16sts) Round 3: \*Work 2sc into nxt st, then sc in nxt st, repeat from \* around (24sts) Rounds 4 - 6: Sc into each st around (24sts) Round 7: \*Work 2sc into nxt st, then work a sc into each of nxt two sts, repeat from \* around (32sts) Rounds 8 - 10: Sc into each st around (32sts) Switch to smaller hook. Round 11: \*Sc2tog, sc into each of nxt two sts, repeat from \* around (24sts) Round 12: \*Sc2tog, sc into nxt st, repeat from \* around (16sts) Begin to stuff head quite firmly. Round 13: Sc2tog around (8sts) Finish stuffing the head. Round 14: Sc2tog around (4sts) Fasten off, leaving a tail and weave the hole shut.
Body
Body is crocheted in continuous spirals without joining the rounds from the top to the bottom. You will need a stitch marker to keep track of where the beginning of each round starts; move the marker up to the first stitch of the nxt round after finishing the previous one. Round 1: With MC and a G hook make a magic circle and work 8sc into the ring (8sts) Round 2: Work 2sc into each st around (16sts) Round 3: \*Work 2sc into nxt st, then sc in nxt st, repeat from \* around (24sts) Rounds 4 - 9: Sc into each st around (24sts) Round 10: \*Work 2sc into nxt st, then work a sc into each of nxt two sts, repeat from \* around (32sts) Round 11 - 13: Sc into each st around (32sts) Round 14: Change yarn colour to CC1, sc into each st around (32sts) Helpful link to a video how to colour change when crocheting amigurumi http://www.youtube.com/watch?v=f8vtkK3Do Rounds 15 - 19: Sc into each st around (32sts) Switch to smaller hook. Round 20: \*Sc2tog, sc into each of nxt two sts, repeat from \* around (24sts) Round 21: \*Sc2tog, sc into nxt st, repeat from \* around (16sts) Begin stuffing body quite firmly. Round 22: Sc2tog around (8sts) Finish stuffing the body. Round 23: Sc2tog around (4sts) Fasten off, leaving a tail and weave the hole shut.
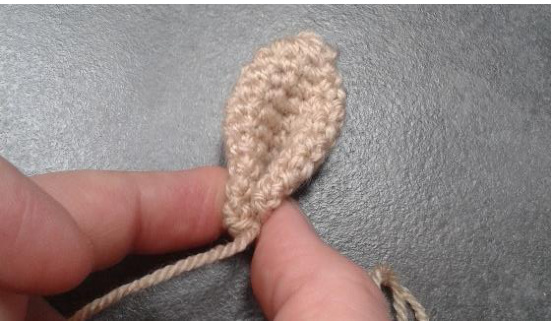
Ear - make two
Ear is crocheted in continuous spirals without joining the rounds from the tip of the ear down. You will need a stitch marker to keep track of where the beginning of each round starts; move the marker up to the first stitch of the nxt round after finishing the previous one. Round 1: With MC and G hook make a magic circle and work 8sc into the ring (8sts) Round 2: Sc into each st around (8sts) Round 3: \*Work 2sc into nxt st, then sc into nxt st, repeat from \* around (12sts) Round 4: Sc into each st around (12sts) Round 5: \*Work 2sc into nxt st, then sc into each of nxt two sts, repeat from \* around (16 sts) Rounds 6 - 10: Sc into each st around (16sts). Work one final sl st into first st and then fasten off leaving a good length of yarn for sewing.
Arm - make two
Arm is crocheted in continuous spirals without joining the rounds from the top to the bottom. You will need a stitch marker to keep track of where the beginning of each round starts; move the marker up to the first stitch of the nxt round after finishing the previous one. Round 1: With MC and G hook make a magic circle and work 8sc into the ring (8sts) Rounds 2 - 6: Sc into each st around (8sts) Round 7: \*Work 2sc into nxt st, then sc into nxt st, repeat from \* around (12sts) Rounds 8 - 16: Sc into each st around (12sts) Stuff arm firmly. Switch to smaller hook. Round 17: \*Sc2tog, sc, rep from \* around (8sc) Round 18: Sc2tog around (4sc) Fasten off, leaving a long tail. Use tail to sew up the hole left at the end and then pass the tail up through the arm to the thin end (the top) so that you can use it to sew the arm to the body.
Legs - make two
Leg is crocheted in continuous spirals without joining the rounds from the top to the bottom. You will need a stitch marker to keep track of where the beginning of each round starts; move the marker up to the first stitch of the nxt round after finishing the previous one. Round 1: With CC1 and G hook make a magic circle and work 8sc into the ring (8sts) Round 2: \*Work 2sc into nxt st, then sc into nxt st, repeat from \* around (12sts) Rounds 3 - 14: Sc into each st around (12sts) Round 15: \*Work 2sc into nxt st, then sc into each of nxt two sts, repeat from \* around (16 sts) Round 16: Sc in 4 sts, 2sc in 8 sts, sc in 4 sts (24sts) Round 17: Change yarn colour to CC2, sc in each st around (24sts) Rounds 18 - 20: Sc into each st around (24sts) Stuff leg quite firmly. Switch to smaller hook. Round 21: Sc2tog around (12sts) Finish stuffing leg if necessary. Round 22: Sc2tog around (6sc) Fasten off and hide any loose ends.
Tail
Round 1: Starting G hook and the white yarn make a magic circle and work 6sc into the ring (6sts) Round 2: Work 2sc into each st around (12sts) Round 3: Sc into each st around (12sts) Switch to smaller hook. Round 4: Sc2tog around (6sts) Fasten off leaving a tail, weave tail in and out through the six remaining stitches and pull the hole shut. Fasten off again and hide any loose ends.
Finishing
Head Shaping
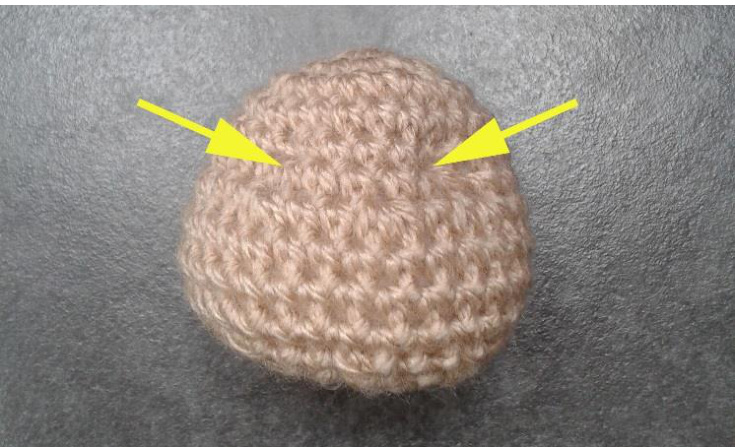
Consider where you wish to place the eyes, then take a metre long length of spare yarn in the colour you have used for the head. Folding the length in half, thread the two ends through the eye of a tapestry needle. This will leave you with a loop at the distant end. Place the bunny so that you are facing straight onto the front of the head. Insert the needle through the right of her head where you wish her left eye to be and pull it through to where you want her right eye to be on the left. Pull the yarn through the head, making sure to leave a small amount of loop at the left eye area. Now reinsert your needle just to the side of where your needle exited (catching a stitch or two) and push through to the left eye area, again exiting just to the side of where the needle was inserted in the beginning. Now place the needle tip through the little loop. Gently tug the yarn to pull it tight and watch as the eye sockets indent slightly. Don't pull too hard though or the eyes will look peculiar! Fasten off and hide the ends in the body.
Putting Viola Together!!!
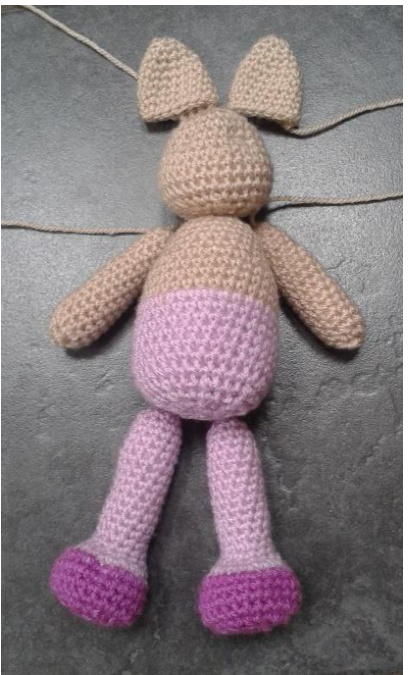
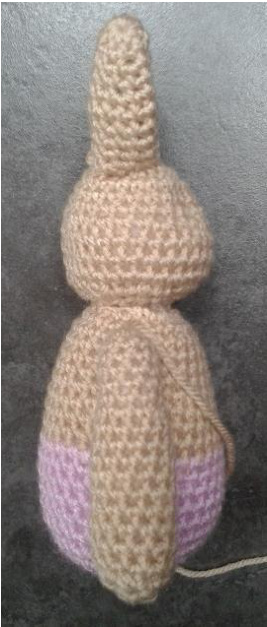
Begin by whipstitching the head to the body through the second rounds of sc - this will give you a nice thick neck and avoid a wobbly head!
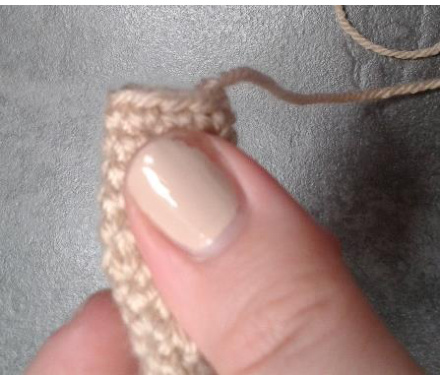
You now need to attach the ears to the head. Start by threading the tail you left onto your tapestry needle and then pinch the bottom of the ear together.
Turn the ear so that you can use the tail to sew through the two loops on either side at the bottom to close it up and shape the ear.
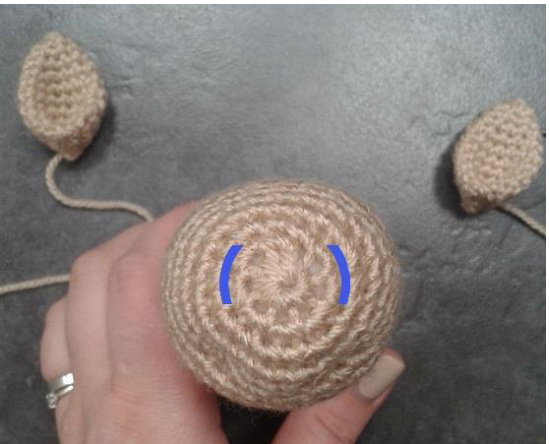
Continue using the tail to attach the ear to the head. You want to sew the ear using a whipstitch to the curve between the second and third rounds on the top of the head.
Using the tails you thread through earlier to the top of the arms, attach them to the body using a whipstitch, working through the first round of sc at the top of the arm. Make sure to leave a space of 2 or 3 rounds at the top of the body to form Viola's shoulders like so:
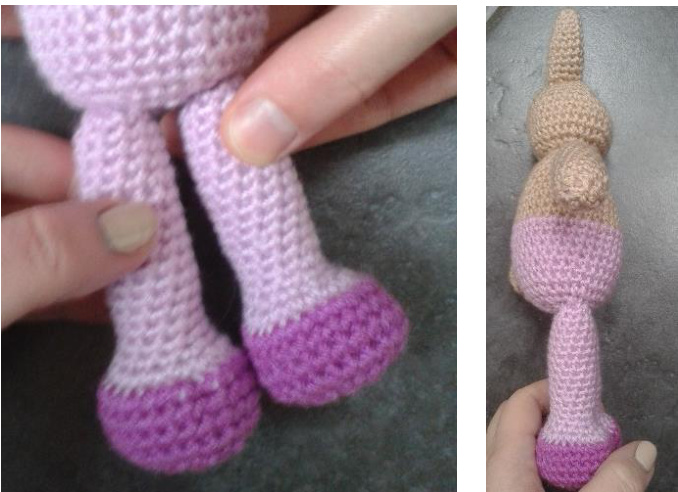
Sew the legs to the body through the second round of sc's at the top of the legs and leaving a small gap between them. Make sure that the feet go to the front and that the legs are slightly forward of Viola's bottom like so:
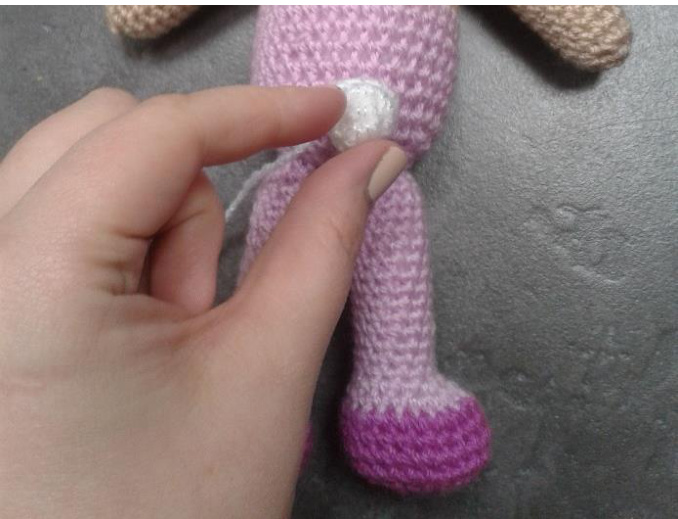
Sew tail onto Viola's bottom, positioning it as follows:
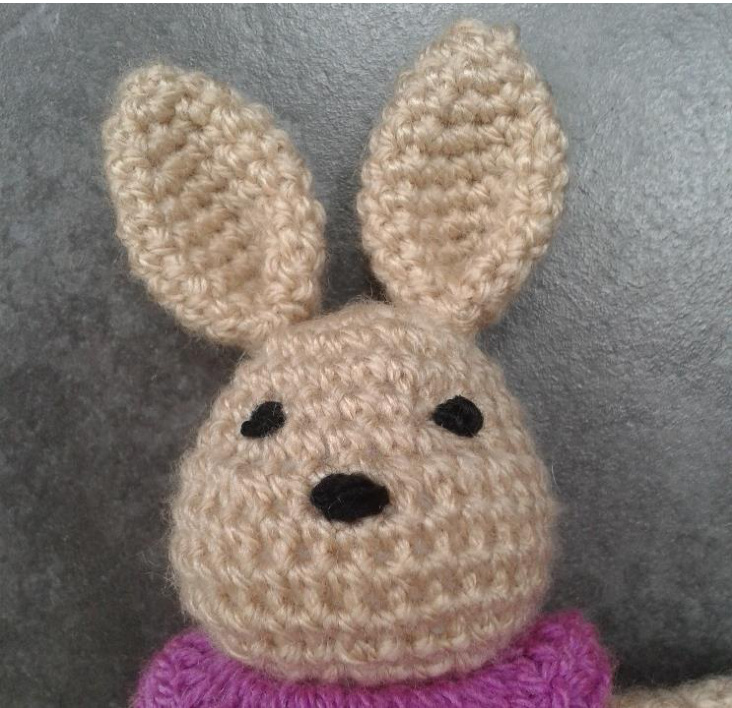
Eyes and Nose:
Using black yarn make two French knots for the eyes and one for the nose - I found this Youtube video helpful for this technique from 1.25 minutes in http://www.youtube.com/watch?v=kxnHOw e td8
Dress
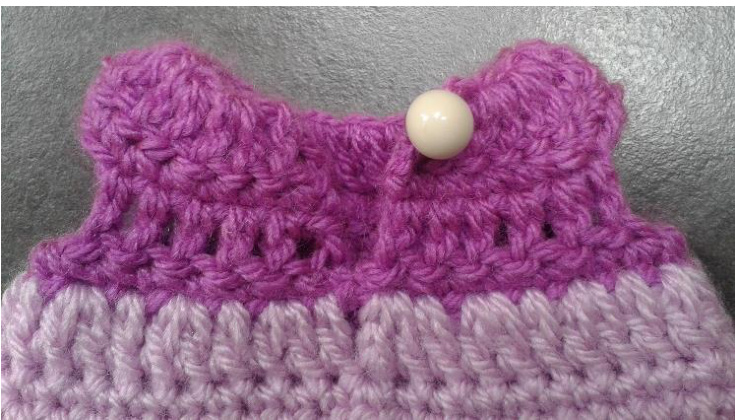
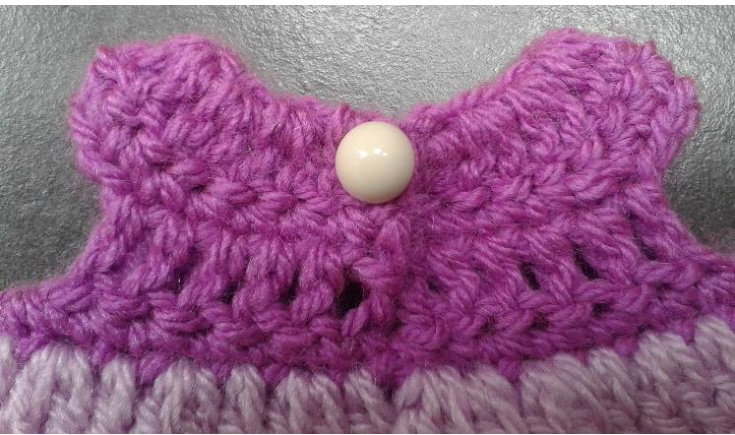
With CC2 ch20 Row 1: Dc in 4th st from hook and 2dc in each remaining ch st (34sts). The turning chain will count as 1dc, turn. Row 2: Ch1, sc in each st across row, turn (34sts). Row 3: Ch3 (counts as a dc from now on), 1dc in nxt 5 sts, ch3, skp 5 sts, 1dc in nxt 12 sts, ch3, skp 5 sts, 1dc in last 6 sts, turn (28 sts and two ch3 sps). Row 4: Ch1, sc in nxt 6 sts, 3sc into ch3 sp, sc in nxt 12 sts, 3sc into ch3 sp, sc in last 6 sts, join last sc to first with a sl st (30sts). Fasten off and join CC1 in same st. Round 5: Ch3, dc in same st, \*dc in nxt st, 2dc in nxt st, rep from \* around ending with a dc in the last st, join last dc to first with a sl st (45sts) Round 6: Ch1, sc in each st around, join last st to first with a sl st (45sts) Round 7: Ch3, dc into each st around, join last st to first with a sl st (45sts) Rounds 8 - 13: Repeat rounds 6 and 7 three times (45sts) Fasten off and join CC2 in same st. Rounds 14 & 15: Sc into each st around, join last st to first with a sl st (45sts) Round 16: Sl st into each st around, fasten off and hide any loose ends. Using a length of yarn in CC2 and your tapestry needle attach a small button to one corner at the back of the neck - either side, it's your choice, as the dc at the opposite corner will slip over the top of the button nicely.
Viola Flower:
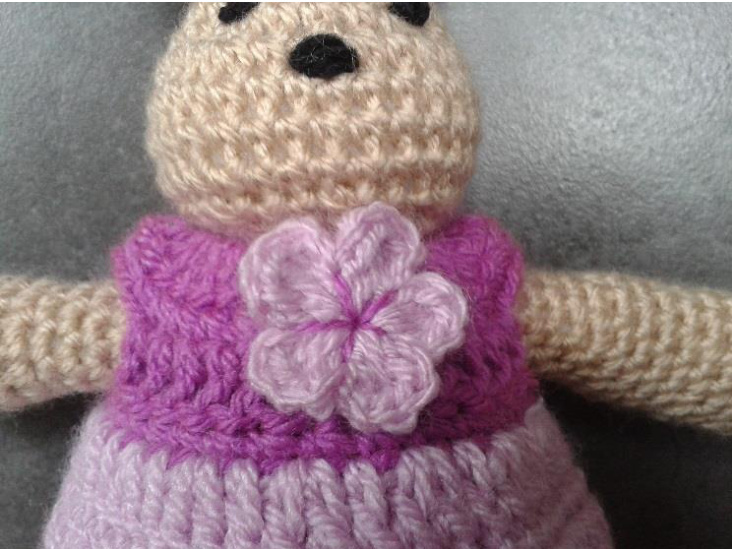
Round 1: With CC1 and your G hook, make a magic circle and work \*ch2, 3dc, ch2, sl st. Repeat from \* around, making 5 petals. Fasten off and hide loose ends. Using a small length of CC2 and your tapestry needle attach the flower centre to the front of the dress, working the stitches through the centre of the flower and between the petals like so:
I hope you enjoy making your own Viola the Bunny!
All my for sale patterns are fully tested by members of my pattern testing group on Ravelry but if you do find that you need any clarification of any part of the pattern or find any errors, please don't hesitate to let me know: Ravelry: LollysCC Facebook: Lolly's Crafty Crochet Twitter: @LollysCC Website: www.lollyscraftycrochet.co.uk


