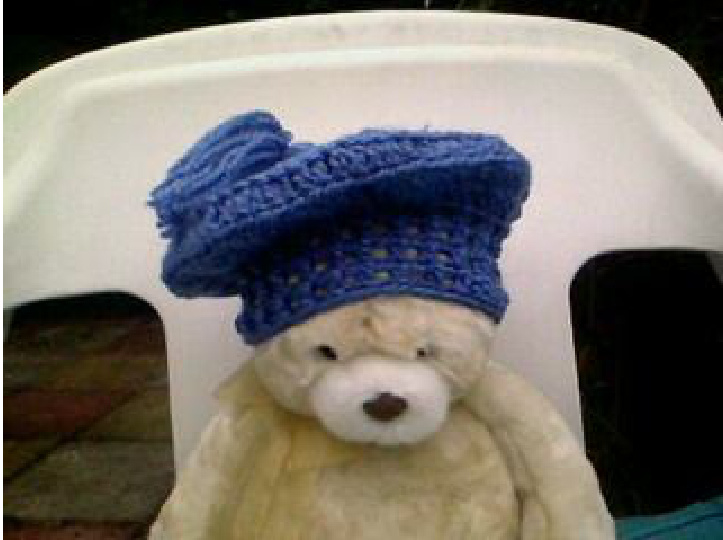
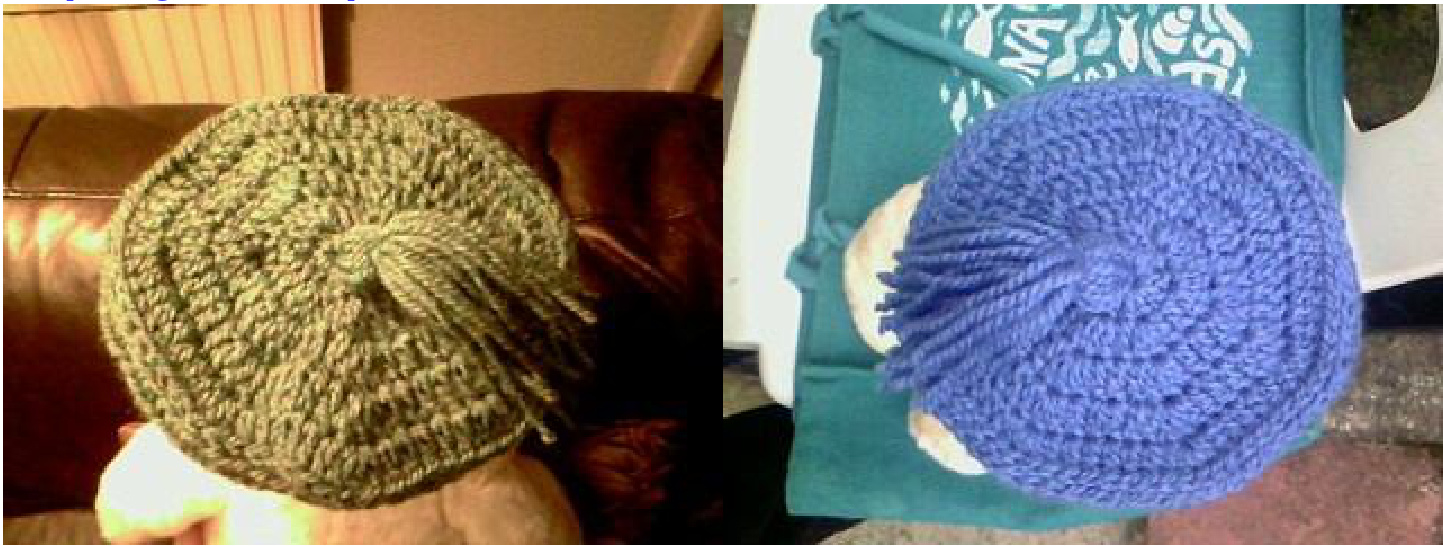
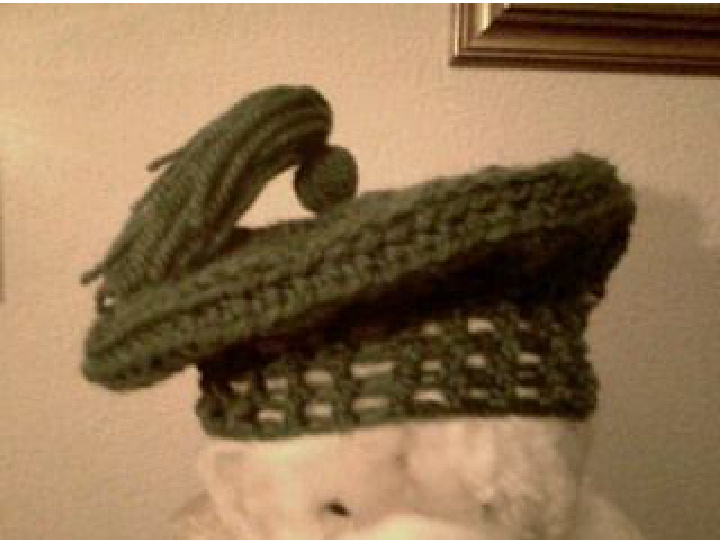
This pattern is for a simple, seven sided baby beret complete with a huge tassel.
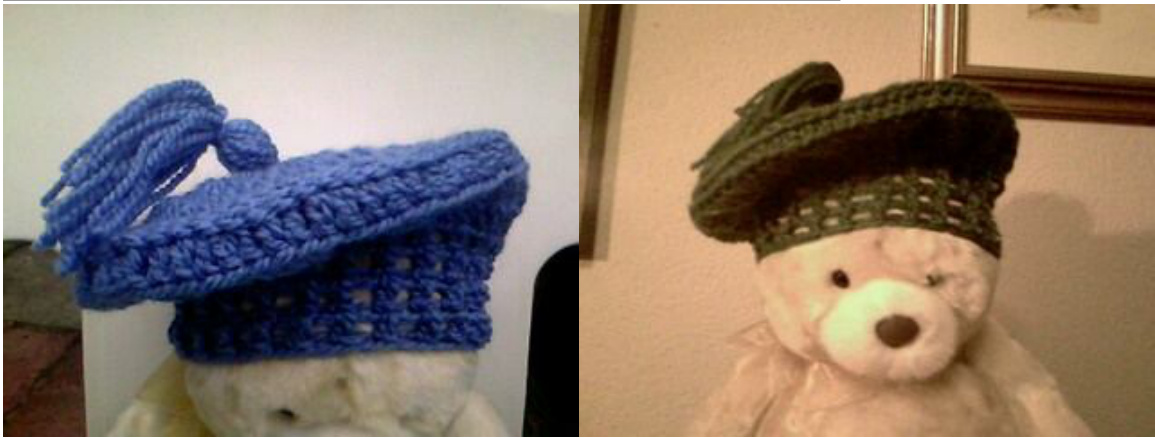
The instructions cover 4 sizes.
Terminology : American Yarn: Preemie - DK (8ply light worsted) Newborn - 3 months - Aran (worsted) 3-6 & 6-9 months - Bulky (chunky)
Hook sizes:
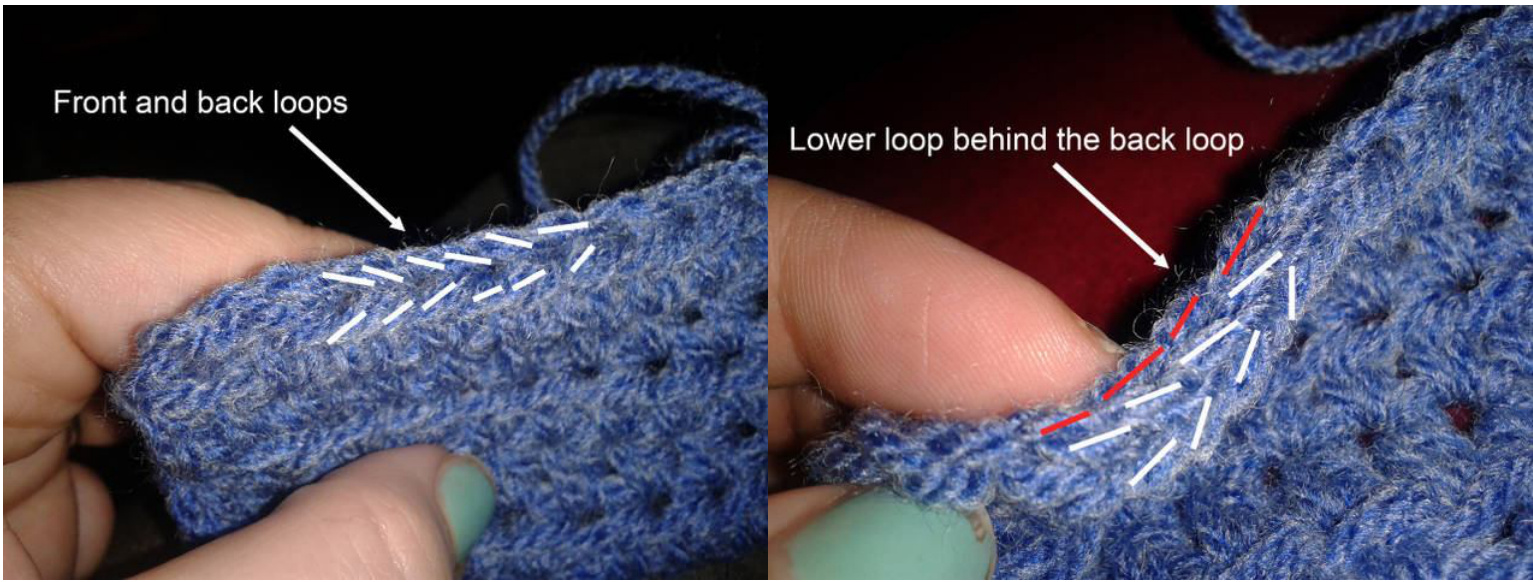
Preemie - 4mm Newborn - 3 months - 4.5mm 3-6 months - 5mm 6-9 months - 5.5mm Special Stitch: single crochet into the back loops of the row below - (When working crochet, there is a front loop & a back loop on every row, but you do not work these). You must go behind the back stitch & into the loop below as in the following photos courtesy of Laura Tegg of Lolly's Crafty Crochet:
ABBREVIATIONS: CH-chain ST(S)-stitch(ES) SK-skip SS-slip stitch RPT-repeat SC-single crochet DC-double crochet SCBLO-Single crochet into back loop only DCBLODouble crochet into back loop only To Start: (Leaving a tail of approx:3 inches 7.5cms) CH 9 LOOSELY Join with a SS to the first CH to form a circle. SC into the circle 14 times. Join with a SS to the first SC. Place a marker into this ST. Row 1: CH2. \*3DC into the next ST. DC into the next ST.\* RPT from \* to \*. Upon reaching the marker, join with a SS. Move the marker up into this last ST. Row 2: CH2. DC into all the STS apart from every_centre ST of the 3DC groups. When it is time to work these centre STS, 3DC into them. Upon reaching the marker, join with a SS & move the marker up into this last ST. You should now have 7 3DC groups which will give you the 7 sides (heptagon shape) needed for theberet. Rows 3 & 4: RPT the last row. Your beret should now be a heptagon shape (i.e. have seven sides).
The next 3 rows form the‘rim' which gives the beret substance&shape.
w 5: (Special stitch, see above for directions ? photographs.) CH1. SC into every back loop of the row below. Upon reaching the marker, join with a SS & move the marker up into this last ST. Row 6: CH1. SCBLO of every ST. Upon reaching the marker, join with a SS & move the marker up to this last ST. Here is a link to an excellent tutorial on how to crochet into the back loops of a row: http://www-youtube-com/watch?v=QkujFbbWUD0 Row 7: CH2. DCBLO of every ST. Upon reaching the marker, join with a SS & move the marker up into this last ST. Row 8: CH2. \*DC into the next ST, SK the next ST\* Rpt from \* to \* all round & upon reaching the marker, join with a SS & move the marker up to this last ST. Row 9: CH2. \*SK next ST, DC into next ST\* RPT from \* to \* all round until the marker is reached. Join with a SS & move the marker up to this last ST. Row 10: Rpt the last row. Upon finishing row 10 the preemie size beret is complete,fasten off. The tassel can now be made.(See below for instructions) Row 11: (for all other sizes): RPT row 9. Having finished row 11, the beret for sizes 0-3 months & 3-6 months is now complete, fasten off. The tassel can now be made (see below). ROW 12: RPT row 9. The 6-9 months beret is now complete. fasten off. The tassel can now be made. All Sizes: Before weaving in loose ends, take the 3 inch (7.5cms) tail of yarn which formed the beginning circle & pull i to close the circle more tightly, weave in to conceal.
Instructions for the tassel are as follows:
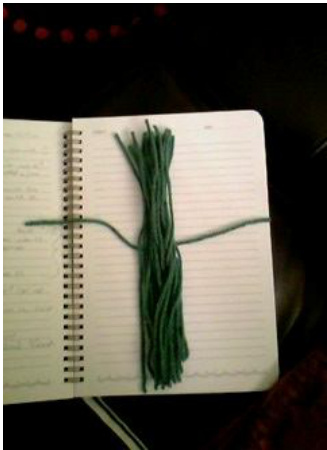
To make the tassel: Cut 22 lengths of yarn 9inches (23cms) long. Place 20 of them onto one of the two left over lengths of yarn which is laid horizontally as in the photograph below:
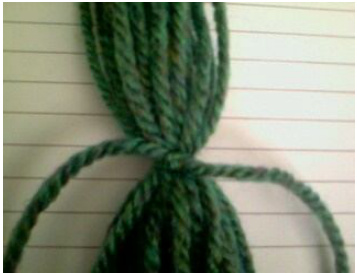
Tie a double knot as such:
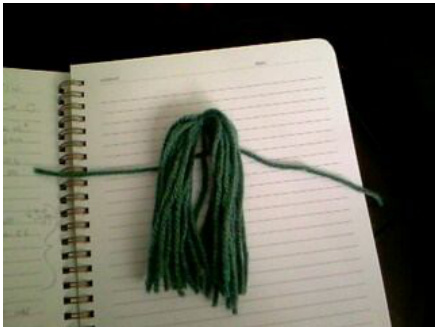
Fold in half & lay on the last length of horizontally placed yarn asbelow:
Tie a double knot as in the photograph below:
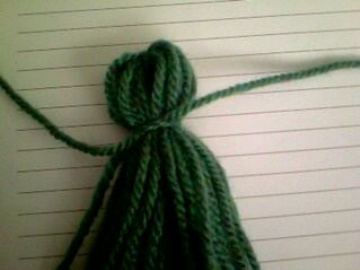
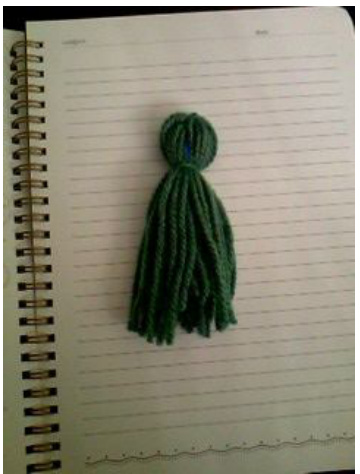
Your tassel is complete as in the above photograph. Trim all the ends to neaten. Text and images by Roo's Crochet Crackers & Ann Holden, all rights reserved. No pattern may be reproduced or distributed — mechanically, electronically, or by any other means, including photocopying, without written permission. Finished products created with this pattern may be used for commercial sale. It is appreciated if design credit to Roo's Crochet Crackers & Ann Holden is listed in finished products.


