Metamorph
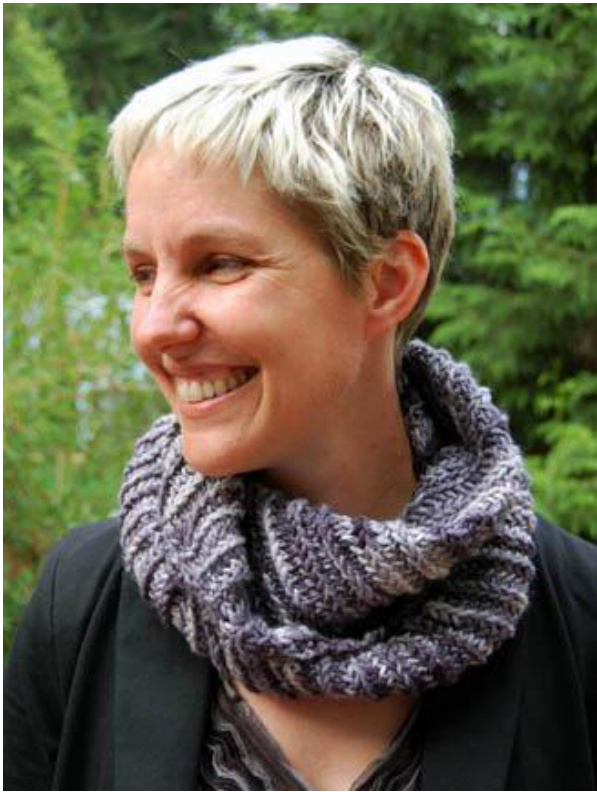
by Jeny Staiman Difficulty: Mellow met-a·morph (met-uh-mawrf), n: a being that can change its shape into that of another person, creature, or entity.
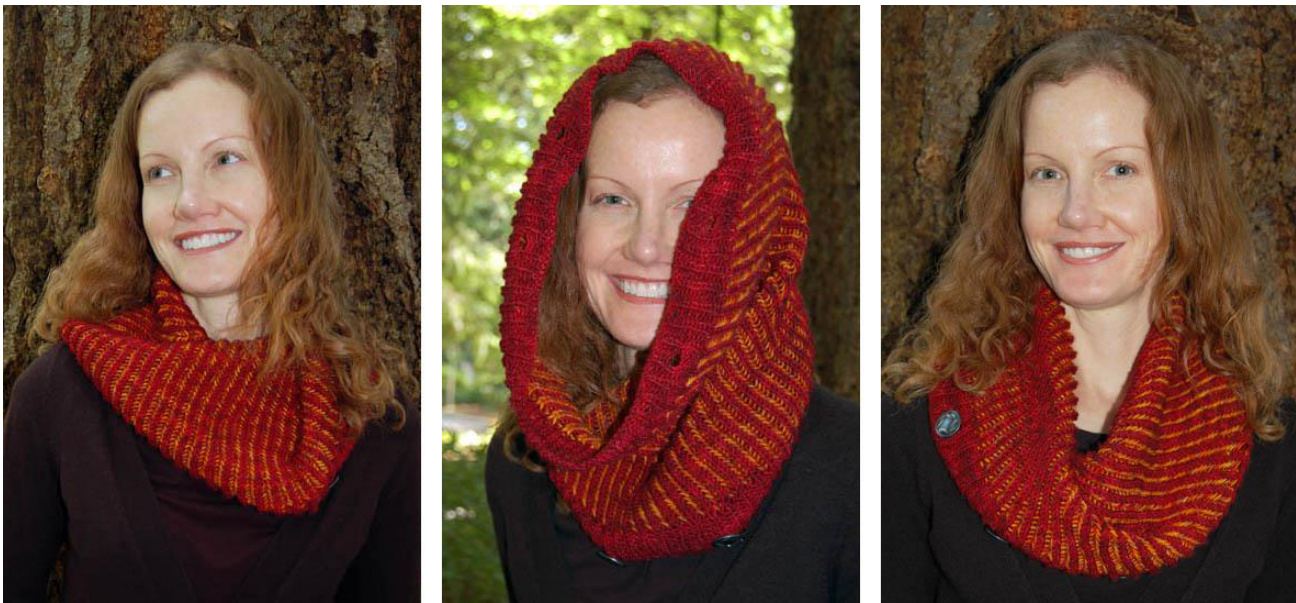
Like a metamorph, this cowl can take on different forms based on the whim of the wearer. In some forms it looks like a moebius, but to make it, you need only know how to knit a tube. It's reversible, scalable, and works with any stitch pattern and any gauge. After you finish making it, it's up to you what shape to give it. Metamorph may have a complex personality, but it's quite straightforward to make. Exactly how and why it takes on its different forms is still beyond me (l have been informed by a physicist-knitter couple that it relates to a periodic harmonic orbits on a torus manifold). Fortunately, one need not understand why it works in order to make it work. It justworks. Most of the Metamorphs pictured in this article were made with Dragonfly Fibers' yarns. Kate Chiocchio's skill and guidance were invaluable to me in finding the right colorways. Her yarns are exquisitely rich, vibrant, and luscious. Thank you Kate!
CONCEPT
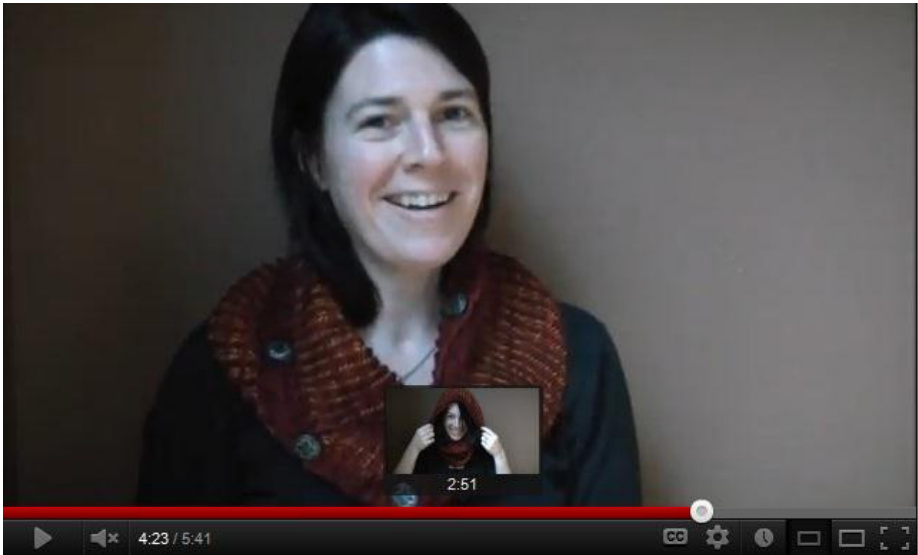
Here's the basic idea behind this form. Watch this short video (5:40) to witness the metamorphosis.
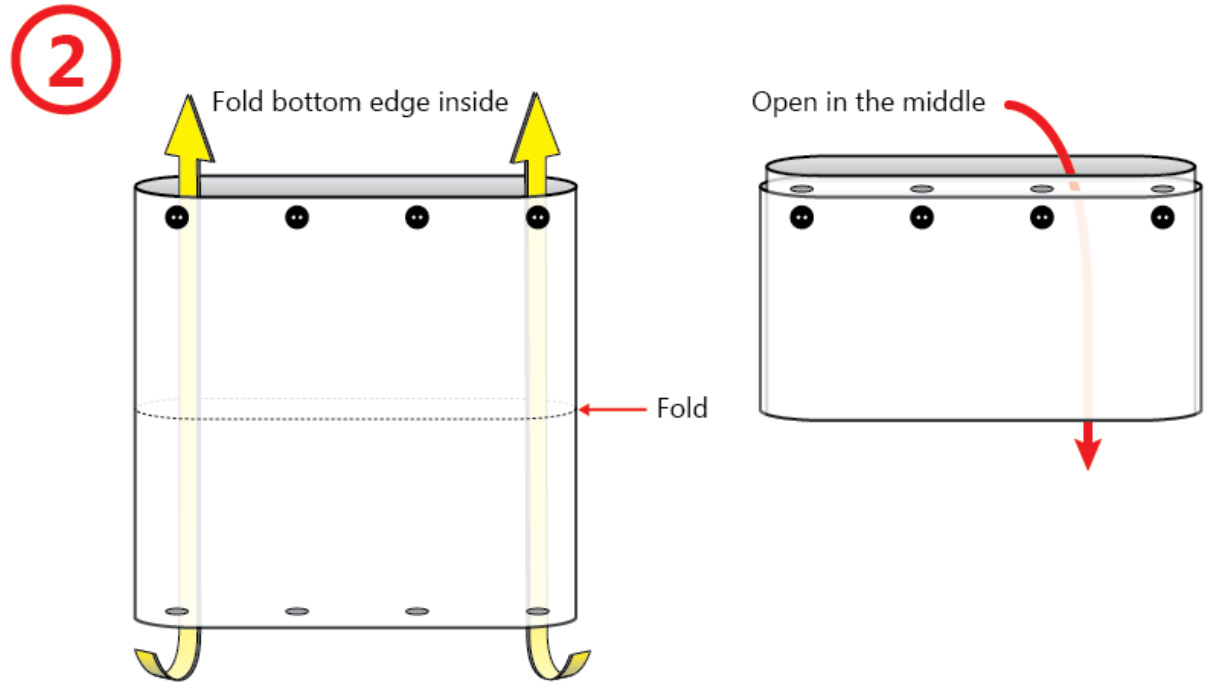
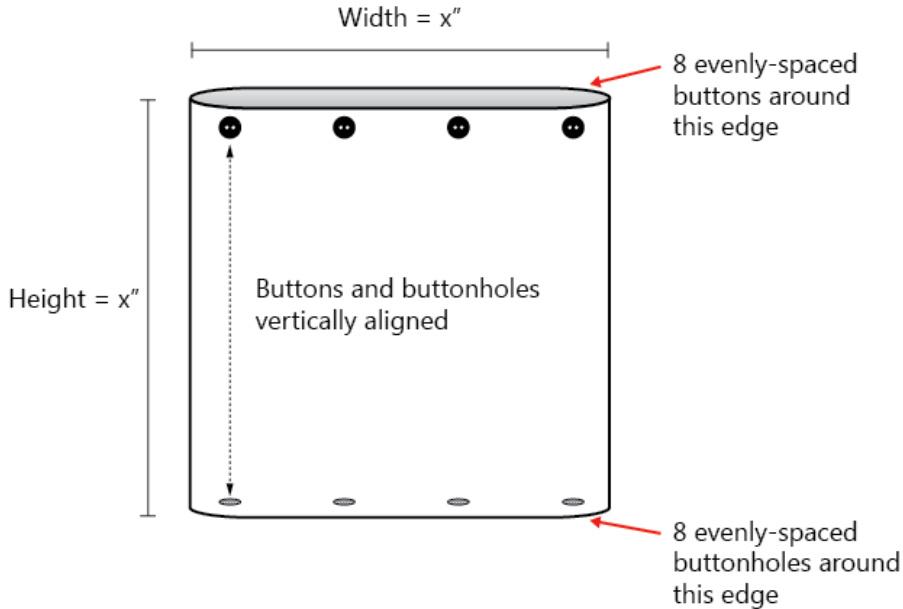
1) Knit a tube as tall as it is wide when laid flat. Work 8 buttons around 1 edge, and 8 buttonholes around the other edge. Align buttons and buttonholes vertically.
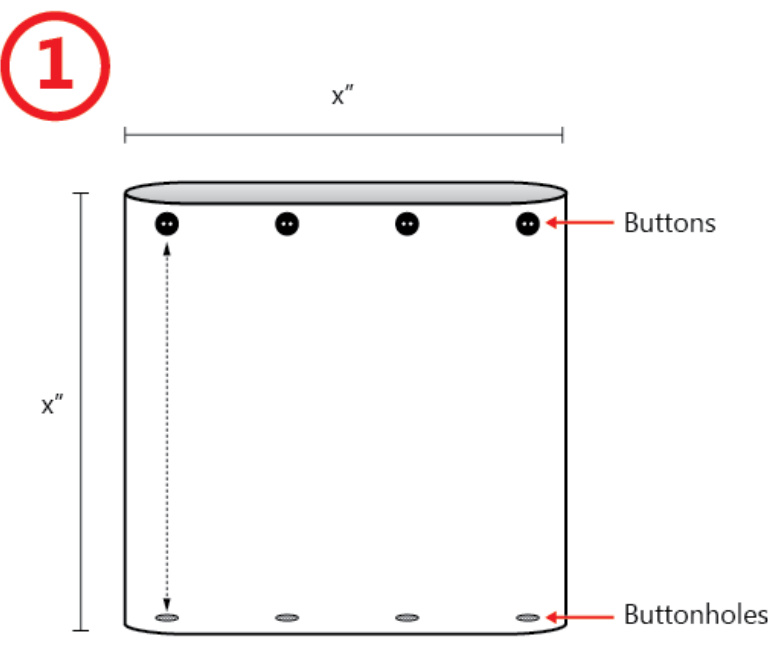
Front view (Rs facing out) 8buttons and 8 buttonholes are distributed evenly around cuffs
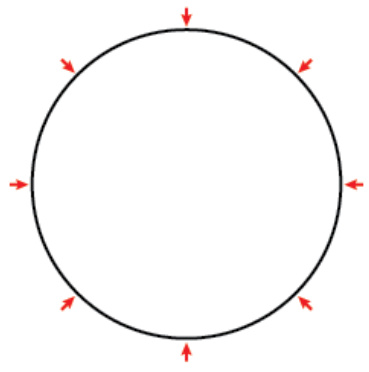
Top view 2) Fold the bottom edge inside and pull through, so that your tube is double-thickness and open in the middle like a flattened donut. Line up buttons and buttonholes.
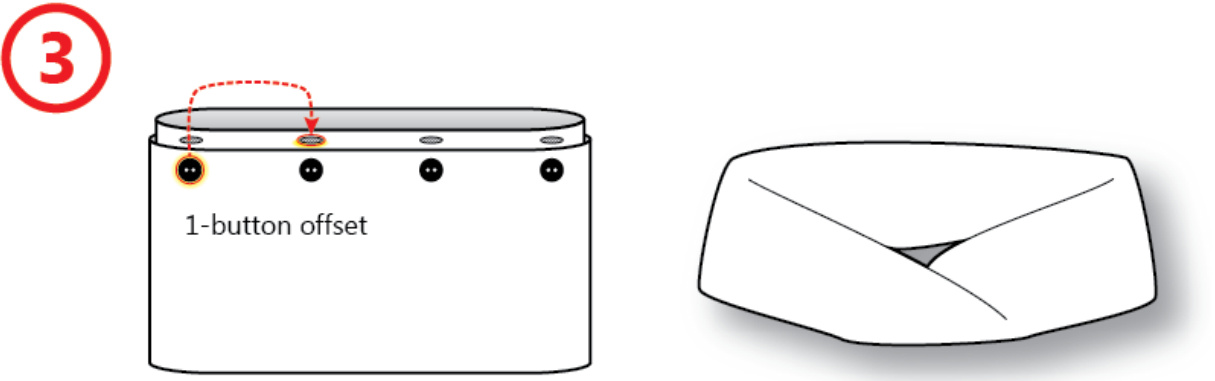
3) Instead of inserting the buttons into the lined-up buttonholes, first offset them, then button around (i.e., this is probably exactly what you don't want to do when buttoning a cardigan). A one-button offset (insert first button into second hole, then button the rest of the way around) will yield a form with 1 twist, like a moebius.
A two-button offset (insert first button into third hole) will yield a form with 2 twist
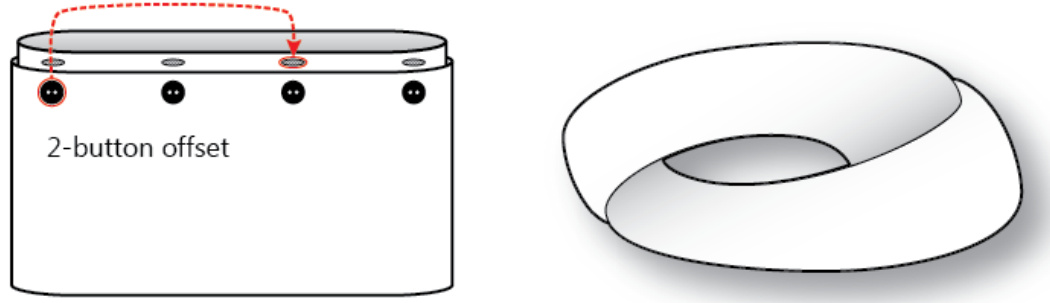
And so on. If you're skeptical, I don't blame you. But seriously, it works. FINISHED MEASUREMENTS Circumference: 24 inches Height: 13 inches
MATERIALS
Yarn [MC] Dragonfly Fibers Djinni Sock [80% Superwash merino, 10% Cashmere, 10% Nylon; 420 yd/384 m per 4.2 oz/119 g skein]; color: Ruby, Ruby; 1 skein [CC] Dragonfly Fibers Djinni Sock [80% Superwash merino, 10% Cashmere, 10% Nylon; 420 yd/384 m per 4.2 oz/119 g skein]; color: The Horse You Rode In On; 1 skein
Needles
1 16" US #7/4.5 mm circular needle 1 16"US #8/5.0 mm circular needle
Notions
8 buttons, 5/8" (shank buttons recommended) 8 backer buttons Tapestry needle 8 Re-closeable or open-ended stitch markers Measuring Tape
GAUGE
Brioche gauge: 18.5 stitches = 4 inches (note that in brioche knitting, a stitch and its yarnover "shawl" are counted as ONE stitch).
PATTERN NOTES
You can make a Metamorph with ANY stitch pattern and ANY gauge - the stitch pattern listed here is just one example. Jump down to the Variations section of this article to see some alternativedesigns. [Knitty's list of standard abbreviations and techniques can be found here.] FeaturedTechniques "Keyhole"buttonhole Jeny's Surprisingly Stretchy Bindoff 2-color brioche knitting in the round M1 increase: EZ method
Terminology (used in Brioche stitch pattern):
brk (brioche knit, or bark): knit the stitch which was slipped in the row below together with its yarnover "shawl" (see yfsl1yo below). brp (brioche purl, or burp): purl the stitch which was slipped in the row below together with its yarnover "shawl" (see sllyof below). yfsl1yo (yarn forward, slip 1 purlwise, yarnover): after a brk, your working yarn will be in back. Bring the working yarn to the front, then slip the next stitch purlwise while bringing the yarn over the needle and the slipped stitch. Return working yarn to the back of the work, in position to work the following brk. The combined slipped stitch and yarnover count as one brioche stitch. The yarnover crosses on top of the slipped stitch likeashawl. sl1yof (slip 1 purlwise, yarnover, yarn forward): after a brp, your working yarn will be in front. Slip the next stitch purlwise while bringing the yarn over the needle and the slipped stitch. Keep working yarn in front, in position to work the following brp. The combined slipped stitch and yarnover count as one brioche stitch. The yarnover crosses on top of the slipped stitch like a shawl.
Note that the only difference between yfsl1yo and s/1yof is this:
OYfsl1yo: Working yarn starts and ends in back of the work. OSl1yof: Working yarn starts and ends in front of the work; If you are unfamiliar with working 2-color brioche in the round, you may benefit from working a swatch in the round before going full size. I highly recommend Nancy Marchant's website, http://briochestitch.com, as an excellent reference for all kinds of brioche knitting techniques.
PATTERN
Cast On & Cuff
Cuff is worked entirely in MC. Using size 7 needles, cast on 168 sts using any method of choice. Rnds 1-9: Double-check to be sure that your cast-on sts do not twist around the cable, then join stitches in the round. [P2, k1] ,\* repeat [\*]for 9 rounds.
Body: Brioche rib
The method described below differs slightly from the classic method; the only difference is that with my method, the end-of-round position shifts back 1 stitch with each new round, whereas with the classic method it stays in one place. This minor (and optional) revision helps to maintain even stitch tension where you switch between working strands. Switch to Size 8 needles. Setup Rnd 1 (MC): L needle starts with (from R to L) p,p,k. Place marker, [yfsl1yo, k2tog],\* repeat [\*] to end of round. Slip marker. (112 brioche stitches). Setup Rnd 2 (CC): L needle starts with a p st with YO "shawl" (MC). Brp1, [sl1yof, brp1],\* repeat [\*] to 1 st before marker (a k2tog in MC from the previous round). Drop working yarn; remove marker from existing position and replace here, shifting it backwards by 1 st.
Repeat begins here:
Rnd 1 (MC): L needle starts with the last st worked in MC. Sl1, pick up MC and [yfsl1yo, brk1],\* repeat [\*] to 1 st before marker. Drop MC strand behind work; remove marker from existing position and replace here, shifting it backwards by 1 st. Rnd 2 (CC): L needle starts with the last st worked in CC. Sl1, pick up CC and [sl1yof, brp1],\* repeat [\*] to 1 st before marker. Drop CC strand in front of work; remove marker from existing position and replace here, shifting it backwards by 1 st. Repeat Rounds 1 and 2 until your work measures about 12 inches from the cast on edge. Last round (CC): Work right up to the marker, ending with a [yfsllyo]. Slip marker.
Cuff, Buttonholes, & Bind off
Cuff is worked entirely in MC. Switch back to Size 7 needles. Transition: L needle starts with a brp in CC from the previous round. [p1, M1, brk1] to marker; sl marker. For the M1, use the EZ method of looping the working yarn around the right needle. Rnds 1-3: [p2, k1] around. Rnds 4-6: Work 8 Keyhole buttonholes, 1 hole every 21 sts. Rnd 4: ([p2, k1] 5 times, p2, then [ssk, YO, k2tog]).\* Repeat (\*) 7 more times to end. Rnd 5: ([p2, k1] 6 times, [M1] 3 times in the strand below).\* This time use the standard M1 increase. Repeat (\*) 7 more times to end. Rnd 6: ([p2, k1] 6 times, p2, k2tog).\* Repeat (\*) 7 more times to end. You may of course substitute any buttonhole technique you prefer. For additional information on working buttonholes, please see this post from my blog. Continue working cuff: Rnds 7-9: [p2, k1] around.
Bind off:
Remove marker and bind off using method of choice (l recommend Jeny's Surprisingly Stretchy Bindoff because for most knitters this is the most elastic bindoff you can work without a tapestry needle).
FINISHING
Apply 8 buttons in evenly-spaced intervals around the top edge. Buttons should face out on whichever side you like better. 1.Lay the knitted tube flat. 2. Place a marker directly astride 1"t buttonhole, along a line parallel to the folded edge. 3. From the first marker, place 7 more markers, each spaced 21 sts apart. Each marker should line up with a buttonhole on the opposite cuff. 4. At each marked point, sew on a button. I highly recommend using backer buttons, to reduce excess stress on the cuff stitches. You can make your metamorph reversible by using a second set of finished buttons as backer buttons. Weave in all ends with a tapestry needle.
METAMORPHOSIS
Using the diagrams at the beginning of this pattern as a guide: 1. Fold bottom edge inside all around; line up the buttons and buttonholes. 2. Decide how many twists you want, and then offset the buttons and buttonholes by that number (1 twist = 1-button offset; 2 twists = 2-button offset). 3. Button all the way around. 4. Roll the cowl around with your hands (see video for demonstration) until it settles into the desired number of twists. You may experience some variability in how many twists result from different amounts of offset. If a 2-button offset doesn't quite get you 2 twists, try a 3-button offset. Play around to get the result that you like best. Try offsetting in either direction.
VARIATIONS
Everything from here to the end of the article is optional reading! As a person who frequently ignores written instructions (sometimes to my own peril), 1 encourage you to play around and explore the wonderful versatility of this form. You can use any stitch pattern, gauge, and stitch count that gets you the size and effect you want.
Stitch Pattern & Gauge
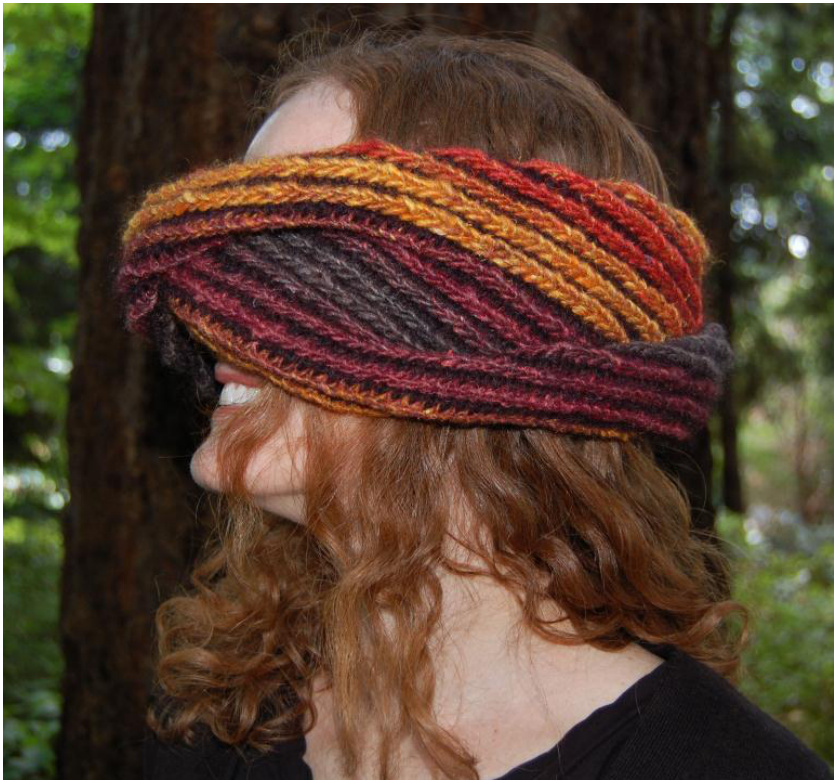
For this form I recommend using knitted fabrics that are somewhat loose but still have a strong structure and texture. Because the finished cowl is double-thickness, it lays around the neck more gracefully if made with springy, highly textured fabric. If you start with a stitch pattern that has a strong orientation in one direction (i.e., vertical, horizontal, or diagonal), you will delight in watching it shift as you add varying amounts of twist to your finished cowl.
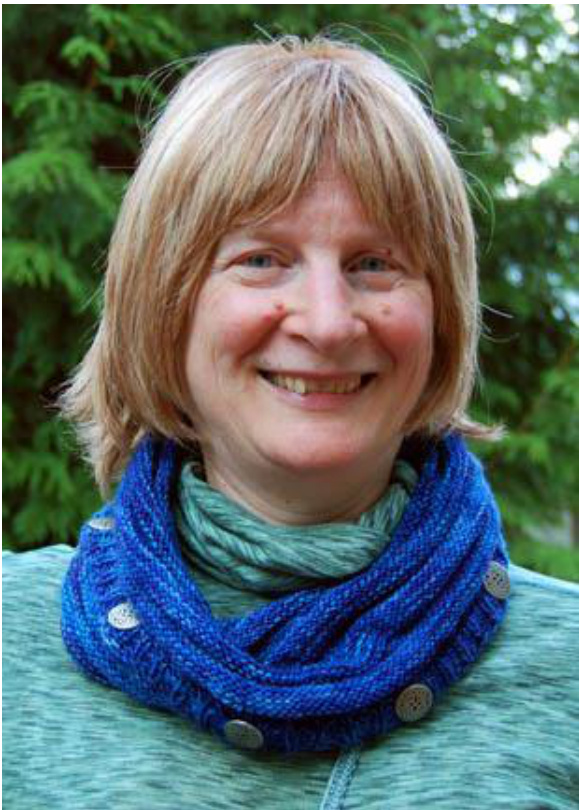
Model:Cat Bordhi;Photographer:JenyStaiman This example was worked in alternating knit-purl stockinette bands, resulting in a very springy fabric with gently-defined twists. Cat Bordhi, whose books on moebius knitting inspire many readers around the world, here models this Metamorph buttoned into a 1-twist form. (Yarn: Blue Velvet Djinni by Dragonfly Fibers)
Size
With each twist you add to your cowl, it will effectively shrink by about 5%. A starting circumference of about 24 inches should yield a good range for most wearers.

Model: Jeny Staiman; Photographer: Jeff Staiman My favorite way to wear this particular Metamorph, worked in Mistake Stitch, is with a 4- button offset. This yields a form that twists around and around, and snugs up nicely against my neck. Can you believe this stitch pattern started out vertical? (Yarn: Heroine Naiad by Dragonfly Fibers)
There's more than one way to knit a tube
You need not limit yourself to knitting your tube in the round from cuff to cuff. It works just as well to make a tube sideways. Start with a provisional cast on, graft your beginning and ending rows into a tube once you achieve your desired length, then offset the top and bottom edges.
Model: Kristin Fitzpatrick; Photographer: Jeny Staiman This example was worked back-and-forth in a horizontal motif, then grafted into a tube, and then fastened into a 2-twist form. (Yarn: Black Pearl Selkie by Dragonfly Fibers)
Forget those buttons!
You need not commit to using buttons and buttonholes for sealing the edges of your Metamorph. A variety of other options exist, including... 1. Fasteners you can apply after-the-fact. Here I used body piercing rings as fasteners instead of buttons & buttonholes.
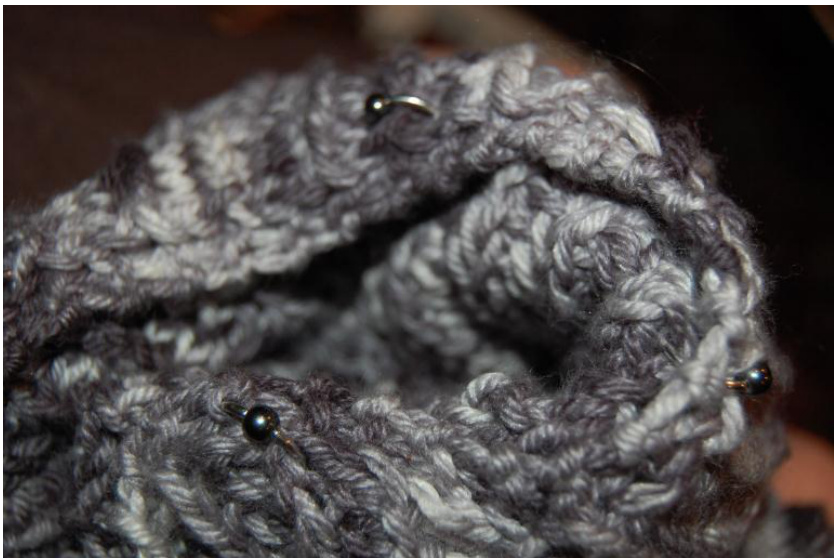
Photographer: Jeny Staiman 2. Grafting your Metamorph permanently into a chosen form.
Model: Jenn Wolfe; Photographer: Jeny Staiman A graft of over 100 stitches is intimidating, but if you can live through it, it does open up some interesting design possibilities. Here my friend Jenn has some fun with a version made in Noro that I grafted into a 2-twist form.
Geometry
The instructions listed above for transforming a knitted tube into a form with 1 or 2 distinct twists assume the following three conditions are met: 1. When laid flat, your tube will be a square (i.e., the tube's height must be equal to the width when flat, or half the circumference). 2. The tube is divided into 8 equal sections. 3. The buttons and buttonholes are lined up parallel to the folded edges.
That said; don't worry if your geometry is not precise, because in practice Ifind that knitted fabrics are quite forgiving. Mathematicians reading this article may recognize the continuous relationship between the height : circumference ratio of the tube and the degree of offset that will yield 1 or 2 (or more) twists after the tube is sealed into a torus. For more on this topic, please see my blog.
ABOUT THEDESIGNER
Jeny Staiman is driven by a deep fascination with how things work, how people think, and how knitted fabric is constructed. Mild mannered usability research engineer by day, obsessive compulsive knitter by night, Jeny enjoys exploring creative approaches to all sorts of problems. You can find Jeny on Ravelry as curiousjeny and at www.curiousknitter.com.