As I am a big fan of knitting and Chowder, it was only a matter of time before I combined the two and knitted myself a Chowder Hat! I'd like to share my pattern with you. But please note that this is the very first time I've written out and shared one of my patterns publicly. This pattern is basically the notes I took as I knitted my hat. The pattern is for a large adult size -- about 23". I've added notes for a size Small in parenthesis - about 21", more suited for kids or smaller adult heads. If my Small size isn't small enough for you, I've found that weaving a few strands of elastic thread through the band does wonders for making a "too-big" hat fit just fine! So, if you're looking for some kooky cartoon-inspired headgear -- use the pattern below and knit aCHOWDERHAT!
CHOWDER HAT (by invisiblemandy, 2009)
MATERIALS:
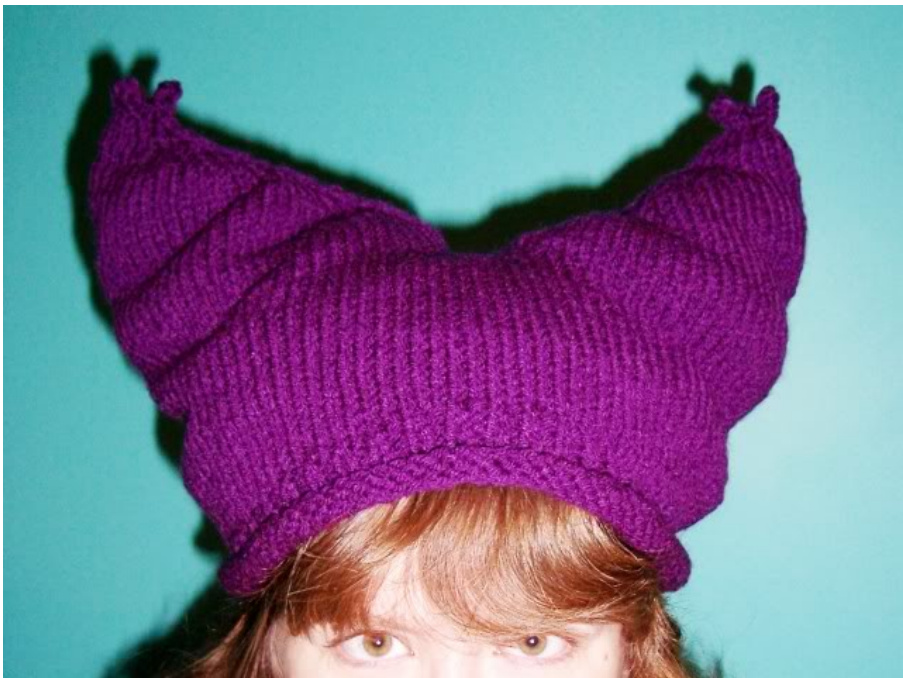
· (250) 350 yds of worsted weight yarn (l used Red Heart Super Saver, in 'Dark Orchid.') · size 8 (5mm) dpns (or any size you need to obtain gauge) GAUGE: 15 stitches, 22 rows = 4 inches (in stockinette stitch) SIZES: (Small) Large TO BEGIN: Cast on (84) 92 stitches, place marker, join in round. Rolled Brim: Knit 8 rounds. Vork the next 3 rounds in K1, P1 rib. (l used a smaller needle size for the rib xT ROw: Increase (6) 8 stitches evenly around. You'll have (90) 100 stitche Now knit until piece measures about (3") 3" from ribbed section. Next, increase 4 stitches evenly, every other row, (3) 5 times. Youll have (102) 120 stitches now. Knit one round, then put the next (51) 60 stitches on a stitch holder or scrap piece of yarn. You'll be working on one half of the hat at a time, creating the funky points. Funky Points: Join the (51) 60 stitches, placing a marker at the join. Knit (1) 3 rounds even. ROW 1: K2tog, K5, K2tog, Knit to 9 stitches before marker, SSK, K5, SSK. (l started the second and third decreases at (3) 5 stitches from the 'edges', but then moved them in a bit as the point became pointier. Use your best judgement.) ROW 2:Knit Repeat these two rows until the funky point is pointy enough to suit you. I stopped when I had 9 stitches left, then I had just enough stitches for three 3-stitch i-cords. If you'd rather have 4- stitch i-cords, stop at 12 stitches. With remaining stitches, knit 3 i-cords. Place the second half of your hat back on the needles, joining and knitting just as the first funky point.
Now you could just stop right there, BUT --I took it a step further..
I found the hat just a bit too floppy, so I decided to put a small amount of polyester stuffing inside each 'point.' Then I knitted a second, beanie-type hat and sewed it inside to keep the stuffing from falling out. I attached this lining just above the ribbing on my hat. I don't have a pattern for the lining, I just started knitting with the original hat pattern, starting after the ribbing section, and checked it often against my original hat as I was knitting. When I felt it was time to decrease, I used this pattern: Hat Lining Decreases: ROW 1: [K3, K2tog] repeat to end. ROW 2: Knit ROW 3: [K2, K2tog] repeat to end. ROW 4: Knit ROW 5: [K1, K2tog] repeat to end. ROW 6: Knit ROW 7: [K2tog] repeat to end. Repeat Row 7 until there are less than 10 stitches left, pull yarn through these stitches and fasten off. I suppose if you didn't want to bother with knitting the lining, you could sew a store-bought beanie inside your hat. Well, that's it! I hope you enjoyed knitting this silly hat as much as I did.