Materials
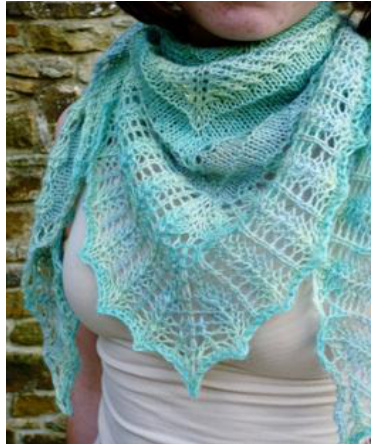
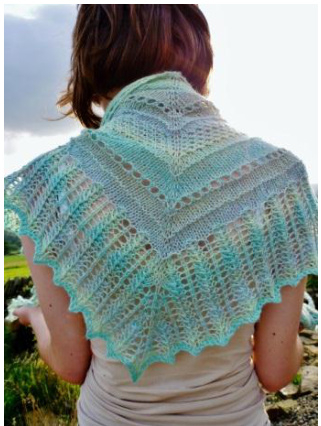
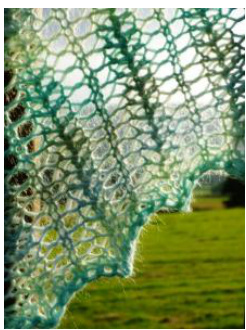
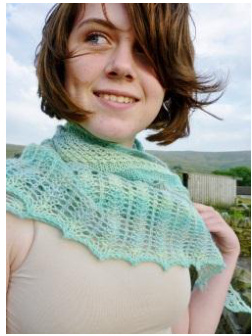
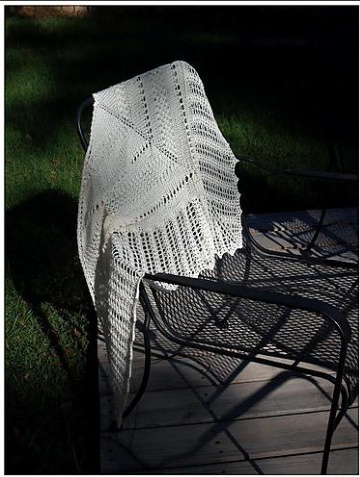
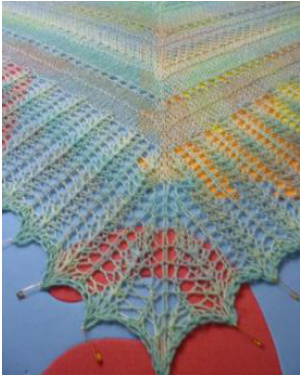
460 yards/420 meters - 4ply (Regia Hand Dyed Effect Sock yarn) 4 mm (US #6 32" circular needle 2 stitch markers Dimensions after Blocking: 56" wide x 26” deep (143 cm x 66 cm) This cosy little shawlette is knitted in one piece from the top down. It is based on a traditional triangular shaped shawl. The instructions for the shawlette are divided into 4 sections. A combination of patterns A-C and a lace border pattern. It is knitted in fingering (4ply) yarn. Lace weight yarns could be used to give a more delicate shawlette, although this would alter the dimensions. The pattern includes written and charted instructions.
PATTERN A
(RS) K2, yo, k to m, m1R, slm, k1c, slm, m1L, k to last 2 sts, yo, k2 (WS) K2, p across to last 2 sts, K2 (slip markers as they occur)
PATTERN C
1. (WS) K across - slipping markers 2 K2, yo, (p2tog, yo) across to marker, m1R, slm, k1c, slm, m1L, (yo, p2tog) to last 2 sts, yo, k2 3 K across - slipping markers
PATTERN B
1. (WS) K across - slipping markers 2. (RS) K2, yo, k to m, m1R, slm, k1c, slm, m1L, k to last 2 sts, yo, k2 3. K2, p across to last 2 sts, K2 (slip markers as they occur) 4. K2, yo, k to m, m1R, slm, k1c, slm, m1L, k to last 2 sts, yo, k2 5. (WS) K2, [p2tog,K2tog into same sts ]- across to m, slm, p1c, slm [p2tog, k2toglinto same sts] to last 2 sts, k2 (see abbr. for guidance on this) 6. K2, yo, k to m, m1R, slm, k1c, slm, m1L, k to last 2 sts, yo, K2. 7 (WS) K2, p across to last 2 stitches, k2 (slip markers as they occur) 8. K2, yo, k to m, m1R, slm, k1c, slm, m1L, k to last 2 sts, yo, k2 9. K across - slipping markers
Designed by Gillie Parsons @ Yarn and Ewe Designs
INSTRUCTIONS
Set up
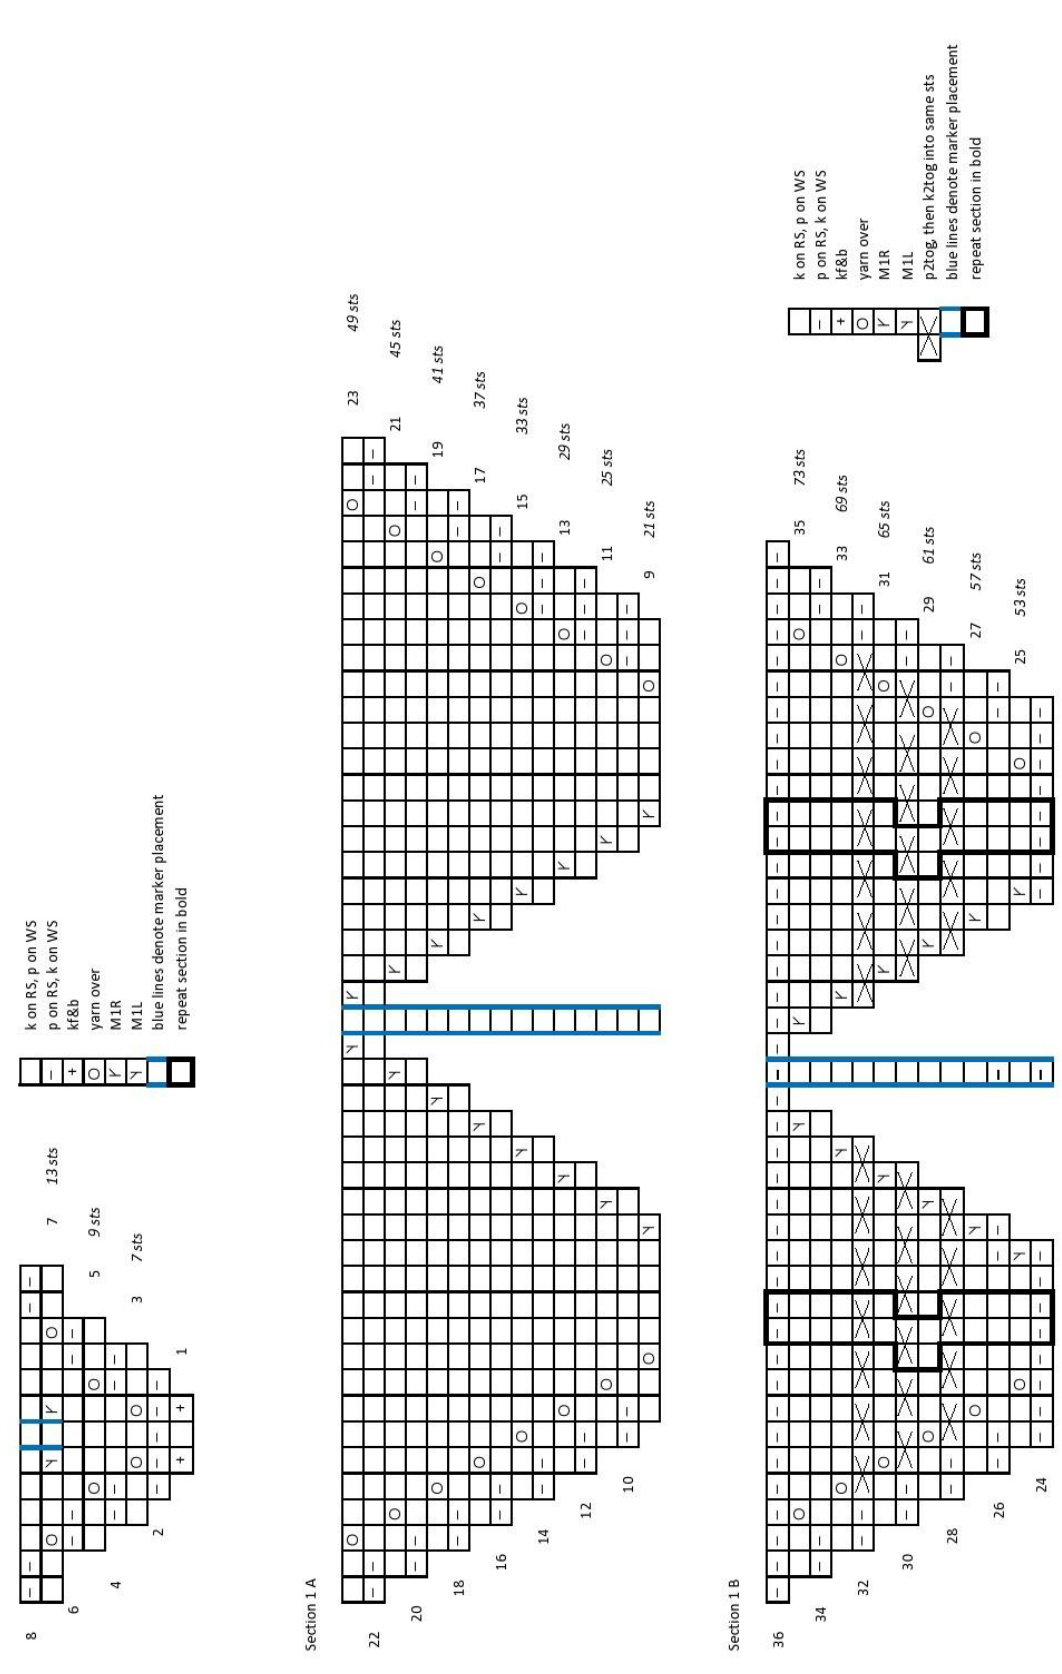
Co 3 1. K1fb, k1, k1fb (5 sts) 2. K3. K2, yo, k1, yo, k2 (7 sts) 4. K2, p3, K2 5. K2, yo, K3, yo, k2 (9 sts) 6. K2, p5, k2 7. K2, yo, k2, m1R, pm, k1c, pm, m1L, k2, yo, k2 (13 sts) 8. K2, p across to last 2 stitches, K2 (slip markers as they occur) If you prefer you can use the garter tab cast on commonly used in top down shawls work as follows:- Co 3 stitches, Knit 6 rows, rotate 90° clockwise and pick up and knit 3 stitches (6 stitches), rotate 90° again, pick up and knit 3 stitches along co edge (9 stitches). (http: / /westknits.com/index.php/2011/07/garter-tab-cast-on /) Continue from row 6 above The shawl is then worked in the following order SECTION1 Using Pattern A: work rows 1&2 x eight (45 sts) Work row 1 once more (49 sts)
Using Pattern B: Work rows 1 -4, Work rows 5 & 6 x threeWork rows 7 - 9
SECTION2
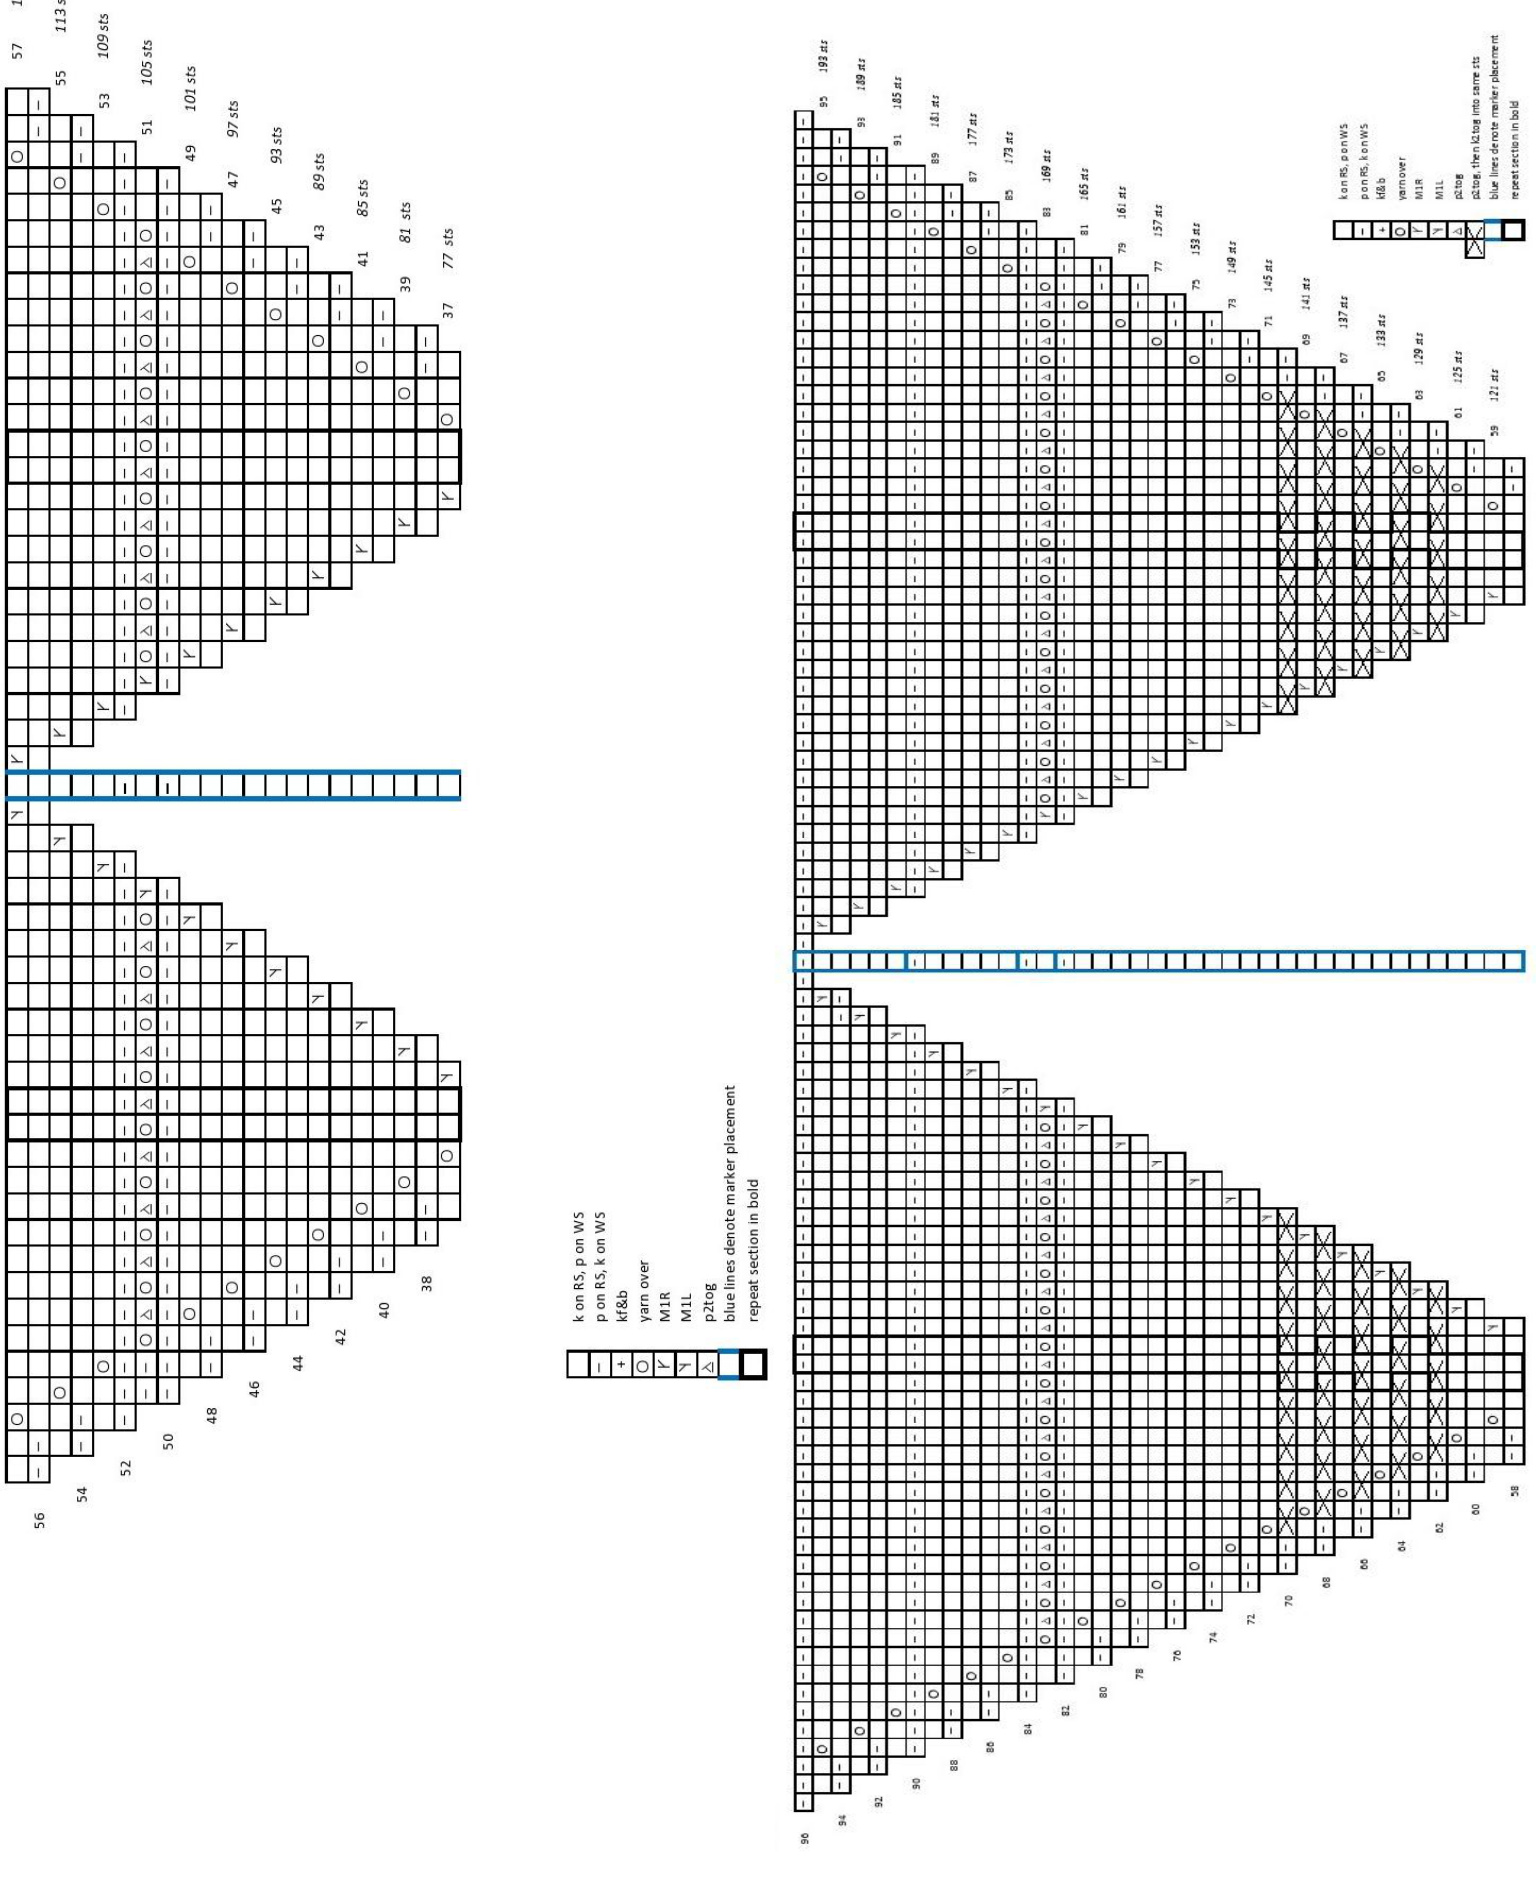
Using Pattern A: work rows 1 &2 x six (97 sts) Work row 1 once more (101 sts) Using Pattern C: work rows 1-3 Using Pattern A: work rows 1&2 x two Work row 1 once more (117 sts) Designed by Gillie Parsons Yarn and Ewe Designs
SECTION3
Using Pattern B: Work rows 1 -4, Work rows 5&6 x5, Work rows 7-9 (149 sts) Using Pattern A: Work rows 1&2 x three, Work row 1 once more (165 sts) Using Pattern C: Work rows 1-3 (169 sts) Using Pattern A: work rows 1&2 x two, Work row 1 once more, x2 Using pattern B: work row 1 (193 sts)
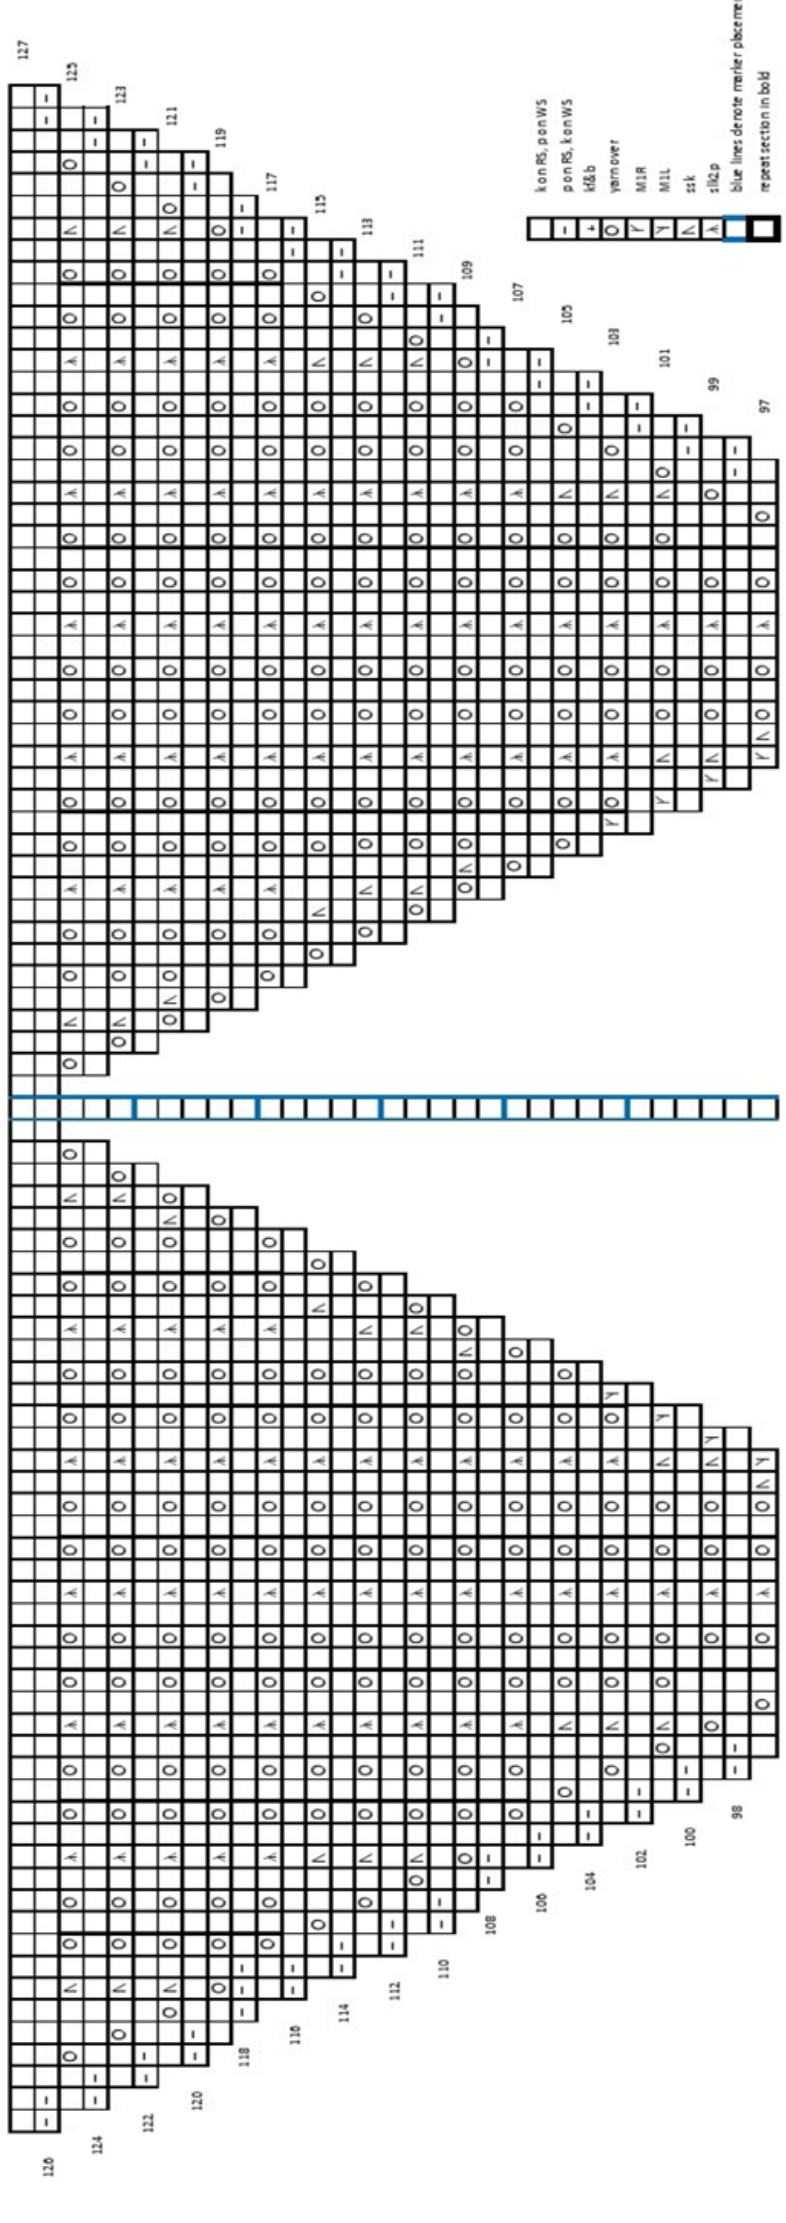
SECTION4:LACE BORDER
1: K2, yo, k1, \*k1, yo, k1, sk2p, k1, yo, rpt from \* to 3 st before Centre (C), k1, yo, ssk, [m1R, slm, k1c, slm, m1L], ssk, yo, k1,\*\*yo, k1, sk2p, k1, yo, k1, rpt from \*\* to last 3 st, k1, yo, k2 2: K2, p across to last 2 sts, K2 (slip markers as they occur). All following even (WS) rows worked in same way. 3: K2, yo, k2 \*k1, yo, k1, sk2p, k1, yo, rpt from \* to 4 sts before C, k1, yo, k1, ssk, [m1R, slm, k1c, slm, m1L], ssk, k1, yo, k1, \*\*yo, k1, sk2p, k1, yo, k1, rpt from \*\* to last 4 sts, k2, yo, k2 5: K2, yo, ssk, k1, yo, \*k1, yo, k1, sk2p, k1, yo, rpt from \* to 5 sts before C, k1, yo, k1, ssk, k1, [m1R, slm, k1c, slm, m1L],k1, ssk, k1, yo, k1, \*\*yo, k1, sk2p, k1, yo,k1, rpt from \*\* to last 5 sts, yo, k1, sk, yo, k2 7: K2, yo, K1, sk, k1, yo, \*k1, yo, k1, sk2p, k1, yo, rpt from \* to C [m1R, slm, k1c, slm, m1L], \*\*yo, k1, sk2p, k1, yo, k1, rpt from \*\* to last 6 sts, yo, k1, ssk, k1, yo, k2 (209 sts) \*(Removal of markers in the next row is completely optional. As the centre stitch is very established by now and the centre increase changes here to a yo, rather than a make one. the markers can get in the way. I just find it easier without them.) 9: K2, yo,k2, ssk, k1, yo, \*k1, yo, k1, sk2p, k1, yo,rpt from \* to 1st before C, k1, [remove marker, yo, k1c, yo, remove marker],k1, \*\* yo, k1, sk2p, k1, yo, k1, rpt from \*\* to last 7 sts, yo, k1, ssk, k2, yo, k2 11: K2, yo,\* k1, yo, k1, sk2p, k1, yo, rpt from \* to 2 st before C, k2, [yo, k1c, yo], k2, \*\* yo k1, sk2p, k1, yo, k1, rpt from \*\* to last 2 sts, yo, k2 13: K2, yo,k1, yo \* k1, yo, k1, sk2p, k1, yo, rpt from \* to 3 sts before C, k1, yo, ssk, [yo, k1c, yo], ssk, yo, k1, \*\* yo, k1, sk2p, k1, yo, k1, rpt from \*\* to last 3 sts, yo, k1, yo, k2 15: K2, yo, ssk, k1, yo, \* k1, yo, k1, sk2p, k1, yo, rpt from \* to 4 sts before C, k1, yo, k1, slkp, [yo,k1c, yo], slkp, k1, yo, k1, \*\* yo, k1, sk2p, k1, yo, k1, rpt from \*\* to last 5 sts, yo, k1, ssk, yo, k2 17: K2, yo, k1, ssk, k1, yo, \* k1, yo, k1,sk2p, k1, yo, rpt from \* to 5 sts before C, k1, yo, k1, s1kp, k1 [yo, k1c, yo], k1,slkp, k1, yo,k1, \*\* yo,k1, sk2p, k1, yo, k1, rpt from \*\* to last 6 sts, yo, k1, ssk, k1, yo, k2 19: K2, yo, k2, ssk, k1, yo, \* k1, yo, k1, sk2p, k1, yo, rpt from \* to 6 sts before C, k1, yo, k2, s1kp, k1, [yo, k1c, yo], k1, slkp, k2, yo, k1, \*\* yo, k1, sk2p, k1, yo, k1, rpt from \*\* to last 7 sts, yo, k1, ssk, k2 yo, k2 21: K2, yo,\* k1, yo, k1, sk2p, k1, yo, rpt from \* to 1st before C, k1, [yo, k1c, yo], k1,\*\* yo, k1, sk2p, k1, yo, k1, rpt from \*\* to last 2 sts, yo, k2 23: K2, yo, k1, yo, \* k1, yo, k1, sk2p, k1, yo, rpt from \* to 2 st before C, k2, [yo, k1c, yo], k2, \*\* yo, k1, sk2p, k1, yo, k1, rpt from \*\* to last 3 sts, yo, k1, yo, k2 25: K2, yo, ssk, k1, yo,\* k1, yo, k1, sk2p, k1, yo, rpt from \* to 3 sts before C, k1, yo, sk, [yo k1c, yo], ssk, yo, k1, \*\* yo, k1, sk2p, k1, yo, k1, rpt from \*\* to last 5 sts, yo, k1, ssk, yo, k2 27: K2, yo, k1, ssk, k1, yo, \* k1, yo,k1, sk2p, k1, yo, rpt from \* to 4 sts before C, k1, yo, k1, slkp, [yo, k1c, yo], slkp, k1, yo, k1, \*\* yo, k1, sk2p, k1, yo, k1, rpt from \*\* to last 6 sts, yo, k1, ssk, k1, yo, k2 29: K2, yo, k2, ssk, k1, yo,\* k1, yo, k1, sk2p, k1, yo,rpt from \* to 5 sts before C, k1, yo, k1, slkp, k1, [yo, k1c, yo], k1, slkp, k1, yo, k1, \*\* yo, k1, sk2p, k1, yo, k1, rpt from \*\*to last 7 sts, yo, k1, ssk, k2, yo, k2 30: k2, purl across to last 2, k2 31: Knit across 32: Stretchy bind off: \*K2tog tbl, move stitch formed on right needle back to left needle, rpt from \* across. (http://www.youtube.com/watch?v=cGHtYwr1us&noredirect=1) Weave in ends and block well.
Abbreviations:
C - centre stitch K1c - knit centre stitch K1fb - knit into the front and back of stitch (increase) K2tog - knit 2 stitches together M1L - make stitch left lean. From the front insert right needle into top of loop just below next stitch. Place lifted loop on left needle. Knit into the back of the stitch. (increase) M1R ——- make stitch right lean. From behind, insert left needle into top of loop just below last completed stitch, knit into front of loop.(increase) http://www.youtube.com/watch?v=DDXfoJYAra8 P2tog - purl 2 stitches togetherP2tog, K2tog into same sts - purl 2 stitches together, don't slip them off needle, then knit 2 together into stitches just worked, then slip off needle. Pm - place marker RS - right side Sk2p - slip one stitch, knit 2 together, passlip stitch over Slm- slip marker Slkp - slip one, knit one, pass slip stitch over knit stitch Ssk - slip, slip, knit Sts - stitches tbl - through the back of the loop WS- wrong side Yo - yarn over needle
Designed by Gillie Parsons Yarn and Ewe Designs


