play with string Tricia M. Ward Vancouver B.C. Canada
Required supplies
EMAlL play.with.string@gmail.com WEB SITE http://PlayWithString.blogspot.com set of four or five 3.25 mm (U.S. no. 3) double pointed needles [short lightweight needles will be the easiest to use for this project - I recommend 5"(13 cm) bamboo needles] worsted weight wool such as Cascade 220. For each sweet, you need about 5 yards (4.6 metres) for the main colour 11%2 yards (1.4 metres) for the contrasting colour .sB small amount small amount of stuffing (polyester fibrefill, scrap yarn, scrap fabric, cotton balls - anything you want to use for stuffing) yarn needle scissors 1 stitch marker (a loop of yarn will suffice)
Abbreviations and terms
k = knit p = purl st = stitch sts = stitches ssk = slip, slip, knit (decrease) kfb = knit front and back of same st (increase) k1 p1 into same st = knit and purl into same st (increase) MC = main colour CC = contrasting colour DPNs = double pointed needles ( )= repeat the directions in the parentheses repeat ( ) around = keep repeating the directions in parentheses until you've reached the end of the round
Gauge
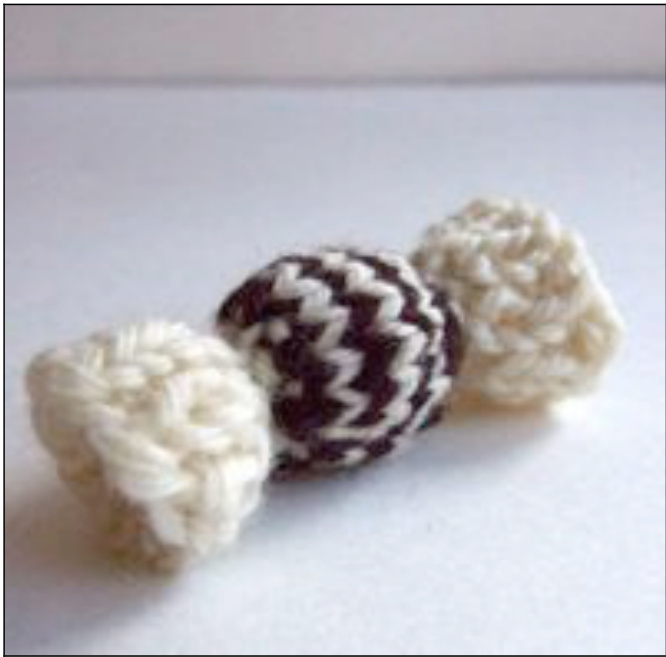
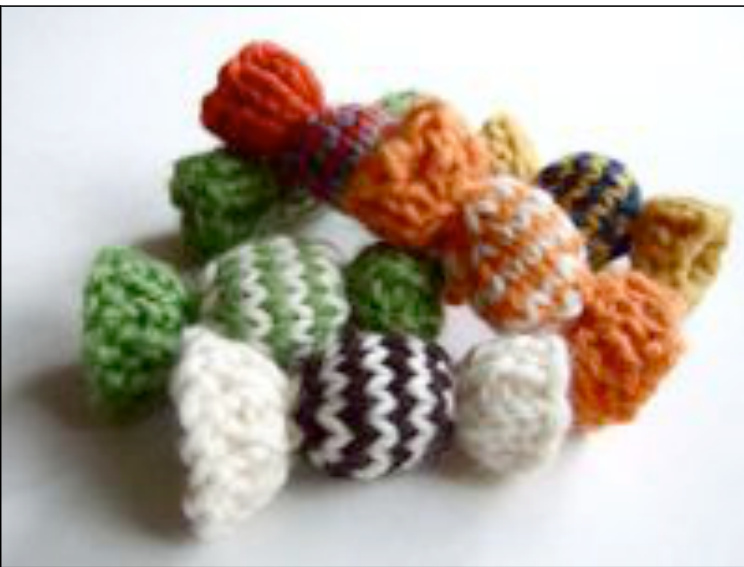
There's no required gauge for this project, but you should use whatever needles work comfortably with your yarn and creates a dense enough fabric that the stuffing will not show through. The finished sweets are approximately 2 1%" (6 cm) long and %" (2 cm) in diameter.
Instructions
Round 1. With MC, cast on 16 sts using the long tail cast on method (you need a tail of about 18"). Redistribute sts onto 3 (or 4) DPNs. TIP: If you have difficulty with the round twisting as you join it, you can knit rounds 2 and 3 back and forth on two of the DPNs (using them as straight needles) and then redistribute the stitches and start working in the round. Round 2. (K1, p1.) Repeat ( ) around. Round 3. (K1, p1.) Repeat ( ) around. Round 4. (K1, p1.) Repeat ( ) around. Round 5. (Ssk.) Repeat ( ) around. There are now 8 sts in the round. Round 6. (Ssk.) Repeat ( ) around. There are now 4 sts in the round. Round 7. (Kfb.) Repeat ( ) around. There are now 8 sts in the round. Round 8. With CC, (kfb.) Repeat( ) around. There are now 16 sts in the round.
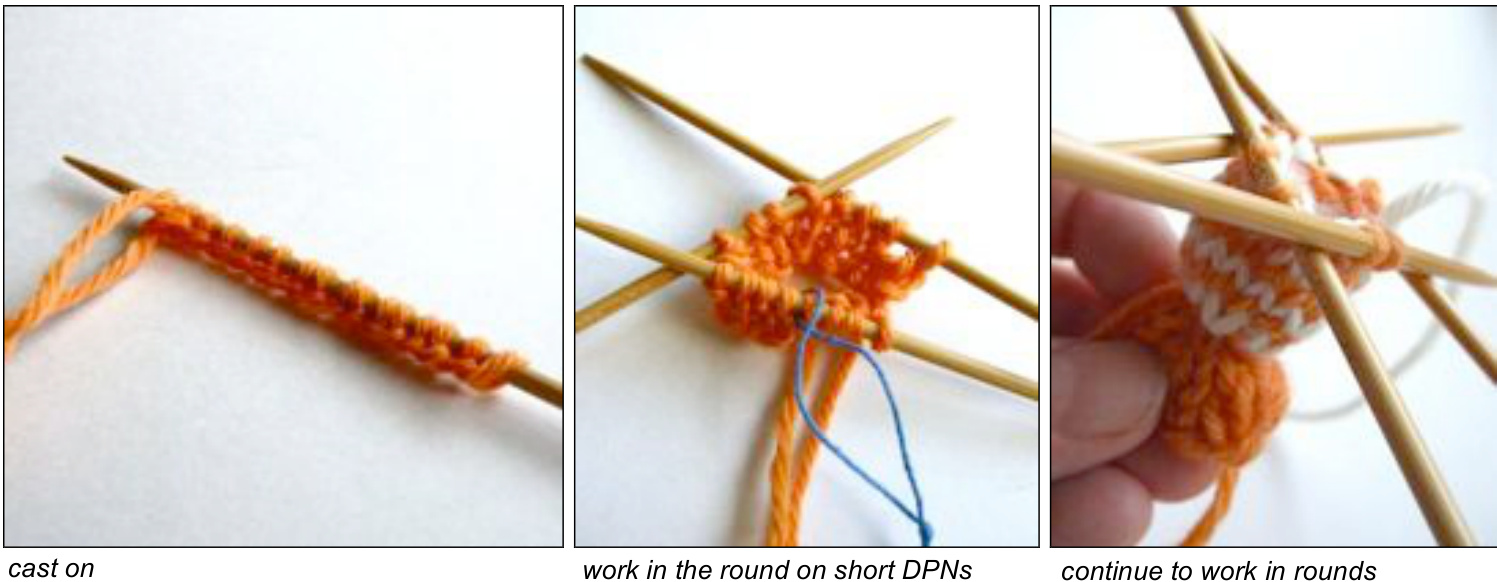
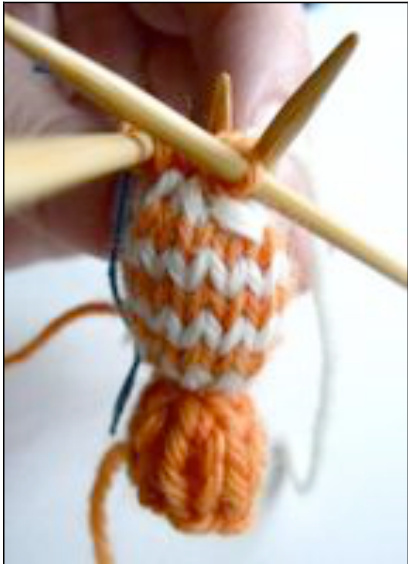
Note about colour changes: Be sure to keep the colour not currently in use hanging behind the work in progress. Round 9. With MC, k16. Round 10. With CC, k16. Round 11. With MC, k16. Round 12. With CC, k16. Round 13. With MC, k16. Round 14. With CC, k16. Cut CC, leaving a tail of about 8" to weave in later. Let this tail hang behind the work. Round 15. With MC, (ssk.) Repeat ( ) around. There are now 8 sts in the round. Stuff the sweet now. If necessary,use something to poke the stuffing in - the blunt end of a chopstick or crochet hook or pen can work fine. Round 16. (Ssk.) Repeat () around. There are now 4 sts in the round. Round 17. (Kfb.) Repeat () around. There are now 8 sts in the round. Round 18. (K1 p1 into same st.) Repeat ( ) around. There are now 16 sts in the round.
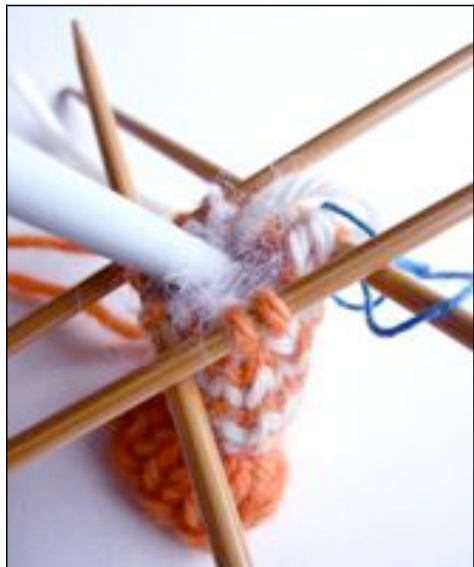
poke stuffing in
decrease Round 19. (K1, p1.) Repeat ( ) around. Round 20. (K1, p1.) Repeat( ) around. Round 21. (K1, p1.) Repeat ( ) around. Round 22. Cut yarn leaving a tail of about 18". Use the yarn needle to do a sewn bind off. If you are not familiar with the sewn bind off technique, you can find a tutorial on my web site. (The address is at the top of this pattern. Go to the web site and click on TUToRIALS.) Use the yarn needle to weave the loose yarn ends into the sweet and out again, and trim neatly. If you did the first couple of rows on straight needles, use the beginning yarn end to sew those row ends together. Tie off securely, weave in yarn end, and trim.
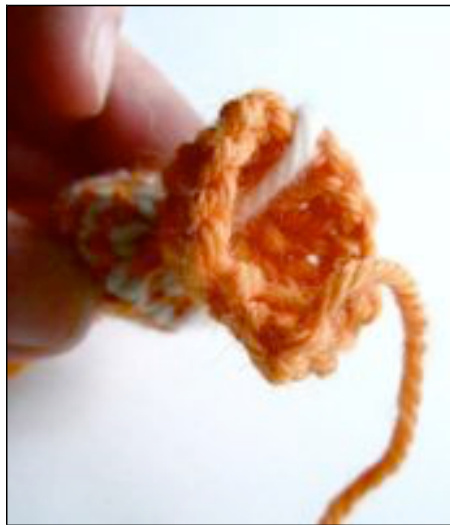
loose yarn ends
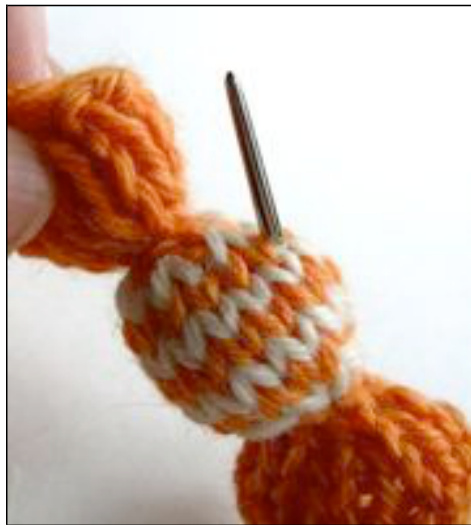
sew in yarn ends If you have questions about this pattern or the techniques used in it, please visit my web site or send me an email message. (Addresses appear at the top of this pattern.) Pattern and images Tricia M. Ward. I hope you enjoy making these items for yourself or as gifts, but ask you to please refrain from selling them, and from copying or distributing this pattern.


