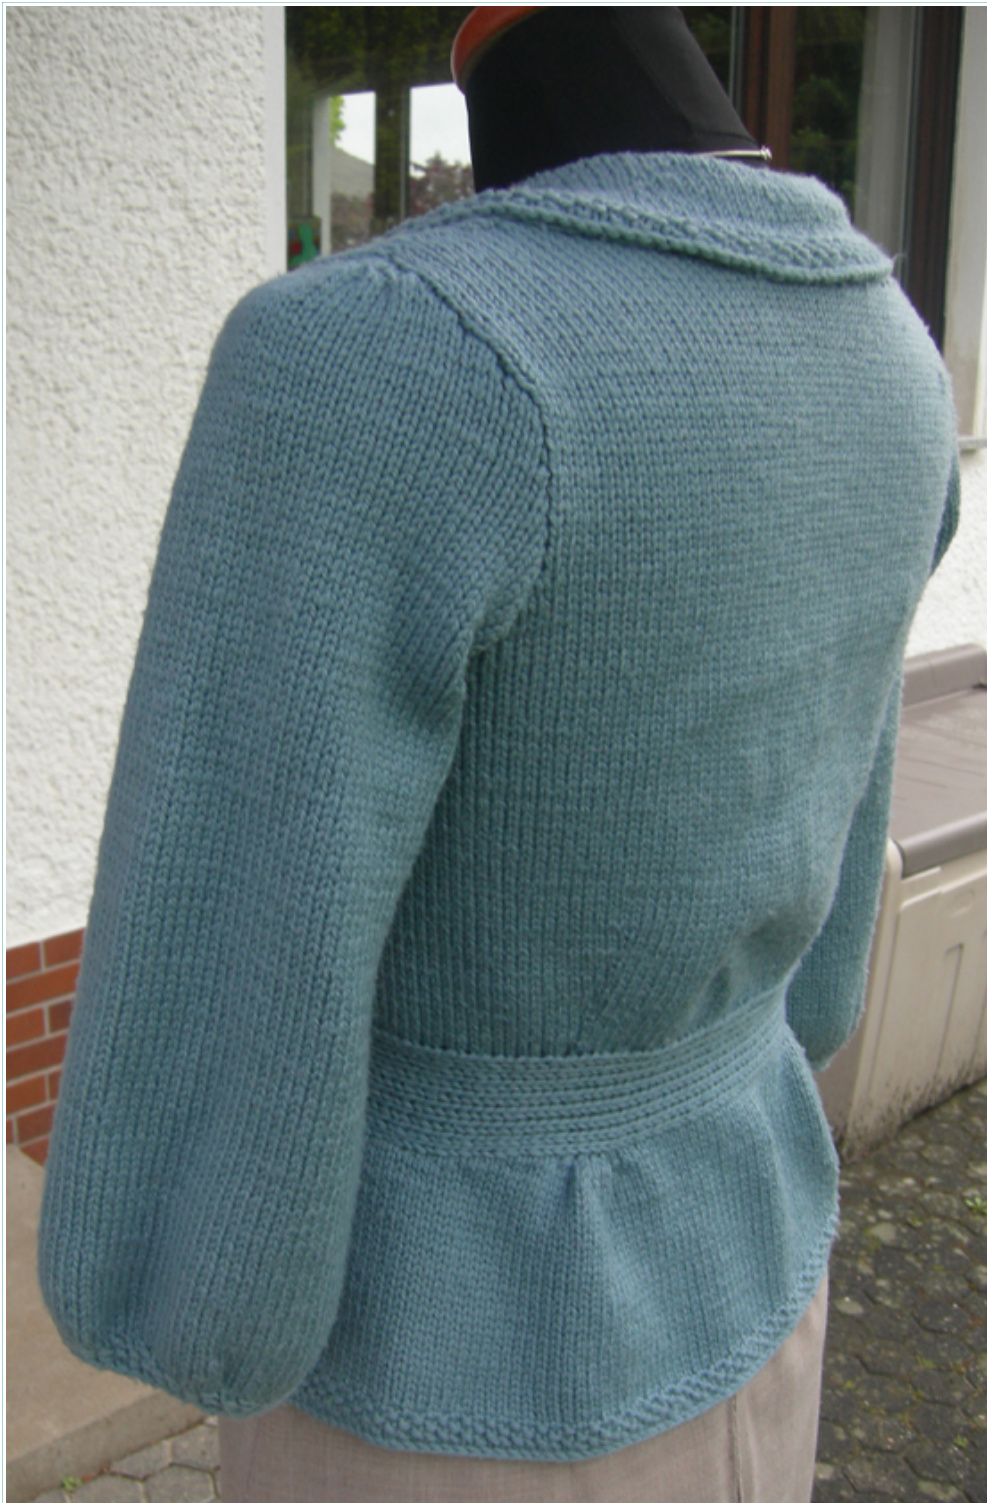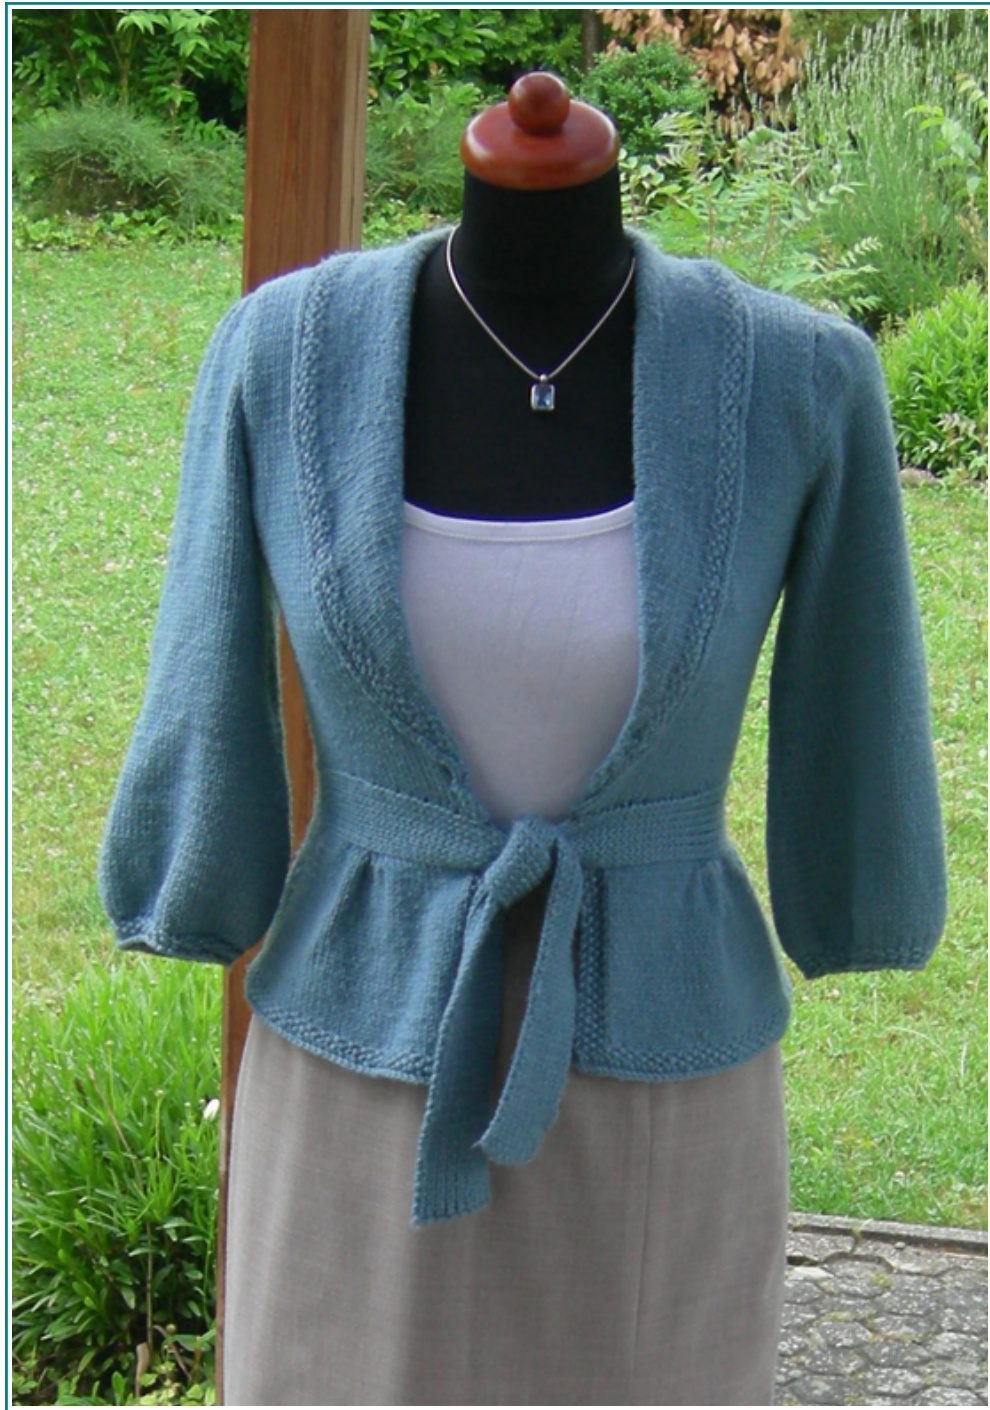
A Rokoko inspired Cardigan with a tie-belt showing your waist, a peplum, a soft shawl collar and ellbow-long pufffed sleeves that gives you everything you want: an hourglass figure and a romantic feel with a tailored look.
Measurements
Bust 34", waist 28",hips 38" Hints for making the cardigan in another size are given in red.
Gauge
22 stitches = 4 inches
Pattern
Stockinette: knit (k) on right side (RS), purl (p) on wrong side (WS). Border: k1, p1 on RS. K1, p1 on WS (Knitted stitches will be purled and vice versa). K in pattern for four rows than k 2 rows in Stockinette. Cast off in stockinette as even as possible and not too tight. Please note that this is - for any other size than the one stated above-rather a recipethanaregularpattern. Also read through every step before starting. And themostimportantthing ofall: Enjoy.
Belt
Cast on 17 stitches. Knit in p1 k1 (RS) and k1 p1 (WS) for the length of your waist measurement +24". Cast off.
Upper front
Mark the middle of the belt and the points where the belt will meet when tied up. Pull the belt as tight as you intend to wear it. Mark the sides. Don't tie it too loose, it is better to stretch the belt a bit. Keep in mind that the tension might soften a bit after washing and wearing. First row: Pick up 35 stitches from knot to side for right front, pick up 74 stitches from side to side for back and another 35 stitches for left front. For every inch your waist measurement is more than 28" add 5 stitches to the overall number of stitches. Divide the number of stitches you need to add by 4 and add the result to both front pieces and theback. This would be for waist 30" 2 stitches for each front and 6 for the back. 32″ 5 at front, 10 at back. 40": 15 at front, 30 at back. 42": 16 at front, 38 at back. Second row and all even rows: Purl. Third row: K20, m1, k30, m1, k44, m1, k30, m1, k20. 5th row: k. 7th row: k20, m1, k32,m1, k44, m1, k32,m1, k20. gth row: k. 11th row: k20, m1, k34, m1, k44, m1, k34, m1, k20. 13th row: k2tog, k18, m1, k36, m1, k44, m1, k36, m1, k18, k2tog. Decrease every 12th row at neck edge 5 times. 15th row: k19, m1, k38, m1, k44, m1, k38, m1, k19. 1gth row: k19, m1, k40, m1, k44, m1, k44, m1, k19. The added stitches form a dart for the bust and the shoulder blades. Those darts should sit right under your bust point. If you needed more stitches around your waist, you will need to move the dart a little bit more to the side. Now is time for some maths: take your stitches for one front, divide them by seven. From the middle knit 4/7, m1, knit the 3/7. Or simply hold the belt with the cast on stitches, mark where your bust point sits and make the dart right there. For the back chose the same placement. If you were well endowed, you might want to add more stitches to give your bust room. You could form the dart in every knit row or you could add 2 stitches, e.g.: k20 m1, k1, m1, k44. When front and belt together are 9" long (or the length you need and want from your waist to your armpits) work is divided for armholes: K to the last 3 stitches before side mark, cast off 6 stitches, k to the last 3 stitches before the next side mark, cast off 6 stitches, k to end. P to last stitch, slip last stitch, turn, cast off 2 stitches, k to end. Repeat this row once more. Decrease at armhole edge 1 stitch every other row 3 times. Don't forget the decreases for front edge while forming the armhole! After all decreases for front edge and armhole there should be 25 stitches on the needle. K straight up until you reach your shoulder, taking care not to make the armhole to wide by knitting this part too long. Now form the shoulder slope: cast off 5 stitches for 5 times every second row. Join yarn at armhole edge for back, decrease on both sides as for the front. K up to your shoulders, Now form the shoulder slope: cast off 5 stitches on both sides for 5 times. Put remaining 24 stitches on holder for collar. Finish right front in same manner as left front. Sew shoulder seams.
Collar
Pick up stitches at neck edge: begin the same height as right underarm, pick up the same amount of stitches you need to not stretch or pull the neck edge, p the stitches on holder, end at left underarm height. The collar will be turned to outside so don't forget to purl on right sides and knit on wrong sides! Knit back and pick up 3 more stitches at end of row. Turn, slip first stitch, purl back and pick up 3 more stitches at end of row. Turn, sl 1, k back and pick up 3 stitches at end of row. Continue this way until only six more stitches should be picked up on each side. While picking up stitches at end of each row you will also start to form the collar: On the 4th row: increase every 1oth stitch in the upper part of collar (from underarm to underarm) to make collar lay flat. Repeat this row every 4th row every 1oth stitch . As the increase stitches won't form a dart it is necessary for a nice looking result that you increasenot to loose! Begin the border pattern and pick up the last 6 stitches at once. After casting off the collar will be stitched on to the jacket to stay in place. The edge where you picked up the stitches should hide under the collar and should be half an inch away from neck edge after sewing the collar edges on. Only the back neck is different: here the pick up seam should lay deeper to form a high scarf like collar.
Peplum
The gathers should sit right under the darts. First row: Turn work upside down and start picking up 16 sts on the left front at waistband. Second row: Turn, slip first stitch, p1, m1 for 6 times, p to the last four stitches, k1, p1, kl, p1. Third and 4th row: P1, k1, p1, knit to the first made stitch the row below. M1, k2 for 6 times, k to end, pick up 3 stitches, turn, slip first stitch, p to last four stitches, k1, p1, kl, p1. Continue the moss stitch at the beginning and ending of every row and continue picking up 3 stitches until you reached the side mark. Put stitches on holder and work the right front peplum the same. For back peplum start picking up 44 stitches between back darts. Turn, slip first stitch, p1 m1 for 6 times, purl to last 6 stitches, p 1, m1 for six times, pick up 3 stitches. Turn, slip first stitch, k to first made stitch, m1, k2 for six times, k to first made stitch at end of row, m1, k2 for six times, pick up 3 stitches. Continue picking up 3 stitches at each end until you reach the side mark. Every peplum piece should have the same amount of rows now. Put all stitches on one needle and start at left front peplum, continuing the moss stitch pattern at front opening. Knit until the peplum measures 4", then start knitting the moss stitch border.
Sleeves
CO 40 sts, k 3 rows in stockinette. K 4 rows in moss stitch. Purl 8th row back. gth row: \*k1, m1\* to the end, end k1. 79 stitches on needle. M1 more stitch somewhere in next row. 80 stitches on needle. Continue in stockinette. 24th row after moss stitch band: decrease 1 stitch each end of row. Repeat decreasing every 10th row 6 times more. 66 stitches on needle. When sleeve reaches from under elbow up to your underarm cast off 3 sts at begin of next two rows. Cast off 2 sts at begin of next two rows. Decrease 1 stitch at each end every other row for 10 times. 36 stitches on needle. Cast off 3 stitches at begin of next 6 rows. 18 stitches on needle. On next knit row: sl1, k2tog, psso for 6 times. Purl back. Cast off. Sew all seams, wash and block, taking care to make collar lay even and flat. Pin carefully in place. After drying, sew collar through moss stitch band invisibly in place. When changing the sleeves to another size you need to know your cap height you can decrease accordingly to get the 18 stitches before cast off: Measure on the outside of your arm from where your armpit is up to your shoulder. Compare this number to the number of rows you need to get this height. Decrease accordingly.