PAPERBACK MITTENS
BY ANNA FISK KNIT YOUR FAVOURITE BOOKS TO WEAR ON YOUR HANDS!
Materials
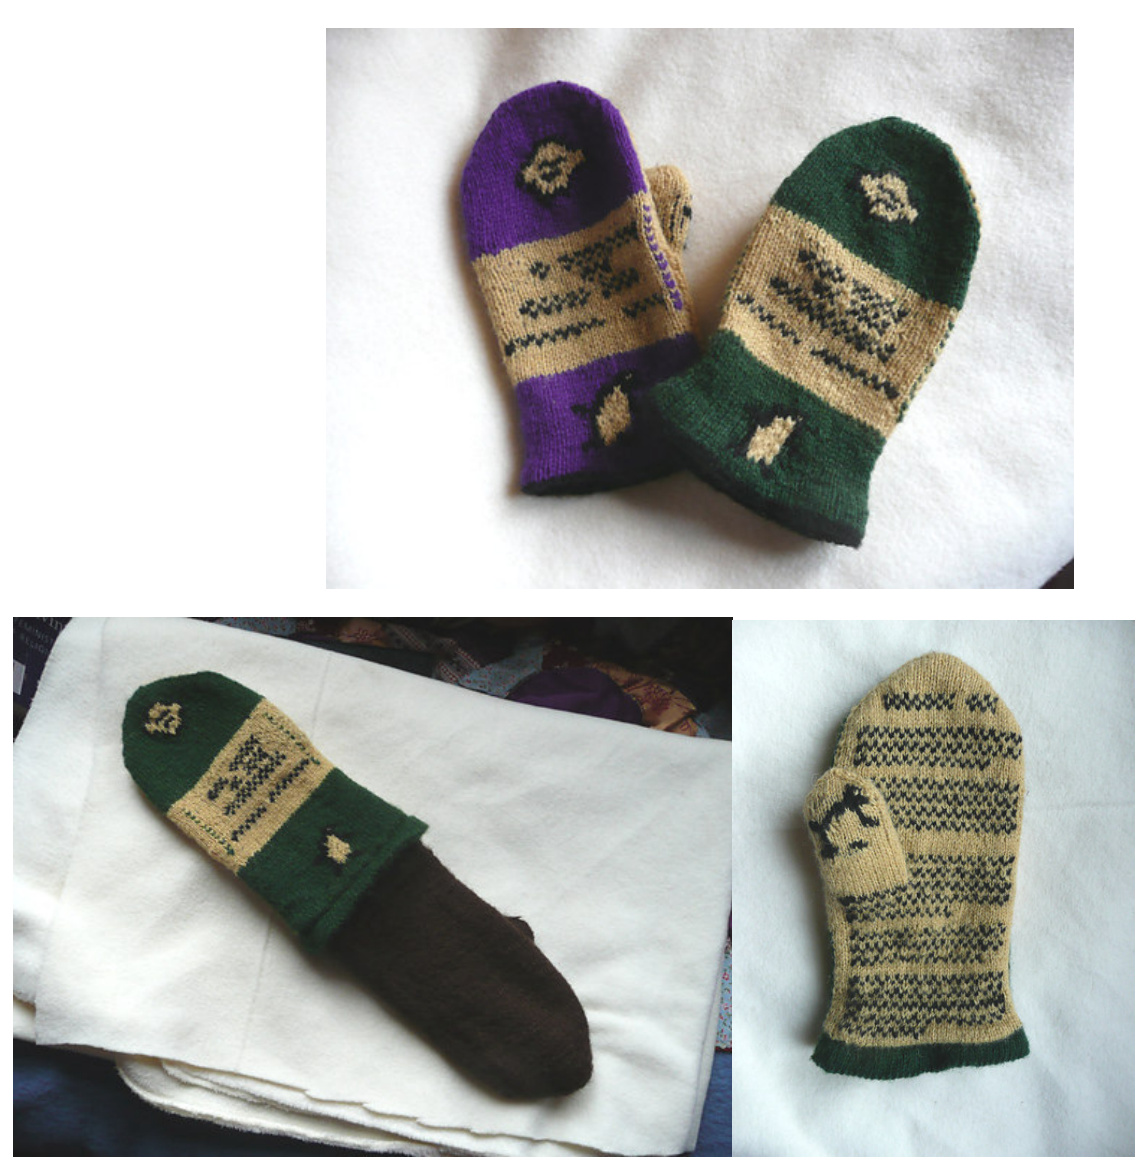
4-ply yarn in the appropriate colours. I used Jamiesons of Shetland Spindrift, in oatmeal, black, green and purple. These mittens are lined with a softer yarn - in this case a 4-ply alpaca/acrylic blend. You could easily alter the charts to make your own particular favourites, by changing the colours - maybe blue or orange! - and the positioning of the "titles". You might even like your pair to be matching! Use whatever needle size you usually use for selbu-style mittens, in my (loose) case, 2.25mm, with 2mm for the lining and the thumb.
Directions
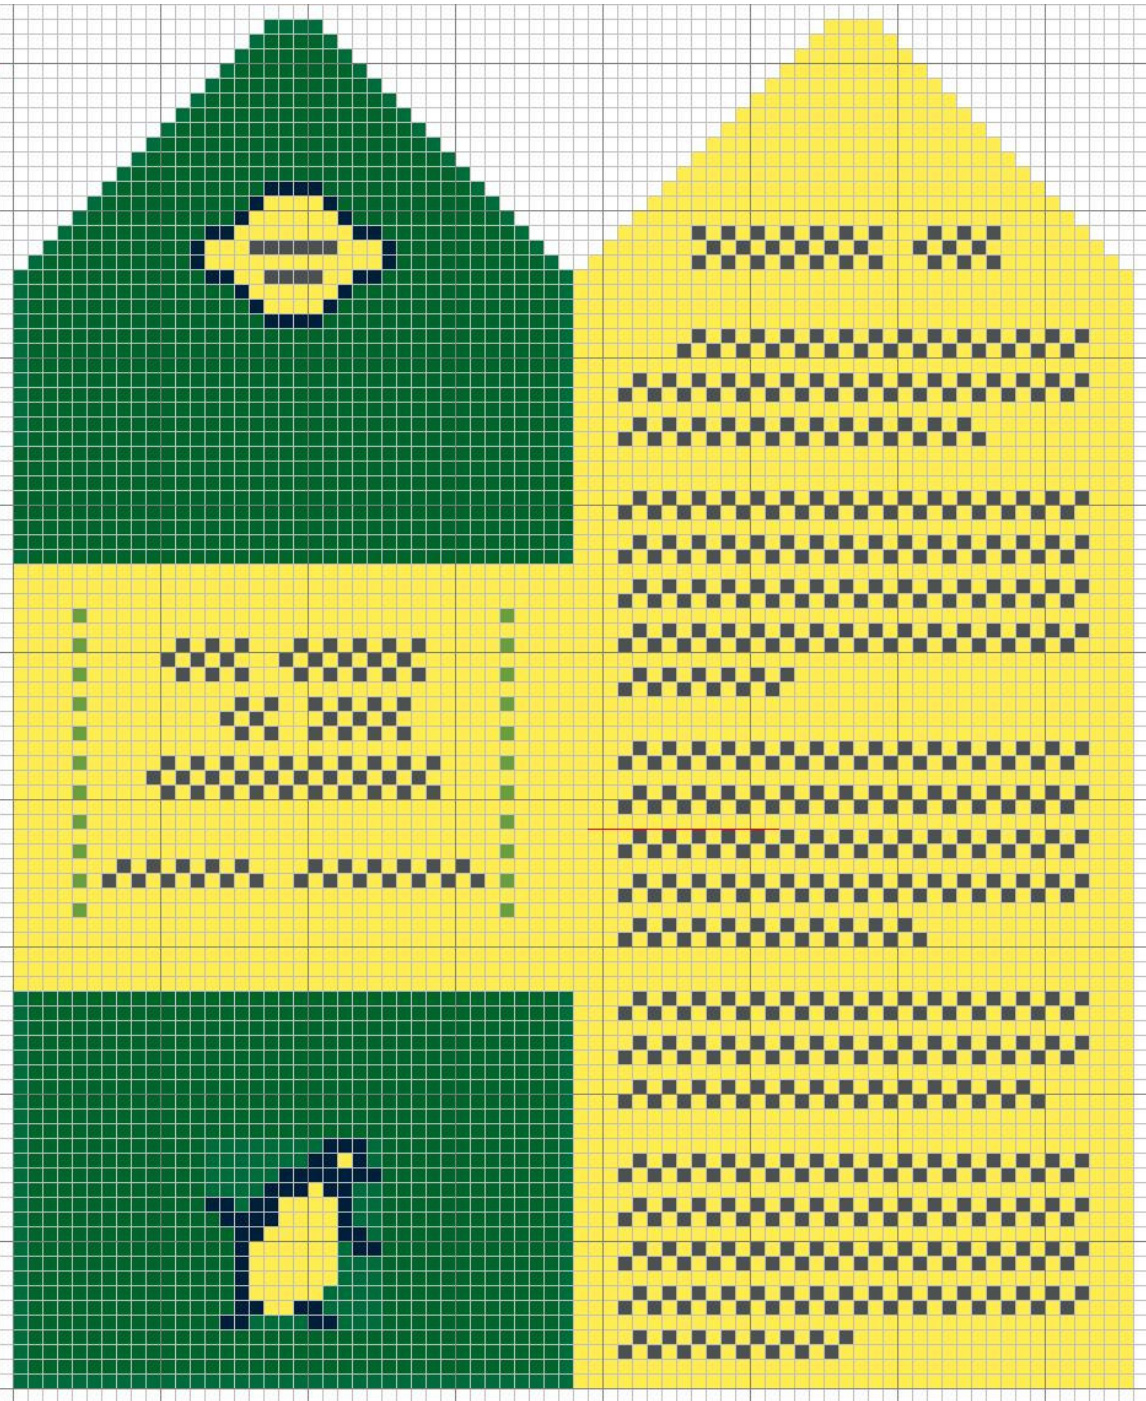
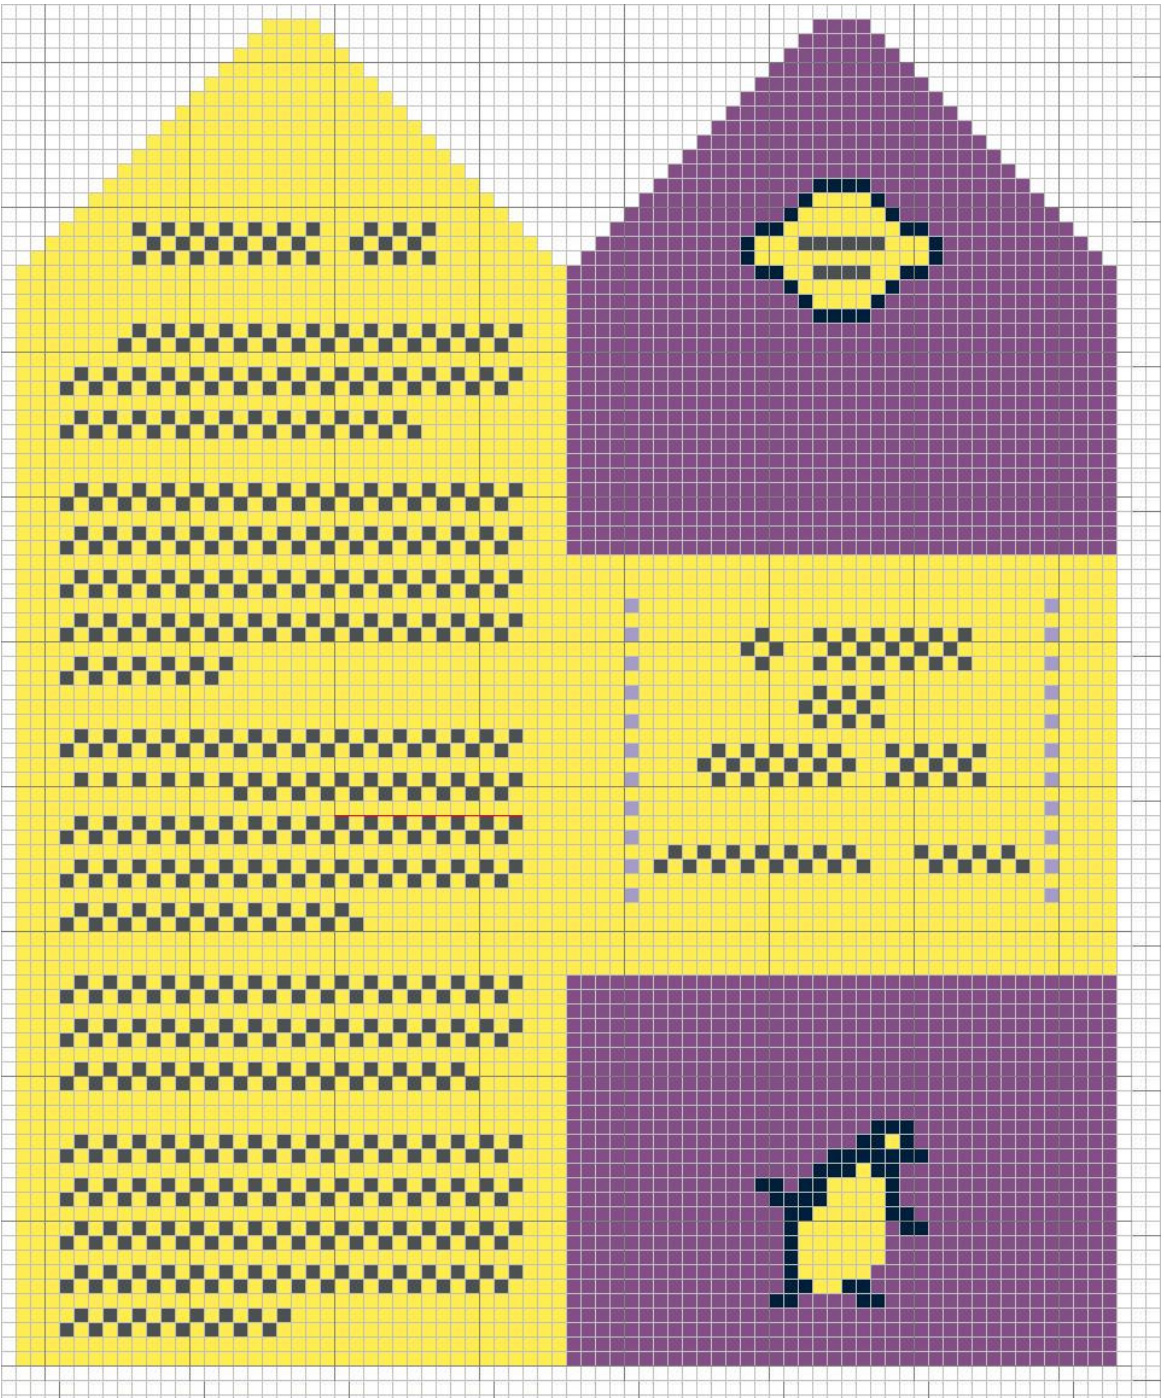
The directions given here are for a mitten that is quite roomy for the average-sized woman's hand. If you want it to fit more snugly, or want to omit the lining, then work a few less sts. on either side of front and back of mitten, or a few more to fit a man's hand. Because the mittens are worked using the intarsia technique, they are worked flat in one piece, with one edge requiring seaming. I cast on 2 extra sts. than the 76 featured in the charts, to slip at the beginning and purl on the end of every row, to form a neater edge for seaming. Cast on 78 sts. in jacket colour. Work 8 rows in st.st., then a purl row on the Rs for the fold-line for the edging. St. st. a further 8 rows. Then fold over and pick up the caston st. and pur it together with the next st. on needle. Rep. until the end of the row K the next 2 rows, then start working from the relevant chart (see pp.3-4). The thumb is worked by knitting the desired number of sts. (in my case 13), at the desired point according to your hand size (as shown on the charts in a fine red line) , in scrap yarn, then slipping them back on to the right-hand needle and working them in pattern. Once the charts are completed, graff the top sts. together, and sew up the side. For the lining, pick up and knit 72 sts. along the inside cast-on sts, so that the RS of both the main section and the lining are facing you. Continue in st.st. Place the thumb sts. as for outer mitten, with 9 sts. on scrap yarn, so the thumb lining will slot inside the main thumb (for me this was after 48 rounds). Work a further 40 rounds, or to length that willfit nicely inside outer mitten. For the top, dec. each round as set in the charts for the outer mitten (i.e. I st each edge on every row), until 8 sts. remain. Graft together the front and back sts. Now for the thumb. On the outer piece, carefuly pull out the scrap yarn and pick up the 13 live sts. leff above and the 13 live sts. leff below. Commence in the round, picking up 2 sts at beginning of round, and then k13, pick and knit 2, k13 - 30 sts. Work 12 rounds before staring on the thumb chart, positioning motif on the front 15 Of your sts.
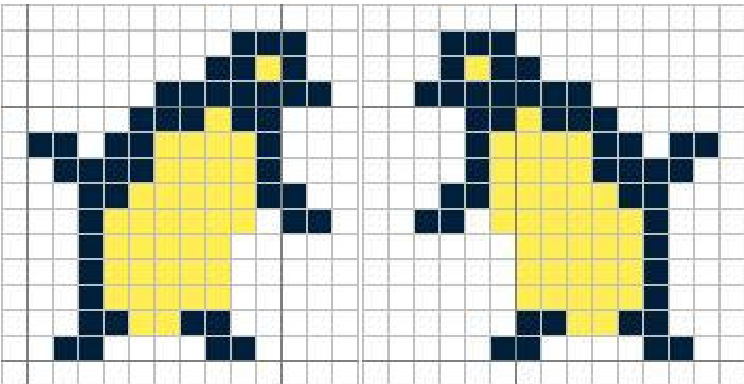
Then dec. as for mitten top - (sll kl psso, kl1, k2tog) twice; on following row (sll k1 psso, k9, k2tog) twice, etc., until 6 sts. remaining. Graft together the front and back sts. For the thumb lining, pick up 18 sts from scrap yarn, as for outer thumb. Pick and knit 1, K9, (pick and knit 1) twice, k9, pick and knit 1 - 22 sts. Work approx. 20 rounds, then dec. as for outer thumb, until 4 sts. remain. Graft these together. And you're done!