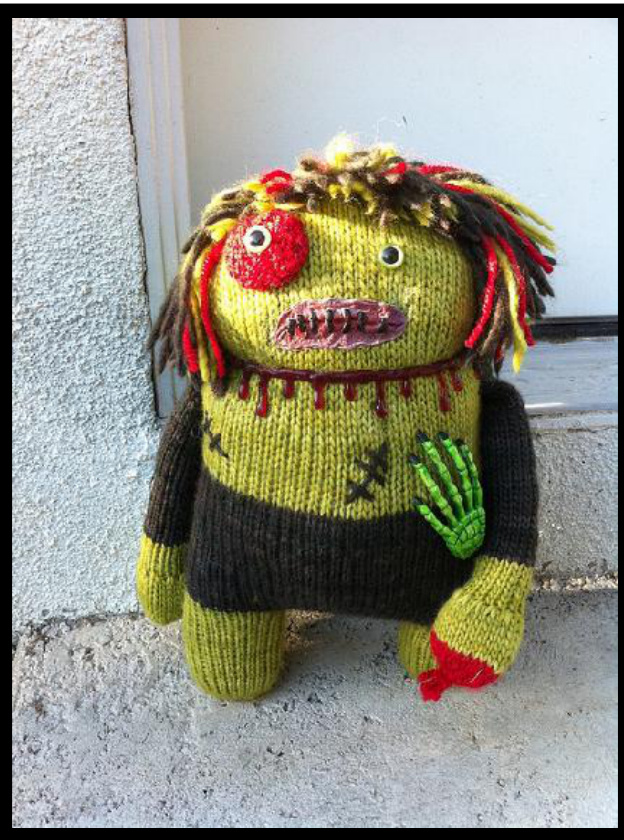
Zombie Monster
@ Designed by Kimberly Kwon Not for resale or distribution. This Zombie monster is inspired by the many monsters already created by Rebecca Danger, author of the Book of Knitted Monsters. Thank you Rebecca for starting the monster mojo within me that helped me create this pattern! And, a thank you to Monika at Jimmy Beans Wool for helping me find the perfect Zombie yarn for this project. Your finished Zombie will be medium sized, approximately 11 inches tall, depending on how you stuff it.
"Must Have" Zombie Materials:
ZUu - Zzu yaius ui iviu wuisicu weiyiil yalll, a zombie colored green. This pattern used Malabrigo Merino worsted yarn in the Lettuce colorway. 200 - 220 yards of CC worsted weight yarn, in a darker color e.g., black, grey, or brown This pattern used Malabrigo Merino worsted yarn in the Black Forest colorway. 50 yards of worsted weight yarn, in blood red for the eye patch, bloody hand, and strands of bloody hair. This pattern used Plymouth Encore worsted in red. Set of US Size and 6 double pointed needles A 32-inch circular needle, US Size 6 12 mm safety eyes in black or color of your choice (green works great) These safety eyes were purchased from the 6060 Etsy store: http://www.etsy.com/shop/6060?ref=seller_info polyfil fiber stuffing Felt in black, white and red (1 sheet each) if optional zombie extras are not used. Fabric glue ·Row counter ·Push pins ·Scissors ·Large tapestry sewing needle Crochet Hook, size G or H
Zombie Extras:
A fake blood choker necklace. The item in this pattern was purchased at the Von Erikson Laboratory Etsy store: http://www.etsy.com/shop/VonErickson Zombie Skeleton Hand: This item is part of a set of hair clips purchased at the Sisters of the Moon Etsy store: http://www.etsy.com/shop/SistersOfTheMoon?ref=seller_info Fake Zombie Bloody Scars: This item is made of latex rubber, and can be found at novelty and party stores, especially during the Halloween season.
Let's Get Started!
All the monster body parts are made with a Us Size 6 needle, except for the eye patch, which is made with a US Size 5 needle.
Knitting Abbreviations:
Zombie Legs (make 2):
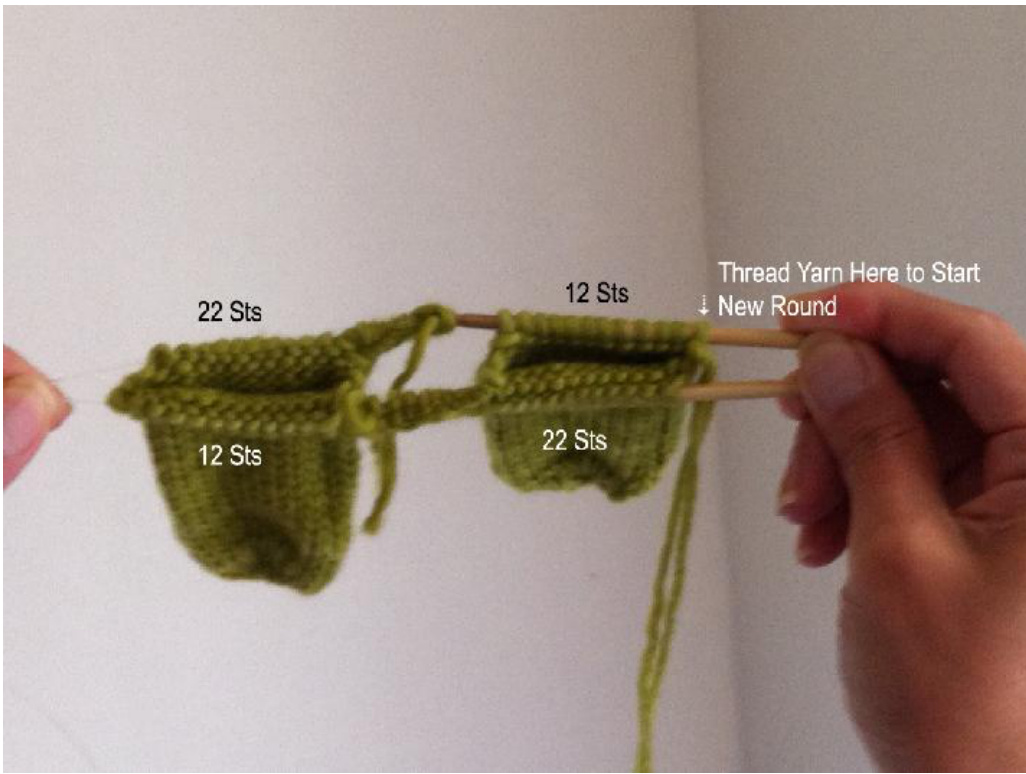
KFB: knit into the front and back of the same stitch K2tog: knit two stitches together With your MC, using US Size 6 dpns, evenly cast on 6 stitches onto 2 dpns and join, making sure not to twist the stitches. With third dpn, work the following rounds: I use the cast on tail to remind me where each round ends. You can also use a stitch marker to mark the beginning/end of your round. R1: KFB all sts (12 sts) R2: KFB all sts (24 sts) R3-R21: Knit all sts Using either the backwards loop or cable cast on method, Cast on 10 sts and cut your yarn. You will now have 12 stitches on one needle and 22 stitches on the other. Repeat this for the second leg.
Body Set Up:
Transfer these stitches onto your circular needle so that the newly cast on stitches are opposite each other, and are now the inside stitches of each leg. The round will now begin with the MC yarn at the middle of the second leg. See photo A. (68 total stitches)
Zombie Body:
Using the Magic Loop method, place your MC yarn at the middle of the second leg and rejoin to start a new round.
Zombie Body continued ...
R1- R3: Knit all sts in MC Switch to CC. This will be skirt or pants for your zombie. R4-R26: Knit all sts in CC Switch back to MC for remainder of the body. R27-R54: Knit all sts in MC R55: (k2tog, K32) twice(66 sts) R56: Knit all sts R57: (k31, k2tog) twice (64 sts) R58: Knit all sts R59: (k2tog, k30) twice (62 sts) R60: Knit all sts R61: (k29, k2tog) twice (60 sts) R62: (k2tog, k26, k2tog) twice (56 sts) R63: (k2tog, k24, k2tog) twice (52 sts) R64: (k2tog, k22, k2tog) twice (48 sts) R65: (k2tog, k20, k2tog) twice (44 sts) R66: (k2tog, k18, k2tog) twice (40 sts) Turn your Zombie monster inside out and three-needle bind off all stitches. Turn your Zombie monster right side out. Now it is time to stuff your monster with the polyfil stuffing. I like to over stuff the monster so that it feels like a medium firm mattress. Important: DO NOT CLOSE YOUR MONSTER BODY YET WITH A SEAM. Leave the body stuffed and not closed for the next steps.
Create Your Zombie Hair:
Creating the Scalp (back of head):
· With your CC, Cast on 22 sts on your US Size 6 needles. Knit 28 rows and bind off. Stretch and place the knitted rectangle at the top of your Zombie monster head at the seam where you did the three-needle bind off. You can pin the top and sides of the rectangle to keep it secure. Stretch the rectangle towards the bottom of the head as comfortably as you can and pin it secure. It does not need to cover the entire back of the head; just 2/3 of the back of the head is enough. · Fold the bottom corners of the rectangle towards the center and pin it. · Sew around the entire scalp securely around the head with your CC yarn. Remove the pins. Pin to the top seam at the back of the head. This will now serve as the scalp for your monster. You won't need to add as many hair strands because the back of the head will be the same color as your hair strands and blend it in. Stretch out across the back of the head to cover 2/3 of the scalp. Fold bottom corners if needed and pin. Sew the entire scalp to the head.
Adding hair strands:
Using the CC yarn, wrap the yarn several times around a small square or rectangular shaped item (CD case, cardboard). Cut one side of the wrapped yarn. You will now have several even strands of hair. You are now going to “latch hook" each strand of yarn onto the scalp by creating individually secure slip knots, but using your crochet hook:
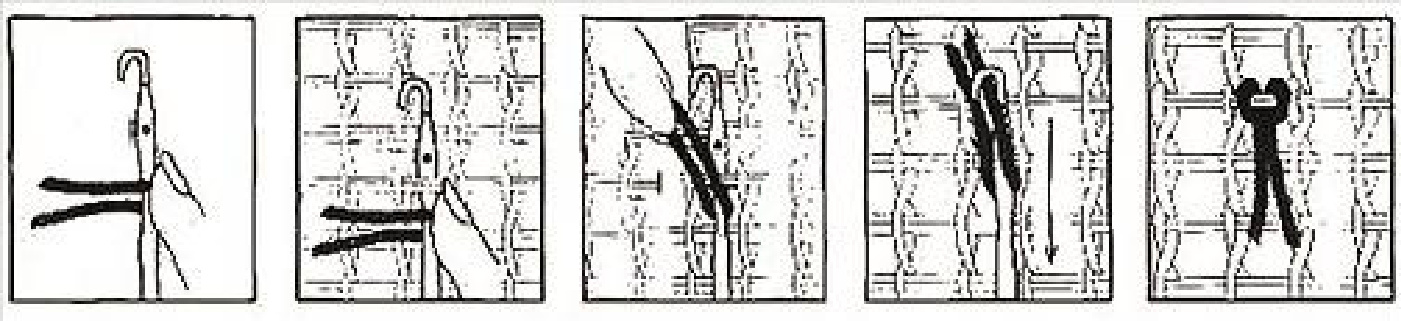
Place your crochet hook in the center of a single strand of yarn, creating a loop. ?Slip the loop through one of the stitches near the top of the scalp. Take the two loose ends of your yarn strand and pull it through the loop on your crochet hook. Tighten it to secure it on the scalp. Repeat throughout the top and middle of the scalp, pushing some of the strands forward for the “bangs" of the hair and others for the back of the head, trimming as needed. Repeat the same steps to create strands of hair with the MC yarn and red colored yarn. Distribute across the head as desired. Trim wherever you feel it is needed.
Zombie Eyes and Bloody Eye Ball:
Now it is time to knit the Zombie's bloody eyeball and place the safety eyes on your Zombie. You want to do this after finishing the hair to avoid placing the eyes in the wrong place. I used 12 mm safety eyes. Switch to US Size 5 dpns. Cast on 6 sts and join in the round, being careful not to twist the stitches. R1: KFB all sts (12 sts) R2: K1, KFB all sts. (18 sts) R3: K2, KFB all sts. (24 sts) R4: Knit all stitches. (24 sts) Bind off all the stiches. Turn over the eye ball so that the bumpy, wrong side of the eye is now the front of the eyeball. Place one of your safety eyes in the center of the eyeball and secure it. Carefully sew it onto your Zombie face, lightly stuffing the eye with polyfil to make it buldge out slightly. Place the second safety eye on your Zombie face and secure it. NOW it is OK to SEAM and SEW the BODY CLOSED: Restuff your Zombie body. Take MC yarn and using your large sewing needle, seam the bottom of the Zombie body closed.
Zombie Mouth:
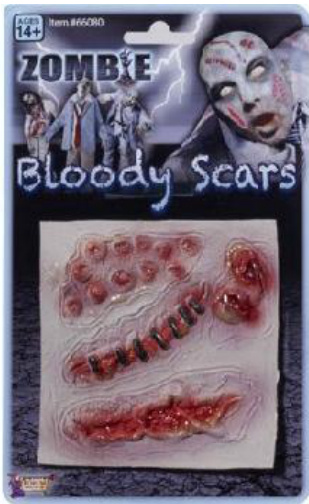
Adding Fake Scars:
Using the fake zombie bloody scars purchased at the novelty store, cut out a mouth. Unpeel the backing. Add fabric glue to the sticky side of the scar. Place firmly on your Zombie face and let dry.
Sewing On Fake Stitches:
If you don't want to use the fake zombie scar, you can use your tapestry needle and CC yarn to embroider a fake mouth of stitches. Make a horizontal line across the mouth area, then add three to five vertical lines across the mouth like the diagram below:
Felted Mouth:
A third option is to use your felt (black or white color) and cut out a mouth for your zombie. You

Add fabric glue to the back of the felt mouth and press firmly on theface. Take some heavy books and add it on top of the mouth for 10 minutes to flatten and secure it onto the face. Then take your blow dryer and dry the mouth completely for several minutes.
Zombie Neck:
Von Erikson Bloody Choker Necklace:
The fake blood choker is adjustable, and can easily be placed on your Zombie monster, cutting off any excess length. The back of the choker should hide behind the Zombie monster's hair. If you want the choker on your Zombie permanent, add fabric glue to the back of the neck and let dry. Then sew several stitches on the back of the choker using the CC yarn after glueing.
Sewing On Fake Stitches:
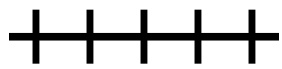
A second option for your neck is to take your red (or dark colored CC) yarn and tapestryneedle to embroider a circle of stitches around the neck of your Zombie. The stitches should look like a long circle around the neck, with short vertical lines and “x" going around the neck like the diagrambelow:
+IXIXIXT
Using Felt to Create a Choker:
A third option for the neck is to cut a choker for your monster using the red or black felt. You can make it blood like, or like a regular necklace, adding a bead or other decorative item in the center.
Zombie Arms:
Arm #1: The regular arm. Using your US Size 6 dpns and CC, evenly cast on 14 stitches, making sure not to twist the stitches. R1- R30: Knit all sts Switch to MC R31 - R38: Knit all sts with MC R39: KFB all sts (28 sts) R40 - R48: Knit all sts in MC R49: k2tog all sts (14 sts) R50: k2tog all sts (7 sts) Cut yarn and using tapestry needle, pull yarn through remaining 7 stitches and close up the hand. Sew securely onto the side of your Zombie monster's body. Arm #2: The bloody arm. Using your US Size 6 dpns and CC, evenly cast on 14 stitches, making sure not to twist the stitches. R1- R30: Knit all sts Switch to MC R31 - R38: Knit all sts with MC R39: KFB all sts (28 sts) R40 - R46: Knit all sts in MC Switch to Red yarn. R47 - R48: Knit all sts in Red yarn R49: k2tog all sts in Red yarn (14 sts) R50: k2tog all sts in Red yarn (7 sts)
Cut yarn and using tapestry needle, pull yarn through remaining 7 stitches and close up the hand. With tail, sew through the center of hand and cut it so that a strand of red yarn sticks out of the hand. Take two or three other strands of red yarn and place and knot it through the center of the hand. Cut to desired length. Sew securely onto the side of your Zombie monster's body.
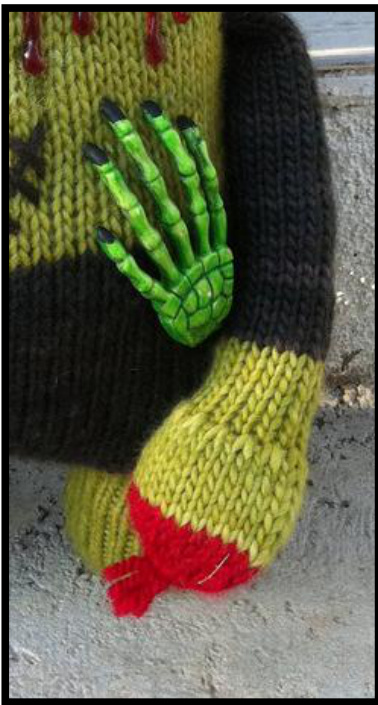
Finishing Touches:
This is where you can use your CC or Red yarn to add stitches to the body. Make a diagonal line with your yarn and then add two or three horizontal lines down the diagonal. I used the embroidery stitch called the stem stitch. You can add any additional novelty items to the body, like the zombie hand, for added dimension and gore. Be as creative as you can be with your finishing touches. Items can be found at novelty, party supply stores and Halloween themed stores.
About the Designer:

Kimberly has been knitting for several years, and finds monster making as one of her favorite things to knit and purl. She lives with a long list of chronic health conditions, and knits monsters to help her fight her daily battles with pain and fatigue. Kimberly lives “one stitch at a time" and chronicles her life on her blog at http://kkhymn.wordpress.com. You can read stories about her random acts of monsters where she gives her knitted monsters to other chronically ill patients she meets while at her many doctor appointments to help them with their own battles. She can be contacted via Ravelry as kkhymn.


