Beth
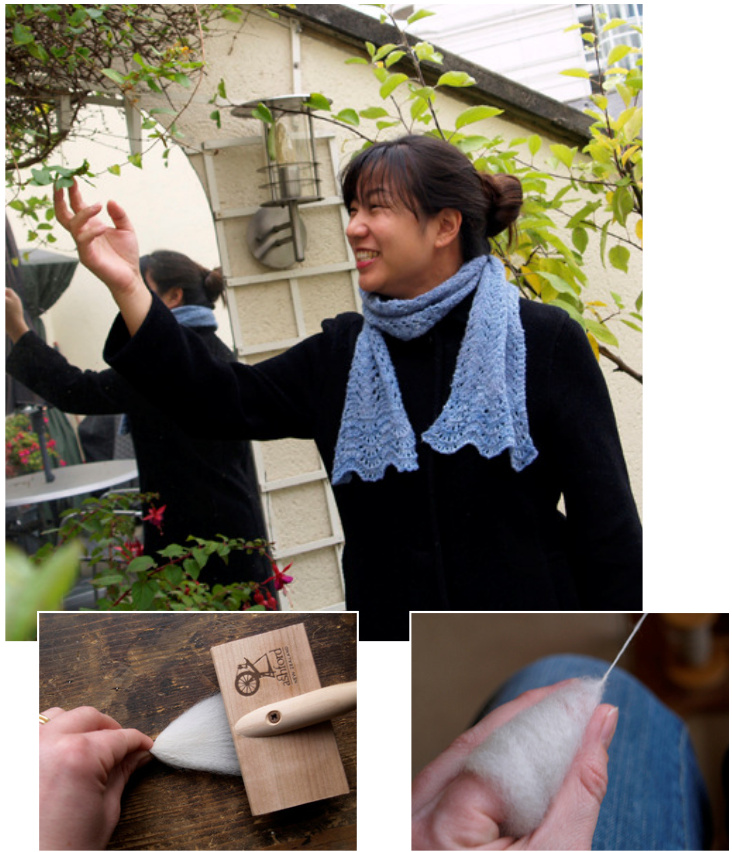
Prepare A fine alpaca fleece Spin A soft, fluffy yarn Knit A beautiful lacy scarf

Super soft Huacaya Alpaca fleece is a joy to work with, but requires special care to ensure that the finished product comes out looking its best. This tutorial takes you step by step through washing, preparing and spinning your fleece. Spinning from the fold works well with fine alpaca to achieve a beautifully soft, fluffy yarn. I chose to dye my yarn, but depending on your flece you may wish to keep its natural colour, before knitting it up into a luxuriously lacy scarf. Project File Fibre $100g$ fine quality alpaca fleece Equipment Flick carder Net bags or cheesecloth fabric Dyes Landscape dyes Sun Orchid' (optional) Yarn Singles ratio: 8:1 Plying ratio: 11:1 Singles wpi: 34 Plied wpi: 16 Gauge: 24sts and $22\mathrm{rows}=4$ inches over pattern after blocking Yards: $250\mathrm{m}\,2$ -ply yarn Needles and Notions 1 set $4.5\mathrm{mm}$ needles Stitch markers, yarn needle, crochet hook for cast on. Finished Size 64"' x 6" after blocking.
Fibre Preparation
Early this year I was very lucky to be given a small amount of fleece from a friend's baby alpaca, ‘Supernova', who won first prize in his category at the Melbourne Show in 2007. When shopping for a fleece remember that alpaca fleece can vary enormously in quality and fineness. Test the fibre against your cheek for softness and ask for a Cria (baby) fleece if you can.
Washing
To wash or not to wash? There are two schools of thought about this and every second spinner will tell you the opposite story to the last. Very fine alpaca felts easily, so unless your fleece is somewhat robust, washing before spinning is a risky way to go. Washing after spinning has its own disadvantages however, dust particles can be trapped in the yarn and become almost impossible to remove. I have found a compromise between the two: Giving the fleece a light bath may not get it completely clean but will remove much of the dirt, carding will then remove even more, and your finished yarn can be safely washed again to remove remaining traces of dust. It is likely that your fleece could be quite dirty, as alpacas love to roll. A good shake outside before you start will remove a lot of the dust. As alpaca does not contain lanolin, only gentle washing agents are necessary. 1. Prepare a basin of warm water and add a small amount of fibre rinse or hair conditioner. Parcel batches of fleece in net bags or cheesecloth squares and press gently under the water, leave to soak for 20 minutes. 2. Lift the bags carefully out of the water and drain without pressing or squeezing. 3. Repeat steps one and two to rinse, press water very gently out of fleece on a draining board and gently remove from bags to dry.
Carding
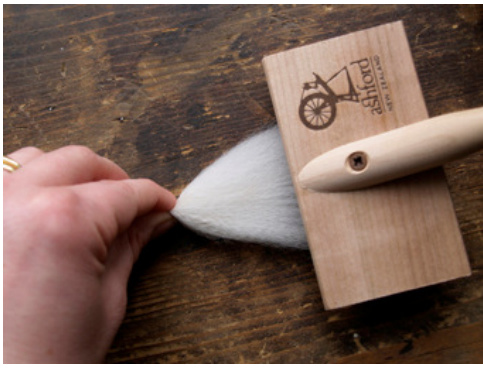
As we will be spinning from the fold the locks of fleece can simply be flicked open to remove dust and vegetable matter, and will be ready for spinning. 1. Using a board or old magazine, grasp one end of the lock firmly and use the flicker to open out the other end (Figure 1). Use a downward-swooping movement, and then barely catch the fibres with the teeth of the flicker before drawing it upwards again.
2. Turn the lock around and repeat on the other end (Figure 2). Lay the flicked locks neatly in a box or basket where they will not be disturbed before spinning.
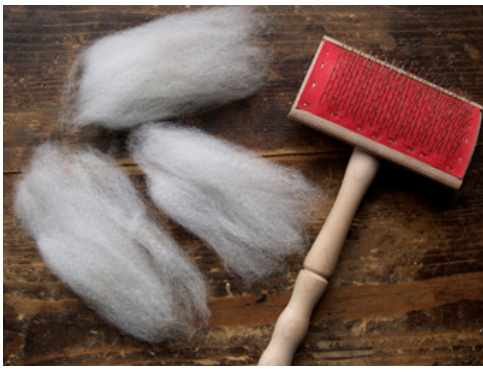
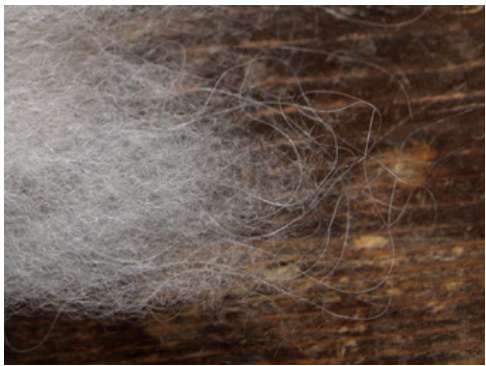
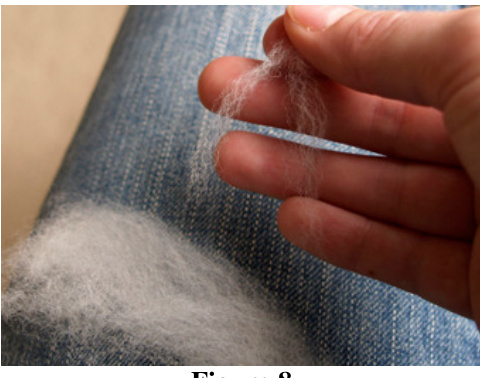
Depending on your fleece, you may find several guard hairs in the locks. You can remove these while flicking or spinning. You can see the guard hairs peeping out from the end of the flicked lock here in figure 3.
Spinning
Because alpaca is a hair fibre it does not have as much elasticity and bounce as wool. Spinning with a worsted-type draft (with fibres lying parall) can result in a yarn that is wiry and limp, no matter how soft the original fibre. Spinning from the fold, however, adds bounce and air to the yarn. The fibres are folded in half as they are spun, and their natural inclination to return to a straight position gives the yarn energy. We are also aiming here for a nice halo to the finished yarn, and spinning from the fold will help us achieve this as well.
Drafting
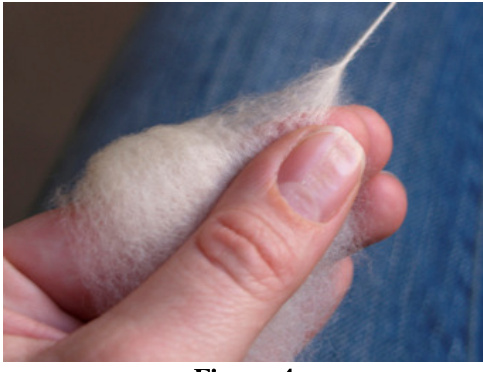
1. To begin, fold a lock of fibre over your index finger and draw some fibres forward from the centre of the lock, just near the tip of your finger. Attach to the leader and allow some twist to flow into the fibres. 2. As you treadle, draft forwards from the centre of the lock, keeping it folded in half over your finger (Figure 4).
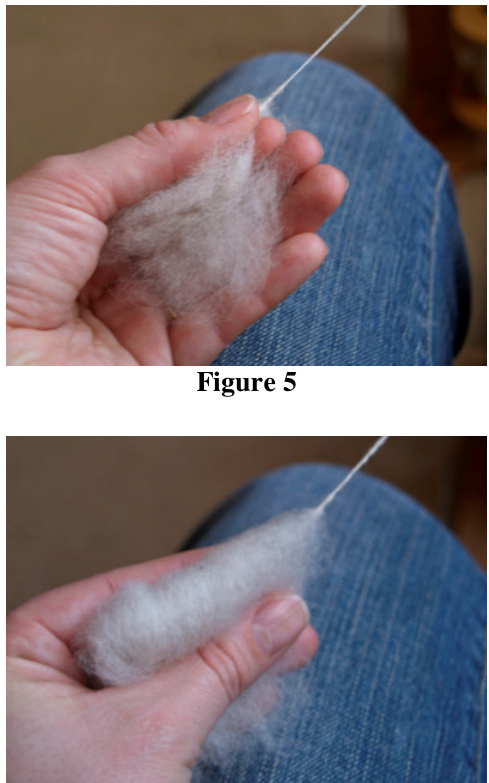
3. Hold the two ends of the lock together between your thumb and ring finger or smallest finger. You may need to stop occasionally and realign the position of the lock if the drafting point wanders away from the centre fold. There are various ways of positioning your fibre hand so that spinning from the fold is comfortable, most spinners find they prefer one way over others. Figures 5 and 6 show two more ways of holding the fibre to spin from the fold, practise a little to see which feels right for you.
Joining Fibre
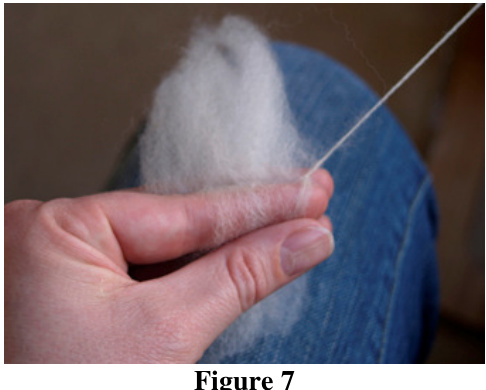
When you have almost finished the lock add a new one to your fibre supply by simply laying it over the remains of the old one (Figure 7). As you draft, fibres from the new lock will be drawn out seamlessly with the others.
If you break the yarn, joining is a little more difficult, especially if you are spinning very finely. Pinch off the twist in the yarn and spread the fibres out in the last inch or so, creating two little fanned out “legs’ (Figure 8).
Lay a new lock over these fanned out fibres and draw a very few fibres from the fold, overlapping them with the two legs (Figure 9). Adding too many fibres to the legs will result in a lump at this point in the yarn, with practice you will be able to create a perfectly seamless join.

Finishing Ply as a standard 2-ply,using a tensioned lazy kate if available to avoid tangles. Wash in warm water with fibre rinse or hair conditioner added, encouraging the halo of the yarn by scrunching the yarn and flicking against the side of the basin. The yarn may stick to itself a little as the surface fibres bloom, but will easily come apart when wound up into balls. Squeeze out excess water in a towel and hang skeins to dry in an airy place.
Dyeing
If you wish to, dye the yarn in the skeins before knitting. 1. Using ‘Sun Orchid’ colourway from Landscape dyes make a dye bath in an oven-safe pan using one teaspoon of dye powder for each $50\mathrm{g}$ skein of yarn. 2. Soak the skeins in water and $100\mathrm{ml}$ of vinegar for half an hour and then place in the dye bath, ensuring that yarn is completely covered with liquid. 3. Seal with aluminium foil and bake at $150^{\circ}\mathrm{C}$ for 1 hour. Leave to cool and then rinse and dry. Safety Note: As always, when dealing with chemical dyes, remember safety considerations. Never use utensils or equipment which are used to prepare food, always wear gloves and cover kitchen surfaces with disposable paper. When using the oven method, be particularly careful of escaping steam.
Pattern
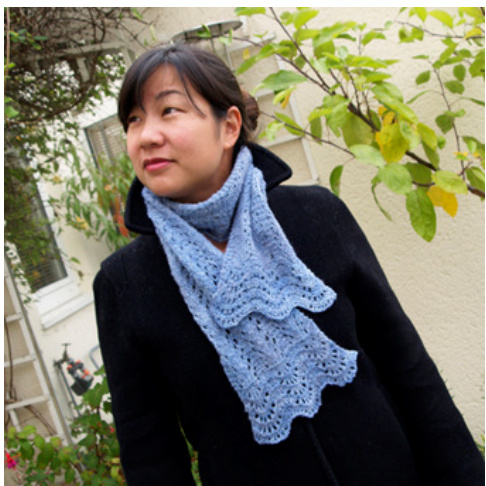
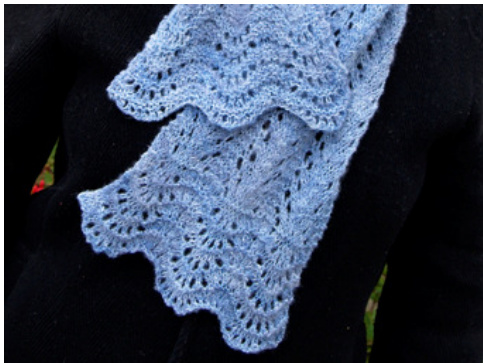
Pattern Notes This light, airy scarf is begun with a provisional cast-on. After finishing the main part of the scarf and the edging at one end, the cast-on is undone and stitches picked up for the second edging. The pattern can be extended if desired for a longer scarf, but do remember that alpaca is extremely warm for its weight - a long scarf which you can wrap around cosily two or three times may not be worn very often!
Requirements
Yarn: $250\mathrm{m}$ fingering weight yarn Needles and notions: 1 set $4.5\mathrm{mm}$ needles stitch markers, yarn needle, crochet hook. Abbreviations k - knit p- purl yo - yarn over k2tog - knit two together k3tog - knit three together ssk - slip next two sts as if to knit, return to left needle and knit tog through back loops k3tog tbl - slip next three sts as if to knit, return to left needle and knit tog through back loops.
Instructions
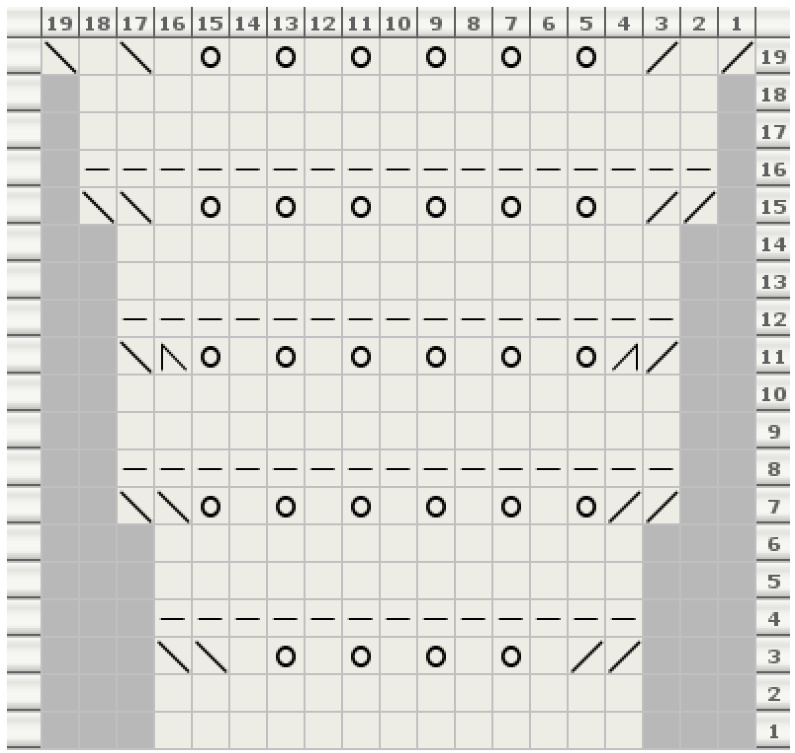
Using a provisional cast on and smooth waste yarn, cast on 39 sts. Main Pattern: These instructions are found in Chart A Row 1: k3, $\ast\mathbf{k}1$ , yo, k2, ssk, k2tog, k2, yo, k3, rpt from \* to end. Row 2: $^{*}\mathrm{k}3$ , p9, rpt from \* to last 3 sts, k3. Row 3: k3, \*yo, k2, ssk, k2tog, k2, yo, k4, rpt from \* to end. Row 4: work as for row 2. Repeat these four rows until work measures 40 inches or desired length, not including edging, finish with row 3. Next row (ws): knit. Edging: These instructions are found in chart B Row 1: knit. Row 2: purl Row 3: $^{*1}\mathrm{k}2$ tog twice, [kl, yo] four times, k1, ssk twice, rpt from \* to end. Row 4 and 5: knit Row 6: purl Row 7: \*k2tog twice, [yo, k1] five times, yo, ssk twice, rpt from \* to end (45 sts). Rows 8 and 9: knit. Row 10: purl Row 11: \*k2tog, k3tog, [yo, k1] five times, yo, ssk, k3tog tbl, rpt from \* to end. Rows 12 and 13: knit. Row 14: purl Row 15: \*k2tog, twice, [k1, yo] six times, k1, ssk twice, rpt from \* to end (51 sts). Row 16 and 175: knit Row 18: purl Row 19: \*k2tog, k1, k2tog, [k1, yo] six times, k1, ssk, k1, ssk, rpt from \* to end (57 sts). Cast off on the wrong side.
Undo provisional cast on and place 39 live sts on needle. With wrong side facing, join yarn and knit one row. Work edging pattern again as before.
Finishing
Darn in all ends. Bathe your scarf gently in warm water with a little fibre rinse added. Press water out by rolling in a towel, pin out to measurements and leave to dry. This tutorial and accompanying pattern are copyright $\circled{\mathbb{C}}~2008$ to Diane Mulholland and sold for your own personal non-commercial use only. No distribution or reproduction, electronic or otherwise, is permitted without express written permission of the copyright owner. If you have any questions or queries related to this Spin! publication please do not hesitate to contact me, I'm happy to help! Photographs: Diane Mulholland Model: Alice Yu
Chart A
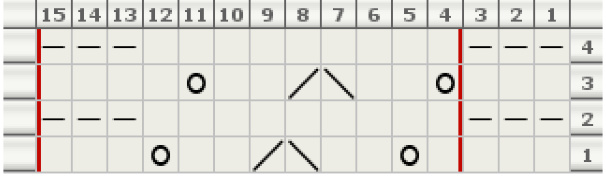
Chart B
Legend:
no stitch knit k2tog 回yo N ssk 日purlk3tog k3tog tbl Created in Knit Visualizer (www.knitfoundry.com) Notes: Red border - chart repeat area.


