Meet the Wabbitys..
Skill level: intermediate, with some fiddly bits!
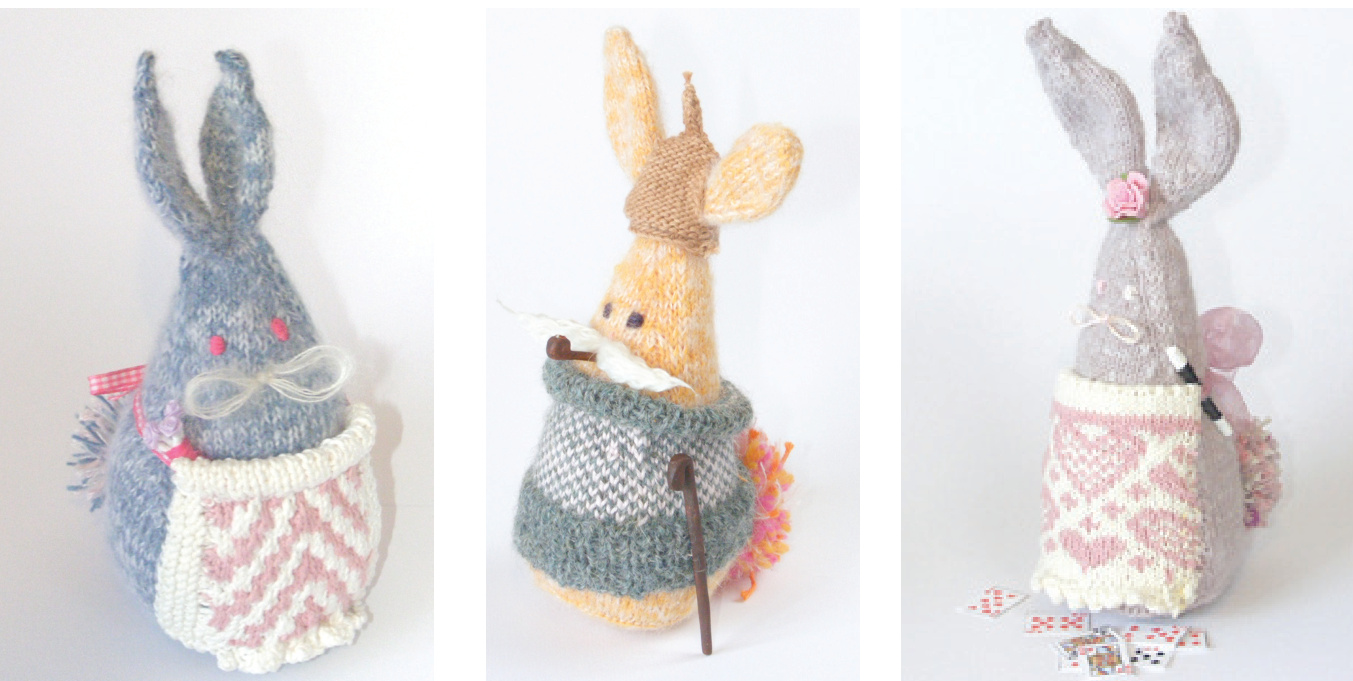
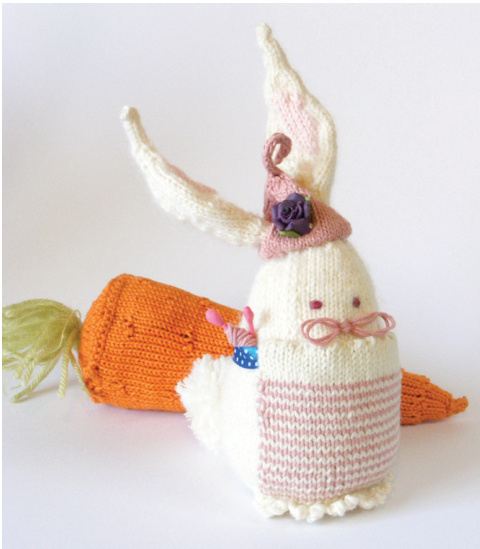
Introducing a family of carrott-shaped rabbits that are knitted entirely in the round and require absolutely no sewing up! A basic pattern is provided here, which is easily adapted to produce an egg-shaped Wabbity (like Coco, Whitney or Twitch), or an elongated Wabbity (like Presto, Jim, or Warren), simply by decreasing or increasing the number of rounds you knit between the shaping instructions. Smaller, or larger Wabbitys can be made by varying the size oftheflatcirclebase. Two yarns have been combined to create a tweed-like, and beautifully tactile, texure, but you can of course, experiment with your own yarn preferences.
Hutch Wabbity
You wil need
1 x 25g ball kidsilk haze (there will be about 1/3 left over) 1 x 50g ball Angora Merino by Regia (there will be plenty leftover) Oddments of yarns for the eyes, whiskers and tail A little embroidery thread, or scraps of yarn 2 pipecleaners Supersoft toy filling 4 x 2.5mm dpns Small stitch holders (safety pins will do) A bodkin or wide eyed sewing needle
Tension
Tension is not important, but a tighter knit produces a better result. If your tension tends to be on the loose side, try using a smaller set of dpns.
Wabbity body
This pattern will produce a larger boy, like Hutch. He stands roughly 23 cm tall (from base to tip of ears), and approximately 30cm in circumfrance, at his widest point, depending on tension and choice of yarn. If using the suggested yarns work them as one yarn. I suggest combining them into a single ball. Make a flat circle by casting on 3sts and dividing them between your dpns. (Leave a vey long tail as you will later use this to connect the Wabbity's tail to its bottom). Knit l round. K1, M1 (6sts). K1, M1, K1 (9sts). M1, K1, M1, K1, M1 (18 sts) Knit l round. M1, K1 (36 sts) Knit I round. M1, K2 (54 sts). Knit l round Purl 2 rounds. \*\*\*On needle one, K1, M1, knit to last 2 sts, M1, K1. Repeat on other 2 needles.\*\*\* (ines to 60 sts) Knit 3 rounds. Repeat \* \*\* round (incs to 66 sts). Knit 3 rounds. Repeat \* \*\* round (incs to 72 sts). Knit 5 rounds. You should now have a flat-bottomed bowl-time to start decreasing! \*\*\*On needle one, Kl, K2tog, Knit to last 3 sts, SSK, K1. Repeat on other 2 needles.\*\*\* (decs to 66 sts) Knit 3 rounds. Repeat \*\*\* round (decs to 60 sts). Knit 2 rounds. Repeat \*\*\* round (decs to 54 sts). Knit 4 rounds.
Whitney Wabbity
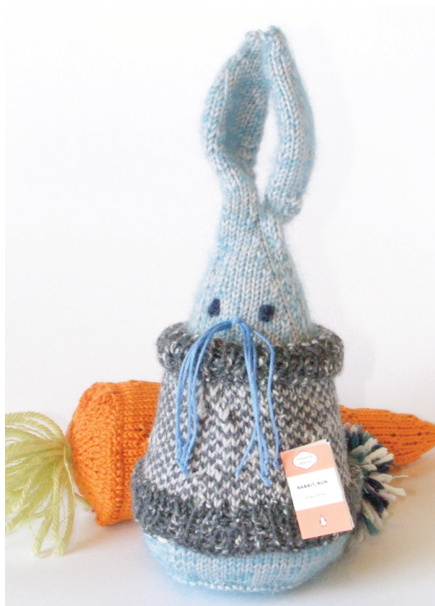
Warren Wabbity
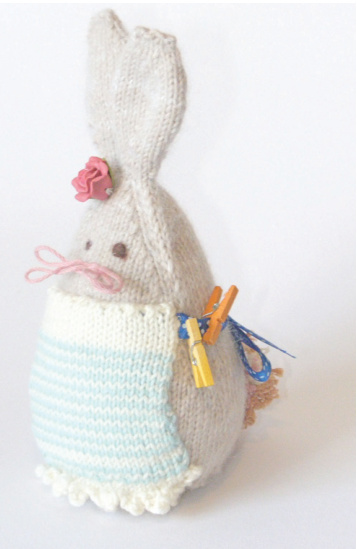
Twitch Wabbity Time to startstuffing! Stuff your Wabbity, making sure you use plenty of filling so the bowl is tightly packed, without any wrinkles. As you continue to decrease, add more stuffing and massage into shape. The weight of the stuffing will help your knitting form a teardrop shape.
Tip (this is optional and can be dropped, as it isn't something I've
done-just thought about)
You could add a weight, such as a flat stone-or suitably sized coaster-if you want a sturdier base, and a guarantee that your Wabbity will stay upright! If you're making this for a small child, you could always hide a squeek in the stuffing. ...Continue to decrease Repeat \*\*\* round (decs to 48 sts). Knit 6 rounds. Repeat \*\*\* round (decs to 42 sts). Knit 4 rounds. Repeat \*\*\* round (decs to 36 sts). Knit 7 rounds. Repeat \*\*\* round (decs to 30 sts). Knit 3 rounds. Repeat \*\*\* round (decs to 24 sts). Knit 2 rounds. Repeat \*\*\* round (decs to 18 sts). Knit 2 rounds. Repeat \*\*\* round (decs to 12 sts). Knit l round. K 2tog 6 times (decs to 12 sts). Knit l round.
Wabbity ears (both alike) Warning: this can get a bit fiddly, tiny fingers would be very useful!
Put 3 sts on a stitch holder (I use old-fashioned nappy pins for jobs like this).
Tip
When you divide the sts, be sure to keep a 'centre parting' in mind, so one ear falls to the left, and the other to the right, of what you want the Wabbity's face side to be. Divide other 3 sts between 3 dpns. Ml, K1, 3 times (6 sts). Knit l round. Ml, K2, 3 times (9 sts). Knit l round. Ml, K3, 3 times (12 sts). Knit 2 rounds. M1, K4, 3 times (15 sts). Knit 5 rounds. K1, SSK, K2 (decs to 12 sts) Knit l round. Insert pipecleaners (only suitable if toy is not intended for a child under ???) Take one pipecleaner and twist ends together to form a loop. Insert into hollow of ear, then knit the rest of the ear over the pipecleaner. The ear can then be bent and twisted, and will not flop. Kl, SSk, K1 (decs to 9 sts). K1, K 2tog, 3 times (6 sts). K 2 tog, 3 times (3 sts). Knit a couple of rows of I-Cord. K 2tog, K1. K 2tog. Cut off a tail, and pull through final stitch then weave in tail. Repeat for other ear. If there is a little gap between the ears, you can always sew it together with a stitch or two, or, cover it up with a hat!
Tip
As with the Wabbity body, the ears can be made longer, or shorter simply by increasing or decreasing the number of rounds between shaping instructions.
Wabbity tail
Make a pom pom and secure with original cast on thread, taking tail up through base and out at point where you want to attach pom pom.
Wabbity eyes
Mark where you'd like the eyes to be. Thread a bodkin with some yarn and sew three lines of satin stitch over the markings. Bring needle out through the back of Wabbity, squishing down as you cut the yarn, so the tail gets lost in the body.
Wabbity Whiskers
For the boys: Thread embroidery silk (or yarn of your choice) onto a large eyed needle or bodkin. Using the yarn at double thickness, sew a figure or eight, twice, with the cross occurring at the same central point. Cut yarn and ends of loops, then tie a knot at the centre of stitching. For an added touch, tie little knots at the end of each whisker. girls: As above, but make the figure of eight (or bow) smaller and don't cut the loo]
Tip
Have fun with the whiskers: try using sisal for the boys, or, as I did with Papa Wabbity use a soft wool that can be unravelled and twisted into an impressive moustache.
Wabbity Jumper
The jumpers follow the basic Wabbity body shape, only they are a little larger. Both the aprons and jumpers are perfect for trying out new techniques such as fair isle or cabling. (You might need to alter the number of cast on sts if your jumper yarn is finer or thicker than that used for the body). If you don't feel up to colourwork however, a variegated yarn with a contrasting colour for the rib is just as effective.
You will need
4 x 2.5mm dpns 2 x 50g balls of Debbie Bliss Sienna 4 ply in contrasting colours (about 1/4 ball of each) Cast on 60st and divide equally between 3 dpns. Taking care not to twist the stitches (particularly on the frst couple of rows) knit 8 rounds of K1, P1 rib. Needle 1: knit to last stitch, inc 1. Needle 2: inc l stitch, knit to last st, inc 1. Needle 3: inc 1 stitch, knit to last st, inc 1. (64 sts in total). Knit a further 8 rounds of Kl, Pl rib. Fold rib in half and knit 1 round, picking up a cast-on stitch with one of the sts on your needle to create a secure, double thickness polo neck. NB: As there are 4 more sts on the needles than when you cast on, Knit 1 st by itself every 16sts. Knit 1 round, increasing by 2sts at the start and half way through the round (66 sts). Start to increase.. Needle 1: K1, M1, knit to last st, M1, K1. Repeat on other 2 needles (72 sts). Join in yarn B, and hold in your left hand if you can. Next round: Kl, with yarn A, Kl with yarn B, repeat to end of round. Next round: Kl, with yarn B, Kl with yarn A, repeat to end of round. Repeat the pattern set out in the above 2 rows until the colourwork is complete, taking in increases as pattern progresses and making sure each new round starts with the contrasting colour to the one before. Knit 1 more round.
Wabbity Hat
You wil need
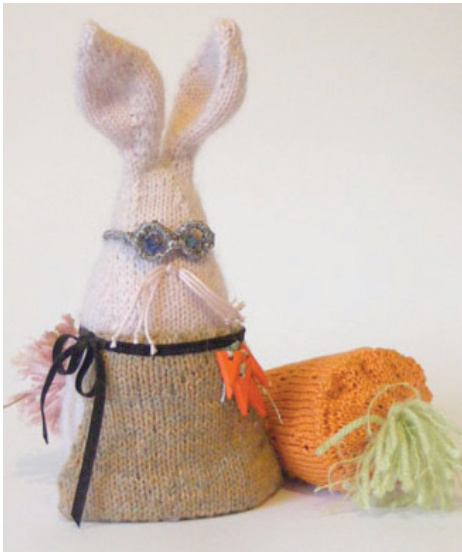
4 x 2.5mm dpns A few metres of scrap yarn Leaving a long tail, cast on 4sts and knit 4cms of I-cord. K1, M1, K2, M1, K1 (6 sts). Place 3 sts on a stitch holder and work on the other 3 sts. Kl, M1, K2, Ml, Kl (5 sts). Turn work and purl 1 row. K1, Ml, K2, Ml, K1 (7 sts). Turn work and purl 1 row. Work4rows. \*\*\*K1, Ml, K2, Ml, Kl (9 sts). Turn work and purl 1 row. Repeat \* \*\* until you have 2lsts on the needle. \* Knit 1 row. Break yarn, leaving a long tail, and trasfer sts to a stitch holder. Transfer 3 sts from other holder onto a needle and repeat instructions above, up to, and including \*. Transfer other sts from stitch holder to a dpn and divide all 42 sts equally between 3 dpns. Knit 5 rounds and cast off leaving a long tail. Thread I-cord tail onto a needle a turn I-cord into a loop. Sew in end tail end. You can either weave in the ends, and voila, you're finished, or if you feel the slits for the ear? are to roomy, use some of the excess yarn to sew a seam. However, that would involve sewing up, and this is meant to be a no-sew pattern! NB: all other accessories such as carrots, books cards etc are either found, or made from paper, string, and air-hardening clay.
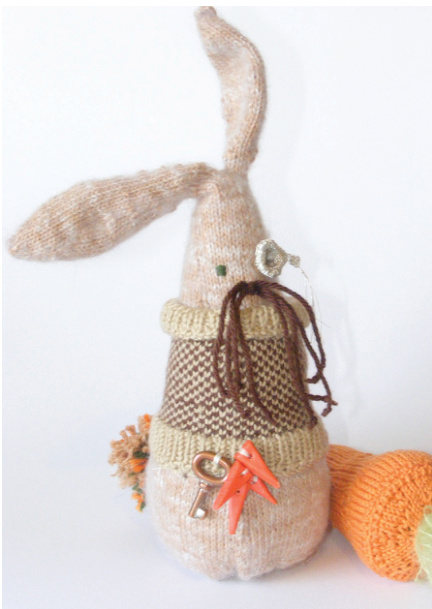
Jim Wabbity (AKA, The Banker)
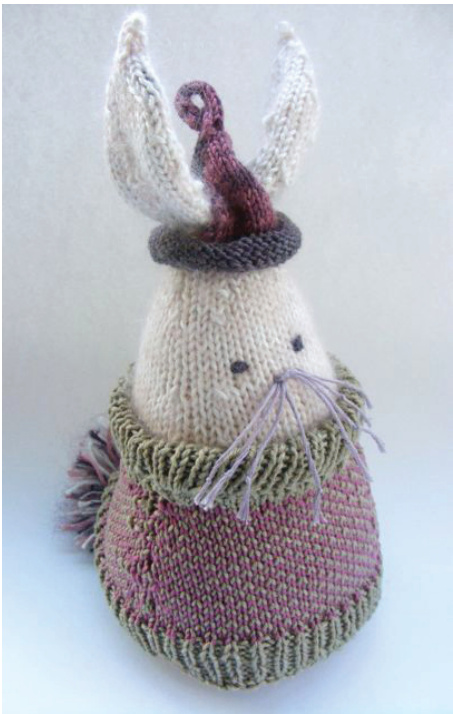
Bookish Buck Wabbity
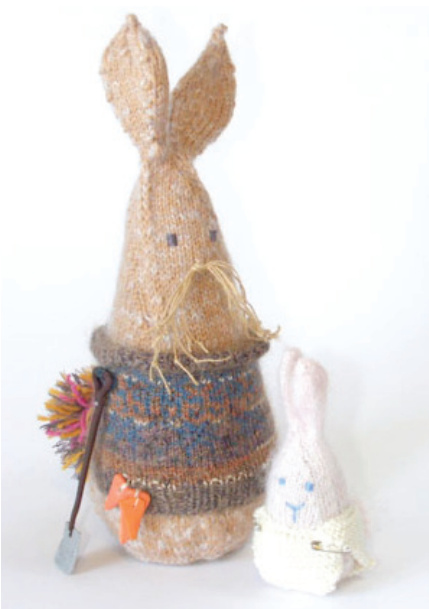
Big Jack and Hopper Wabbity


