Zebra Finch
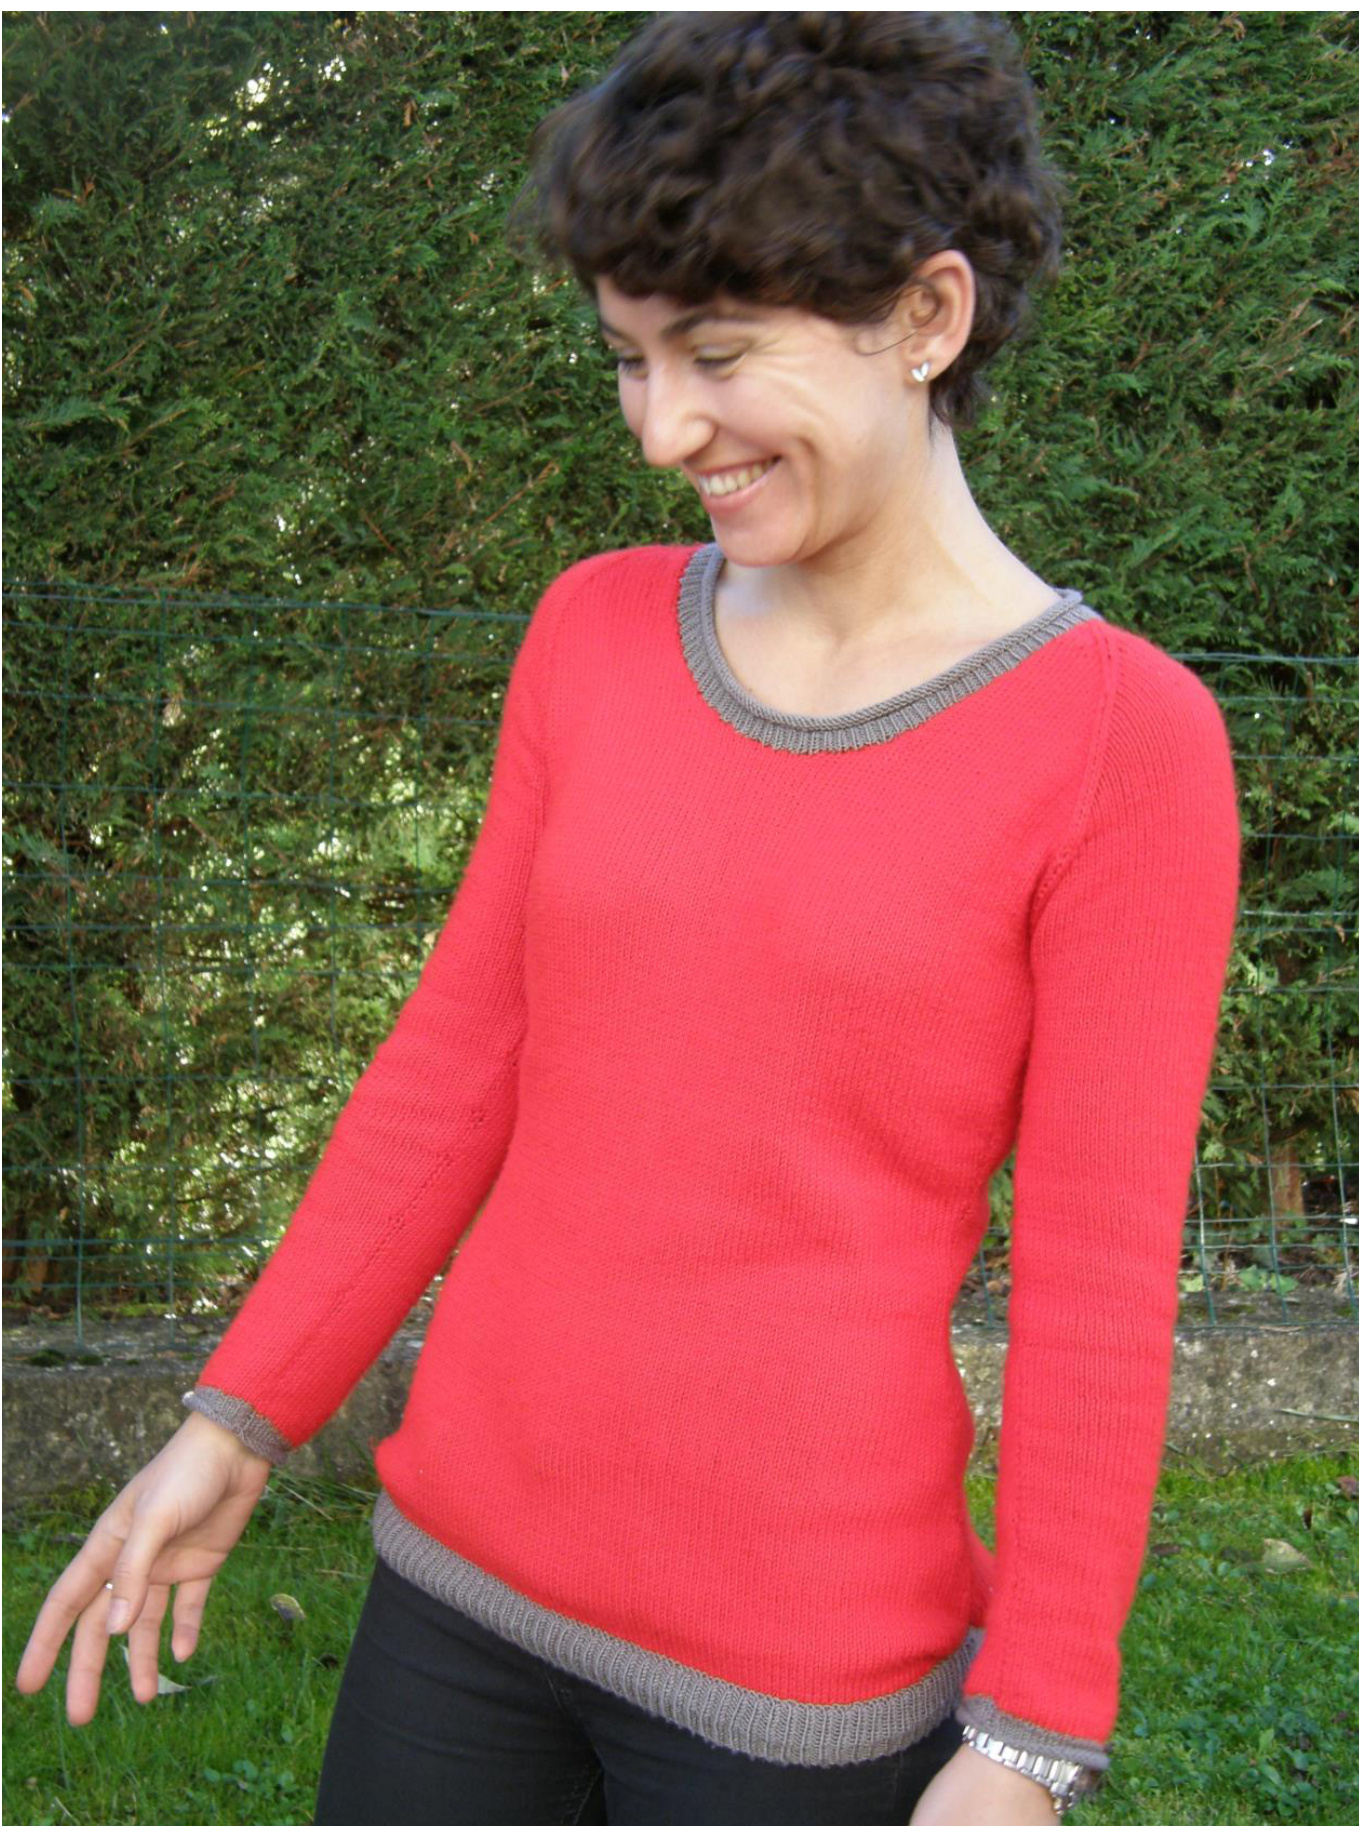
Gauge: 26 sts & 35 rows for 10 cm x 10 cm St-st Fit: very close fitting, no ease
Materials:
450 (500; 550; 600; 700) gr Nako Serin (50% Viloft, 50% Acrylic) in Red as MC / Less than 50 gr Nako Comfort Stretch (50% Acrylic, 50% Polyester) in Grey as CC For the bird embroidery, besides the CC, scrap yarn in black and beige are used too. 3,5 mm straight & circular needles Size: Prototype on the photos is knit in S. Instructions are written for five sizes in the following order: S (M; L; XL; XXL). Otherwise indicated, if only one number is available, it is valid for all sizes.
Abbreviations:
1-1 ribbing: knit 1, purl 1 approx.: approximately BO: bind off CC: combination color CO: cast on Cont.: continue Dec: decrease DRORS (dec. row on RS): k1, k2tog, knit until the last 3 sts, skp, k1 Inc: increase IRORS (inc. row on RS): k1, M1, knit until the last st, M1, k1 K: knit M1 (increase one stitch): make one st MC: main color P: purl Rnd: round RS: right side of the work Skp: slip, knit, pass stitch over St-st: stockinette stich, knit on RS, purl on WS WS: wrong side of the work X: times
Instructions:
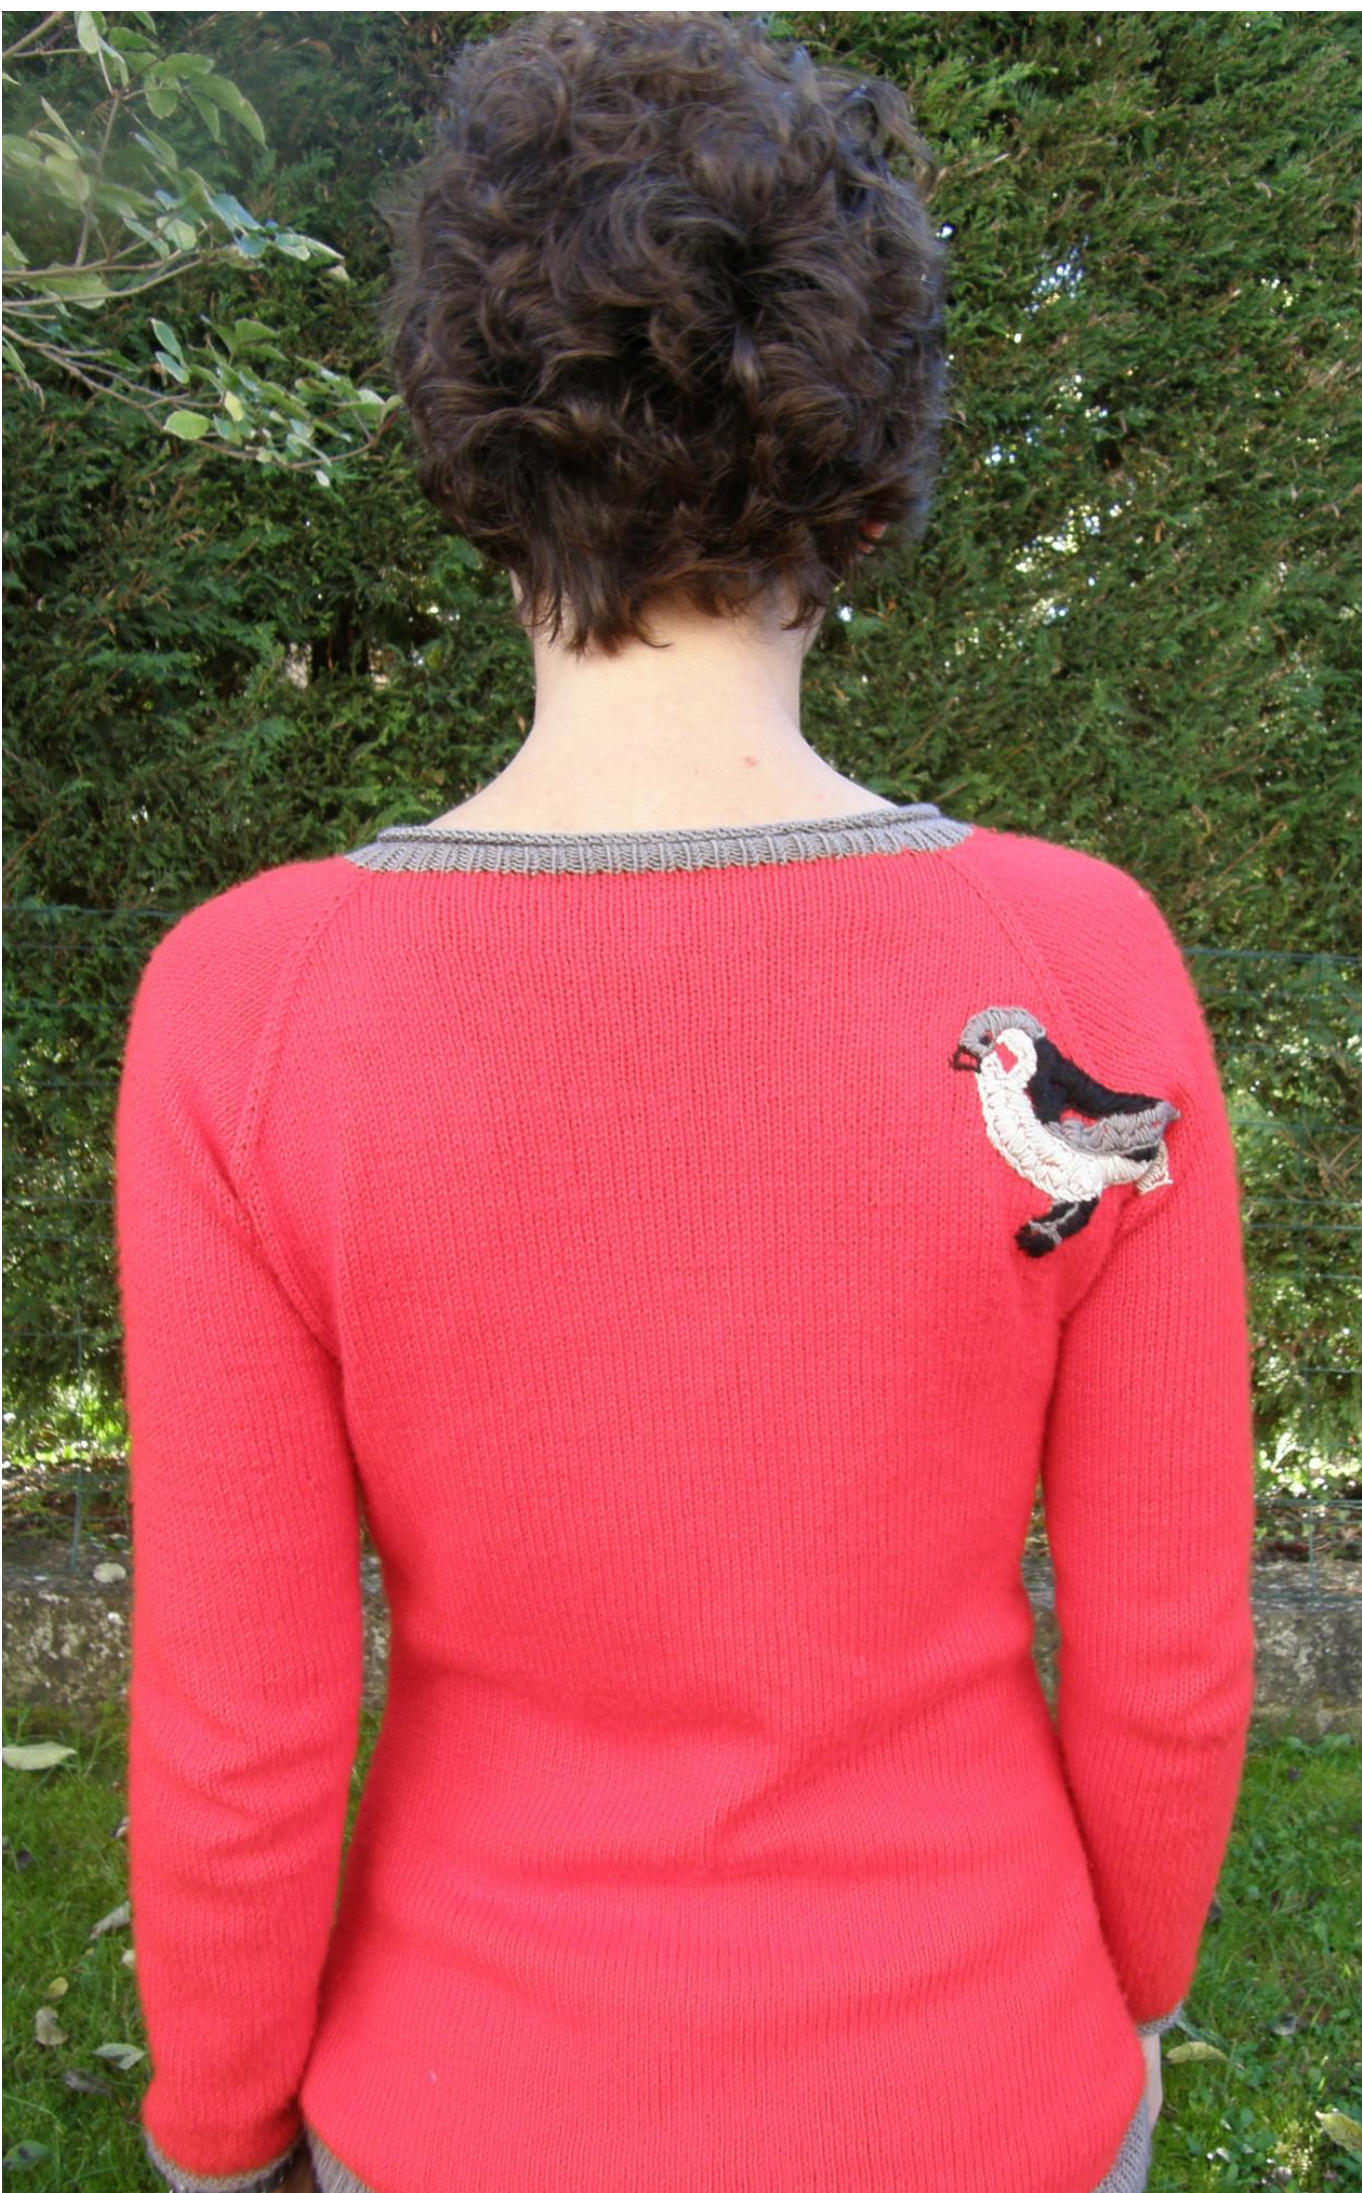
The front, the back and the sleeves are knit separately on straight needles until the underarms; those pieces are then joined to knit the yoke in one piece on circular needles. The neckline is shaped while working back & forth on circular needles. Once the raglan reaches to the desired length, sts are picked up along the neckline and worked together with the live body sts to form the collar band. Once the sweater is finished, the bird figure is embroidered on the back right shoulder. BACK
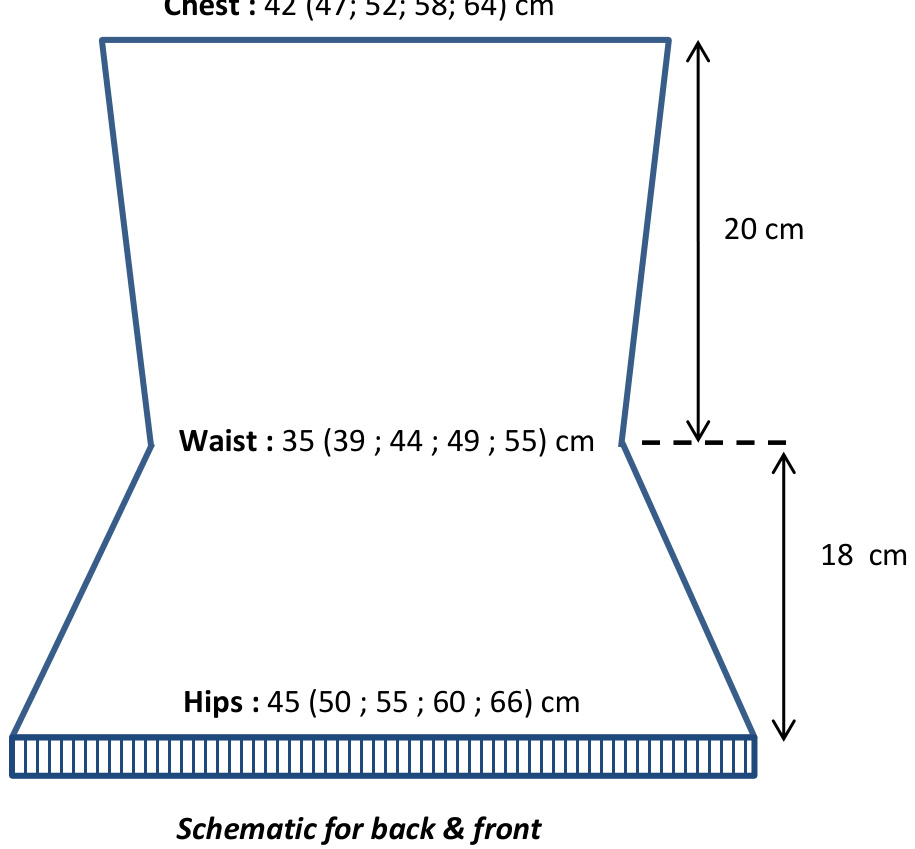
With CC and straight needles CO 117 (130; 143; 156; 172) sts. Work 1X1 Rib until the work measures 2,5 cm. Next row on RS, with MC, start working St-st. Work 8 rows after the rib. On the 9th row on after the rib, dec. one st at each end of the work as per DRORS and continue dec. for the waist as follows: Size S: every 6 rows X 5; and then every 4 rows X 5; and then every 2 rows X 2 by repeating theDRORS. Sizes M, L, XL & XXL: every 6 rows X 4; and then every 4 rows X 6; and then every 2 rows X 3 by repeating the DRORS. 91 (102; 115; 128; 144) sts remain. After the last dec. row for the waist which is approx. 18 cm from the rib, work 5 rows. Next row on RS, inc. one st at each end of the work as per IRORS and continue increasing for thechest asfollows: Size S: every 6 rows X 4, every 8 rows X 2 and every 10 rows X 2. I & L: every 4 rows X 2, every 6 rows X 3, every 8 rows X 3, and every 10 rows X 1. xXL: every 4 rows X 4, every 6 rows X 3, every 8 rows X 2, and every 10 rows X 1. 109 (122; 135; 150; 166) sts on needles. When the work measures 38 cm from the rib, put all sts on holder.
FRONT
Work exactly the same as Back.
SLEEVES (make two)
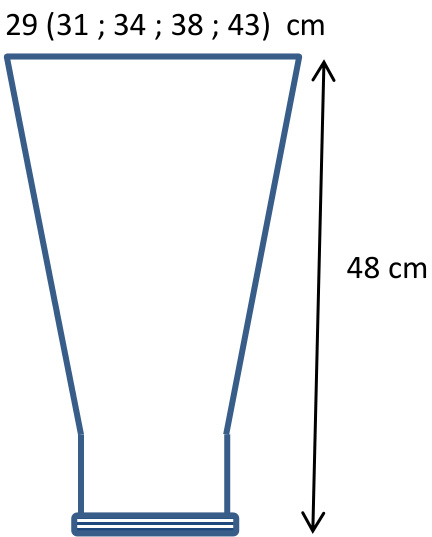
21(23;25;27;29) cm Schematicforsleeves With CC and straight needles CO 55 (60; 65; 70; 75) sts. Work in St-st for 8 rows. gth row & 1oth row: work 1-1 rib 11th row (RS): Join MC and knit all sts. From this row on work in St-st until the end. When the piece measures 10 cm from the beginning, work one IRORS and then cont. increasing at each end of the work by repeating the IRORS as follows: Size S: every 14 rows X 9 Size M: every 14 rows X 5, every 12 rows X 5 Size L: every 12 rows X 8, every 10 rows X 3 Size Xl: every 10 rows X 11 and then every 8 rows X 2. Size xXL: every 6 rows X 5 and then every 8 rows X 12. 75 (82; 89; 98; 111) sts on needles. When the sleeve measures 48 cm from the beginning, put all the sts on holder. YOKE
Holding the circular needle on your right hand and facing the RS of the knit pieces towards you, transfer the live sts on holders to the circular needle in the following order: place 1st marker, place 75 (82; 89; 98; 111) sts for the first sleeve, place 2nd marker, place 109 (122; 135; 150; 166) sts for the front, place 3rd marker, place 75 (82; 89; 98; 111) sts for the second sleeve, place 4th marker, place 109 (122; 135; 150; 166) sts for the back. Join the work to start knitting in rounds UNTIL the collar opening. 1st rnd & all odd rnds: K allsts. 2nd rnd & all even rnds: Slip 1st marker, skp, knit all sts until the last two sts before 2nd marker, skp, slip 2nd marker, k2tog, knit all sts until the last two sts before 3'd marker, k2tog, slip 3rd marker, skp, knit all sts until the last two sts before 4th marker, skp, slip 4th marker, k2tog, knit al sts until the last two sts before 1st marker, k2tog.
Shape the neckline
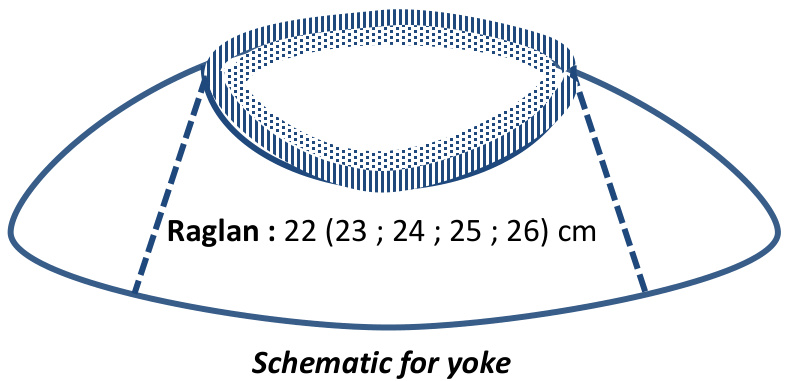
When the work measures 7 (8; 9; 10; 11) cm from underarm (where you joined the body and the sleeves), on an "even round": slip 1't marker, skp, knit all sts until the last two sts before 2nd marker, skp, slip 2nd marker. At that moment count your sts between 2nd marker and the 3'd and define the 5 (5, 5, 7, 7) sts at the center of the front and knit all sts until those sts, then B0 the 5 (5, 5, 7, 7) sts at the center front, knit until the last two sts before 3rd marker, k2tog, slip 3'd marker, skp, knit until the last two sts before 4th marker, skp, slip 4th marker, k2tog, knit all sts until the last two sts before 1st marker, k2tog. Next rnd: slip 1st marker, knit all sts, slip 2nd marker, knit all sts until the binded off sts in the previous rnd. Now that the work is divided at the center front, work back and forth on circular needles, purling all sts on WS and knitting all sts on RS. Both the raglan shaping and the decreases for the neckline will be made on RS, on WS rows no shaping will be done, just purl all @ Every row on RS cont. doing the raglan decreases as you k2tog before the 1"t marker and skp after the 1"t marker skp before the 2nd marker and k2tog after the 2nd marker k2tog before the 3rd marker and skp after the 3rd marker skp before the 4th marker and k2tog after the 4th marker AT THE SAME TIME cont. shaping the neckline as you bind off 1 X 5 (5, 5, 7, 7) sts, 3 X (3; 3; 5; 5) sts, 3 X 2 (2; 2; 3; 3) sts, 3 X 1 (1; 1; 2; 2) sts and 3 x 0 (0; 0; 1; 1) sts at each side of the center front. Once the raglan measures 22 (23; 24; 25; 26) cm, with CC pick up 2 sts for every 3 rows along the neckline and start working with CC in rnds with all remaining sts for the collar band.
Collar band
Work 1-1 ribbing for 8 rnds, then knit all sts for 8 rnds (for an outwards curling effect) and BO loosely all sts.
Finishing
Sew side and sleeve seams. Sew in all ends. Block the finished sweater by slightly wetting and fixing on a towel to let dry.
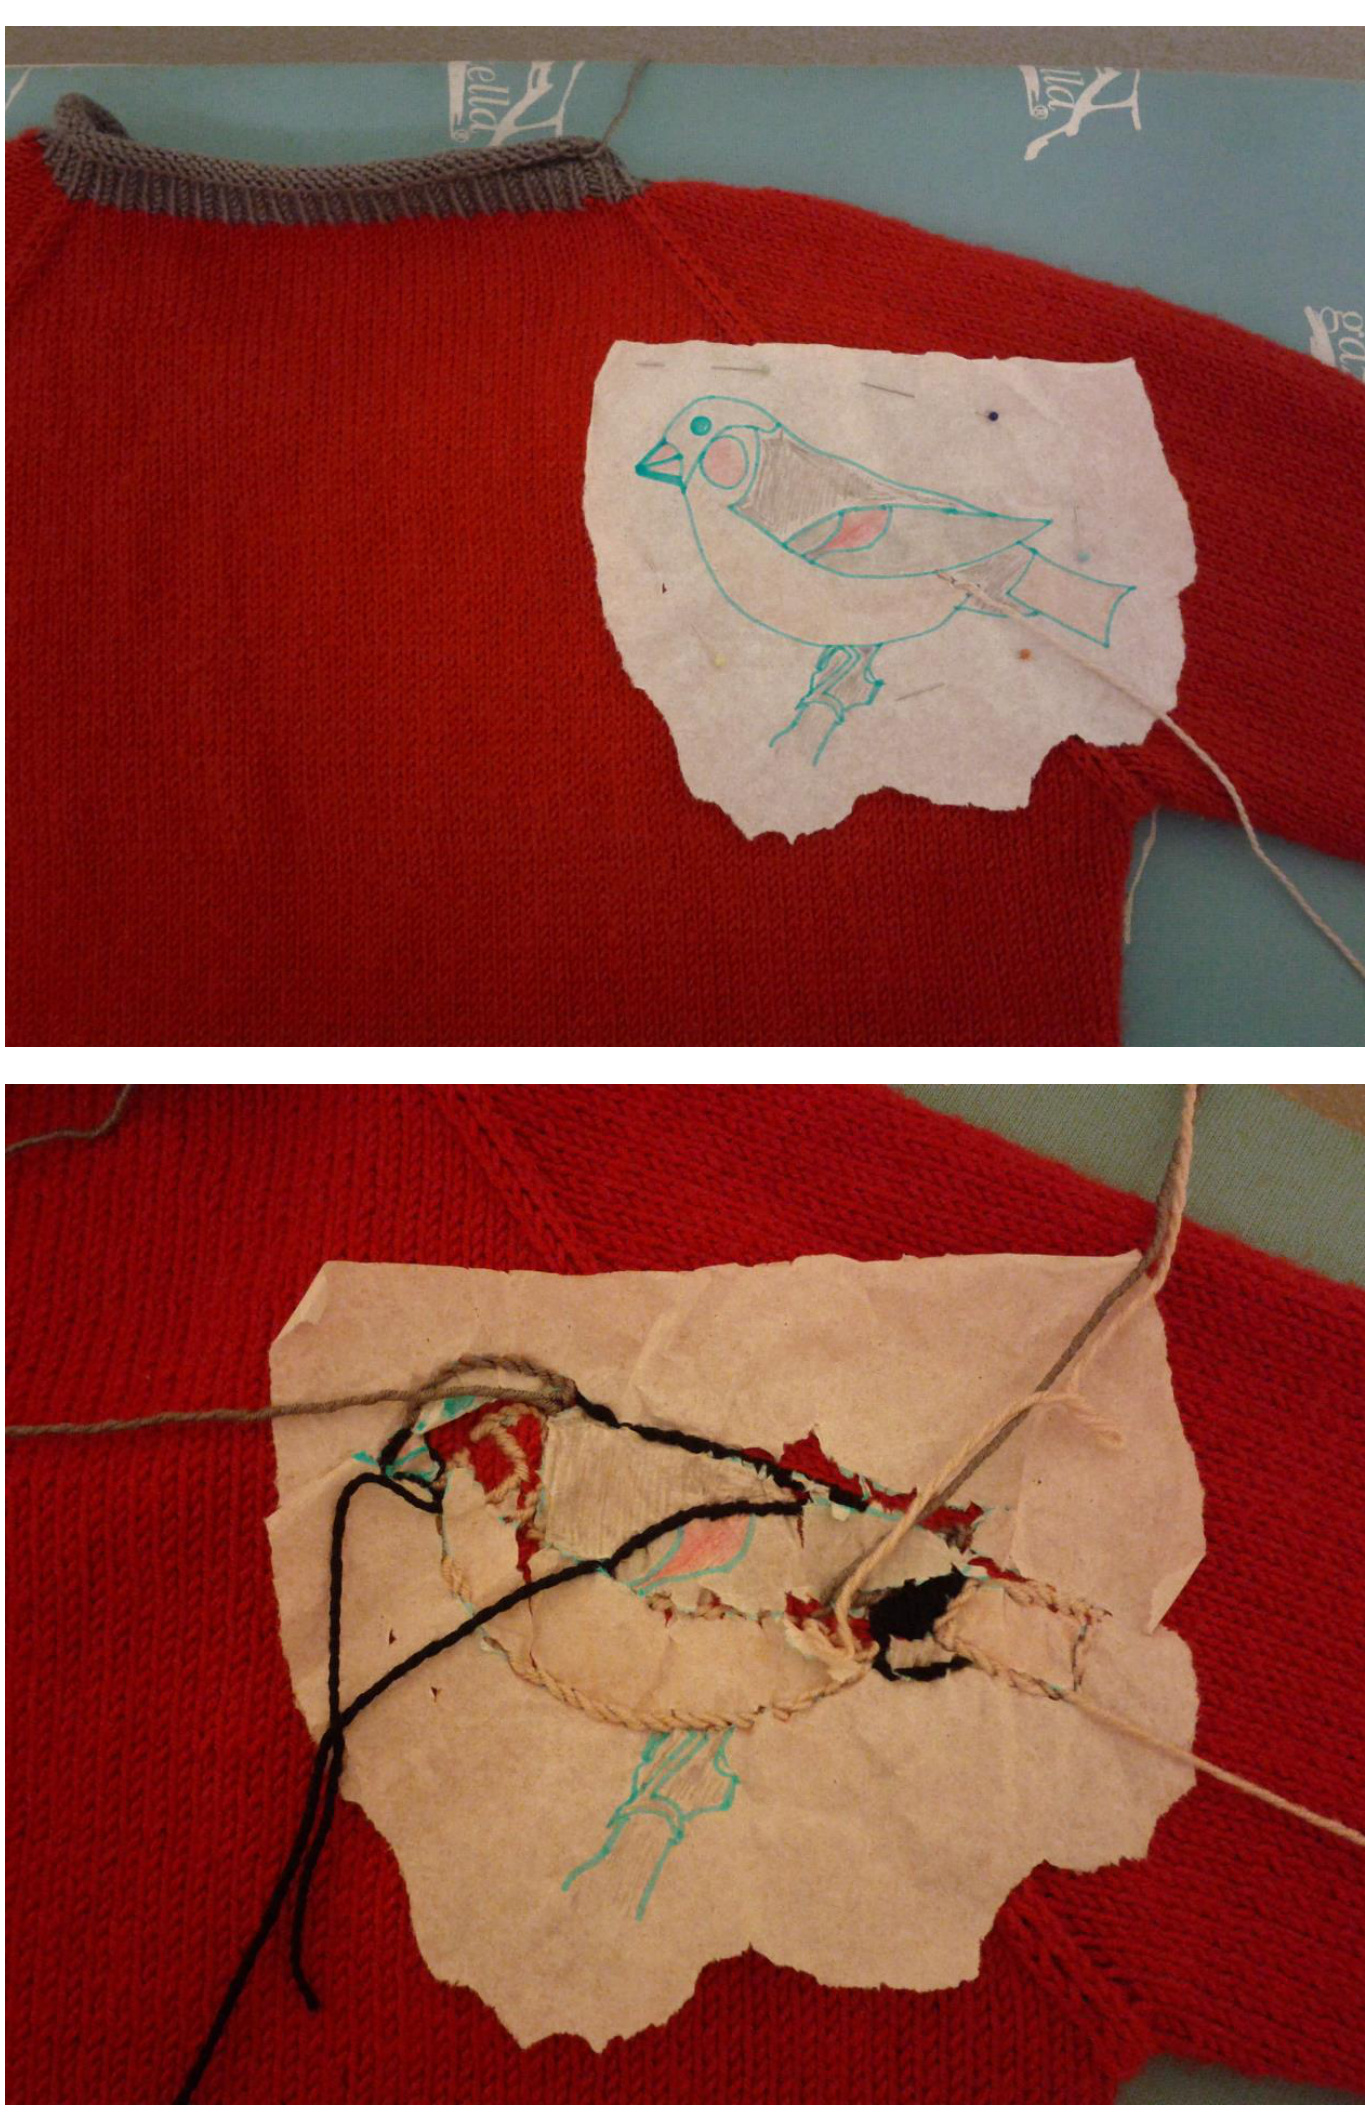
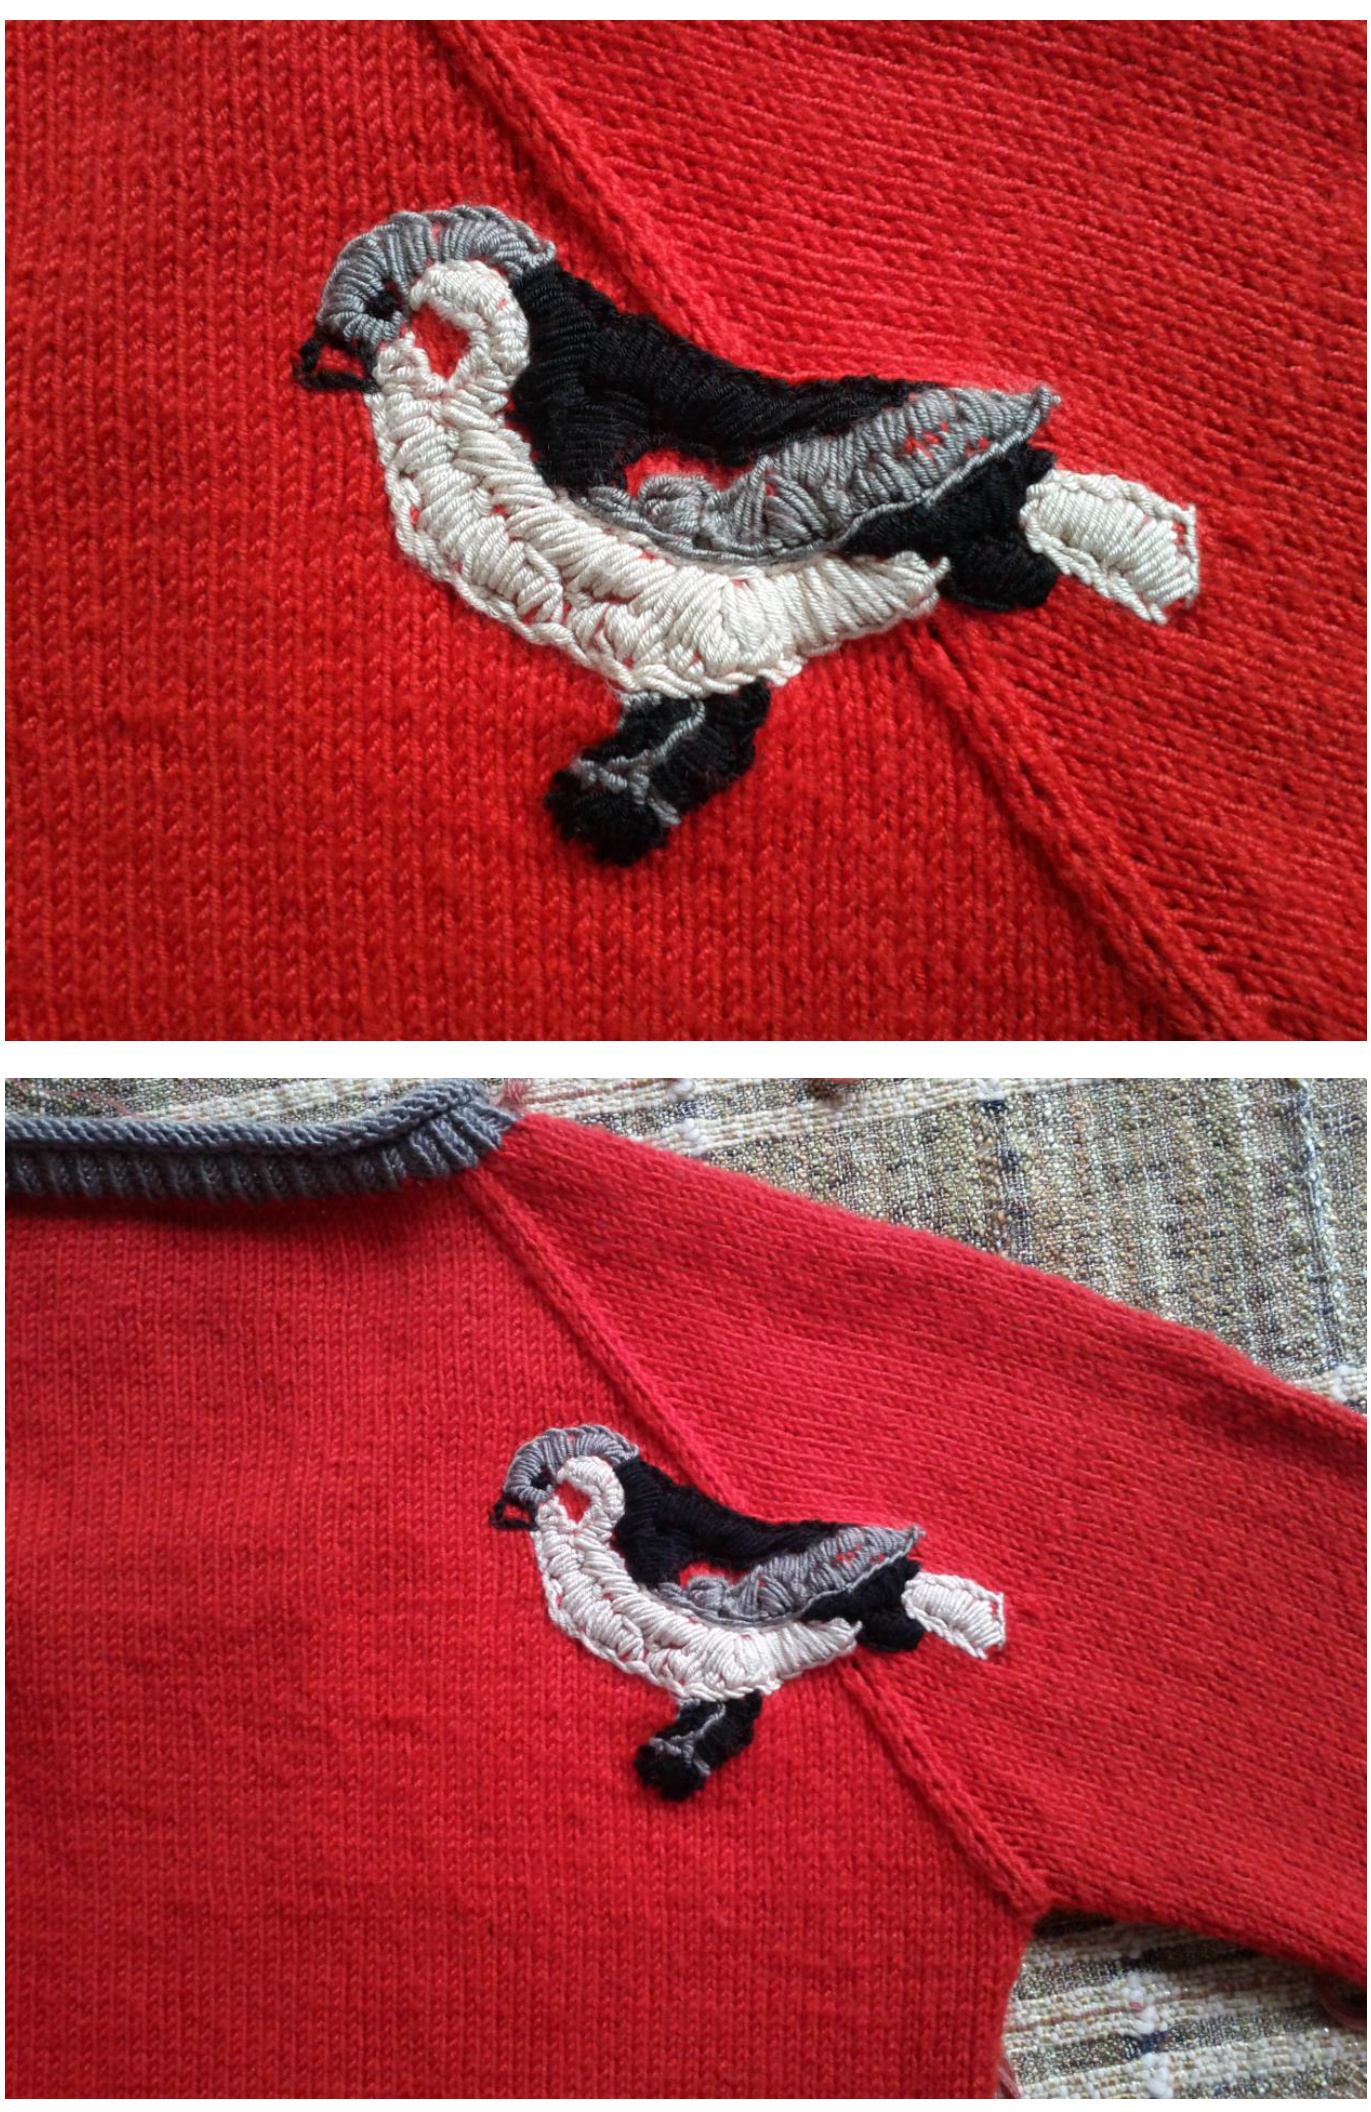
Bird Embroidery
Copy the bird figure below on a transparent paper. Then place it on the right back shoulder of the sweater on the raglan shaping (see the photos). Fix with pins. You can now start embroidering the bird figure using stem stitch for the outlining and satin stitch for filling. If you are not familiar with these embroidery techniques, here is one of the numerous help links on internet: http://www.knitsimplemag.com/node/65.
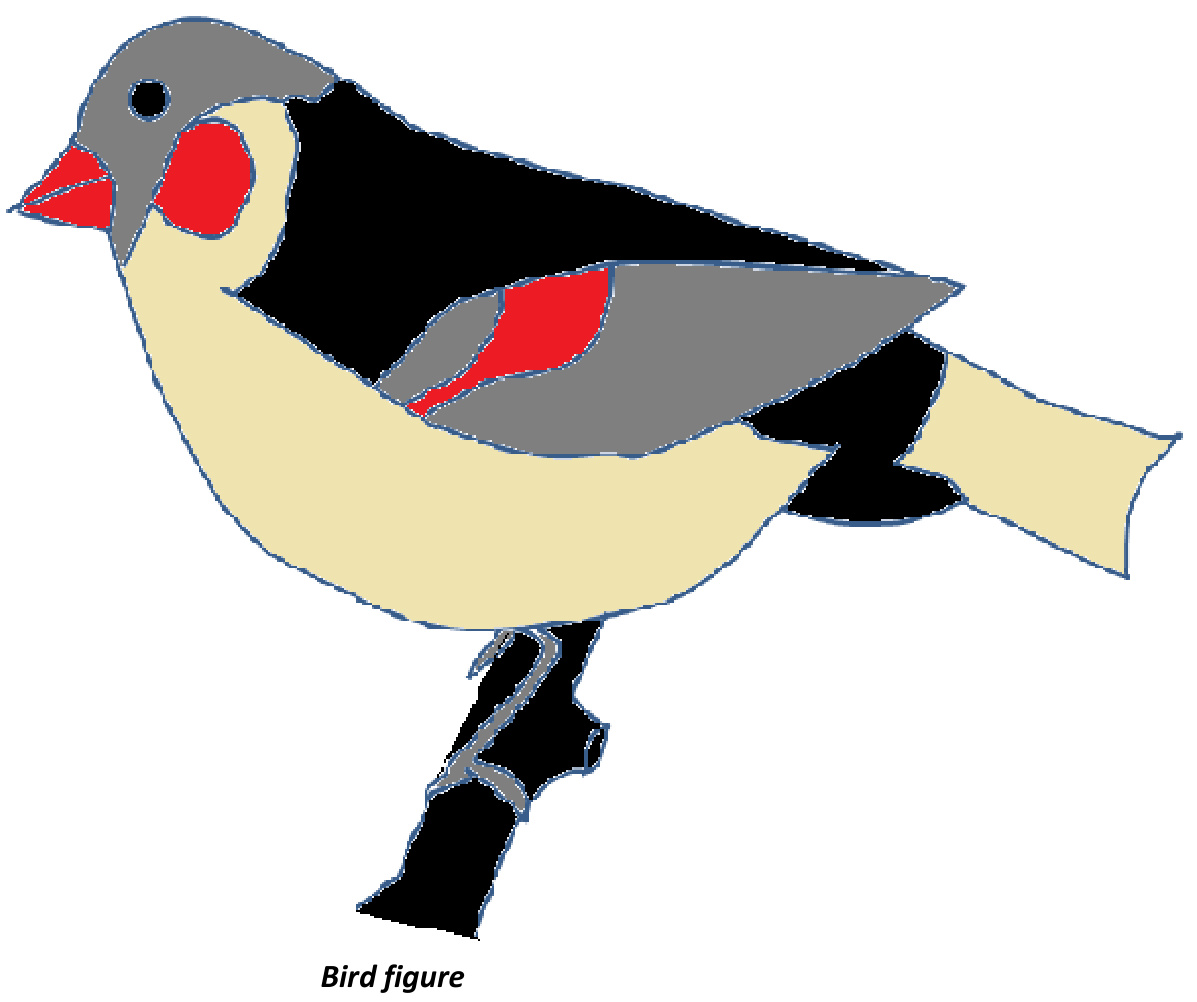
Make the embroidery onto the transparent copy paper which you will tear and take off carefully once the work is finished (see below photos for better understanding). Pay attention not to pull the yarn too much while you are embroidering to avoid deformation of the sts on the area that you are working. Happy knitting!