Finished Measurements
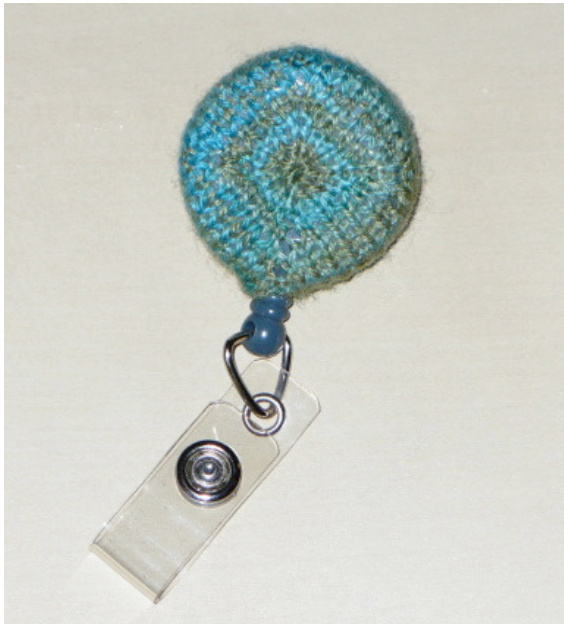
White Coat Badge Cozy
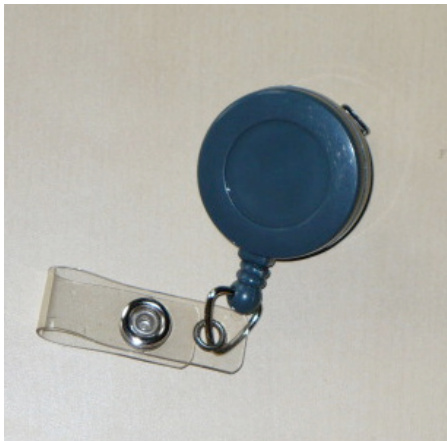
E.B.Fouts-Palmer Stockinette cover knit in the round from center out to fit standard-sized ID badge holder. This is the perfect way to show off a leftover bit of pretty sock or lace weight yarn and to display your love of knitting at work on those days when you can't justify wearing a big lacy shawl with your scrubs. To fit a standard-sized round retractable ID badge holder 3 cm in diameter and 1 cm thick (see picture at right).
Materials
About 1g (5-10 yards) lace-weight or fingering-weight yarn. I used Helen's Lace by Lorna's Laces in color 308 Huron. A note on yarn selection: The yarn that I used was very fine lace weight and had fairly short bands of color, so there are many stripes. If you use a self-striping sock yarn or other yarn with longer bands of color, think carefully about where in the ball you want to start. as you will not be using very much yarn and may only have two or three colors showing on the finished object. I would suggest starting a foot or so before the end of one color band, so that there is a color change relatively quickly. Also note that the nubbin attached to the cord on the badge holder will be visible, so be sure you are happy with how it matches your yarn. If using lace weight yarn, one set (5) US size 0 (2mm) double-pointed needles, or size needed to obtaingauge. If using fingering weight yarn, one set (5) US size 1 (2.25 mm) double-pointed needles, or size needed to obtain gauge. Stitch marker Tapestry needle ID badge holder as described above.
Gauge
20 sts = 5cm / 2" in stockinette on size O needles if using lace weight 17 sts = 5cm / 2" in stockinette on size 1 needles if using fingering weight Normally at this point I would say TAKE TIME TO CHECK GAUGE. However, this piece is so small, that it took me longer to knit a gauge swatch than to finish the project, so if you feel like being a rebel and knitting something without a gauge swatch, this wouldn't be a terrible time to try it. Even if it turns out the wrong size and has to be knit over, it will probably take about the same amount of time that knitting a swatchwouldhave. This pattern is available as a free download from www.Ravelry.com 2011 E.B. Fouts-Palmer for BentPaperclips Designs
Badge Cover
CO 12 stitches using twisted loop cast on, leaving a 15 cm tail (later referred to as the "short tail"). Join to work in the round, being careful not to twist. PM for beginning of round. Note: Ifound it easiest to cast on to two needles and divide stitches among the needles further after working the first two rounds. If you prefer to cast on to three or four needles, that's fine, too. Just make sure you have things arranged with three stitches per needle before starting round 3. Rounds 1 and 2: Knit all stitches Round 3: Increase round \*Kf&b of first stitch on needle, k to last stitch on needle, kf&b. Repeat from \* to end of round. (8 sts increased, 20 sts total) Round 4: Knit all stitches Repeat rounds 3 and 4 until there are 9 sts on each needle (36 sts total). For lace weight yarn only: repeat rounds 3 and 4 once more so that there are 11 sts on each needle (44 sts total). You will now switch from working in the round to working back and forth in order to create an opening for the cord attaching the badge holder to the badge. Because of the size of the piece, it will probably be easiest to keep the stitches divided among four needles. Just be sure to knit all the stitches in each row. Next row: knit all stitches with RS facing you, just as you have in previous rounds At the end of the row, turn work. Purl all stitches (with WS facing you) Repeat these two rows once more. Try slipping your badge holder into the cover to be sure it fits. Then cut yarn leaving a 30 cm tail ("long tail").
Finishing
Using a tapestry needle thread long tail through all remaining stitches working from left to right. Leave this yarn very loose, and be sure to leave a long enough loop that the cord and badge loop can easily pass through the opening (see picture -- the “long tail" is blue, and the “short tail' is brown). Pass ID cord through the opening you left for it, and fit cover over the front of the badge holder.. Cinch the
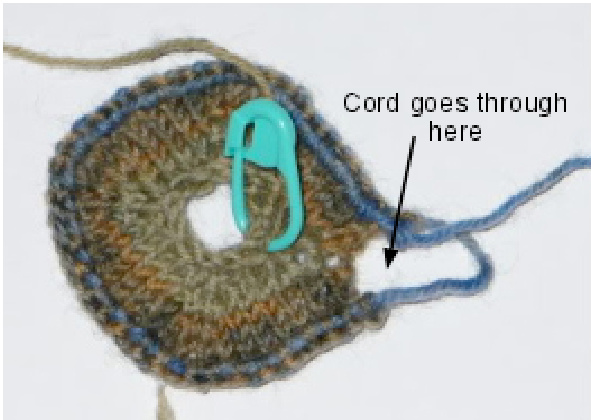
long tail so that the cover fits snugly, while allowing room for the clip on the back of the badge to function. Thread needle with short tail. Run this tail through the cast on edge and cinch closed. Secure end and pull tail to WS of work. Re-thread the tapestry needle with the long tail and make a few stitches to close the small gap behind the ID cord and secure the cover. If using lace-weight yarn, run the tail through the stitches in the last row a second time to be sure they are secure. Secure end and hide tail.


