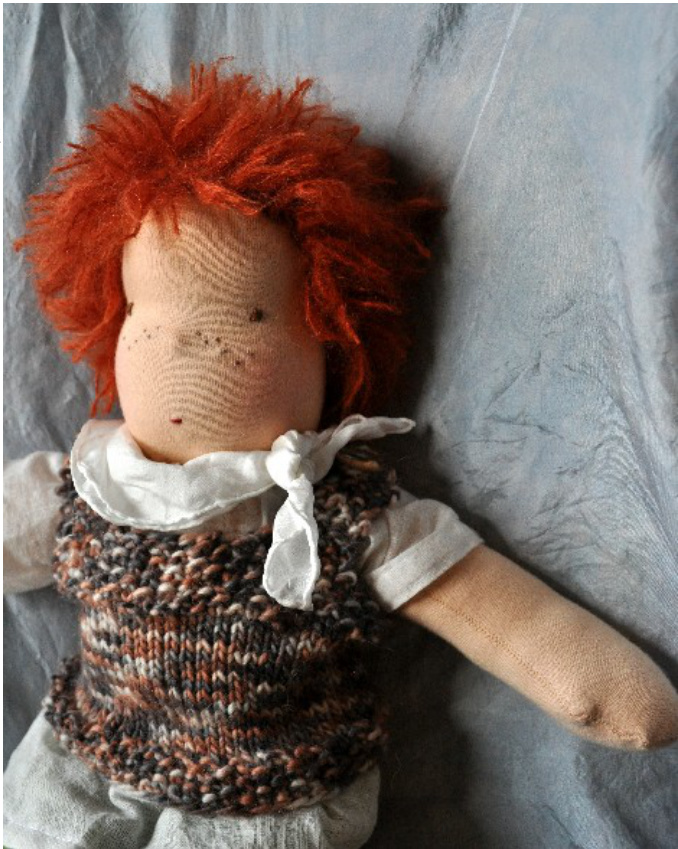
Mossy Vest
bv Ruth Haske / www.kiddiwinks.etsv.com Keep your little friend warm and stylish with this comfy knit vest. Close fitting, but with plenty of stretch, this is perfect for wearing over a light shirt on those breezy spring mornings!
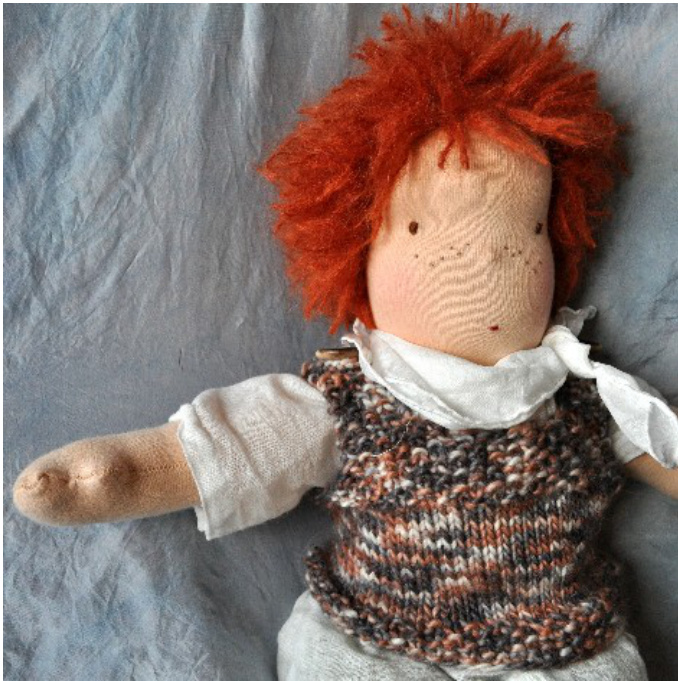
This pattern may be made by doll makers for sale of up to ten pieces. When selling, please provide a link to my store! Many thanks Sizing This pattern is designed for a 15" Waldorf doll
Gauge
20 stitches & 30 rows = 4"x 4" Choose the size of needles to obtain the correct gauge
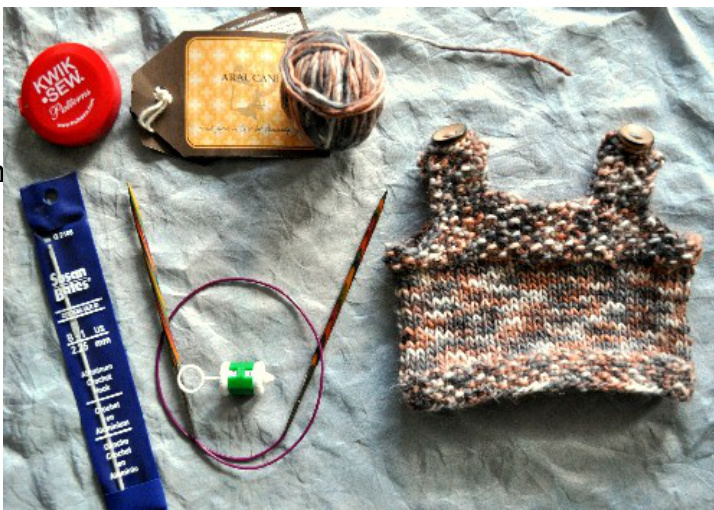
Materials & Tools
40 yards Aran weight yarr (Araucania Aysen) Needles to obtain correct gauge (Circular or DPNs) 2 wooden buttons Stitch counter Crochet hook (2.25mm) Measuring tape 1 stitch marker
Mossy Vest, page 1 of 3 www.etsy.com/shop/kiddiwinks
Abbreviations
CO - cast on using the long tail cast on method K - Knit P - Purl K2tog - Knit two stitches together P2tog - Purl 2 stitches together Stockingette Stitch - knit on right side, pearl or wrong side Moss Stitch - 1st row = K1, P1, K1, P1.... 2"d row = P1, K1, P1, K1... BO - bind off This vest is knit from the bottom up. You will knit in the round, either with DPNs or using the 'magic loop' method with a circular needle. First you will make the bottom mossy rib band. The body is knit in stockingette and then you return to moss stitch for the chest band and shoulder straps. Once complete you may choose to add a single crochet row around the edges to neaten and strengthen the straps, although this is not necessary.
Let's get started!!!
Moss Stitch Band:
CO 60 stitches using the longtail cast on method - this will ensure the vest is nice and stretchy, making it easy to put on! Join in the round and ensure the stitches are not twisted. Place a marker at the beginning of the row Knit five rounds in moss stitch = Row 1) \*K1, P1\* repeat to end of row. Row 2) \*P1, K1\* repeat to end of row. Row 3) \*K1, P1\* repeat to end of row. Row 4) \*P1, K1\* repeat to end of row. Row 5) \*K1, P1\* repeat to end of row.
Body:
Rows 6-21) Knit 16 rows in stockingette (continuing to knit in the round) Mossy Vest, page 2 of 3 www.etsy.com/shop/kiddiwinks
Chest:
Rows 22-25) Knit 4 rows of Moss Stitch (starting with K1, P1) Row 26) K25 (moss stitch), BO5, K25 (moss stitch), BO5 25 stitches will be worked on for the front next. Meanwhile, leave the other 25 stitches on a circular needle or some scrap yarn - these will be for the back of the vest!
Front:
Row 27) K2tog, K21 (Moss stitch), K2tog (23 stitches) Row 28) P2tog, K19 (Moss stitch), P2tog (21 stitches) Row 29) K2tog, K17 (Moss stitch), K2tog (19stitches) Row 30) K5 (Moss stitch), BO9, K5 (Moss stitch) You will leave the first five stitches on the needle for now whilst you work on the second five for the shoulder strap. Row 31-41) K5 (Moss stitch) Row 42) BO
Now, go back to the other 5 stitches you have on the needle. Take a new piece of yarn and repeat rows 31-42 for this strap. You can weave in the yarn end when you are finished.
Back:
Pick up the 25 stitches you earlier left on a circular needle, or scrap yarn. Repeat rows 27-41 Knit 2 extra rows of Moss stitch on each strap before binding off. This will make the back straps slightly longer than the front straps
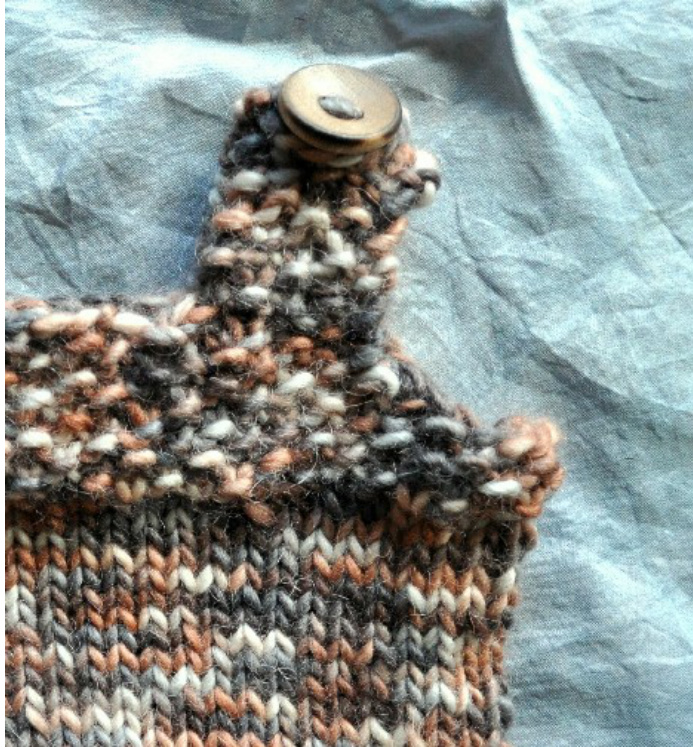
Finishing Off:
Using a crochet hook, make a simple chain loop at the end of the end of each front strap. This will be the button loop. Using some extra yarn, sew a small wooden button onto the end of each back strap, making sure it lines up with the loop on the front strap. Weave in any loose ends. If you wish, you can add a simple chain crochet edge around the chest and strap areas. This will neaten and strengthen the edges. Mossy Vest, page 3 of 3 www.etsy.com/shop/kiddiwinks


